|
We all want to create breathtaking landscape photos, right? But the trick is figuring out how to improve on the photos we take to get them to that breathtaking level... Fortunately, you don't have to be an expert or a professional photographer to greatly improve your images. In fact, for some photographers, it's a dead simple process that really only requires a bit of time and patience. That being the case, here's a few simple landscape photography tips that you can use to vastly improve the quality of your photos.
Participate in a Photography Workshop
When I was in high school, we had the chance to take immersion-based language courses. That meant having a block class that was 90-minutes long every day for a semester. I took French, and learned the language far faster than my friends that took the traditional 45-minute daily course for a year. That kind of immersion learning is beneficial for all sorts of things - photography included - which is why immersing yourself in learning new techniques and skills in a workshop format is such a great way to improve your photography.
I'm an especially big proponent of taking part in on-location photography workshops. Companies like National Photographic Adventures, for example, put you in a gorgeous location like Monument Valley, the Grand Tetons, Iceland, or Glacier National Park where you get to develop your photography skills in the midst of some of the most beautiful landscapes on earth.
Better still, on-location workshops like these put you elbow-to-elbow with a professional teacher that can give you one-on-one learning time because group sizes are limited. You also benefit from getting to know other photography enthusiasts, sharing your work with one another, and getting quality feedback on your photos. So, beautiful scenery? Check. In-depth learning opportunities? Check. Making connections with other photographers? Check! Sounds like a great way to improve your photography to me. Shoot in Aperture Priority Mode
If you're not quite to the point where you feel comfortable shooting in manual mode, but you want to escape the clutches of shooting in full auto mode, aperture priority mode is a great compromise. Using aperture priority mode (A or Av on your camera's dial) allows you to retain control over the aperture for landscape and ISO settings while the camera controls the shutter speed. Without having to remember all three camera settings, instead, you can focus on just two. And, really, you can set the ISO in most situations and worry only about the aperture. With less brain power devoted to trying to figure out all the exposure settings, you can instead concentrate on other aspects of getting a great shot like framing, composition, and lighting. Use That Histogram
When you start out in photography, you often get into the habit of checking the exposure of the images you take by looking at them on the camera's LCD. The problem with doing so is that the LCD is not a good representation of the exposure levels of an image. Not only is the LCD difficult to see in some situations (like bright sunlight) but it's also not intended to be a means of inspecting shadows and highlights. Instead, to improve your landscape photography, get into the habit of using your camera's histogram. As you can see in the chart above, the histogram is a graphical representation of the brightness of pixels in a photo. That means that there's no mistaking if a photo is overexposed, underexposed, or just right, and that, in turn, means that you'll have better-exposed photos because you can take action based on the histogram's data to rectify exposure problems. Simplify Your Photos
The last piece of advice I'd like to give is to simplify your photos. Though this sounds easy to do, in landscape photography - in which there is so much detail everywhere you look - it can actually be quite difficult to create a simplified image. But the simpler a composition is, often, the more powerful that composition is as well. A key practice for simplifying your landscape compositions is to consider what it is about the scene that you like most, and make it the focal point of the shot. Is it an interesting mountain peak? The color of the rocks under the surface of the water in a river? The way the light filters through the trees? Whatever it is about the landscape that draws your attention the most, make it the subject of your shot, work to cut everything else out of the image, and you'll likely end up with a much stronger composition that has more visual appeal. This blog post about the topic "Simple Landscape Photography Tips With Huge Benefits for Your Photos" was first published on our website here https://www.photographytalk.com/landscape-photography/8819-simple-landscape-photography-tips-with-huge-benefits-for-your-photos from https://photographytalkcom.blogspot.com/2021/01/simple-landscape-photography-tips-with.html
0 Comments
By and large, the landscape images you see in magazines and online are taken with a wide-angle lens. It’s the go-to focal length for landscapes for a variety of reasons, not the least of which that the angle of view allows you to capture more of the scene before you. For that reason, a wide-angle lens is a crucial part of a landscape photography kit.
Where a normal focal length lens (50mm on a full frame camera or 35mm on a crop sensor) captures a landscape much like we see it with our own eyes, a wide-angle lens creates an image with a wider angle of view. From sweeping vistas to close-up shots of individual landscape elements, wide-angle lenses (which is generally anything wider than the lenses listed above) produce results that are pleasing to the eye. Let’s explore a few tips and tricks that will help you get the most compelling shots with your wide-angle lens. Highlight the Broad View
Going with a wide-angle lens means you can capture more of the landscape before you in a single frame. That’s advantageous for a couple of reasons. First, wide-angle lenses allow you to show off the grand scale of a landscape. If vastness of space is an important aspect of the scene, a wide-angle lens will help you capture that. Second, a wide-angle lens gives you an opportunity to highlight a single, strong subject by placing it in a position of importance in the frame while simultaneously allowing you to show the relationship of that subject with the larger landscape. That, in turn, assists you in telling a stronger story about the subject and its place in the immediate environment. This trick in action: Using a wide-angle lens allowed the photographer of the image above to highlight the tree in the foreground while still giving us a view of the surrounding landscape. Without a wide-angle lens, getting so close to that three would obscure the surrounding environment. What’s more, by going wide-angle, we get a better feel for how distant the mountains are in the background. In that regard, the wide-angle lens helps tell a more compelling story about how desolate the landscape is and how isolated the tree is within that space. Play Up the Foreground
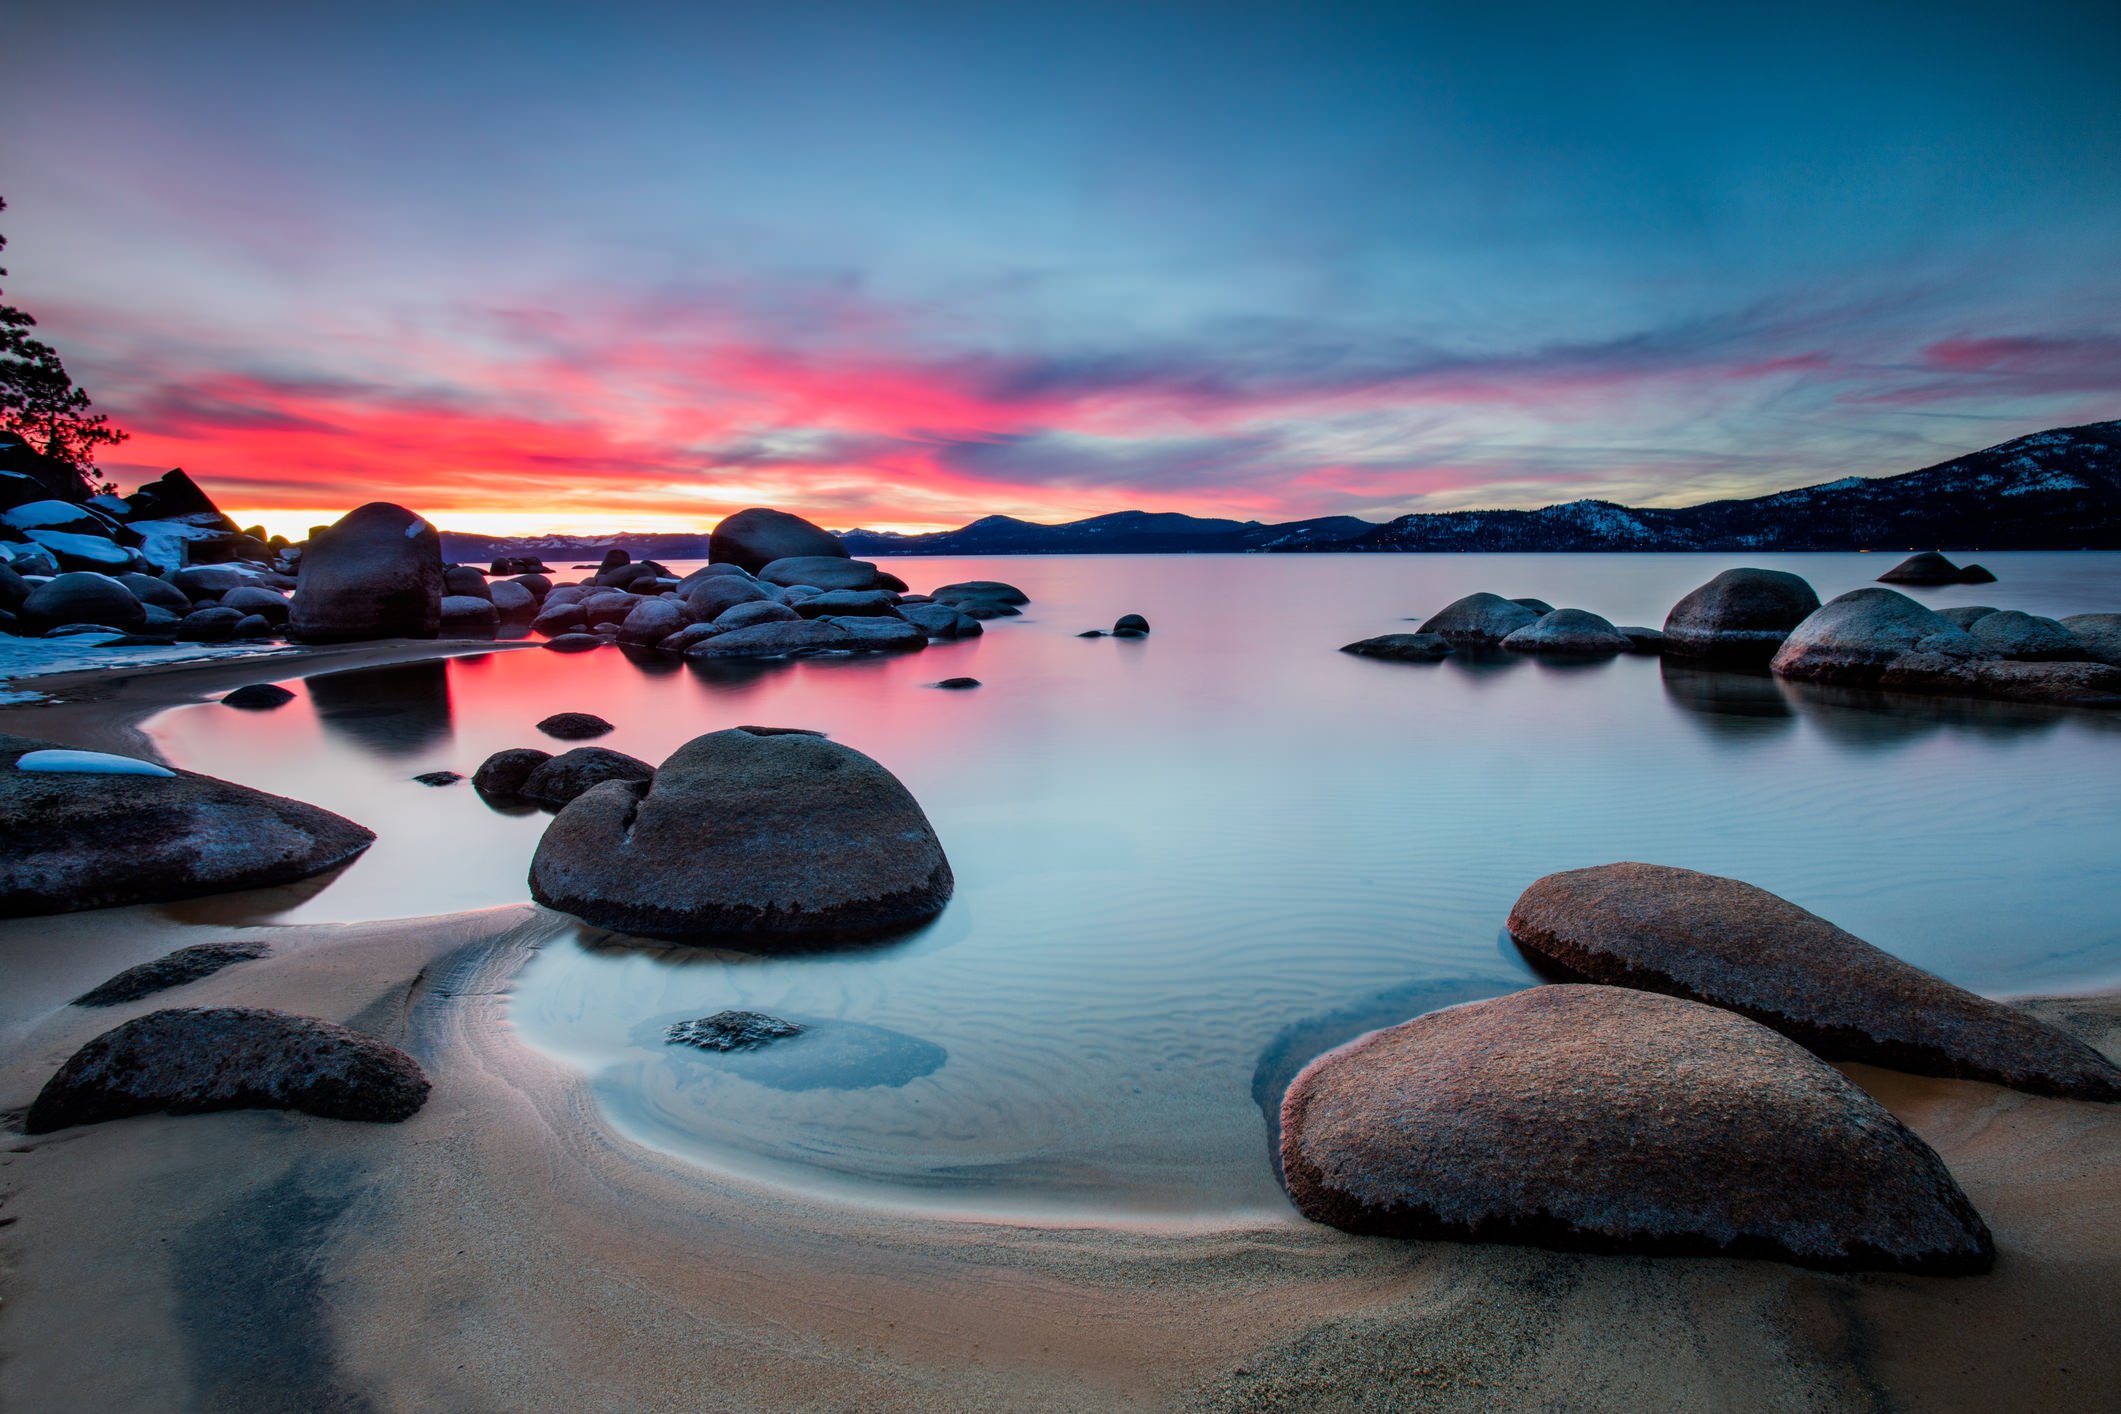
One of the best assets of a wide-angle lens is that you can get up close to an element of foreground interest in order to make it more important in the scene. That is, a wide-angle lens alters the perceived size of elements in the frame - elements that are closer seem larger than they are while elements in the background seem smaller. This trick in action: Perhaps the best way to take advantage of this feature of a wide-angle lens is to use a low shooting angle to place a foreground element on full display. Using the image above as an example, note how the lower-than-normal shooting angle helps bring the foreground boulders into full view. Note as well how their size is emphasized in the frame, while the mountains in the background seem much smaller. And, because wide-angle lenses offer a greater depth of field, you can get even closer to foreground elements and still manage to have a decent depth of sharpness in the photo. Try getting a foot or even closer to a foreground element and see how much of the scene you can still get in focus. Go Vertical
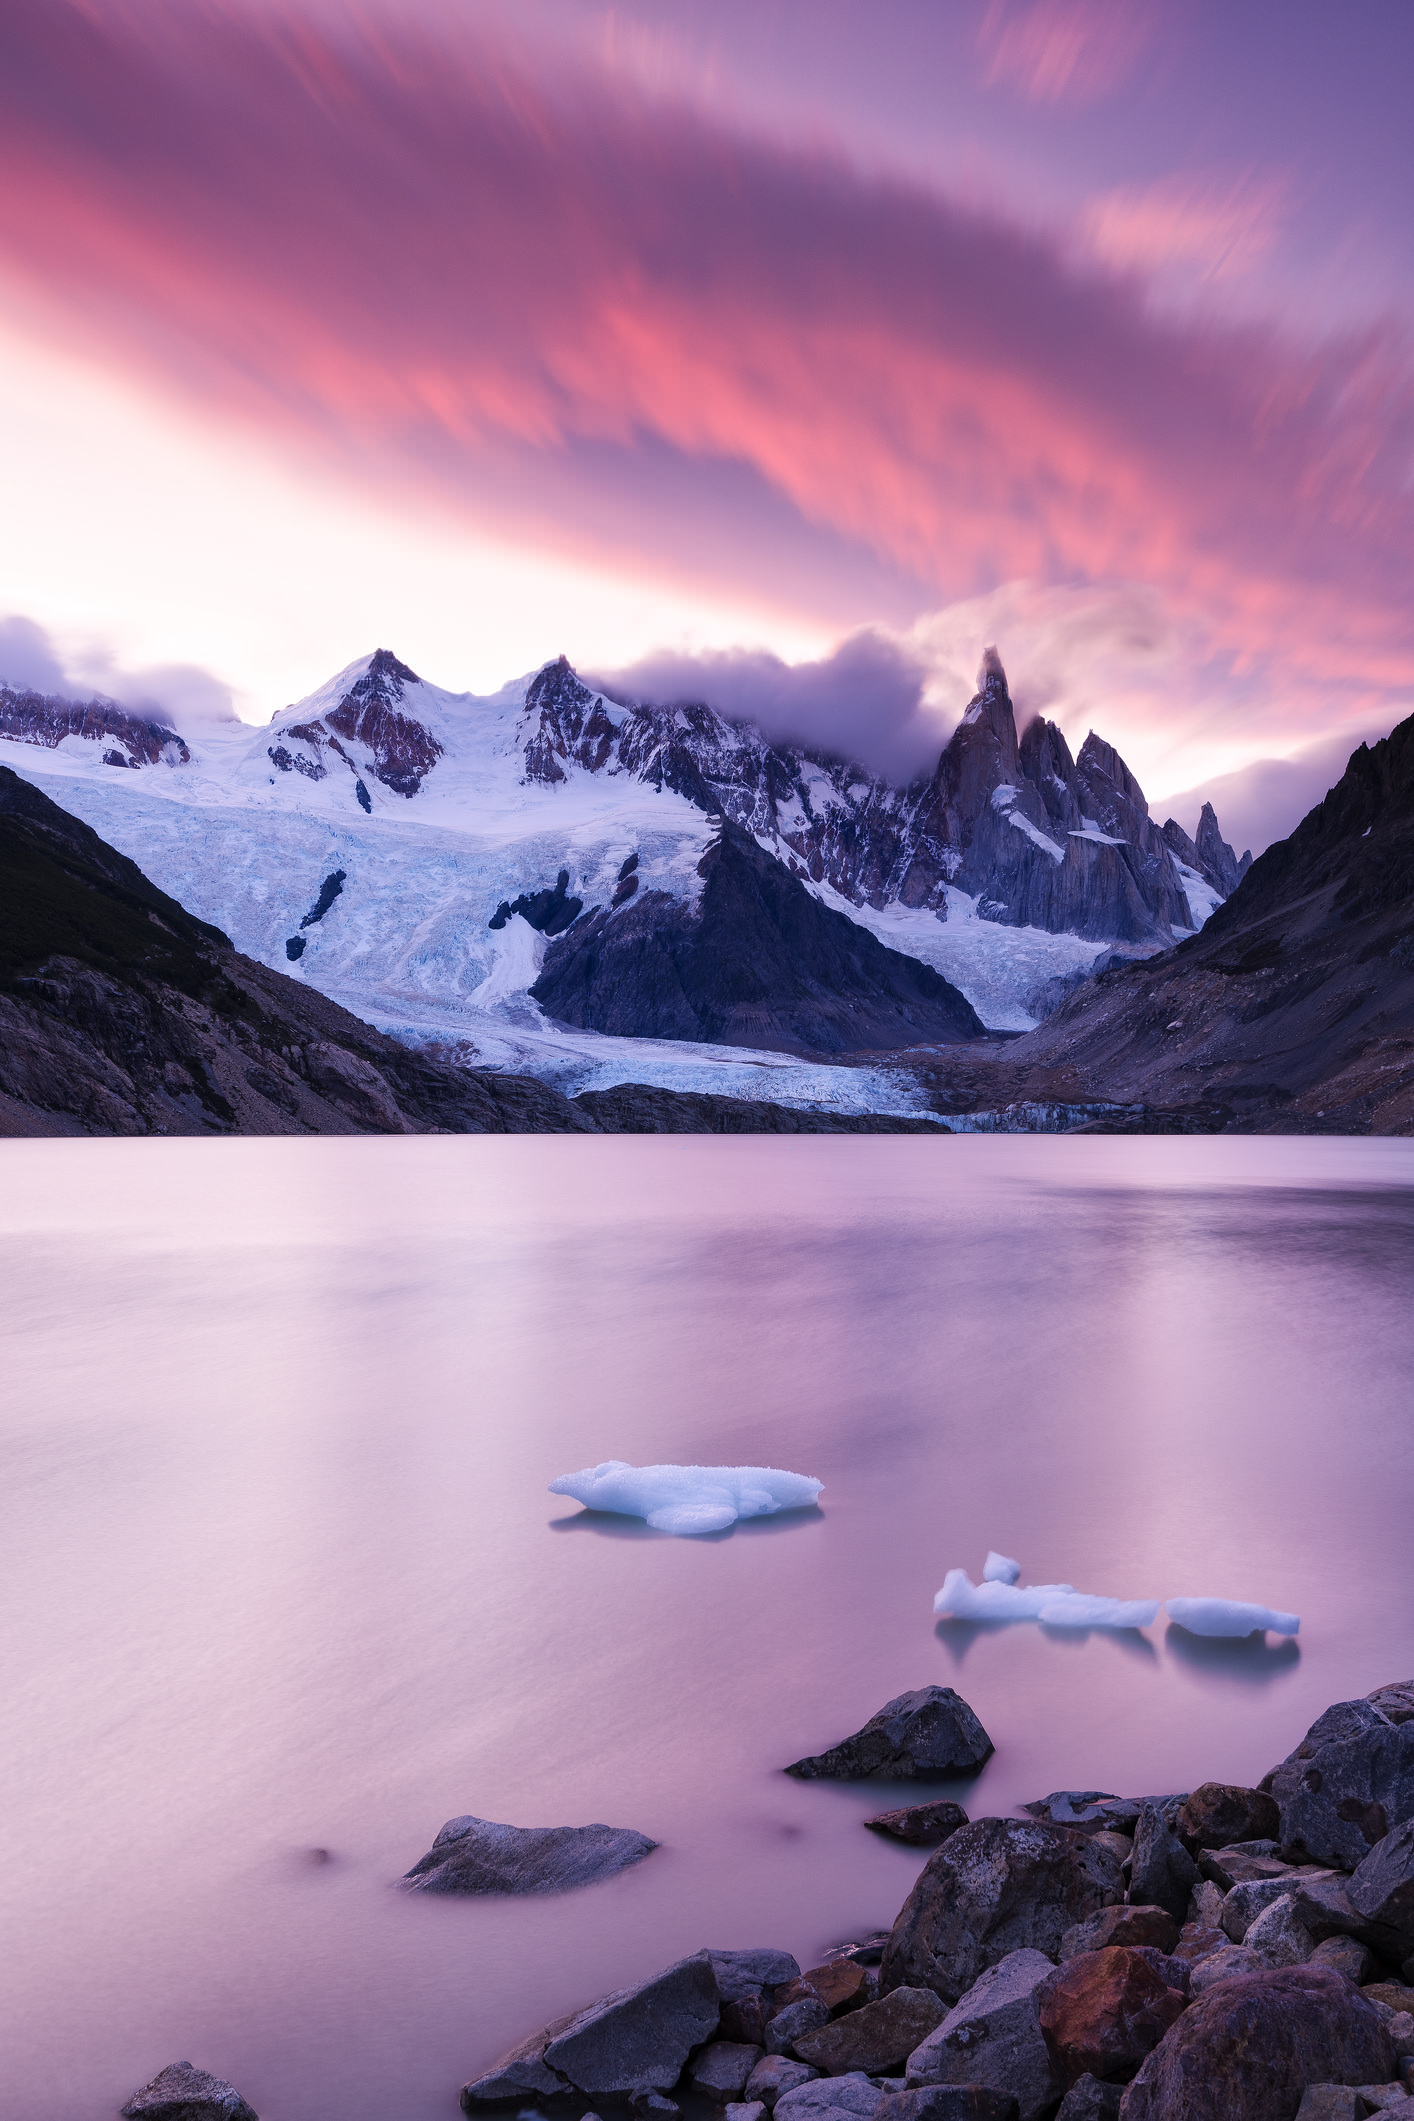
When using a wide-angle lens, it’s most common to shoot in horizontal format. However, don’t be afraid to tilt your camera on its side and take some vertical format wide-angle shots as well. Doing so gives you the power to put the height of a landscape element, like a tree, mountain or waterfall, on full display because you can capture its entire length in the shot, even from relatively close up. What’s more, a vertical wide-angle shot gives you a unique result in which the viewer can see the scene from the extreme foreground to very high in the sky. Learn more about scenery photography on our website PhotographyTalk.com. This trick in action: In the image above, note how the vertical format offers a pleasing view of the landscape. We’re afforded a view of the rocks in the immediate foreground, which adds some texture and shape to the image. But we’re also given a full view of the sky extending above the mountain peaks in the background. Note as well how there are no lines in the shot to be distorted. That’s an important consideration if you want to create a more life-like image (more on distortion below). Beware of Too Many Elements
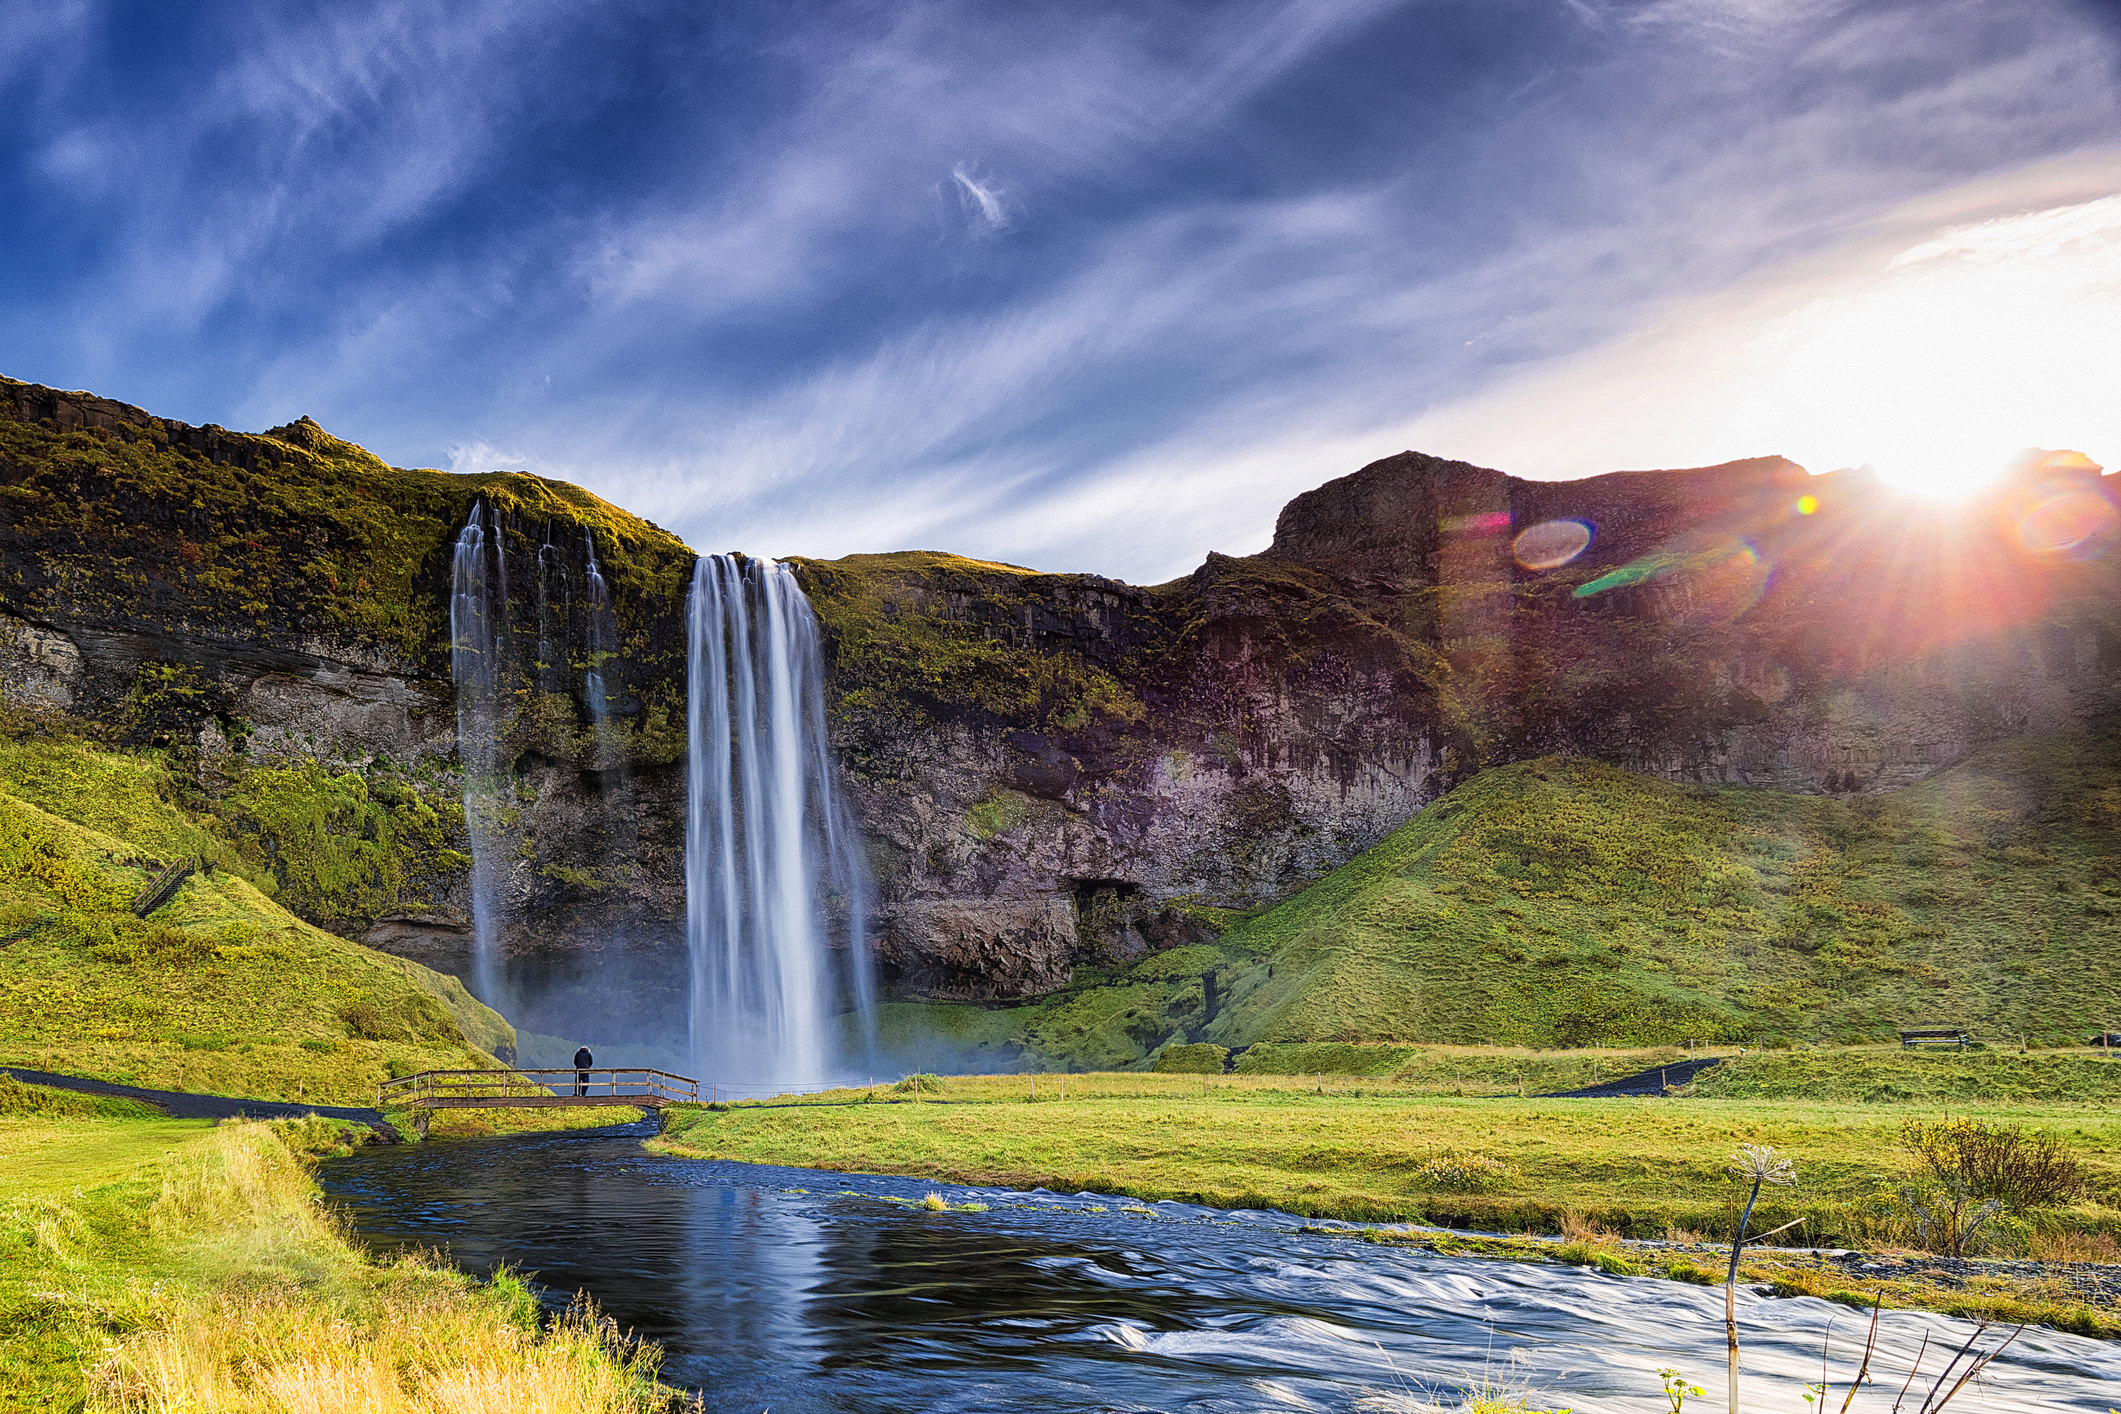
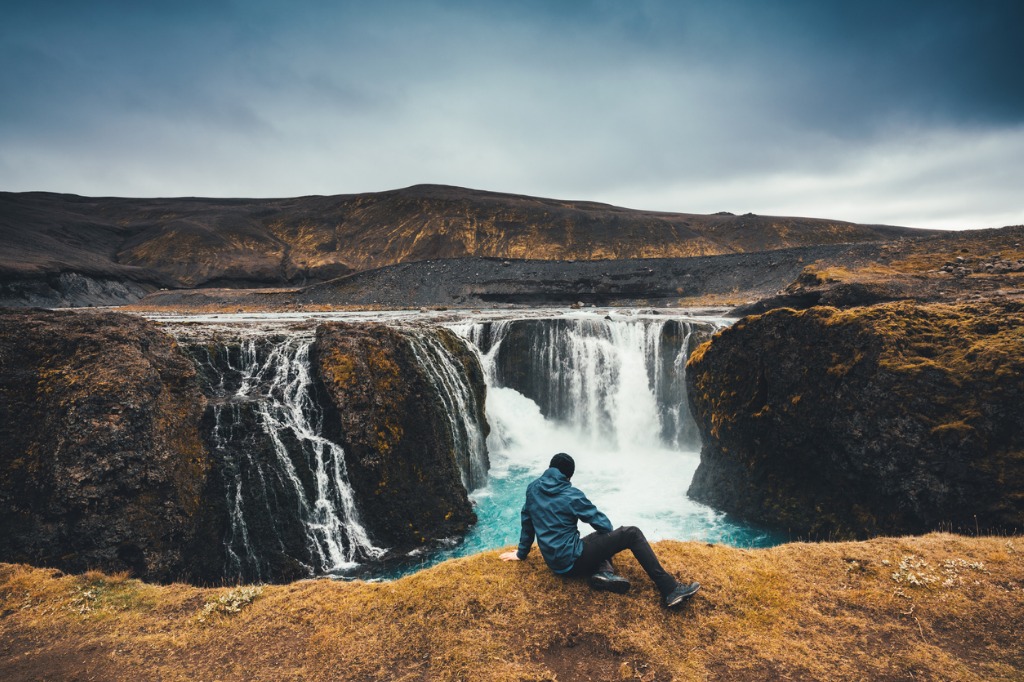
Though the broad angle of view a wide-angle lens provides is often a blessing, it can also be a curse. By incorporating so much of the landscape into a single image, it’s easy to get too much visual interest, leading to a photo that seems chaotic and distracting. In other words, just because you have the ability to photograph everything in the scene doesn’t mean that you should. In fact, using a wide-angle lens requires you to pay greater attention to the objects in the landscape that provide the most visual interest. Everything in the shot should be there for a reason - to add texture or color, to help frame the primary subject, or to help you tell a better story about the landscape. Check your composition for any distractions - elements in the foreground or background that take interest away from the primary subject - and work to frame them out of the shot as best you can. This trick in action: Look at the image above and notice how there are branches sticking up in the bottom left corner. These branches are in the frame because of the wide-angle view, and they are precisely the type of thing you must be vigilant of when composing your shots. Had the photographer noticed the branches, they could have taken a few steps forward, excluded them from the shot, and it would be easier for the viewer to focus on the subject - the gorgeous waterfall. In short, seek to simplify your compositions and they will be much stronger. Show Off the Sky
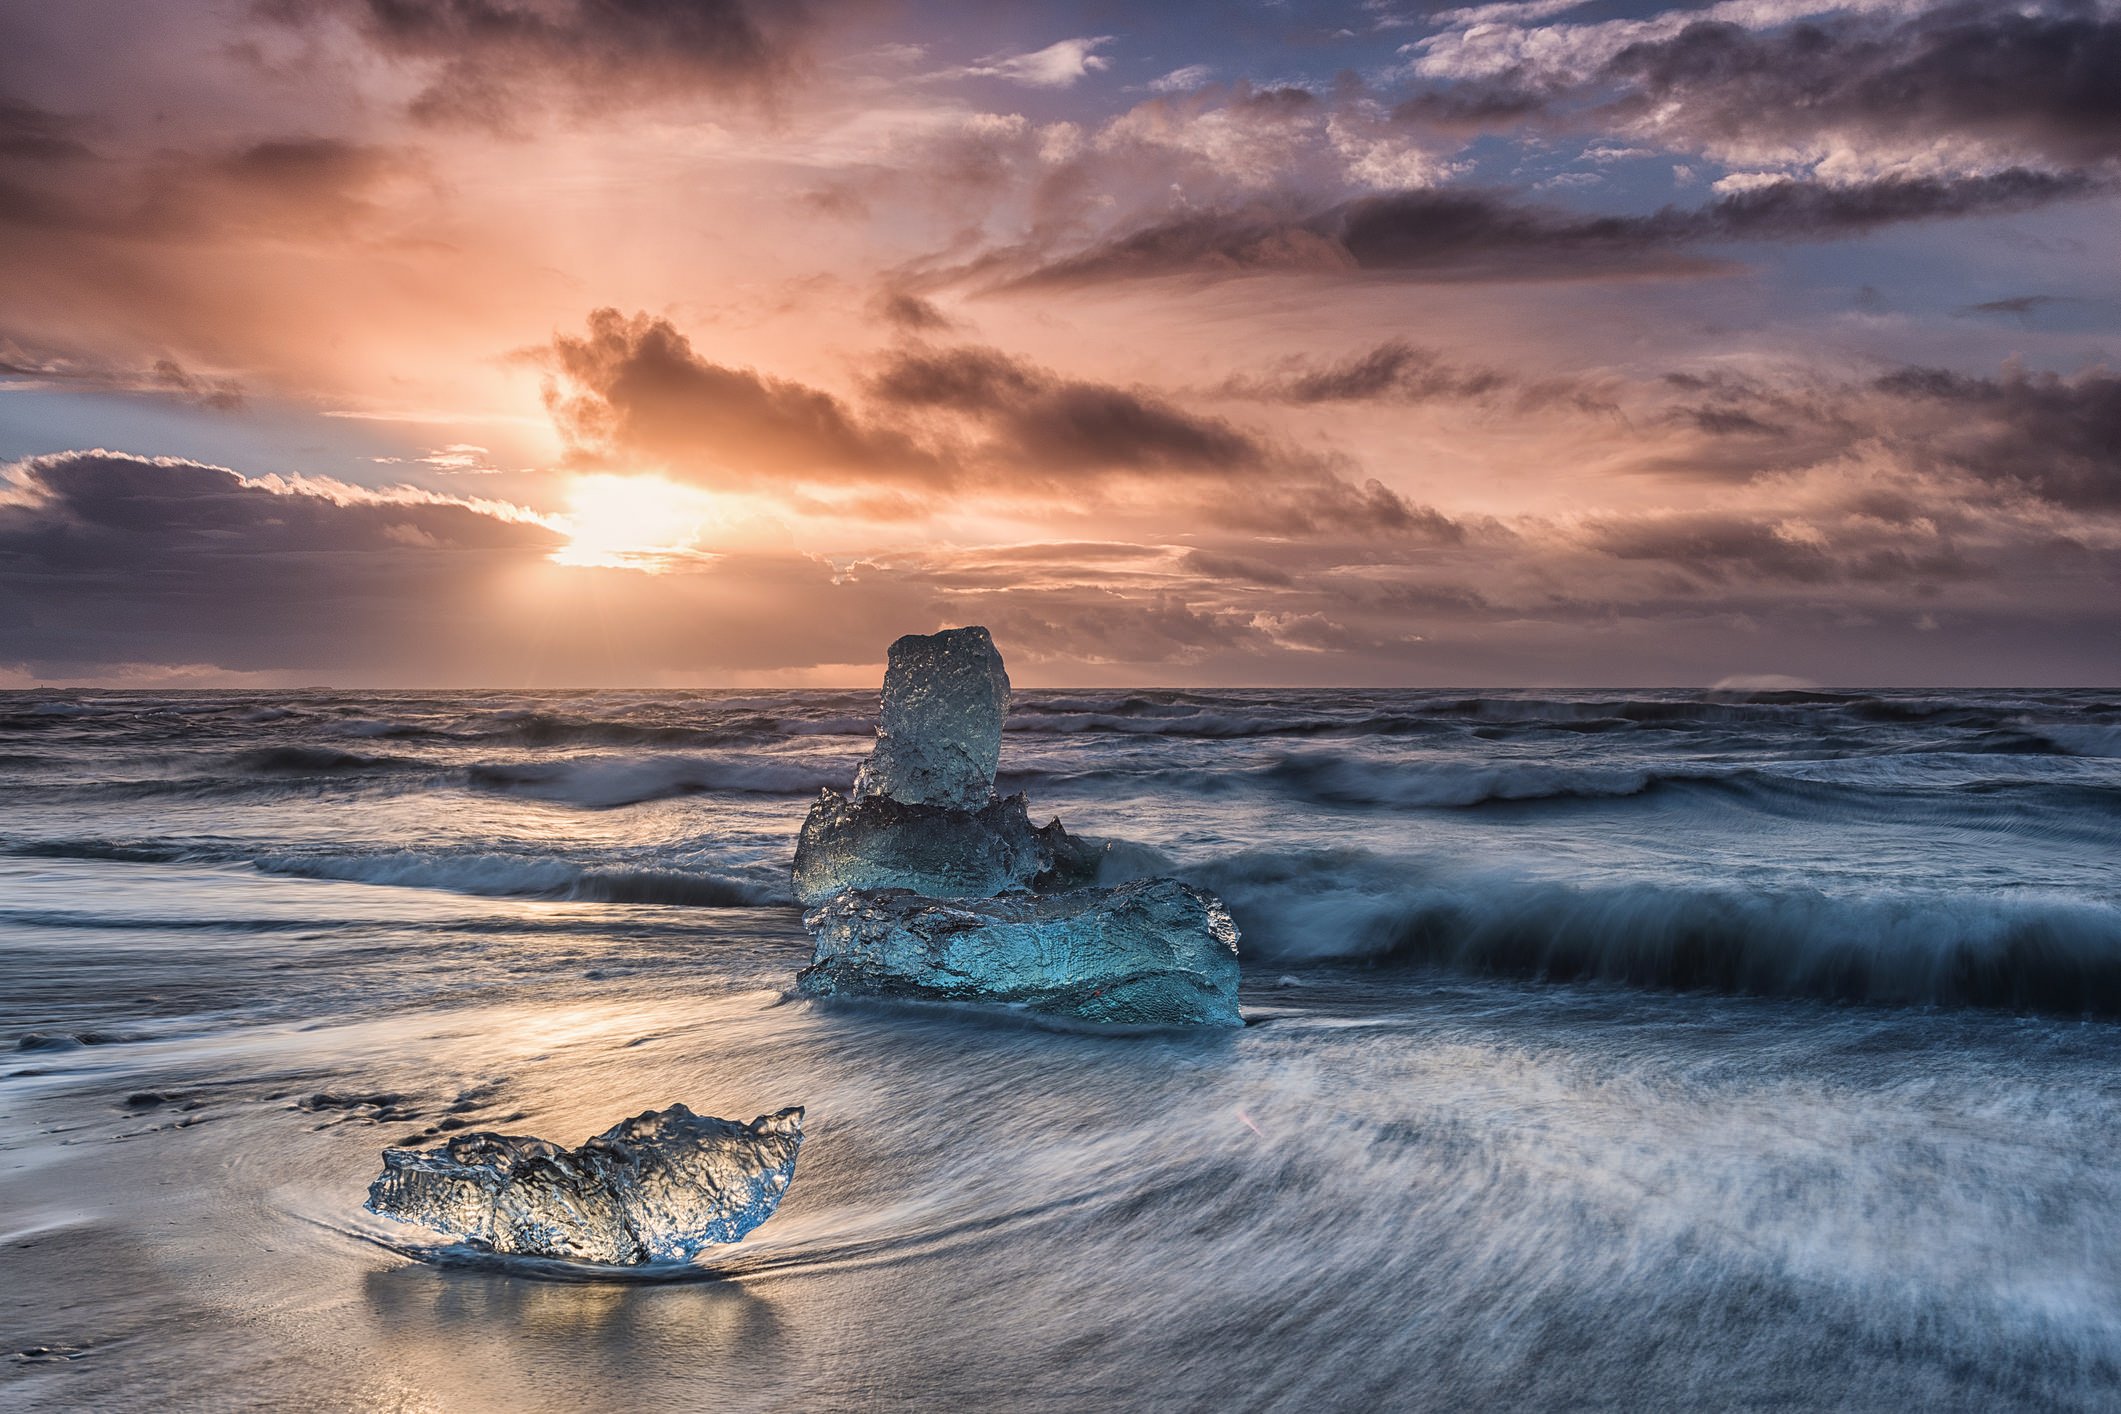
If you happen upon a landscape scene that’s got a dramatic sky, a wide-angle lens is an ideal choice. Just like a wide-angle helps you convey the space of a landscape, it helps indicate the volume of space too. And, because of the wide-angle of view means you can incorporate the landscape and the sky, it gives you opportunities to create a single image with a dramatic foreground and a dramatic sky at the same time. This trick in action: In the image of the iceberg above, you can see how the foreground and background work together to create a more dynamic composition. The glistening ice is on full display, but with the backdrop of the dramatic sky behind it, the image becomes far more compelling. Notice as well how the photographer sought to include only what was important - they are close enough to the ice to frame out any other foreground elements, but the wide-angle view still gives us clues as to the relationship between each element in the shot. Watch Your Angles
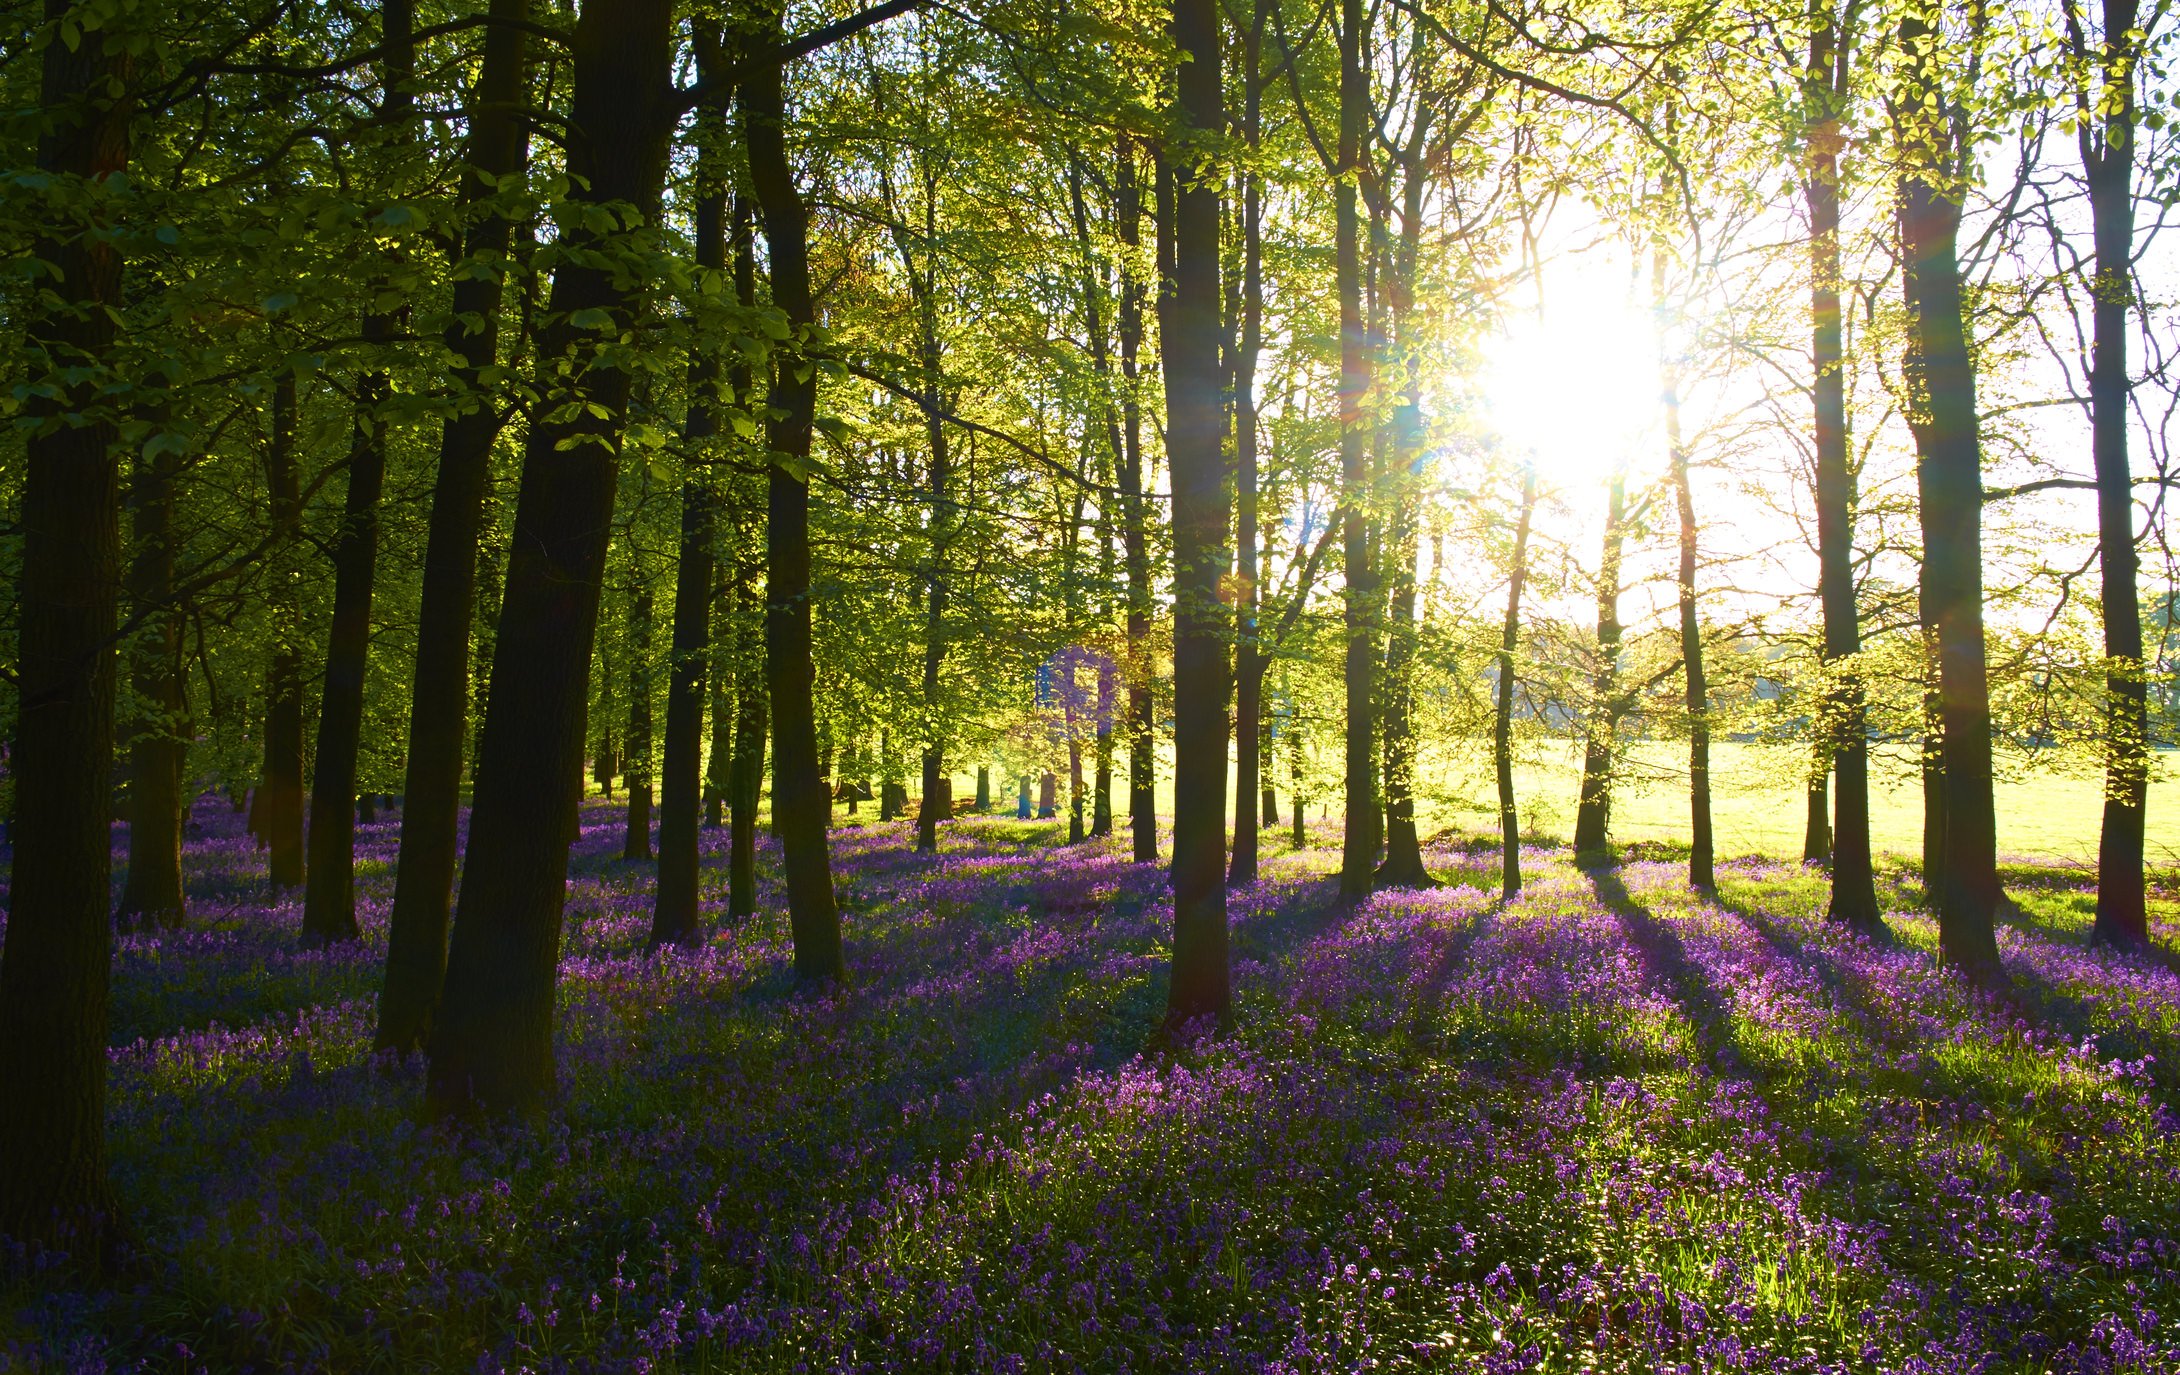
Because wide-angle lenses often create distortion around the edges of the frame, straight lines can appear to converge inward. Though this can be used as an artistic tool, keeping the camera level with the horizon will help minimize these distortions. This trick in action: In the image above, note how the tree trunks all appear to be straight. This is because the camera was kept level to the ground. The resulting image looks normal, as though we are viewing it with our own eyes. This can make a landscape image seem more familiar and help the viewer connect with it on a deeper level.
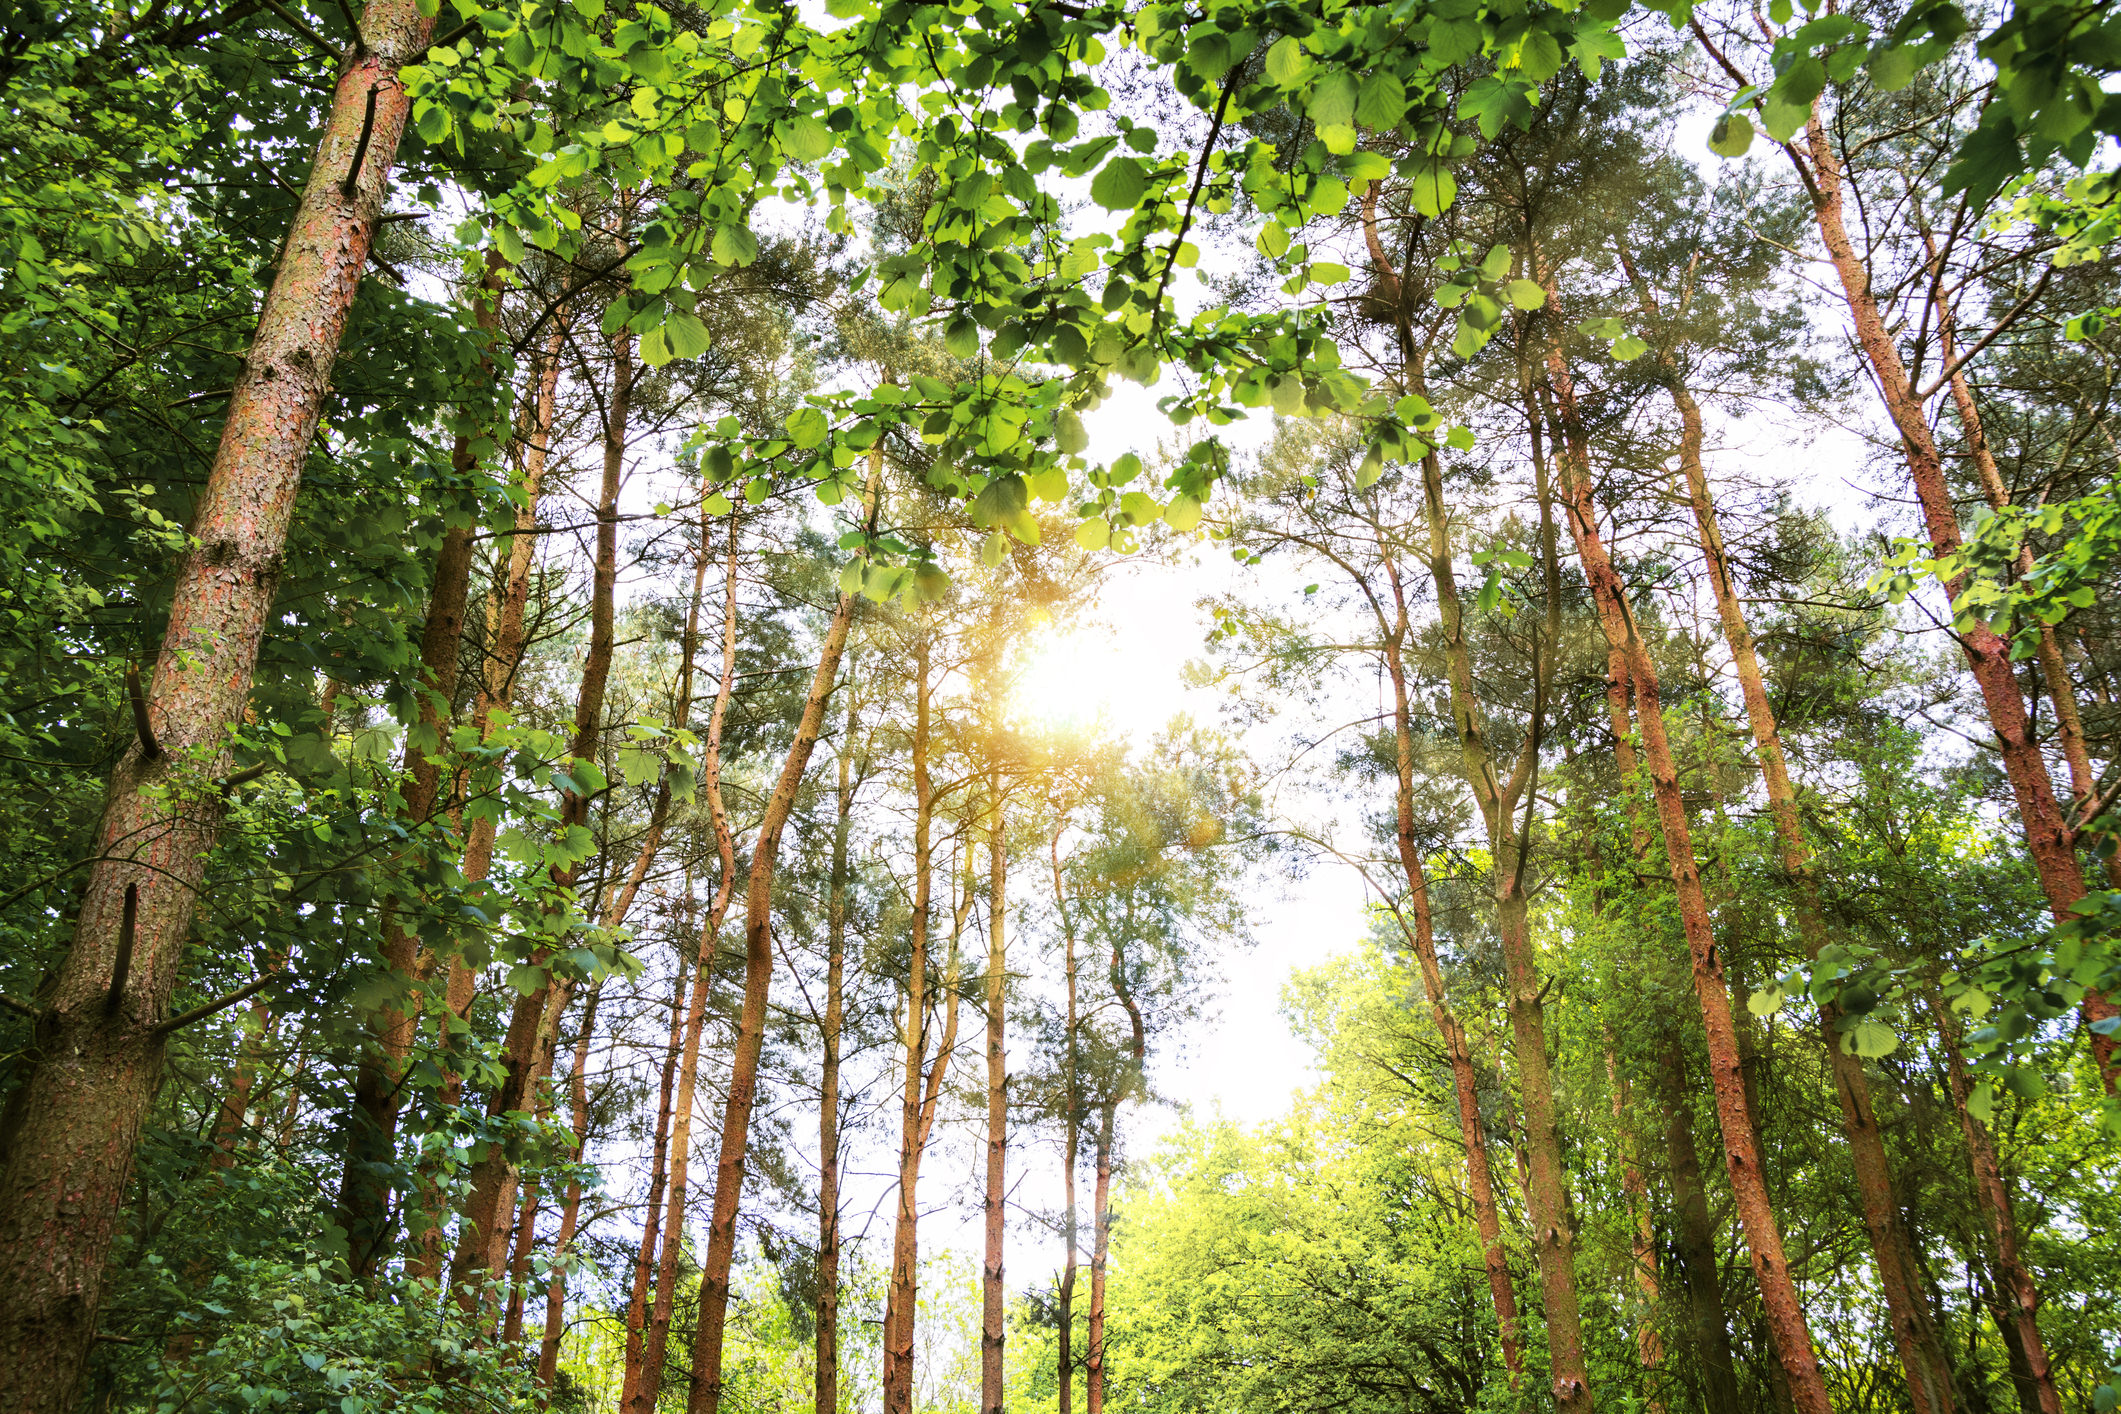
Then again, angling the camera upwards will distort straight lines, as seen in the image above. Compared to the previous image, you can see just how much the straight lines of the trees converge as they extend toward the top of the frame. This trick in action: Note as well that angling the camera upwards allows you to frame the foreground out of the shot. This might be advantageous if the foreground is distracting or if there are elements that just don’t fit the scene. If there is a compelling sky, angling the camera upwards can also be advantageous. Get In Tight Spaces
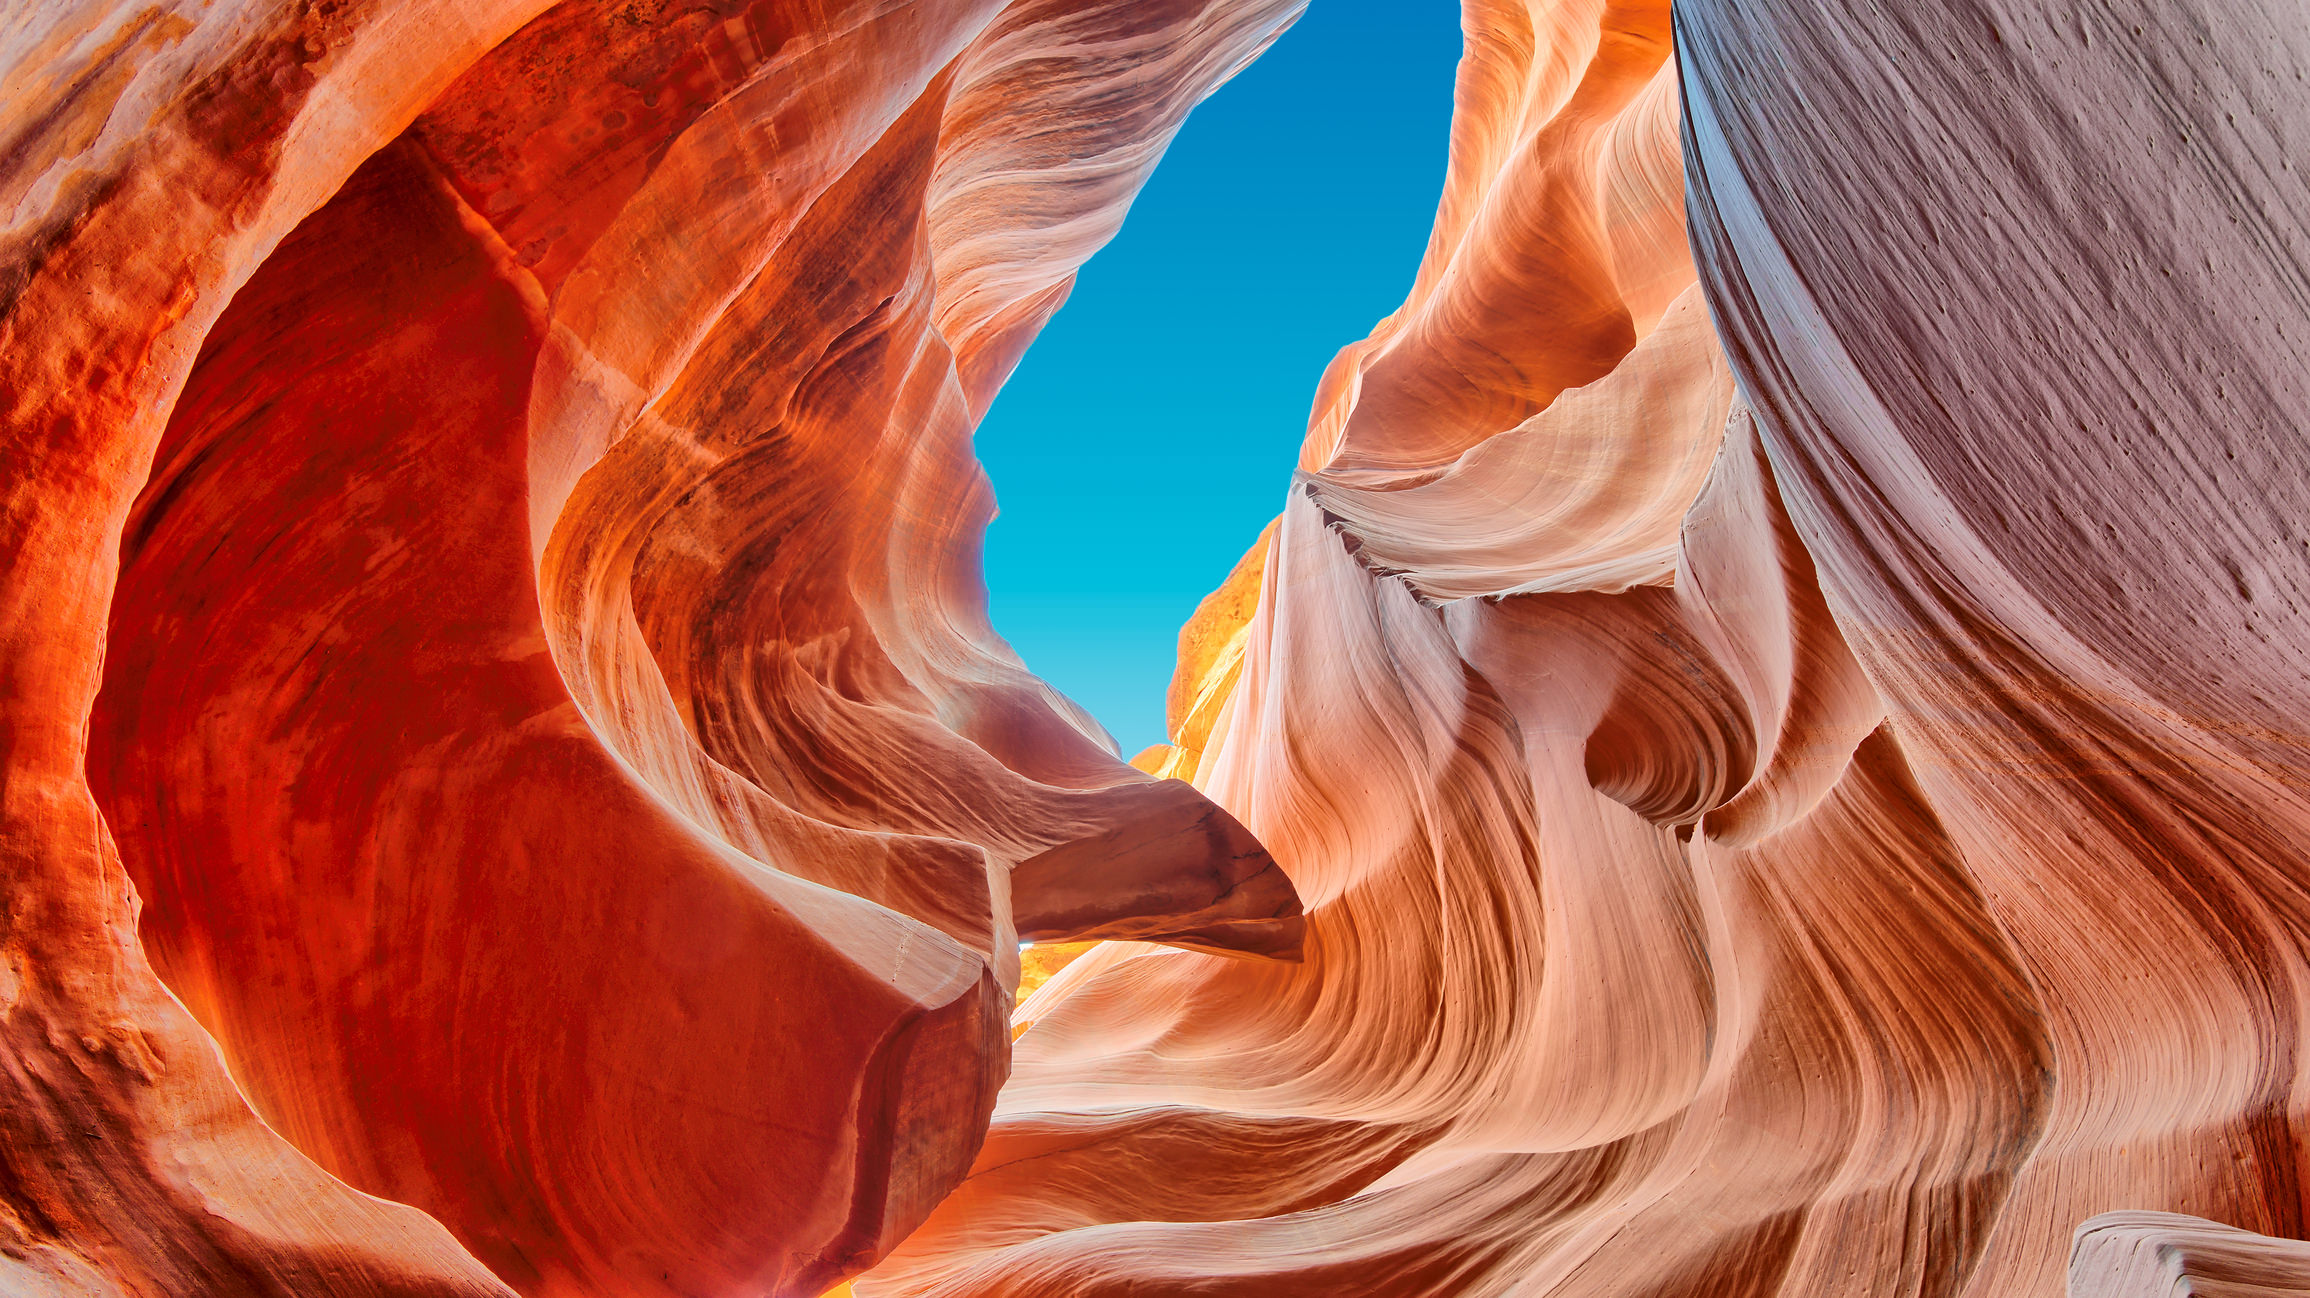
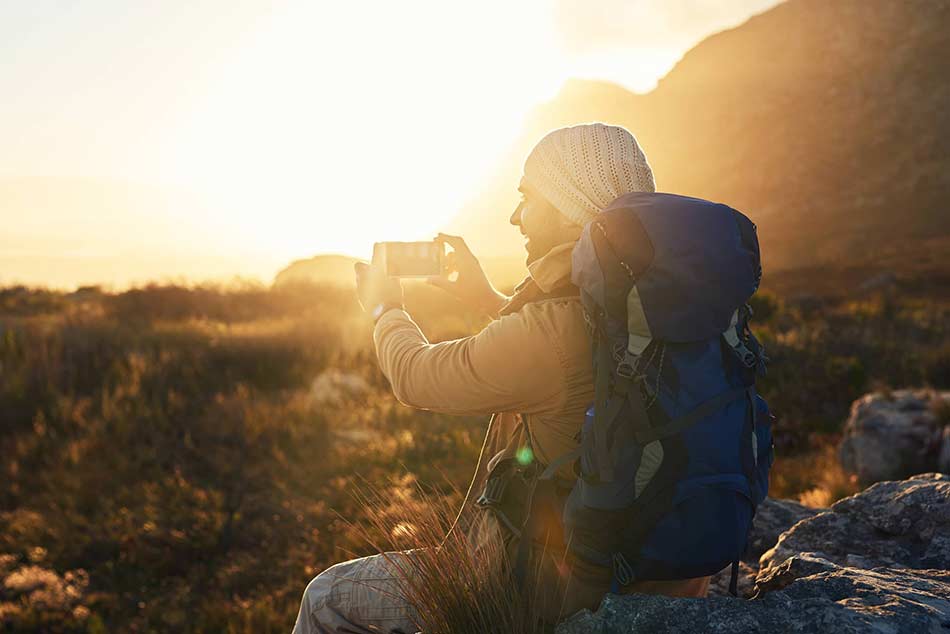
Some landscapes aren’t wide open vistas, but are instead tiny spaces by comparison that pose a significant challenge to photographers. In these situations, a wide-angle lens is an ideal choice because, again, the wider angle of view allows you to capture more of the scene, even though you’re in tight quarters. This trick in action: In the image of Antelope Canyon, you can see how the wide-angle lens is beneficial. Both sides of the canyon are in full view, giving us insight into the textures of the canyon walls. It also gives us an indication of just how narrow the canyon actually is, while also allowing the photographer to incorporate some of the sky to indicate how deep the canyon is as well. With that, you’ve got seven solid tips that will help you make the most out of your wide-angle lens. Next time you venture out to photograph a landscape, test one or two of these tricks to see how they can improve your images. Keep practicing each one, and with time, they will become second nature. This article about the topic "7 Tips and Tricks for Photographing Landscapes With a Wide-Angle Lens" was first published on our website here https://www.photographytalk.com/landscape-photography/7163-7-tips-and-tricks-for-photographing-landscapes-with-a-wide-angle-lens from https://photographytalkcom.blogspot.com/2021/01/7-tips-and-tricks-for-photographing.html I enjoy shooting landscapes, so many of the tips I'm sharing with you here cross over from what I use with my Nikon D850 when I'm out looking for that next amazing shot... At the time of this writing, my smartphone - an iPhone X - has 19,189 photos on it. As you can see, I take a lot of photos!
Over the years I've taken many, many more photos than that, a good portion of which were taken with my smartphone. Here's a few tips I've learned along the way that will help you get all the juice you can out of your phone to take better landscape photos. Landscapes Are All About Going Wide
Out of the box, my iPhone X isn't bad in the camera and lens departments. But, let's face it, it does have its limitations. The challenge, then, is to find the right lenses to use with your iPhone. I've tested a number of iPhone lenses over the years, and most of them have had poor optics, required huge cases to attach to the phone, or both.
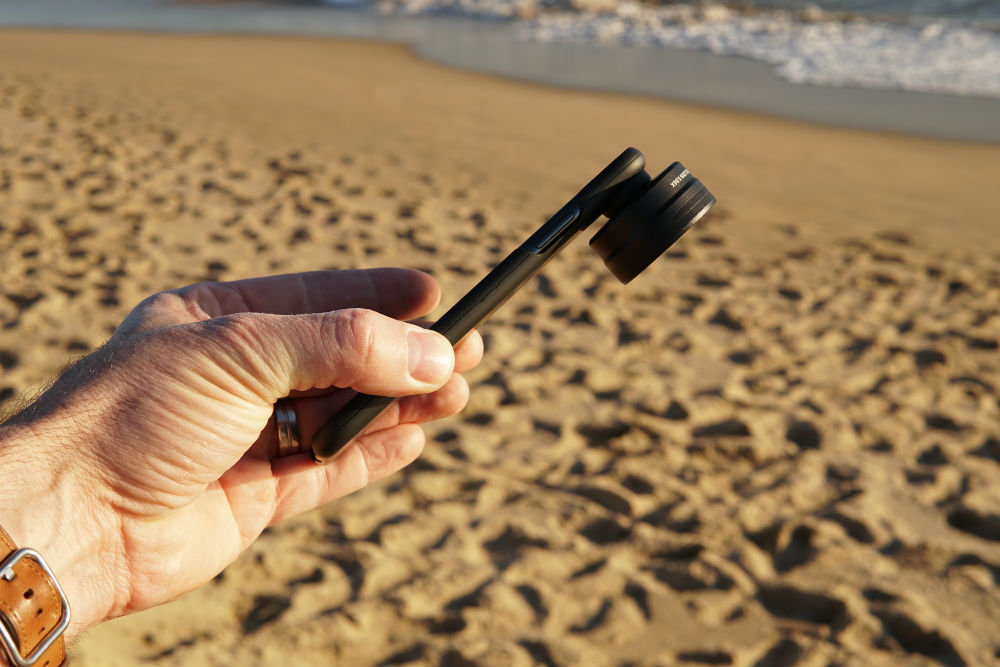
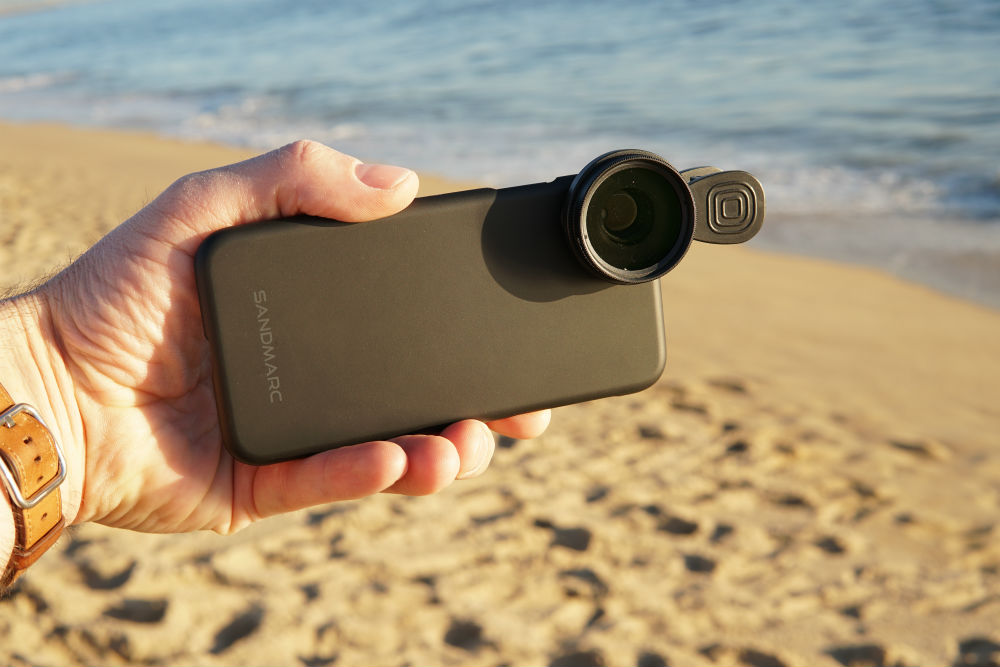
Recently, though, I got my hands on a set of iPhone lenses from Sandmarc, and, well, they've certainly won me over! A couple of things right out of the gate really impressed me.
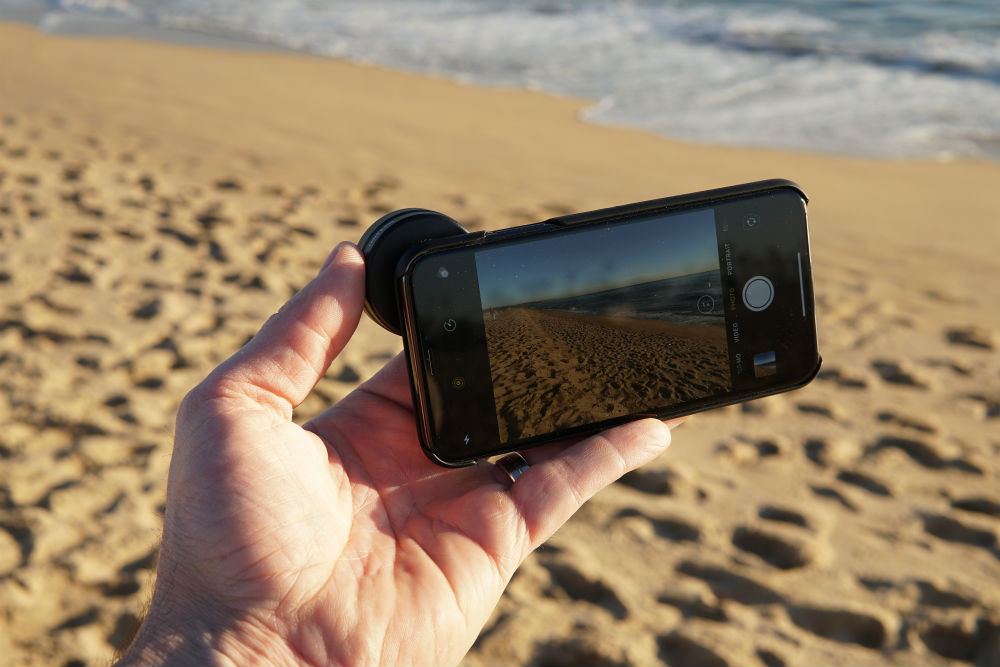
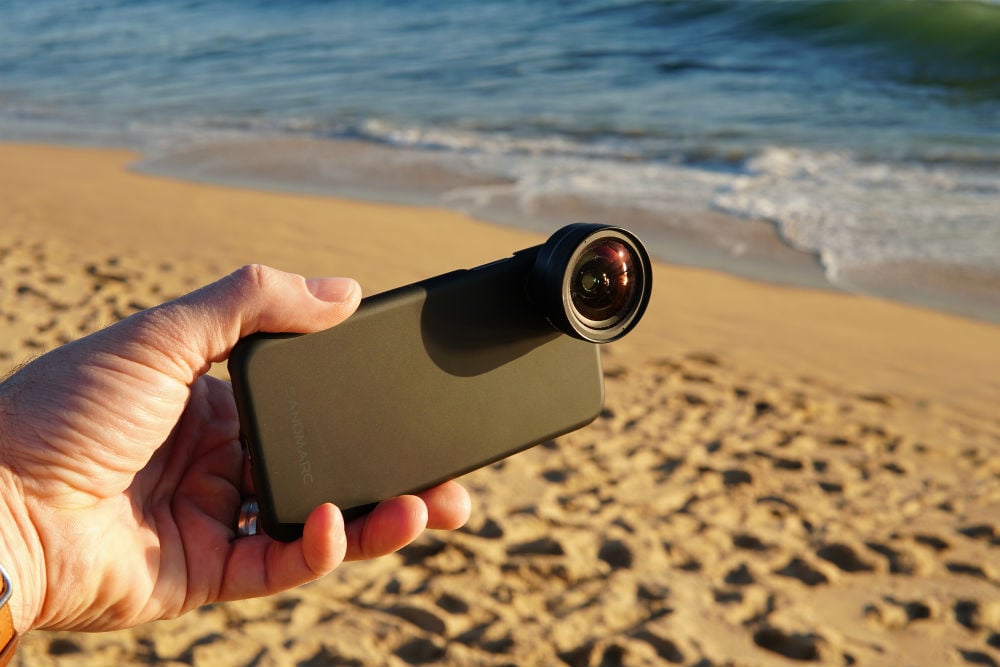
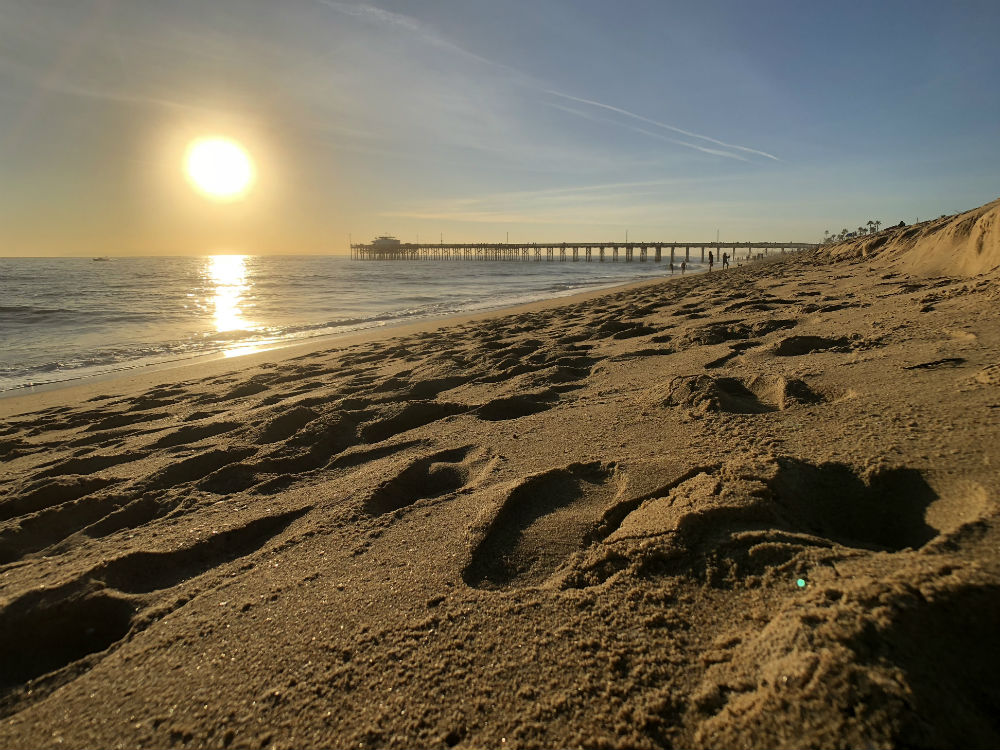
First, the build quality of these lenses is second-to-none. The lens is constructed from premium multi-coated optics so you get clear, sharp images with minimal flare, ghosting, and other aberrations. The wide-angle lens gives you 2x the field of view, too, so you can incorporate more of those gorgeous landscapes into a single shot. You can see the difference between the field of view with the iPhone X's native lens (above) and with the Sandmarc wide-angle iPhone lens (below), which has an effective focal length of 16mm.
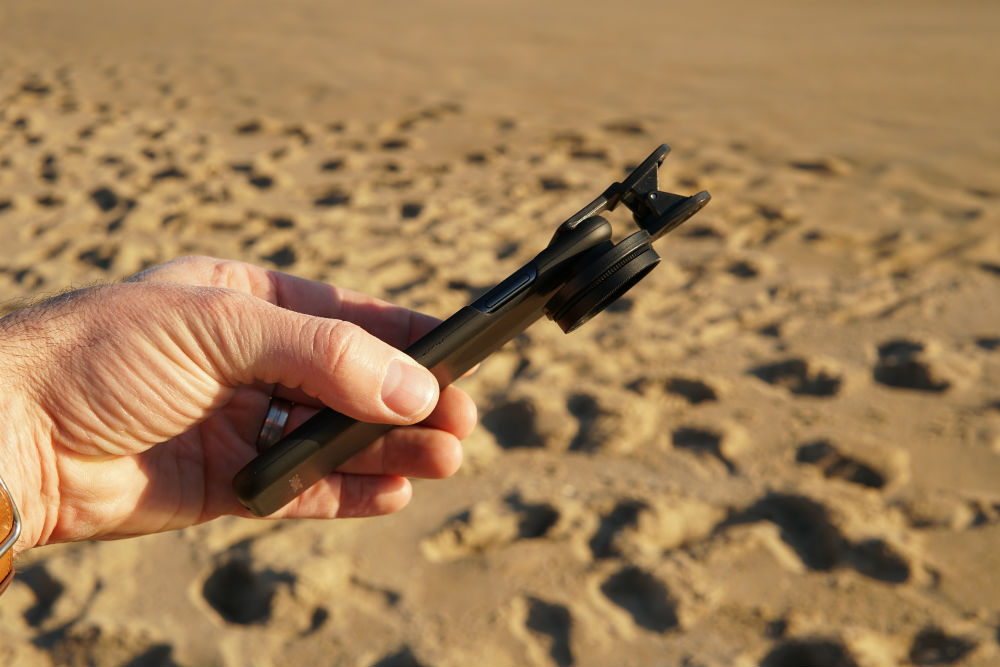
Second, the lens has a low-profile case, so you don't feel like you're carrying around a brick phone with a bulky and clumsy case that gets in your way. In fact, not only is the case the world's thinnest lens case mount, but you can also simply clip the lens onto your phone if you already have a case or don't need a case at all.
The only bummer is that the case was a bear to remove from my phone. But after speaking with the fine folks at Sandmarc, I've been assured that in a couple weeks, a new case will be released that specifically addresses that problem.
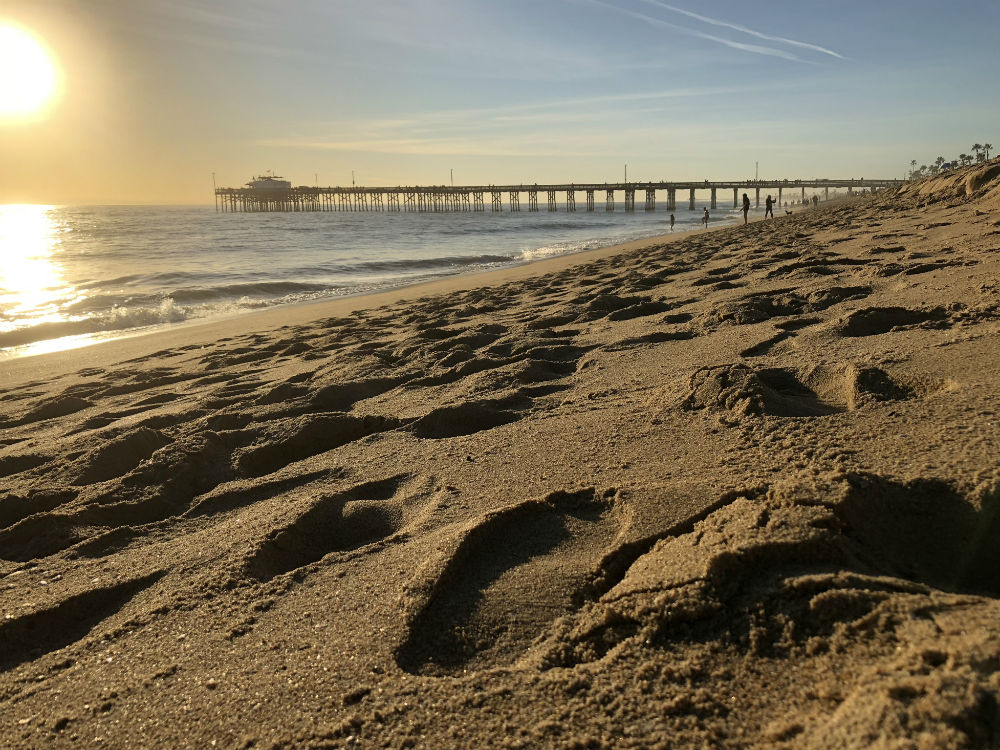
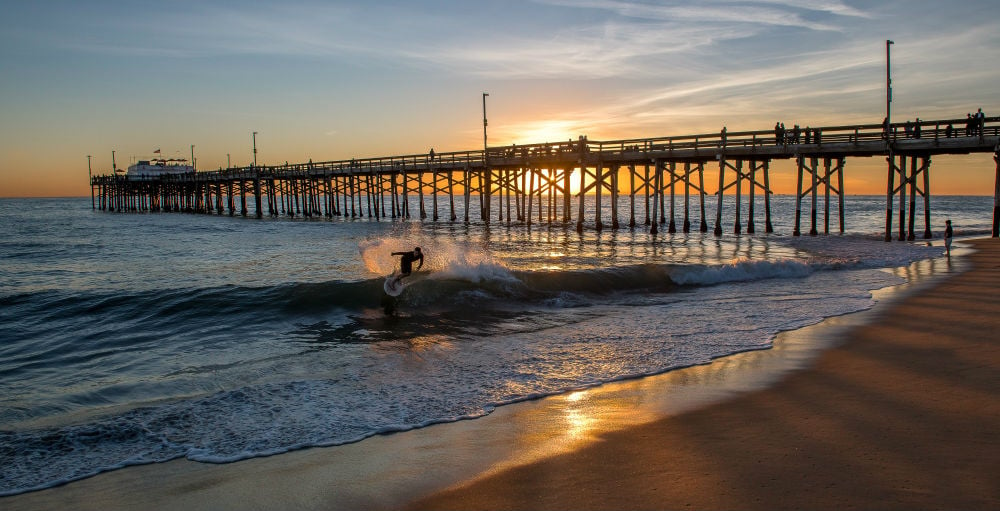
Just as an aside, I know that the sun is blown out in the previous two images, but in my defense, I was just taking a couple of quick snaps to show the difference in the angle of view while I set up my gear for a long exposure later that evening. You can see that shot above, which, lucky for me, happened to include a guy skim boarding in the foreground! You Need the Right Apps
Having the right apps on your phone can make the difference between your photo being a success or a flop. And I don't just mean post-processing apps, either... These days, there really is an app for just about everything. Here's a few of my favorites. My Sunset
As I noted earlier, I went to the beach to snag a long exposure shot of the sunset, and to ensure I was there at the right time, I used the MySunset app (available for iOS and Android devices). This app gives you a five-day forecast for the sunrise and sunset, including an analysis of how good the sunset will be. In other words, the lower the number displayed on the app (i.e., 58%, as shown in the green box in the upper-left part of the screenshot above), the less colorful the sunset will be. Conversely, the higher the number, the greater the likelihood that you'll have a color-filled sky to serve as a backdrop for your landscape photos.
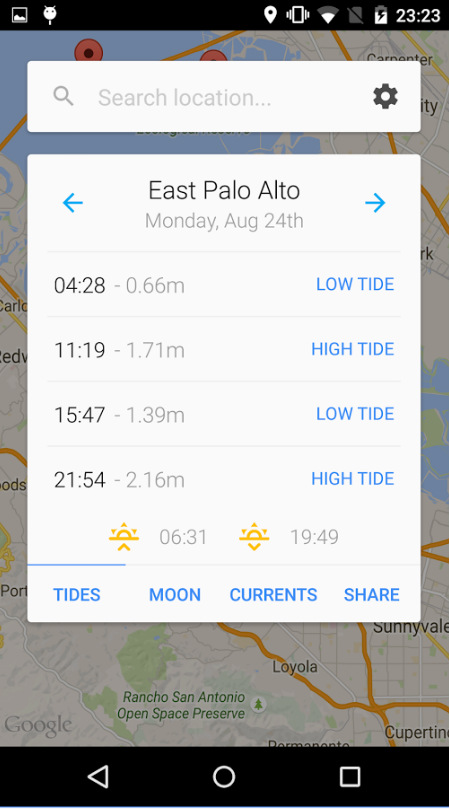
My Tide Times
My Tide Times is another app that I use a lot so I'm sure to plan my photo-taking adventures just right. With a detailed forecast of the tides, My Tide Times allows you to pinpoint a location and get accurate times for the tide coming in and going out. It'll even tell you how high (or low) the tide will be so you can plan your shoot safely. It's available for iOS and Android devices. VSCO
One of the best photo-editing apps out there is VSCO. And if you recognize the name, its because VSCO has been around forever, but back in the day, it was film they produced. Their experience with film photography led to the development of a suite of filters you can apply to your landscapes that give them all sorts of looks, from bright, clean, and simple to dark and gritty. The app includes camera controls as well, which let you make manual adjustments to exposure settings, shoot in RAW or HDR, and much more. Download VSCO here. Use a Polarizer
I know it might sound crazy to use a polarizer with an iPhone, but trust me, it can be done! As it turns out, Sandmarc not only makes lenses for iPhones but they also make a polarized filter. I tested their polarizer out, and it worked like a charm. I noticed an increase in the contrast of the sky and clouds, less glare off the ocean surface, and less atmospheric haze, too.
The build quality of this filter is top-notch as well. It's easy to snap on and off, so using it is a breeze. My only complaint is that the filter isn't compatible with the Sandmarc wide-angle lens, so to use it, I had to remove my wide-angle lens and go with the iPhone's native lens. But, if you ask me, that's a small price to pay for getting better landscape photos with this handy polarizer! Find Ways to Add Depth
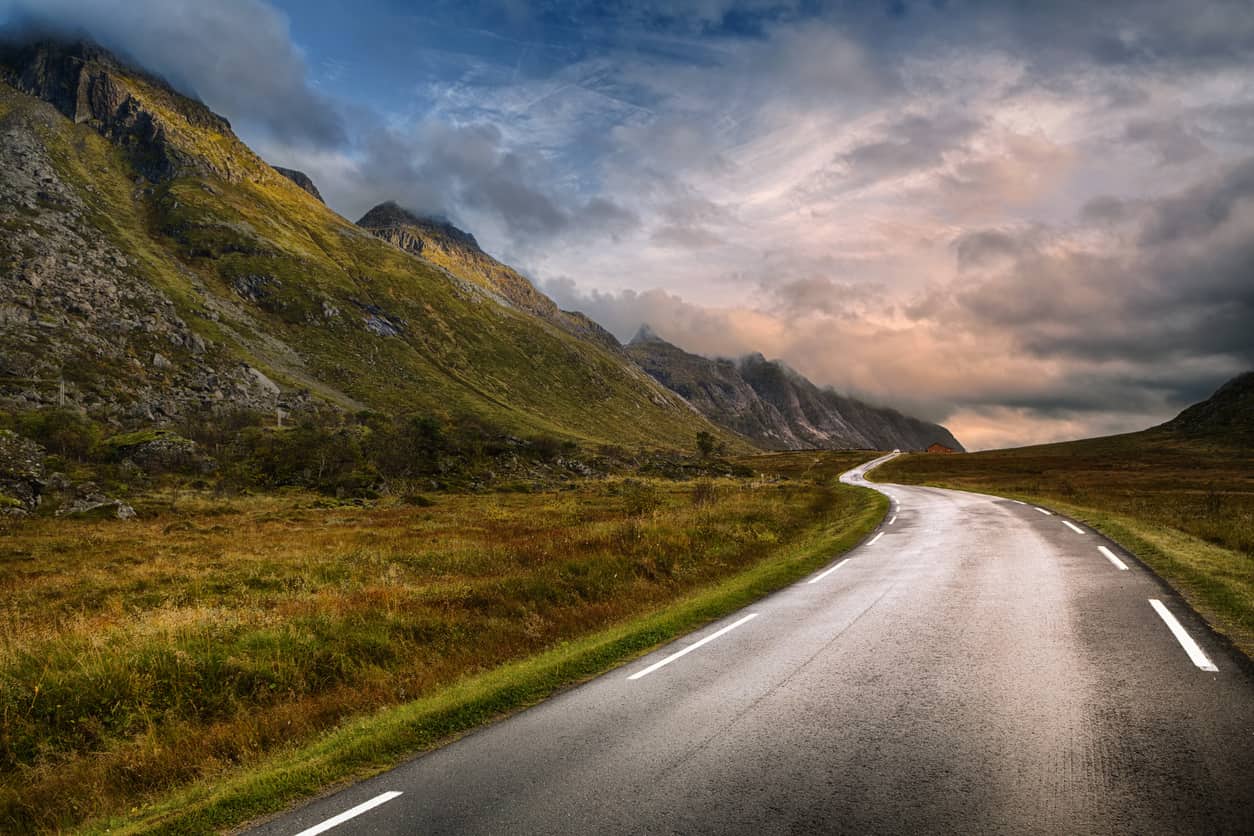
One of the troubles that you encounter as a landscape photographer is conveying the depth you see with your eyes in the photos you take. But there are several tricks you can use to give your landscapes that needed depth, including leading lines. As you can see in the photo above, the lines created by the roadway help move your eye from the foreground to the midground to the background. That movement allows you to inspect each "layer" of the shot, thereby giving it the impression of being three-dimensional.
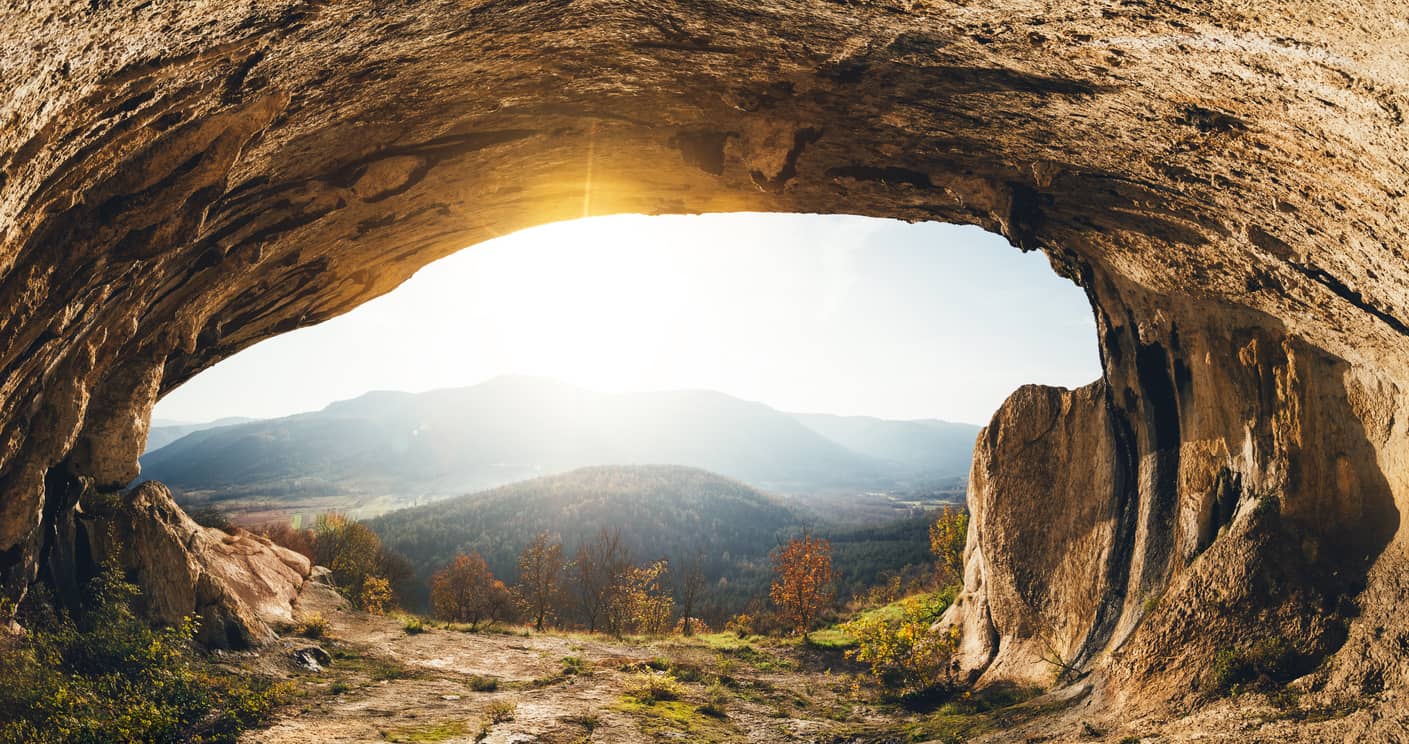
Another popular trick you can use to create depth is to frame the primary subject in some way. As shown in the photo above, by composing the shot such that the landscape is viewed through the rock formation, we get a sense of the spatial relationship of the elements in the shot. In other words, we have a better understanding of how far away the background elements might be from those in the foreground. Using a frame within a frame is also a handy trick when you want to create a more intimate look at the landscape, or even if you want to crop unwanted elements out of the shot. Find Shadows
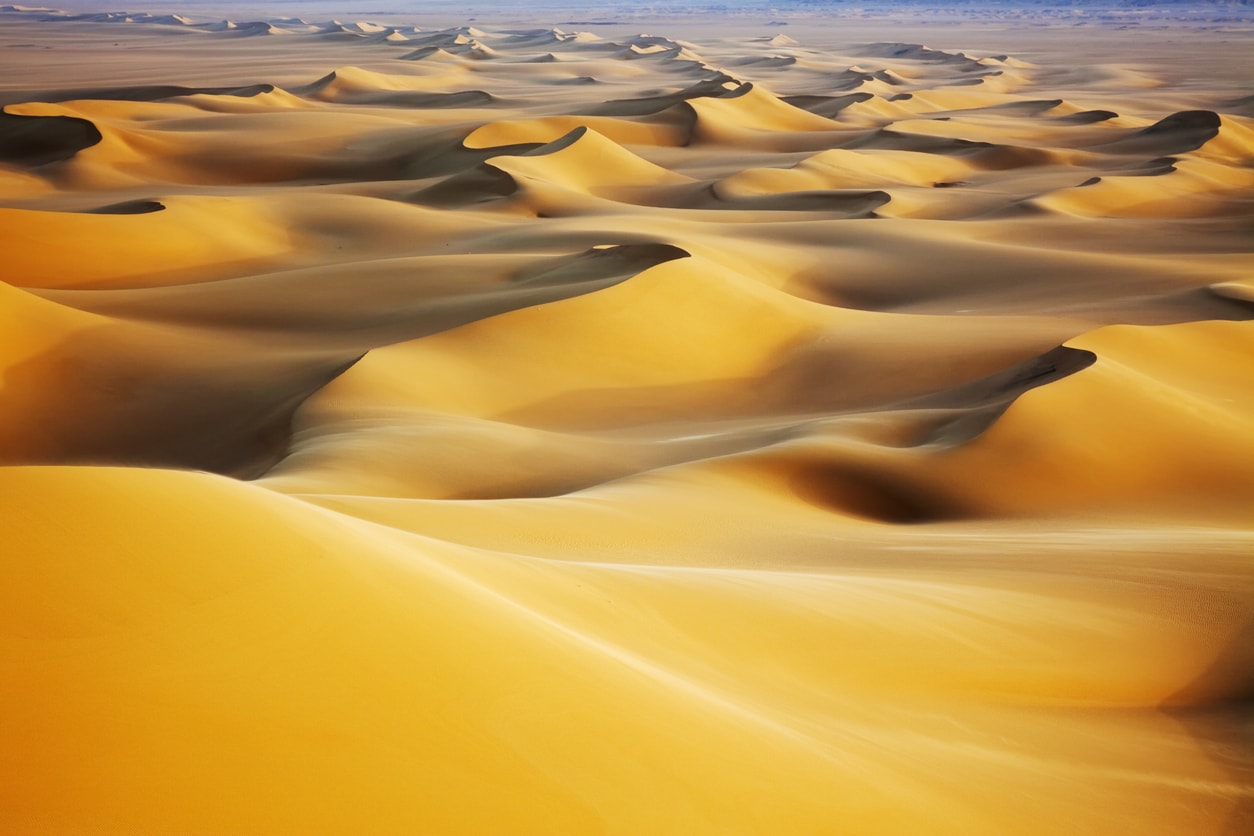
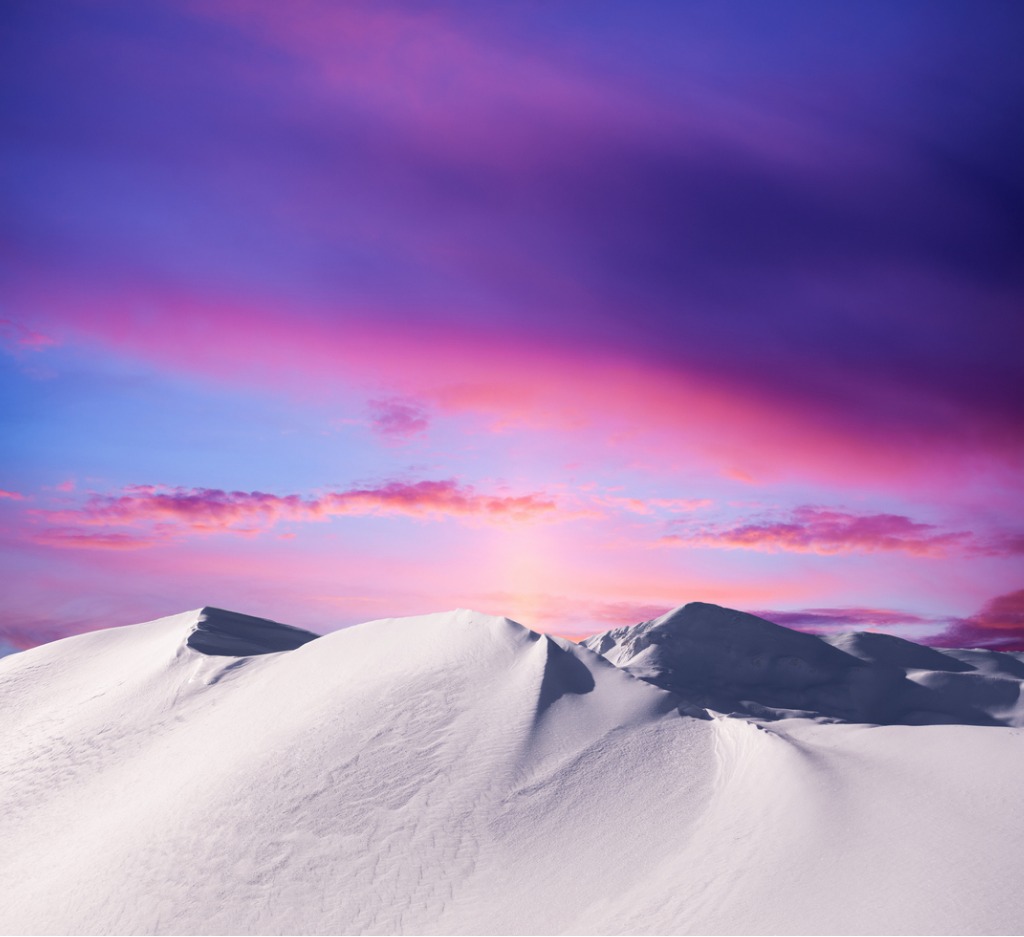
If you shoot during Golden Hour, you'll find beautifully long shadows cast by the low sun. These shadows not only give your smartphone photos improved dynamic range, but they also help create more visual interest in the photo. There's different ways to incorporate shadows into your shots, too. As seen above, you can simply use shadows to highlight a texture or pattern, as you see in the sand dunes.
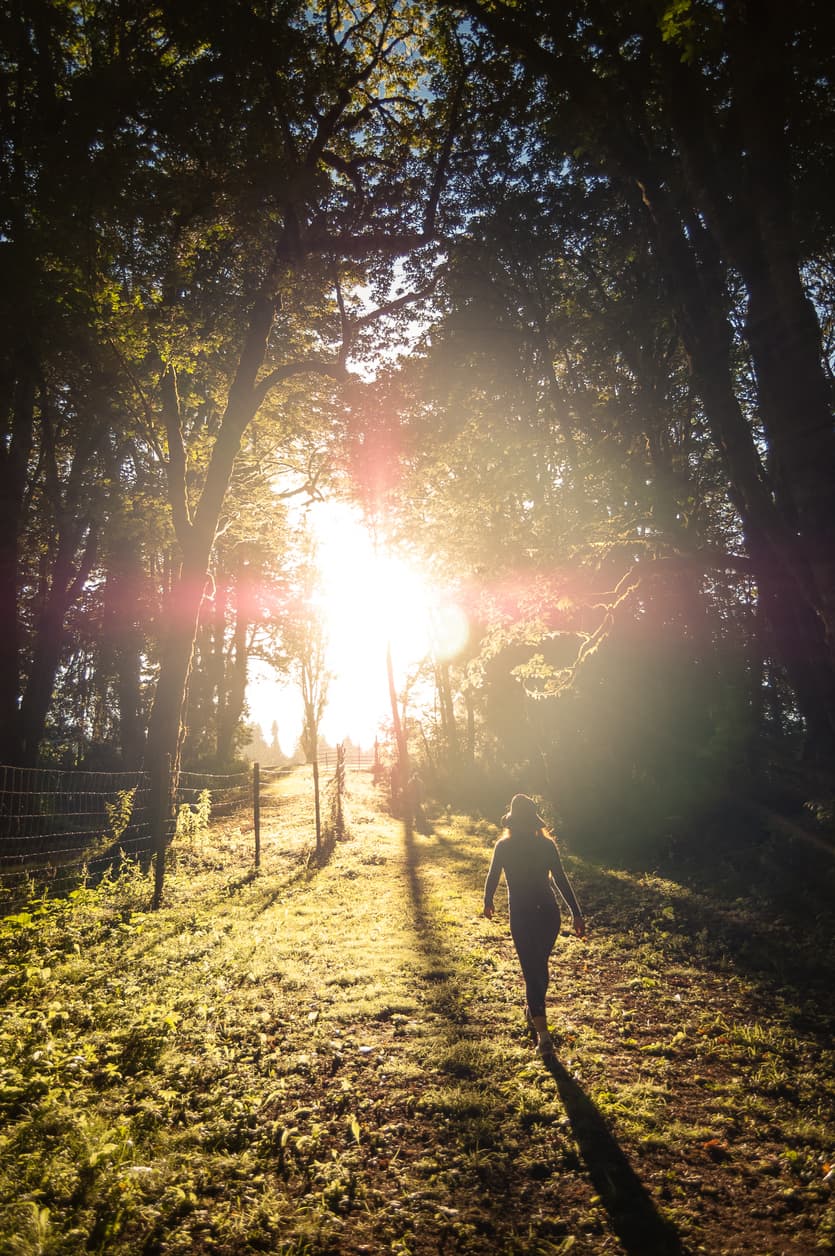
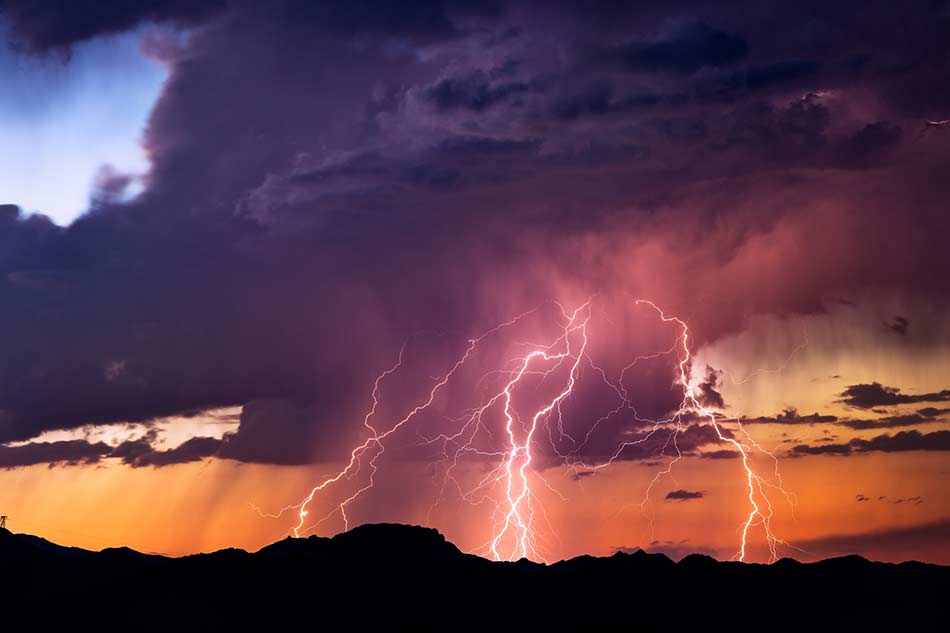
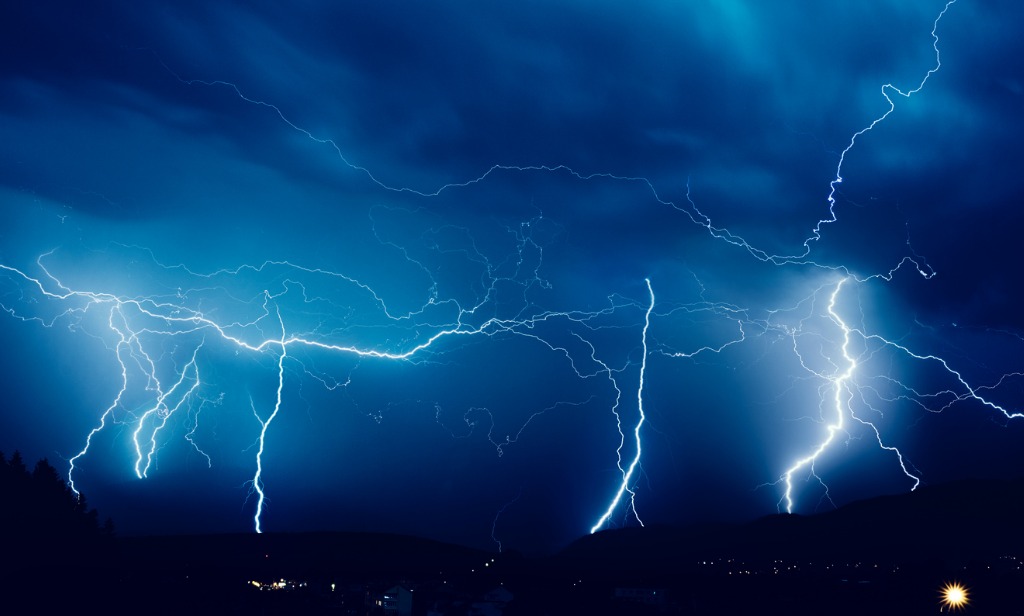
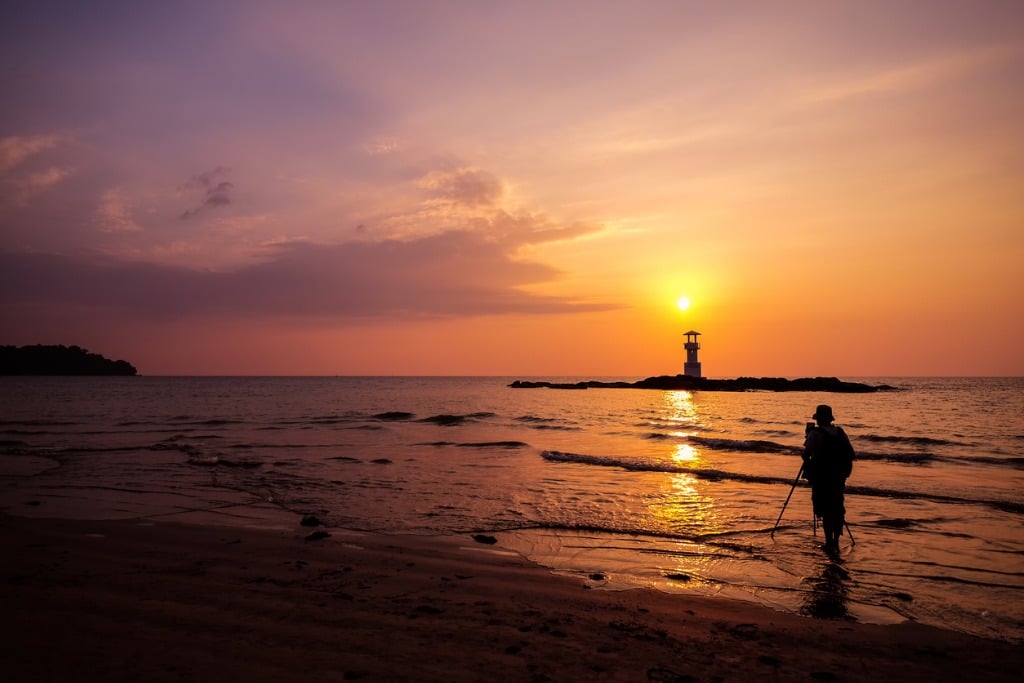
But you can also use shadows to create a little mystery with silhouetted figures, as the photo above demonstrates. This gives you a little more creative freedom for making gorgeous photos, and in the case of this shot, it also allows you to include a person in the image. People and landscapes are great complementary subject matter, so whenever you have a chance to include a person in your shots, do it! This blog post about the topic "iPhone Photography Tips: 5 Tricks to Master Landscapes With Your iPhone" was first published on our website here https://www.photographytalk.com/landscape-photography/8244-iphone-photography-tips-5-tricks-to-master-landscapes-with-your-iphone from https://photographytalkcom.blogspot.com/2021/01/iphone-photography-tips-5-tricks-to.html If you ask me, lightning is one of the ultimate of nature's wonders to capture in a photograph. Of course, the difficulty with photographing lightning is getting the timing just right so that you can take spectacular photos like the one you see above. There are a million tutorials out there on how to photograph lightning. But what I want to discuss in this article is the one piece of photography gear that will help you get better quality photos of lightning more often - a lightning activated shutter release (LASR).
In this LASR buying guide, you'll learn all about the must-have features you need to get the best shots. It's All About Detectability
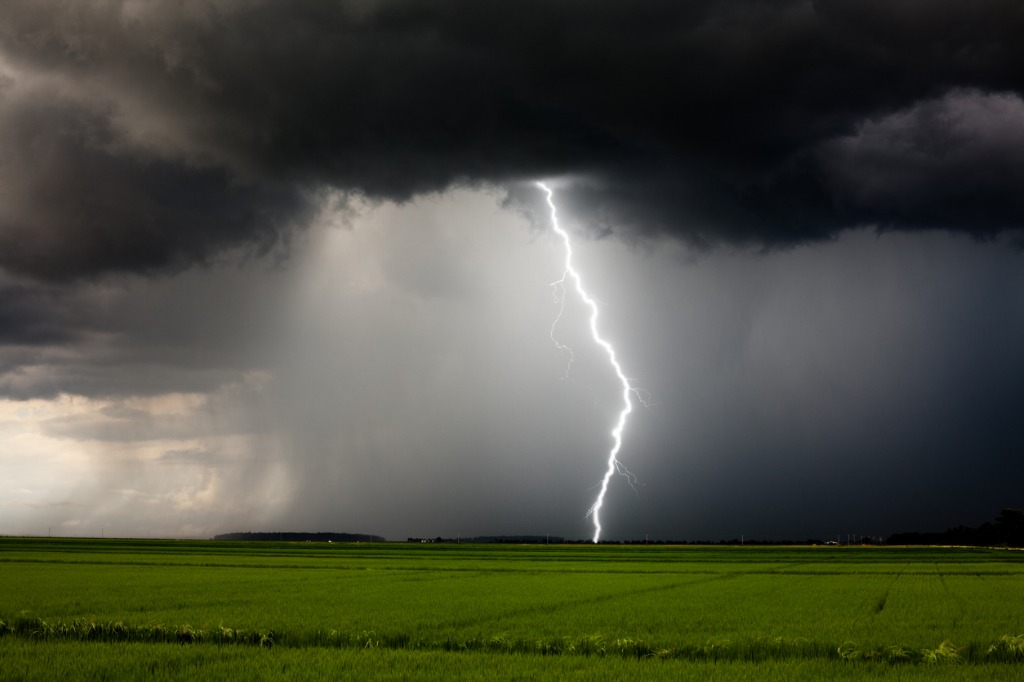
When you observe lightning with the naked eye, even though it might seem quite close, it might actually be many, many miles away. You even might see a brightly lit summer thunderstorm with dark clouds and brilliant ground flashes that you wish you could capture in pixels. That can cause problems for low-grade LASRs (even high-priced ones), which can't detect lightning in the bright daytime, nor detect lightning flashes at a distance. Investing in a good, quality LASR means that you get the ultimate in sensitivity for unsurpassed performance. In fact, some LASRs can detect lightning flashes up to 25 miles away during the day and a whopping 40 miles away at night. Now that's going to help you get some awesome shots! LASRs Should Have Fast Response Times
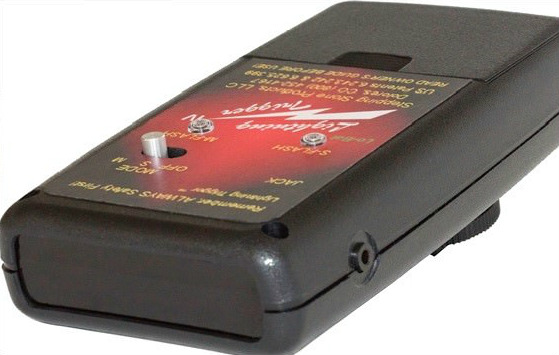
The whole point of using a LASR is to enable your camera to snap a photo of lightning as it occurs. Yet, some devices don't do a very good job of the very thing they were built to do! For the best results, you want a LASR that's lightning fast - pardon the pun. The best LASRs money can buy are the Lightning TriggerⓇ LT-3 and LT-IV by Stepping Stone Products, LLC. In fact, these triggers are up to seven times faster than other devices due to their patented stepped leader-ground flash detection. Not only do these triggers have fast response times, but they're accurate too - single and multi-pulse modes reduce intracloud and out-of-field-of-view responses. With that accuracy, that means you have a much better chance of getting those high-quality lightning photos that you're after. Look for Something That Offers Compatibility
Sure, you might shoot primarily with a Sony a7R II at the moment, but in a couple of years, you might upgrade to whatever the big, bad Sony camera is (or you might even switch to Canon, Nikon, or another brand). The point is that you don't want to invest in a LASR that is only compatible with your current camera. Instead, do your research and buy a LASR that's future-proof and that will work with whatever rig you use. In many cases, all you have to do is buy the release cable for your specific camera and you're ready to go! Automatic Settings are a Plus
Sometimes you'll be out during the daytime to photograph lightning, other times you'll be out at night. What you don't want is to have to make manual adjustments to your LASR. Instead, opt for a LASR with automatic gain control, which allows the trigger to sense the light level at any time of day automatically. What's more, devices that allow automatic metering will help activate the system to maintain the correct exposure as ambient light is changing with minimal shutter lag time. That's a combination of automatic camera settings that will help you take your lightning photography to the next level! You Want Quality
Obviously, when buying a LASR you don't want to spend your money on something that's going to fall apart after a few uses... Some companies offer 1-year warranties on their rigs; others offer 5-year warranties. But Lightning TriggerⓇ bests that by a longshot with a full 15-year warranty on their LT-3 and LT-IV triggers. That's the kind of peace of mind you want when you're out in the rain, wind, and hail with your gear! Better still, Lightning TriggerⓇ has a long-standing reputation for having one of the best technical support teams in the business. Just let them know what problems you're having, and they'll work with you to find a resolution! So, don't buy the first LASR you come upon. Instead, do some research and invest lightning photography gear that's intelligently designed, easy to use, durable, and affordable! This blog post about the topic "How to Photograph Lightning: Lightning Activated Shutter Release Buying Guide" was first published on our website here https://www.photographytalk.com/landscape-photography/8591-how-to-photograph-lightning-lightning-activated-shutter-release-buying-guide from https://photographytalkcom.blogspot.com/2021/01/how-to-photograph-lightning-lightning.html My biggest passion in photography is photographing landscapes. There's a lot of reasons for this, but chief among them is that there are simply so many types of landscapes that can be used to create beautiful landscape photos. In many cases, landscapes have lots of features - mountains, trees, water, plants, rocks, beaches, rolling hills - you name it.
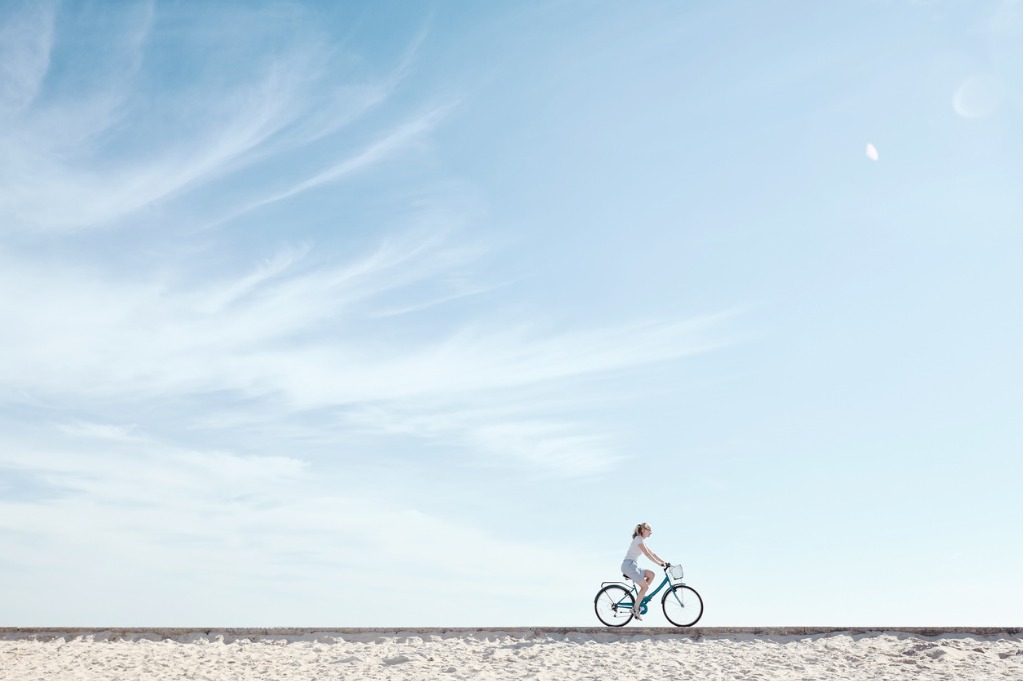
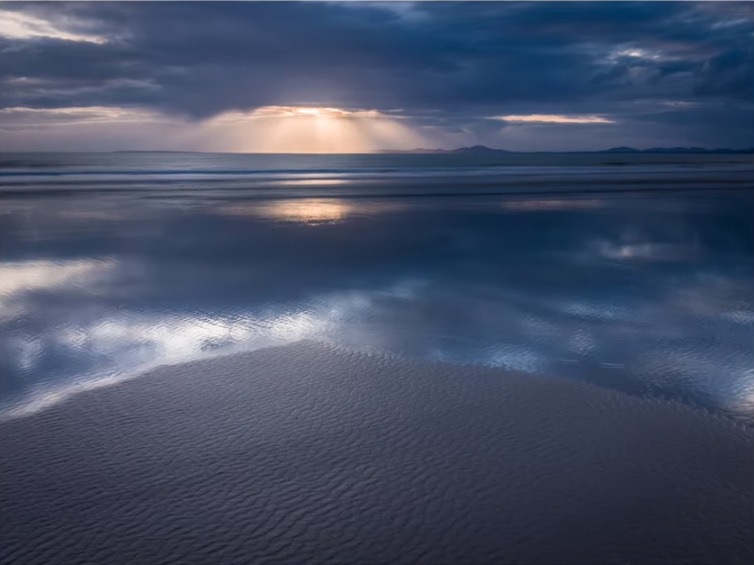
But sometimes, crafting a minimalist landscape image is a fun challenge. I say it's a challenge because finding wide open spaces with little detail can be difficult in and of itself. But beyond that, using negative space in photography and doing it well requires a good photography eye and a great attention to detail. In the video above, Thomas Heaton documents his journey with negative space photography. Below, I've outlined a few landscape photography tips Thomas discusses. Editor's Tip: Improve the quality of your landscape photography by utilizing filters. Find the right filters for you.In Negative Space Photography, You Still Need a Strong Subject
Just because you're looking for a landscape that's got a lot of open space doesn't mean that you don't still need a strong subject. But when working with negative space, you don't necessarily need a big, hulking subject in your photo. Since there's nothing in the negative space to draw the attention of the viewer, the subject can be something small, even delicate. A stone or a rock, textures left in the sand by crashing waves, a single flower, and so forth can all be used as a strong subject that draws the viewer's eyes into the photo. Get Outfitted With Proper Gear
One thing you'll find when shooting positive and negative space is that a great way to ramp up the interest in the shot is to extend the shutter speed. Even by using a shutter speed of just a few seconds, you can begin to see beautiful blur in clouds and water that make your photos - regardless of the subject - more compelling. Of course, using a long shutter speed requires that you have a solid tripod to support your camera while the shutter is open. A camera remote is also a handy tool to have so you can trigger the shutter without actually touching the camera.
Another must-have piece of gear you need for landscape photography is a good set of filters. I never leave the house without a polarizing filter, a couple of graduated neutral density filters, and a few solid neutral density filters as well. That's because filters give you so much more visual impact in your photos, not to mention making post-processing a simpler task because you have fewer things to fix and tweak.
Here's what these filters can do for your landscape photos:
This is a very quick and basic explanation of these filters. Editor's Tip: A high-quality lens filter can make all the difference in how your landscape photos turn out. Get outfitted with landscape photography filters.Good Light is a Must
Obviously, you need good light to get a good photo. But beyond light's role in the exposure of the image, in negative space photography, light can provide something else that can benefit your photos - color. If you shoot at sunrise or sunset, for example, the brilliant rays of the sun can add warmth to the shot. Learn more about camera settings for sunrise on our website PhotographyTalk.com. What's more, you can use that light to help draw people deeper into the shot. In Thomas' photo above, you can see how the textures of the sand invite you in, and then your eyes are pulled toward the background by the warm tones of the sunset. Again, you don't need a ton of detail in negative space photography - just enough to pique the viewer's interest. Wrapping It Up
Taking gorgeous negative space photos (well, any type of photo) is a process. You have to plan ahead, have the right gear and tools to get the job done, develop an eye for details, and, of course, practice. Using negative space might seem a little scary, simply because it's so different from what we normally see in landscape photography. But if you can master the steps outlined above, you will be well on your way to mastering negative space in photography. This post about the topic "How to Use Negative Space in Landscape Photography" was first published on our website here https://www.photographytalk.com/landscape-photography/8419-how-to-use-negative-space-in-landscape-photography from https://photographytalkcom.blogspot.com/2021/01/how-to-use-negative-space-in-landscape.html For many landscape photographers, mountains represent the pinnacle of subject matter. Not only can you photograph gorgeous mountain peaks covered in snow, but there's also plentiful opportunities to capture things like forests, lakes, rivers, glaciers, wildflowers, wildlife, and even the Northern Lights. The question, of course, is what mountain ranges should you photograph? Here's a few landscape photography tips for the next mountains you need to photograph.
The Tetons
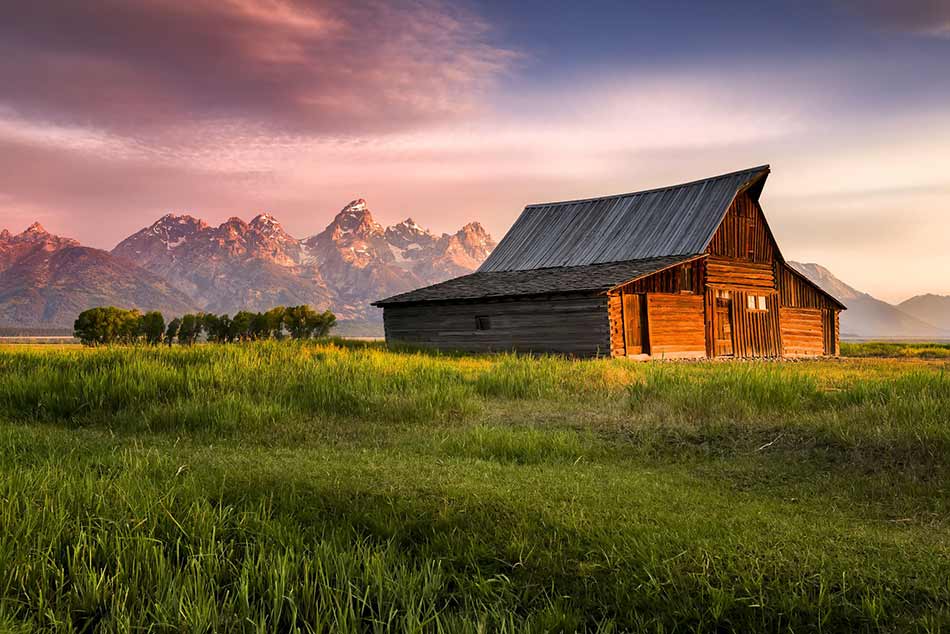
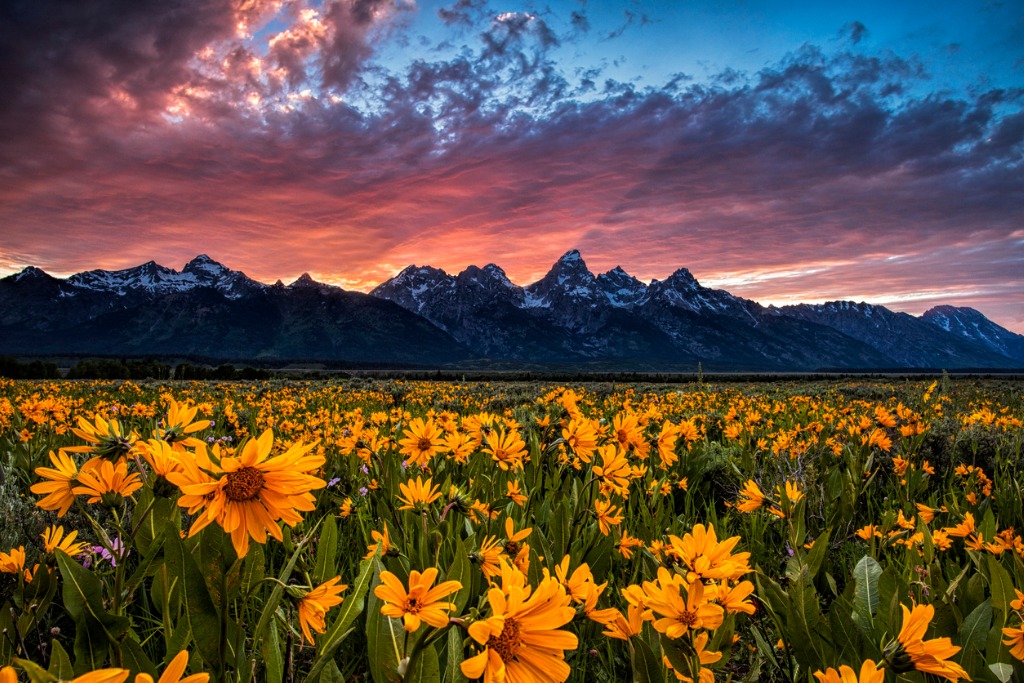
The Tetons abruptly rise out of Jackson Hole, their signature peaks without foothills, which make the mountains seem that much taller. The Grand Teton, rising to 13,776 feet, gets a lot of photographer's attention - and deservedly so. But this mountain range offers much more in the way of photographic opportunities than simply photographing its signature peak. Bears, moose, and elk roam the valley below, as do bison, which, depending on the time of year, number in the thousands.
There's history in the Tetons as well. You can visit the same spot where Ansel Adams took his famous photo The Tetons and the Snake River and create your own spin on that iconic image. Speaking of iconic, you can also visit Mormon Row, a collection of 100-year-old buildings on Antelope Flats, where people flock to photograph the Moulton Barns set against the backdrop of the Tetons. Of course, sunrises and sunsets here are incredible, with the golden light of the early morning illuminating the peaks of the Tetons and the setting sun lighting the sky above the mountains on fire at night. The Northern Rockies - Glacier National Park
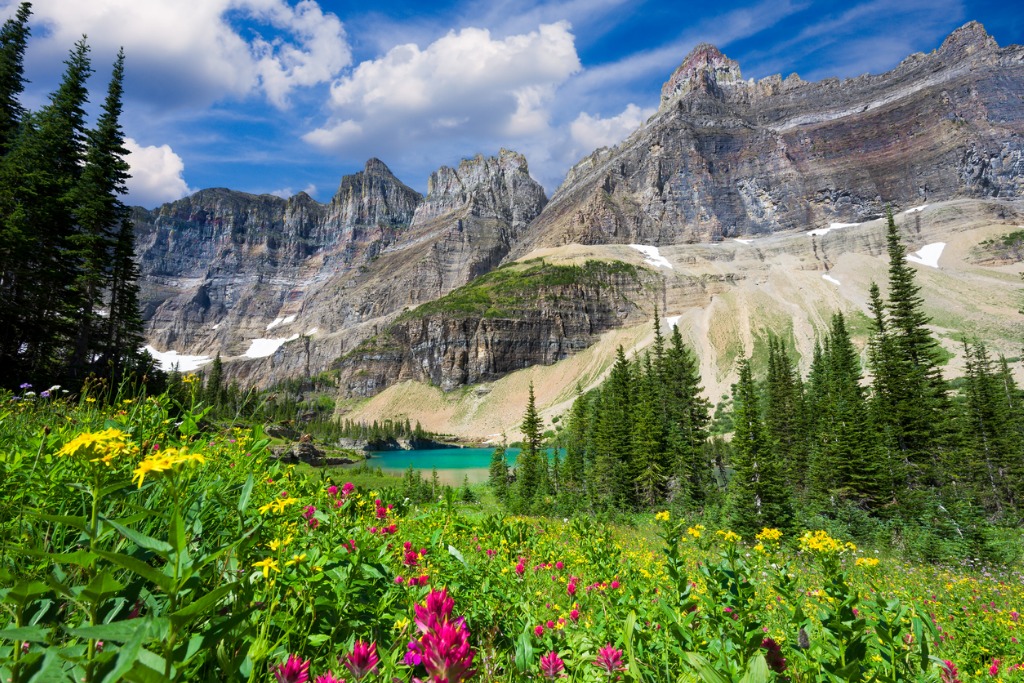
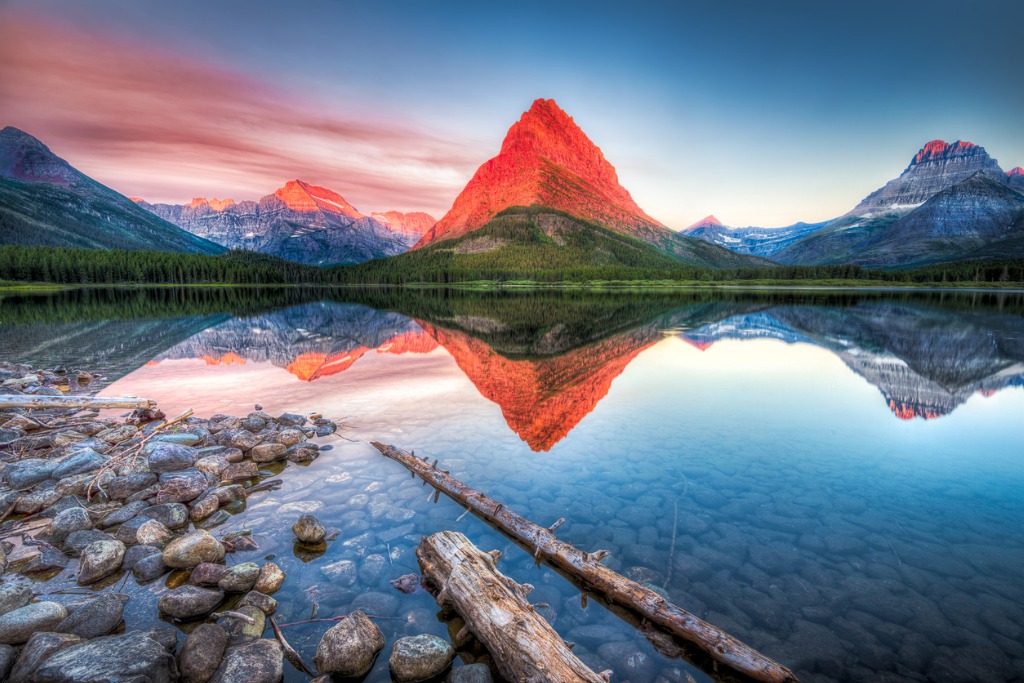
If you're looking for a mountain range that is unabashedly wild, the Northern Rockies in Glacier National Park should be at the top of your list. The soaring peaks are only part of the equation here... The many lakes and streams - many of which are lined with rainbow-colored rocks - give you plenty of opportunities to incorporate gorgeous reflections of mountain peaks in still waters or use the leading lines of streams to compose a more compelling landscape photo. The deep valleys between the peaks are fodder for excellent photos as well, particularly in the early summer when wildflowers explode to life everywhere you look.
Naturally, Glacier National Park is a prime spot for sunrise and sunset photography. Night photography is an ideal pursuit in this region as well. With dark skies, clear nights, and more than enough gorgeous landscapes to serve as visual interest, you can create spectacular photos of the night sky just about anywhere in the park. Bring a long lens and photograph the abundant wildlife as well, which includes mountain lions, elk, mountain goats, bears, and bighorn sheep, to name a few. The Canadian Rockies - Banff
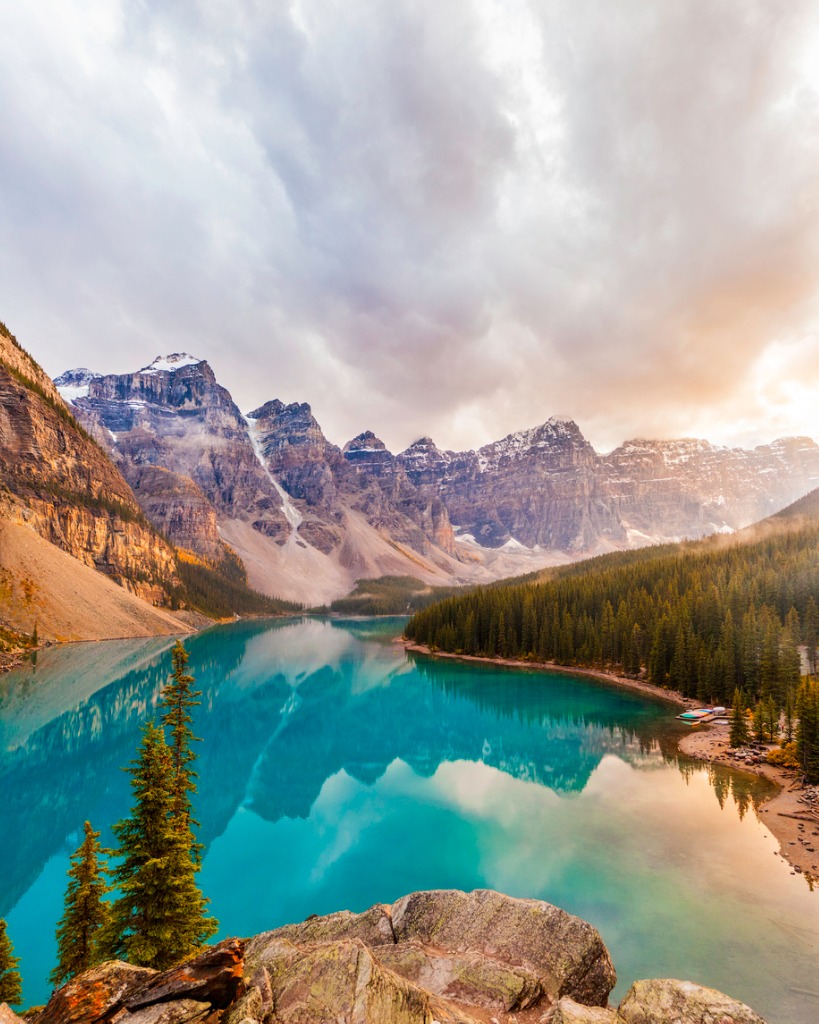
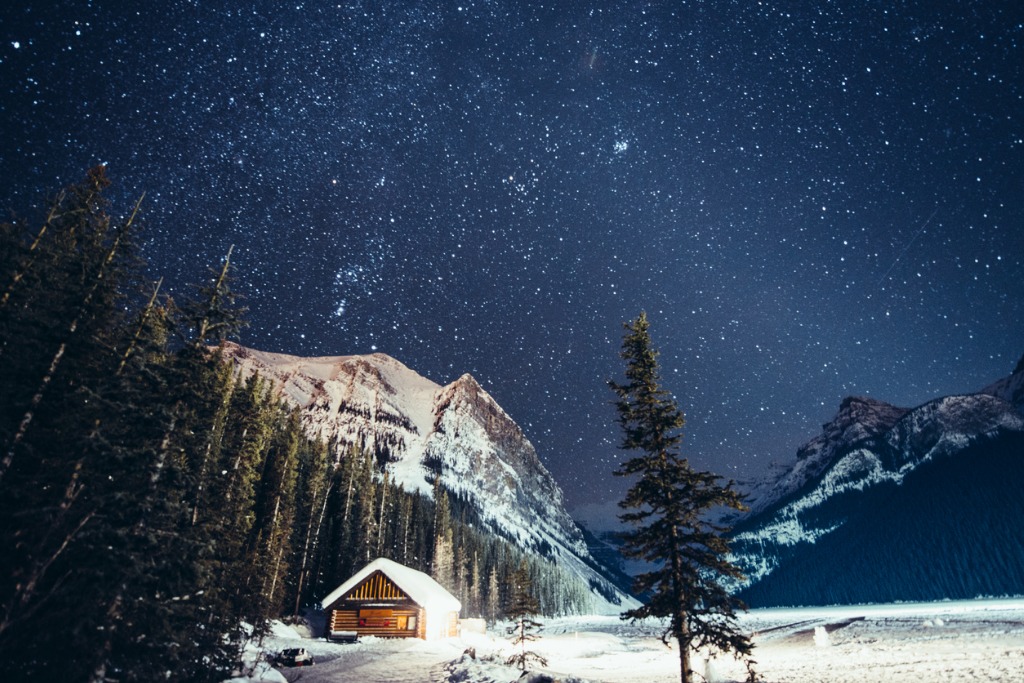
Go to any landscape photography gallery online, and there's a good chance that you'll find a big pile of photos taken in the Canadian Rockies, specifically, the area around Banff. I had the opportunity to tour the Banff area many years ago, and to say that it was one of the most breathtaking places I've ever been is a massive understatement. Learn more about the best camera for landscape photography on our website PhotographyTalk.com. The mountains around Banff aren't any bigger than those you find south of the border in the United States, but man, they sure do seem bigger. The imposing peaks make for epic subjects for landscape photos, particularly when you consider that this area is home to some of the most gorgeous lakes in North America as well.
Another factor that you'll like about the Banff area is that it has such varied weather conditions. That means you can capture sunrise photos with fog and mist to give your photos a mysterious vibe, and then traipse around Lake Louise or Moraine Lake for a daytime shot with a big, blue sky above the landscape. Follow that up with a sunset shot with storm clouds rolling in above the peaks, and a night photo session of the stars with a crystal clear sky. Even when it's cold, rainy, snowy, or foggy, there is more than enough to occupy your time and your lens in the Canadian Rockies! The Cascades
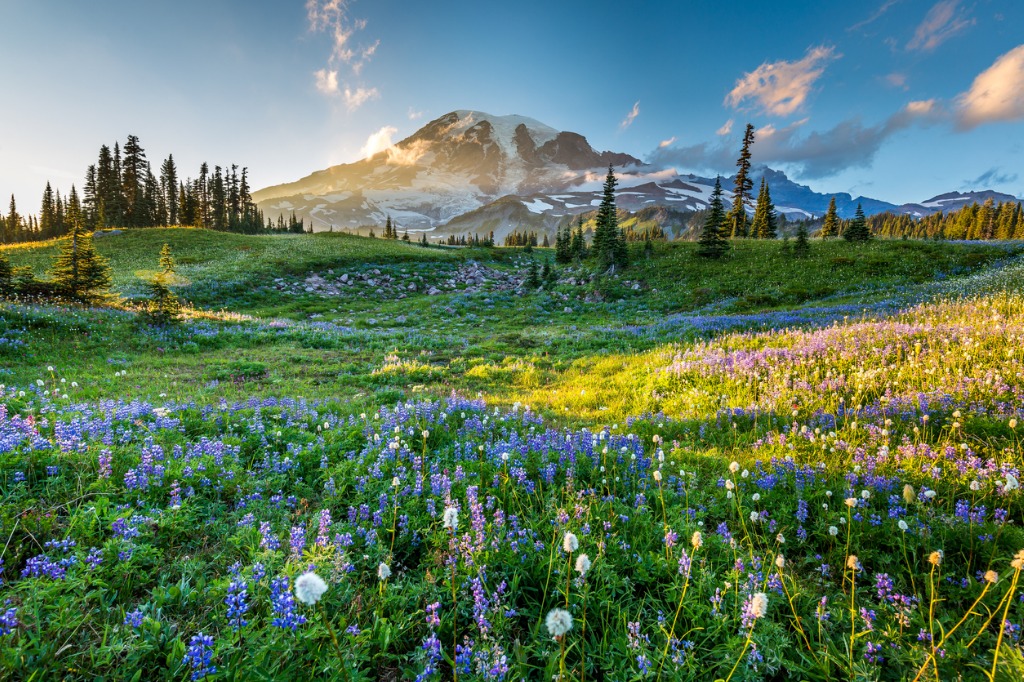
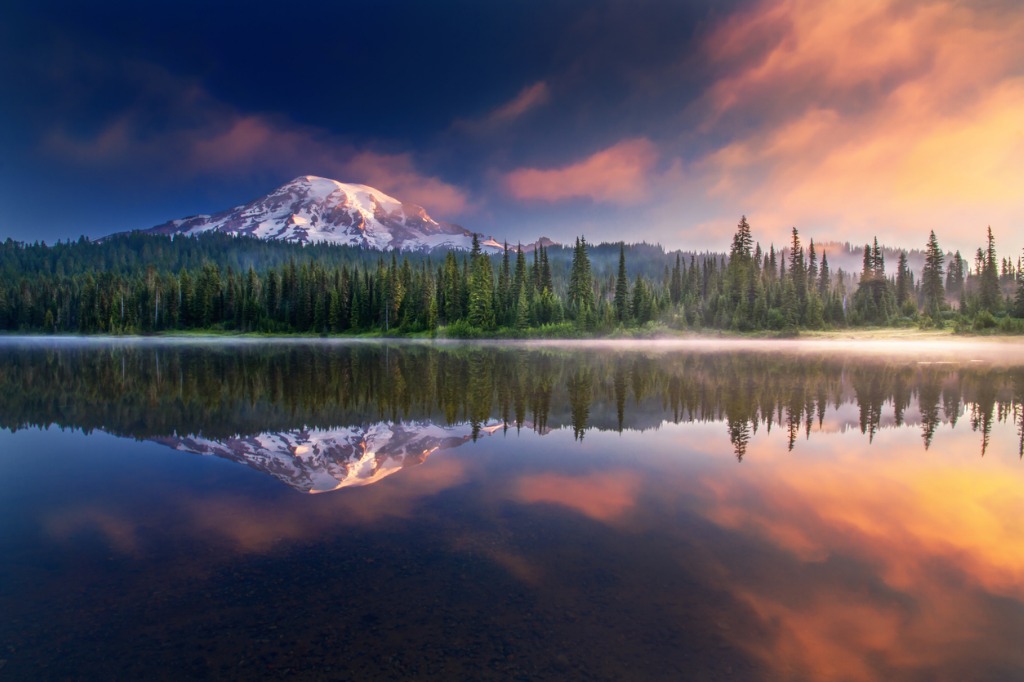
The Cascade Range of Washington and Oregon is a landscape photographer's playground, with volcanic peaks jutting up towards the sky through thickly forested surroundings. Obviously, peaks like Mt. Rainier, Mt. Hood, and Mt. St. Helens provide you with strong, gorgeous subjects to set against the colorful sky at sunrise or sunset. But aside from these mountains that have snow-covered peaks year-round, you'll find millions of wildflowers dotting the mountainsides in the spring and early summer. The juxtaposition of the hulking mountains with such colorful and delicate flowers makes for an interesting and gorgeous photo opportunity.
Of course, since there's so much rain in the Pacific Northwest, another subject that you have to photograph is the many waterfalls that dot the area. From streams that fall a few dozen feet over a cliff's edge to waterfalls that roar downward hundreds of feet, you can find all types and sizes of waterfalls in the Cascades. And with all the rainy weather, there are chances to capture dramatic skies - from soaring clouds to low-hanging fog to rainbows - to use as backdrops for your landscape photos of the Cascades. The Alaska Range
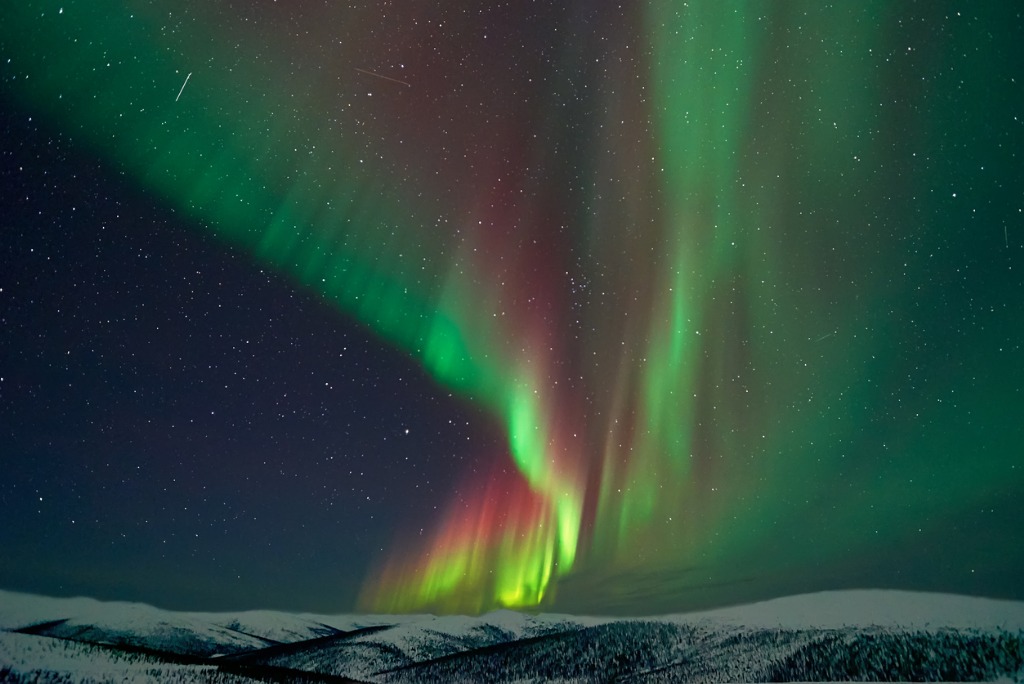
When it comes to rugged, desolate mountains, it's hard to beat the Alaska Range. Arcing from east to west in southern Alaska, this mountain range is the third highest in the world and is home to North America's tallest mountain, Denali, which stands 20,310 feet. Because of its shape and location, the Alaska Range has some of the most turbulent weather in the world - which can either mean highly dramatic photos or no photos at all due to the weather. However, if timed right, the Alaska Range offers photographers unparalleled beauty, with dozens of glaciers, large river systems, and abundant wildlife.
Perhaps the best photo opportunity here, though, is the Northern Lights. Like Glacier National Park, the Alaska Range has cold, clear nights that give you an unfettered view of the aurora dancing in the sky above the soaring peaks of the Alaska Range. Time your trip to the Alaska Range in March, when the Northern Lights are at their strongest and most visible. You can frame up images of the aurora above giant mountain peaks, untouched forests, frozen lakes, or glaciers. If it sounds like a beautiful place - it is! Just like the other destinations outlined above, you could spend weeks in this place and never run out of gorgeous landscapes to photograph. So, if you're planning a landscape photography adventure, keep these North American mountain ranges in mind! This blog post about the topic "Top Mountain Ranges in North America That Photographers Love to Photograph" was first published on our website here https://www.photographytalk.com/landscape-photography/8546-top-mountain-ranges-in-north-america-that-photographers-love-to-photograph from https://photographytalkcom.blogspot.com/2021/01/top-mountain-ranges-in-north-america.html Portraits in landscape orientation? What is this madness? Yes, you should take portraits in landscape orientation, and you should do it a lot. In fact, there are a whole host of reasons why landscape-oriented portraits are the way to go. Learn more about camera setup for landscape photography on our website PhotographyTalk.com.
Below, I’ve outlined three primary reasons why you should take portraits in landscape orientation. Landscape-Oriented Portraits Can Be Cropped to Portrait Orientation
photo by dusanpetkovic via iStock First and foremost, when you create a portrait that’s in landscape format, you can easily crop it to portrait format. This gives you the best of both worlds because you have both options on the table. However, when you create a portrait in portrait format, there’s no going back - you’re stuck with a vertical aspect photo (unless you take vertical and horizontal images each time). Personally, I just like having the option to process the image in landscape or portrait format, should I desire a change from the original. Besides, it’s just easier and faster to take one landscape-oriented portrait each time, rather than taking two shots of each pose. Get more portrait photography composition tips in the video above by Weekly Imogen. Why You Should Take Portraits in Landscape Orientation: It’s Best for Displaying
When creating a portrait, you have to consider how the finish project will be best displayed. For example, most of us don’t have long, tall areas of wall on which to hang a large portrait. Furniture, lamps, and other items are often in the way of doing so. However, what most of us do have are wide areas of walls that are perfect for landscape-oriented portraits.
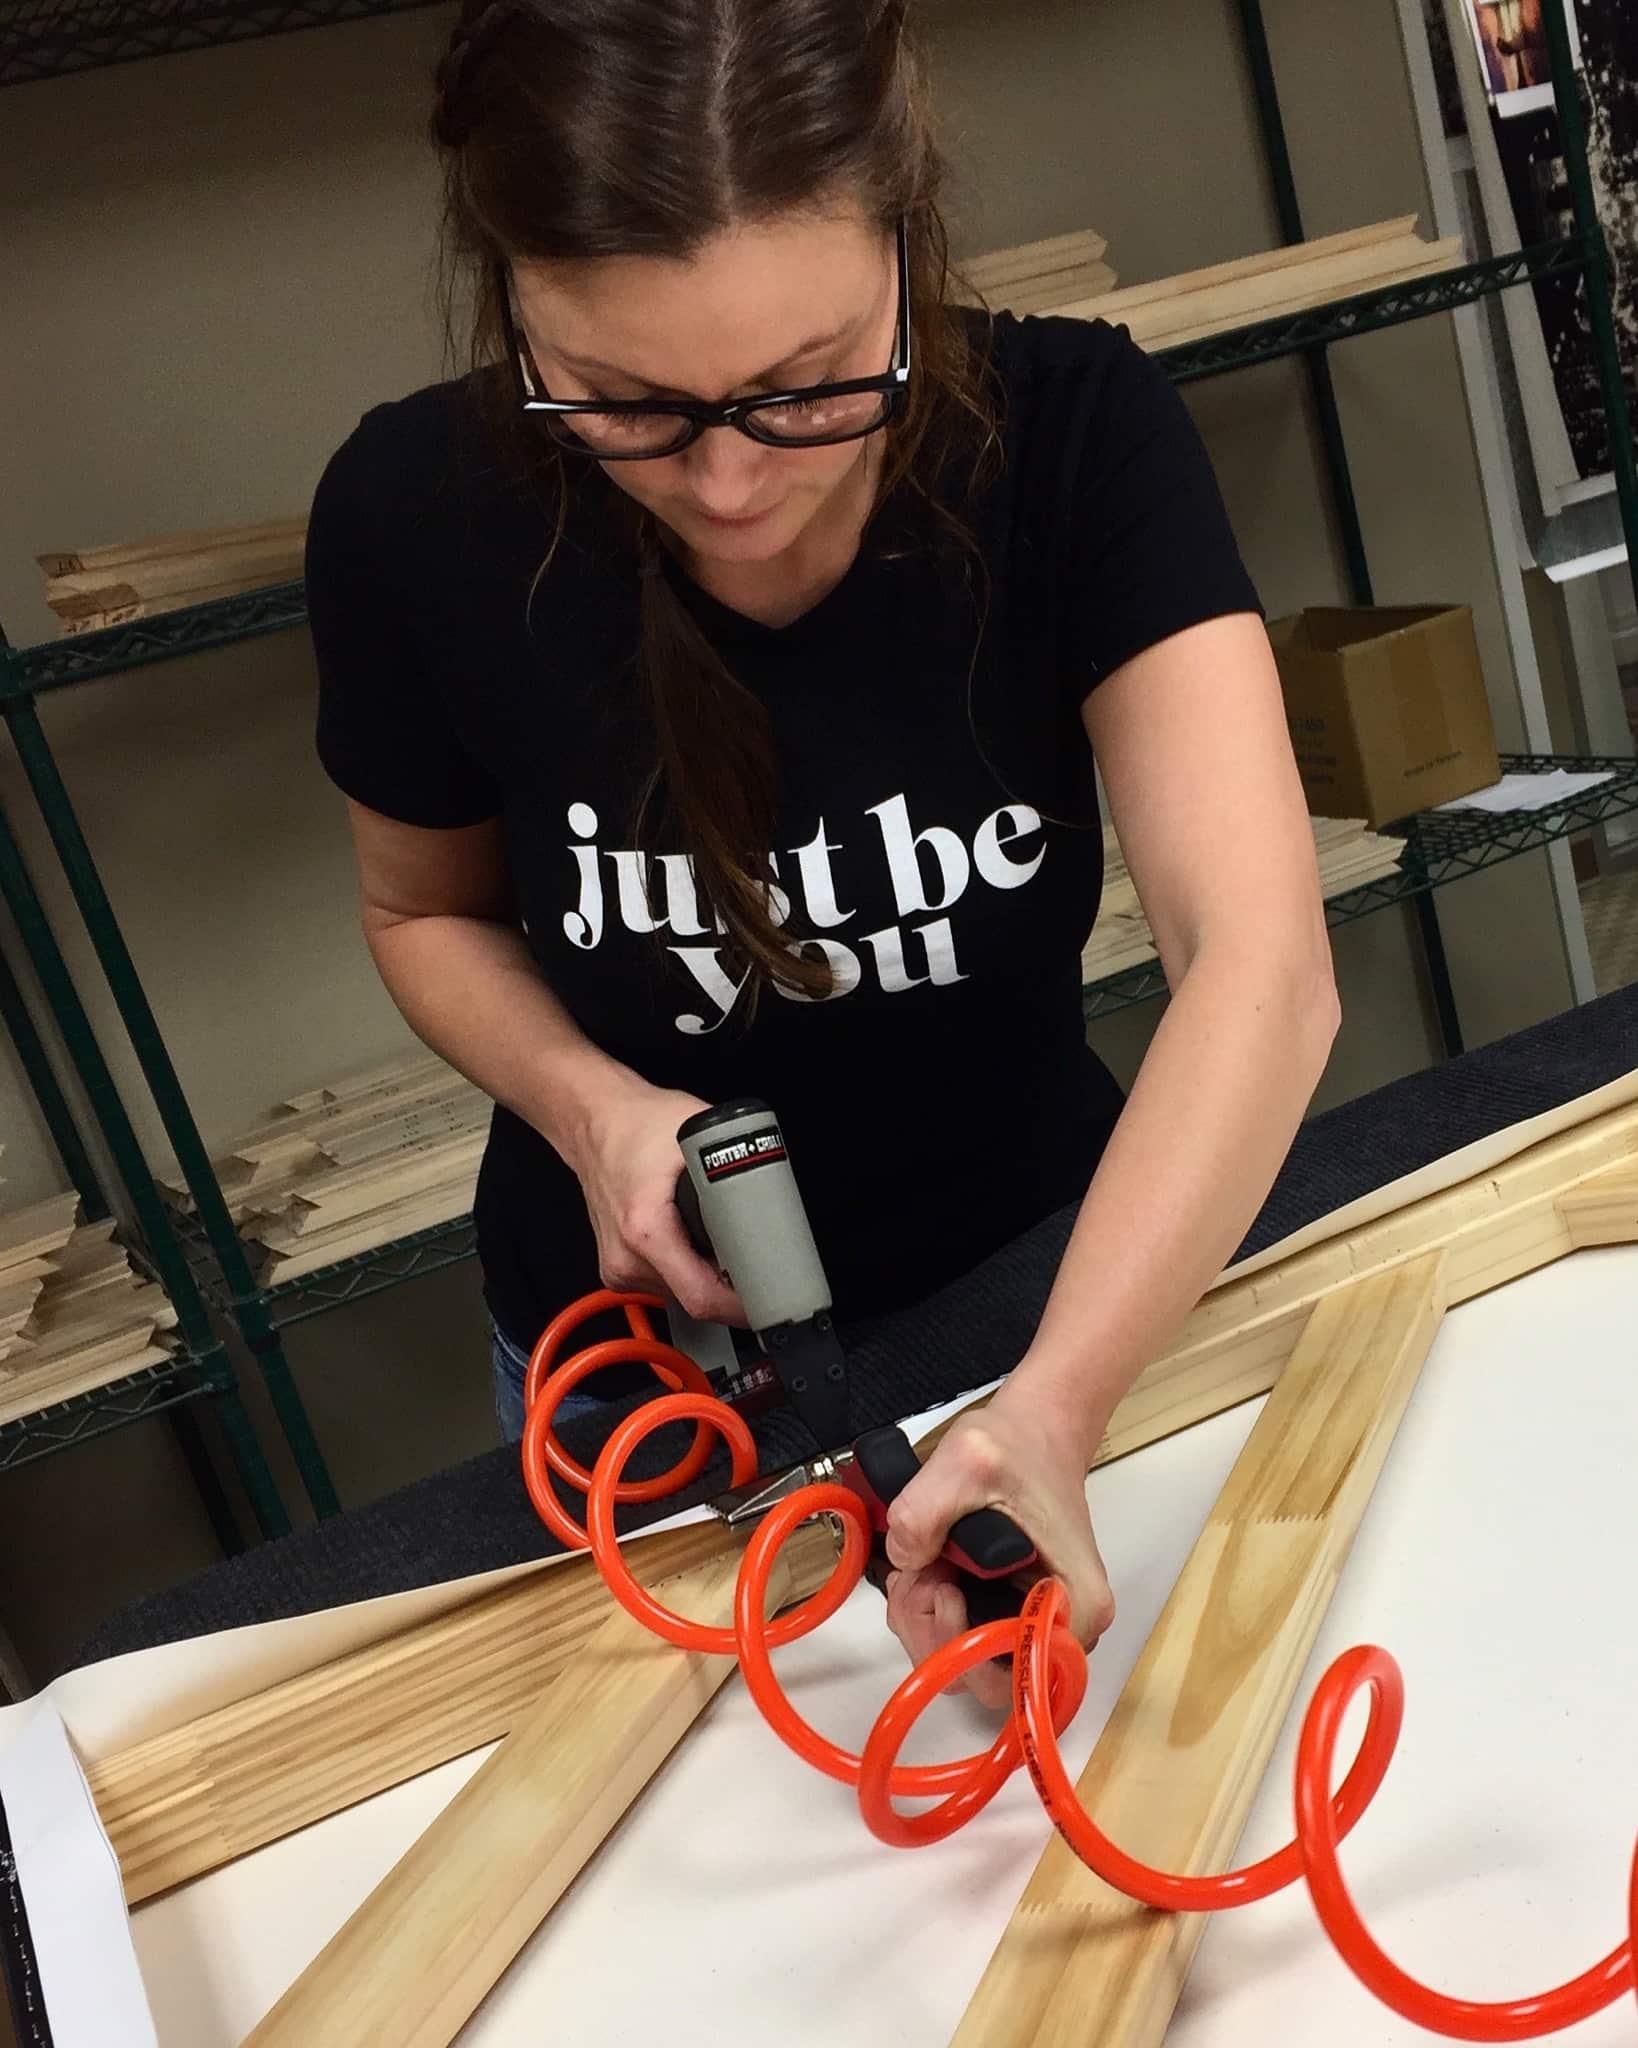
Better still, you can create a photo display with numerous landscape-format portraits to fill a long, wide wall. I’ve done just that in my house with canvas prints, and I think it looks awesome! Of course, looking awesome is partly due to your skills as a portrait photographer, but the types of prints you get matter as well.
I like canvas because it has a classic look. I like the subtle texture of the substrate because I think it gives nice depth and definition to my portraits. As I expound upon in this canvas print review, not all canvas companies are made alike. If you have landscape-oriented portraits you’d like printed, give CanvasHQ a try.
These guys are dedicated to crafting the perfect canvas print. They do so by using premium inks, archival-grade canvas, and hand-crafting the frame. Their prints look like a million bucks, but are extremely affordable, so it’s the best of both worlds. I’m telling you - the combination of a portrait in landscape format and a high-quality canvas is a great one! Portraits in Landscape Orientation Allow You to Tell a Better Story
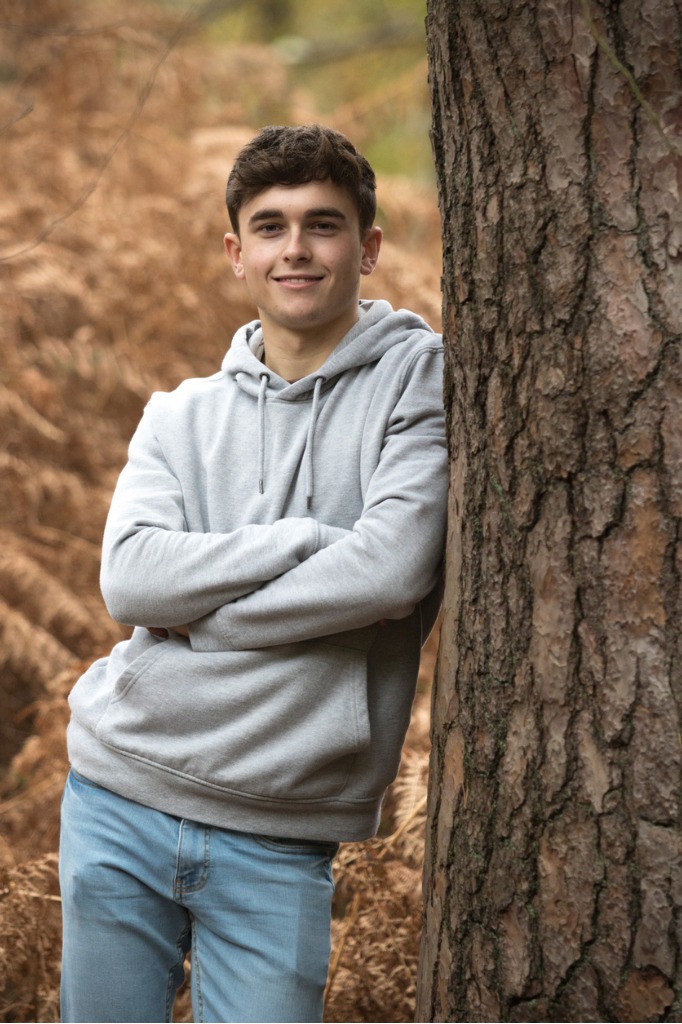
photo by Ben Gingell via iStock A final advantage of taking portraits in landscape format is that it often gives you more creative freedom for telling a story with the photo. If you think about it, a more traditional vertical portrait like the one above omits much of the subject’s surroundings. But it’s often the surroundings that help you create part of the narrative about the person in the shot, what they’re doing, where they are, and so forth.
photo by borchee via iStock Obviously, there are times when the surroundings aren’t all that great and a tightly framed portrait is best. But if the situation is like above, and the subject is amongst great beauty, a landscape-format portrait is definitely the way to go. This blog post about the topic "Here’s Why You Should Take Portraits in Landscape Orientation" was first published on our website here https://www.photographytalk.com/why-you-should-take-portraits-in-landscape-orientation from https://photographytalkcom.blogspot.com/2021/01/heres-why-you-should-take-portraits-in.html Let's face it - there are a ton of factors involved in creating a beautiful landscape photo. You need great light, a solid composition, the right gear, and your timing needs to be spot on, too. But there's more to do after you take the photo... If you want to maximize the quality of the shots you take, you need to learn how to edit landscape photos. Joshua Cripps of Professional Landscape Photography Tips offers a great introductory tutorial on editing landscape photography in the video above.
Have a detailed look at some of Joshua's tips and tricks below. Post Processing Photos Should Begin in Adobe Camera RAW
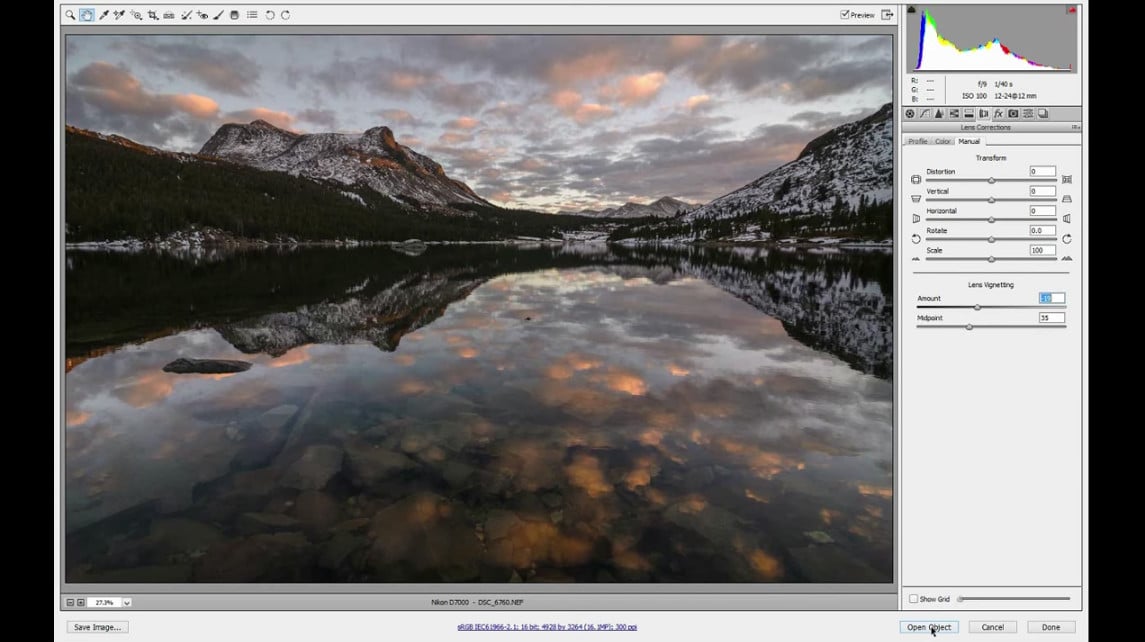
The beauty of shooting your landscape photos in RAW format is that it preserves all the data collected by the camera's sensor, unlike a JPG. With all that data, you can make many more manipulations to your images, and non-destructive changes at that. Adobe Camera RAW is like a primer for Photoshop in that you can make changes to things like exposure, contrast, highlights, shadows, and so forth. It's easy to do, too. Just open your image in Camera RAW, and use the sliders you see above to make improvements to the shot. You can also make adjustments to curves, add a vignette, apply a graduated filter, and many other handy things to make your photo pop, all before you ever open it in Photoshop. In the screenshot above, you can see how much better the image already looks after just a few adjustments in Camera RAW. Open the Photo in Photoshop and Get to Work
The real fun of editing landscape photography starts when you open the image in Photoshop. That's because Photoshop is rife with advanced tools that allow you to really punch up the drama in your photos. As seen in the video above, Joshua adds a Dodge/Burn layer to his image to help bring more attention to the mountains in the background. Dodging and burning is an old film technique that allows you to brighten (dodge) or darken (burn) certain areas of the image. Of course, Photoshop automates that process for you.
Essentially, all Joshua does to brighten the mountain peaks is paint on the Dodge/Burn layer with a light color that he color-picked from the clouds. This is important because by picking a color that's already in the photo, it makes the areas he's working on look like they were naturally that bright and colorful. As you can see in the comparison between the before and after images above, it's not a huge difference, but it's just enough to make the mountain peaks a little more eye-catching. Improve Contrast by Using the Curves Adjustment
If you have a landscape photo that's got a sky that's a little too bright and light on the contrast, you can easily correct that in Photoshop by using the Curves adjustment. In the screenshot above, you can see the Curves adjustment panel. In its beginning state, the Curves line is perfectly flat. But by pulling the highlights up and the shadows down, you get more of an S-curve shape, as seen below.
The result of manipulating the curves in this manner is a photo with more contrast. And with more contrast, the elements of the image - the sky, the mountains, and their reflections, are more visually appealing with more pop. Now, there are other adjustments you'll likely need to make when using Curves because the changes made can often darken parts of the image too much. For a complete tutorial on how to maximize the effectiveness of the Curves adjustment, be sure to watch Joshua's video above. More Landscape Tutorials
Joshua Cripps has tons of other landscape photography tutorials on photoshop, taking photos, gear, and more. Be sure to check his YouTube channel for more details! Additionally, you can vastly improve the quality of your photos in landscape camera by using high-quality photo filters like those from Formatt-Hitech. Formatt-Hitech has built a reputation for quality materials and high-performing filters over the years, and I can attest to that quality firsthand. I've used their Firecrest Polarizing Filter, various Firecrest Graduated Neutral Density Filters, and various Firecrest Solid Neutral Density Filters as well. Your ability to create breathtaking photos is only increased by using good photo filters. Get outfitted with filters and start taking better photos right now! This article about the topic "Photoshop Tutorial: How to Edit Landscape Photos" was first published on our website here https://www.photographytalk.com/post-processing/8439-photoshop-tutorial-how-to-edit-landscape-photos from https://photographytalkcom.blogspot.com/2021/01/photoshop-tutorial-how-to-edit.html If you've ever seen Forrest Gump, you know the setting above well. It's Highway 163, mile marker 13 in Monument Valley, a spot that's now called Forrest Gump Point.
This is one of the most iconic landscapes in all of the United States, and a bucket list location for many photographers.
In this short guide, I'll walk you through some critical Monument Valley landscape photography tips to help you get the best possible landscape shot. Step 1: Finding Forrest Gump Point
As noted above, the location of this shot is US Highway 163, mile marker 13 in Monument Valley, near Mexican Hat, Utah. It is a desolate location, not particularly near anything else, which is part of its mystique. When you stand at Forrest Gump point, looking out on the incredible vistas of Monument Valley, you can't help but feel like you've gone back in time. You half expect a stagecoach to rumble by on the highway! Step 2: Timing Your Visit
There are a couple of things to consider regarding the timing of your visit to Forrest Gump Point. First, you'll likely find the best photographic opportunities in the early morning. There tends to be less traffic in the morning, and the light of the rising sun illuminating the landscape is quite fetching. Arrive early, though, to get a parking spot. There will be plenty of other people there with their cameras hoping to capture a shot as well.
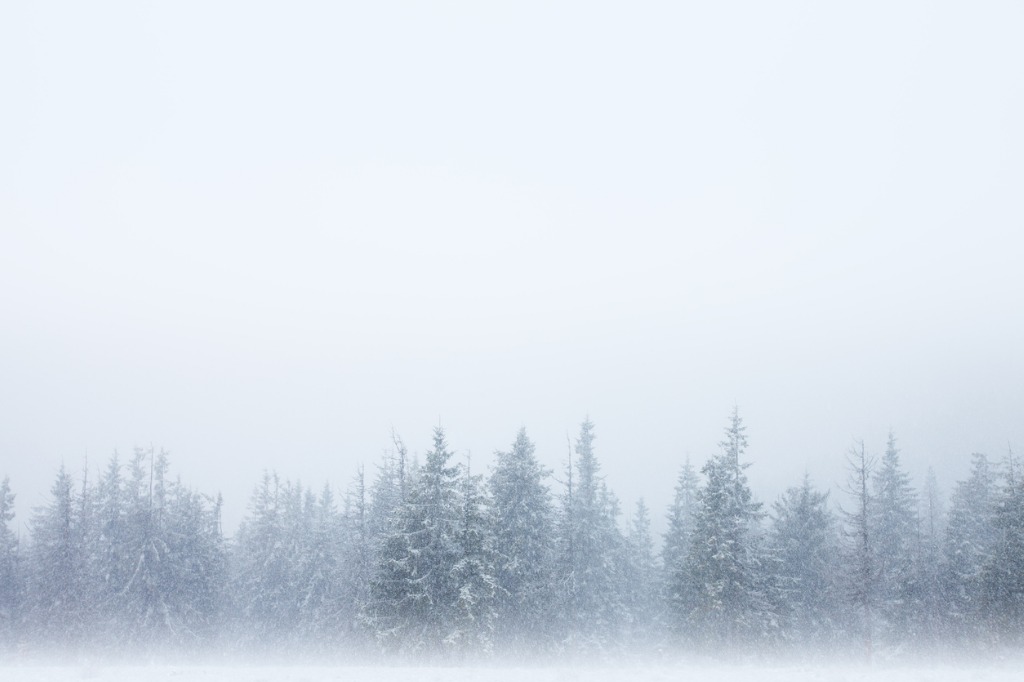
The second thing to consider when thinking about the best time to photograph Monument Valley is the time of year. On the one hand, summertime offers more predictable weather with most days being hot with few clouds in the sky. You can also get out to Forrest Gump Point earlier in the morning or stay later in the evening to take advantage of the longer summertime days. On the other hand, visiting this area in the winter affords you the greater likelihood of photographing thunderstorms rolling through the valley. You might even get lucky and see some snow dotting the higher peaks, too. Step 3: Have the Right Gear
Many photographers choose a telephoto lens to photograph Forrest Gump Point, and I agree wholeheartedly with that decision. Though there's nothing wrong with using a wide-angle lens (or even a standard lens) here, using a telephoto lens allows you to bring the distant bluffs closer in the shot. The compression that occurs between foreground and background make the scene look more impressive with far-off features appearing to be larger. You can see the difference between a telephoto shot (above) and a wide-angle shot (below). Of course, ultimately, the type of lens you use is up to you!
Another must-have item for your Monument Valley photography kit is a polarizing filter. Polarizers are especially useful during the daytime because they help boost the contrast in the sky, which can look a little washed out when shooting in the late morning or afternoon hours. Polarizers also help reduce atmospheric haze, which is a helpful feature to ensure that distant landforms appear as bright and crisp as possible. And though I'm normally an advocate of using a tripod to give your landscape camera as stable a base as possible, in this situation, you can leave it in the car. Learn more about best camera for landscape photography on our website PhotographyTalk.com. The best compositions of Forrest Gump Point (in my opinion, anyway) are taken from the middle of the highway. That means you need to work fast to get the shot, and setting up a tripod might not fit in that plan. Step 4: Compose the Shot
As mentioned above, I find the best compositions of this area to be symmetrical, with the highway serving as a leading line right through the vertical midline of the shot. You can see why this is a good idea when comparing some of the more symmetrical shots earlier in this article with the asymmetrical immediately above. In the asymmetrical shot, you lose some of the drama of the stick-straight road stretching out before you. And while it's virtually impossible to capture a landscape photo of Highway 163 completely devoid of cars, the best results occur when cars are in the far distance rather than the foreground. Step 5: Be Safe
Clearly, when you're running out to the middle of a highway to get a photo, you need to be safe and practice smart photography. Don't go it alone - have someone whose sole job is to tell you when cars are coming from either direction. Also don't block traffic for the sake of getting the shot you want. You don't want to be that guy that gets a talking to (or worse) by the highway patrol. In the end, Forrest Gump Point is a worthy destination for a quick photography adventure, but it's one of many breathtaking sites in Monument Valley. If you have the time, spend a few days there to see as much as you can. Better still, join a photography adventure to really experience the beauty and history that this area has to provide, and to learn essential tips for photographing Monument Valley. You won't regret doing so! This article about the topic "Quick Tips for Recreating This Iconic Shot of Monument Valley" was first published on our website here https://www.photographytalk.com/landscape-photography/8719-quick-tips-for-recreating-this-iconic-shot-of-monument-valley from https://photographytalkcom.blogspot.com/2021/01/quick-tips-for-recreating-this-iconic.html Not sure why your photos of mountains don't look that great? Well, it could be because of any number of simple mistakes that diminish your ability to get the best shots. In fact, I'd say that the majority of landscape photography mistakes are just that - simple errors that have a big negative impact.
With that in mind, here's a few tips on how to photograph mountains the right way. How to Photograph Mountains: Pay Attention to the Light
Perhaps the most common issue when photographing mountains is simply not paying attention to the light. The whole point of photographing a mountain is to put its rugged beauty on display, and some types of lighting simply prevent you from doing that. Frontlighting, or when the sun is behind you and shining directly on the mountains, eliminates any hope of seeing the textures and details of the mountains. This is especially true when the landscape photo is taken during the middle of the day when the quality of sunlight is its worst, as shown above.
Instead, seek out opportunities to photograph mountains using side lighting. With the sunlight entering the scene from the right or left, you not only have light that accentuates the textures of the mountains, but you also have the opportunity to incorporate long, sweeping shadows into the shot as well. This interplay between shadow and light gives mountain photos much more drama, especially if you shoot in the early morning or late evening when sunlight takes on a much warmer and appealing quality. So, wherever the sun is, turn 90-degrees and start shooting. You'll end up with far more dramatic photos! Filters are a Must for Mountain Photography
Even when shooting in the best light of the day, you'll often find that your images of mountains still need a little help when it comes to controlling contrast. That is, the landscape is usually darker than the sky above it, and your camera can struggle to come to terms with how to manage that. In some cases, the sky might be well-exposed but the landscape is too dark. In other cases, the landscape might be well-exposed but the sky is too bright. You can overcome these obstacles by using a graduated neutral density filter like the one shown above.
These filters are dark on the top, which blocks some of the brightness of the sky, while having no impact on the landscape below. The result is a more even exposure from top to bottom, as seen above. And the best part? You take care of this problem in the field while you're staring at a gorgeous landscape instead of in post-processing while you're hunched over your computer in your basement. It's a win-win! Editor's Tip: Add a polarizing filter to your camera bag, too. Polarizers help boost contrast in the sky, reduce glare off of water, and minimize atmospheric haze.Mountain Photography Tip: Stop Shooting at f/22
A misconception among many photographers that enjoy landscapes is that they have to slam their aperture down to f/22 to get the best depth of field. The problem with doing that is that no lens - not even expensive, professional ones - is its sharpest at its minimum or maximum aperture. That means that when you shoot at f/22, you're sacrificing sharpness in the shot. Instead, you'll get better results by using a wider aperture. Learn more about best camera settings for landscape photography on our website PhotographyTalk.com. So long as there isn't anything immediately in front of you in the scene, you can go virtually as wide as you want with the aperture and still have good depth of field. The best results, though, come from shooting in your lens's sweet spot, or the aperture at which the lens is the sharpest. The sweet spot is different for every lens, but a good rule of thumb is that it's in the f/8-f/11 range. Learn how to find your lens's sweet spot and start taking sharper photos of mountains. Tips for Photographing Mountains: Plan Ahead
I cannot emphasize enough how important planning is to the process of photographing mountains (or any subject, for that matter). If you don't plan ahead, you will find yourself dealing with bad light, bad weather, getting lost, not having the right gear, and other factors that inhibit your ability to get high-quality photos. That's why participating in a photo tour is such a great idea. Think about it... When you join a photography tour, all the planning is taken care of. You don't have to make hotel reservations or Google Maps your way from one spot to the next. You also don't have to scout locations or figure out the must-see locations that you need to photograph. Instead, you can sit back, relax, and focus on honing your craft and learning from skilled photographers as they lead the tour.
For my money, there's no better way to learn how to photograph mountains than by a photography tour like ApertureXplorer's Southern France, Swiss Alps, and Dolomite Mountains Tour. When it comes to iconic mountains, it doesn't get any better than the Alps. Between the Matterhorn, the Dolomites, and all the valleys, lakes, forests, glaciers, and rivers in between, the Alps provide you with endless opportunities for photographing landscapes. And to say that you'll travel in style is an understatement...
ApertureXplorers not only focuses your time on learning new skills and expanding your abilities as a photographer, but they also ensure that you enjoy hiking the countryside, enjoying excellent food, exploring the quaint villages and bustling cities in these regions, and meeting the wonderful locals. On the Northern Italy leg of the journey, world-renown landscape photographer Nico Rinaldi will join the tour and take you to some of the best locations in the Alps for capturing breathtaking photos. Perhaps even better, this photography tour isn't only about the mountains. You'll spend time in Geneva, Milan, Pisa, and Monaco, as well as the breathtaking lavender fields in Southern France.
To top it all off, a photography tour like this one gives you a chance to learn how to be a better photographer and immediately put those skills to the test. With personal photography lessons, time to learn how to process images, and opportunities to share and critique photos with the group, this is a true photography learning experience. If you want to step up your mountain photography game, visit ApertureXplorers to sign up for their Alps photo tour. The trip is August 29-September 7, 2018, so time is of the essence! This article about the topic "Landscape Photography Tips: How to Photograph Mountains" was first published on our website here https://www.photographytalk.com/landscape-photography/8642-landscape-photography-tips-how-to-photograph-mountains from https://photographytalkcom.blogspot.com/2021/01/landscape-photography-tips-how-to.html |
ABOUT USPhotographyTalk is the all about talking photography to celebrity photographers. Those who are tops in their respective photography fields. You can catch up with PhotographyTalk at www.photographytalk.com. Archives
April 2021
Categories |
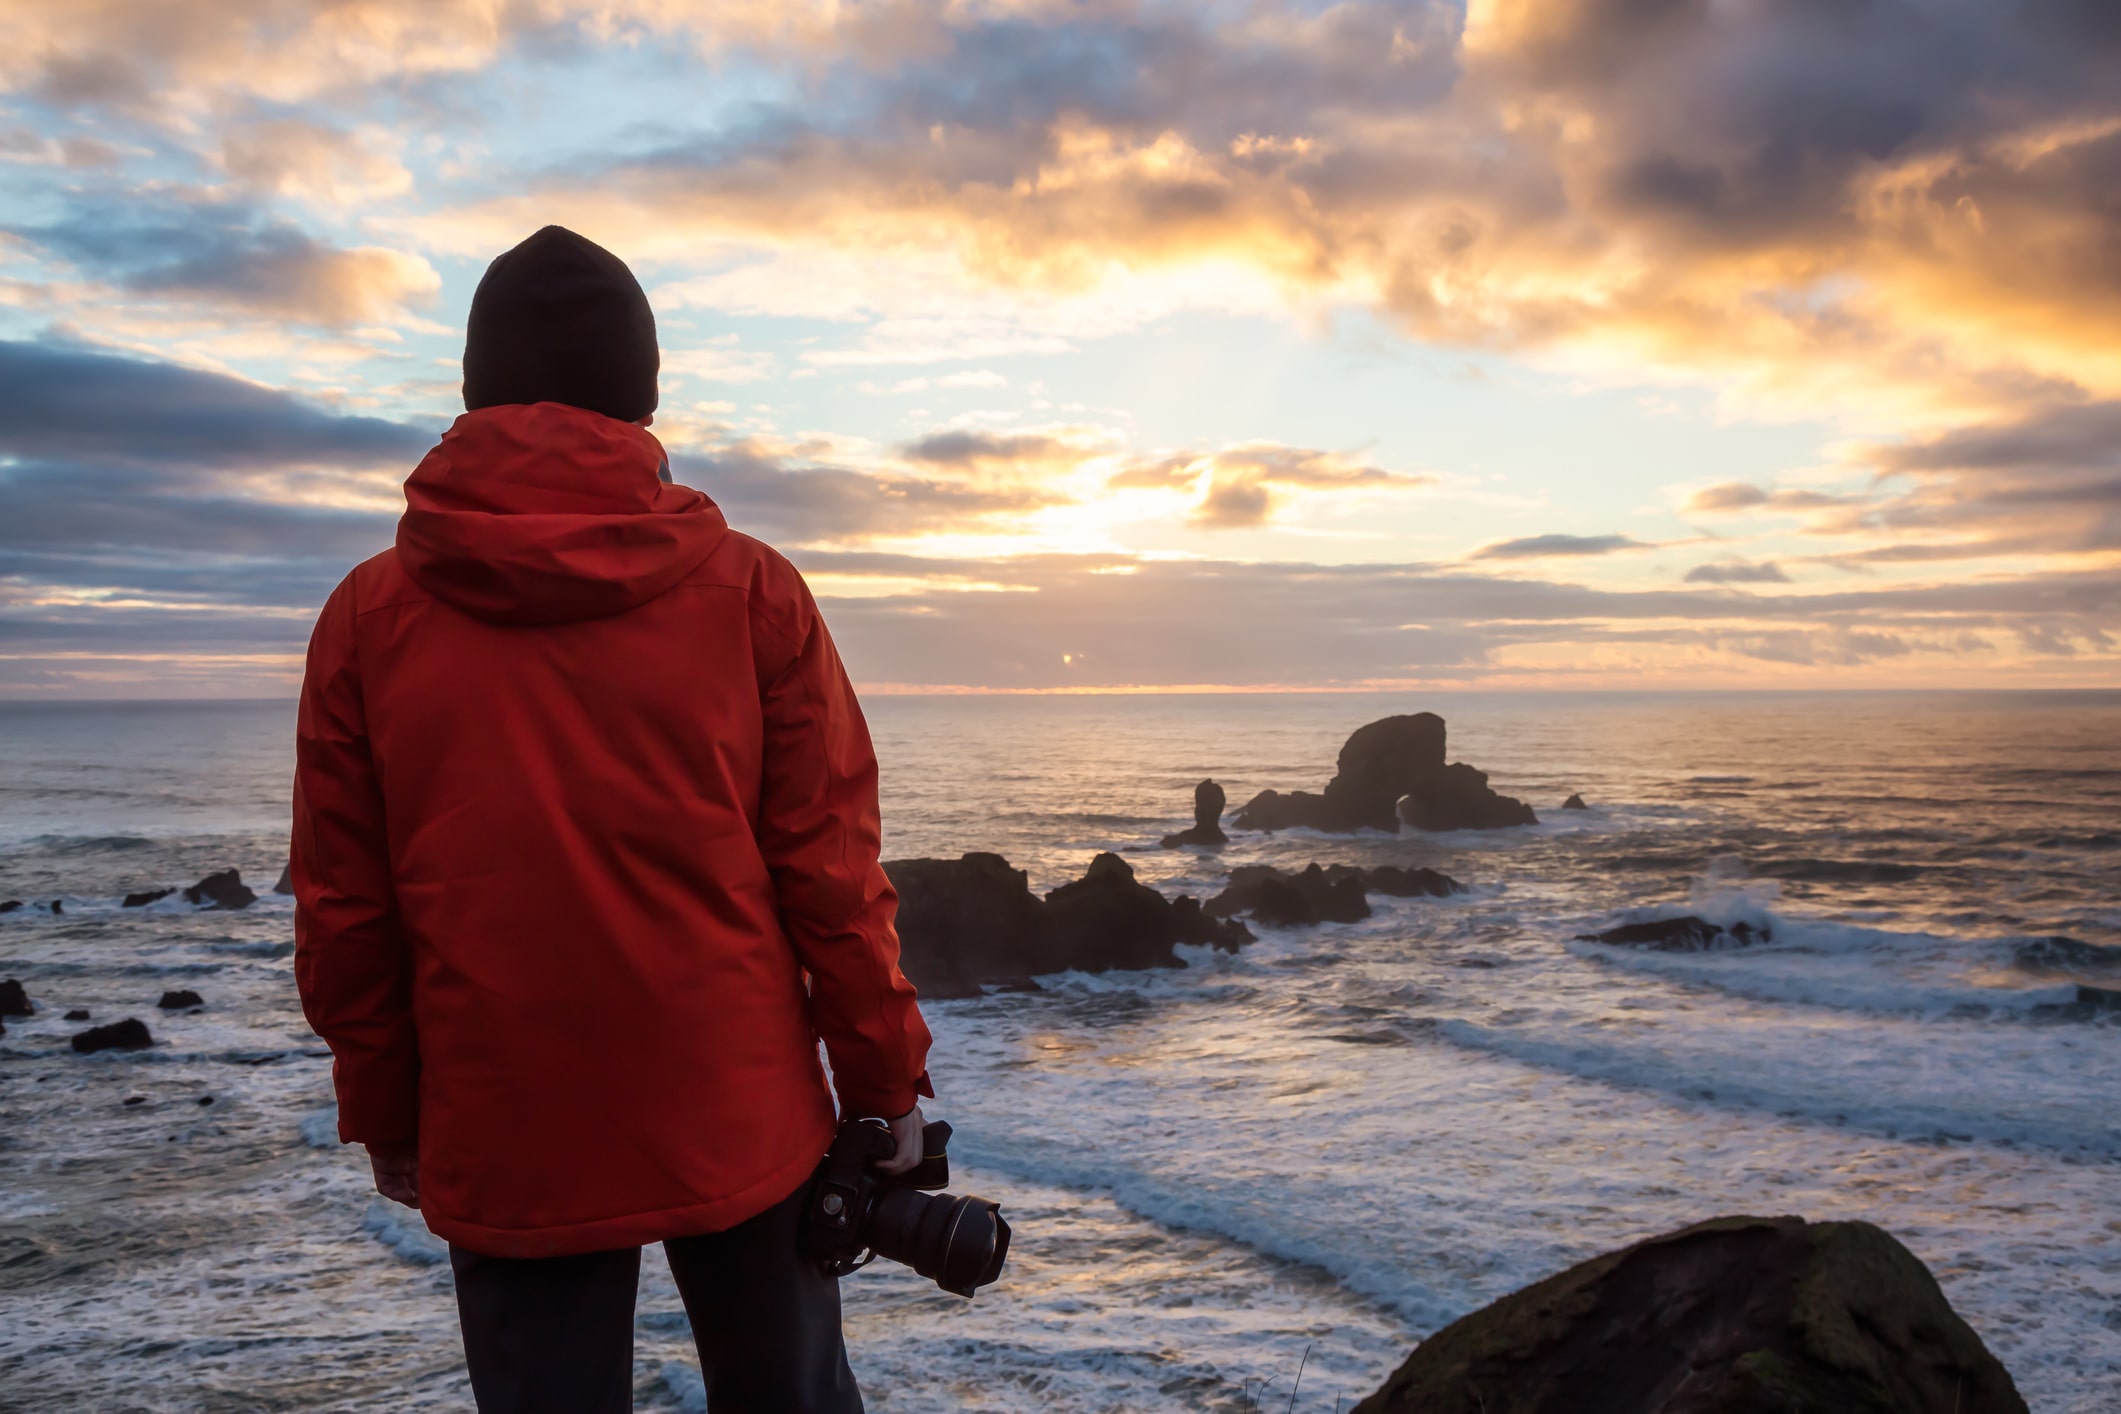

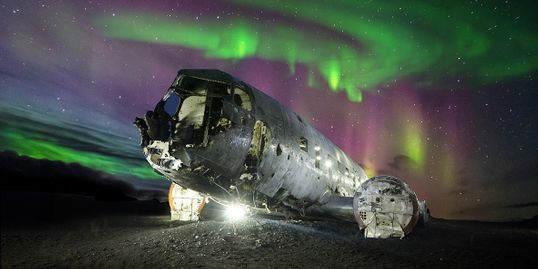 Image Credit: Kevin Vandivier
  Image Credit: Kevin Vandivier
 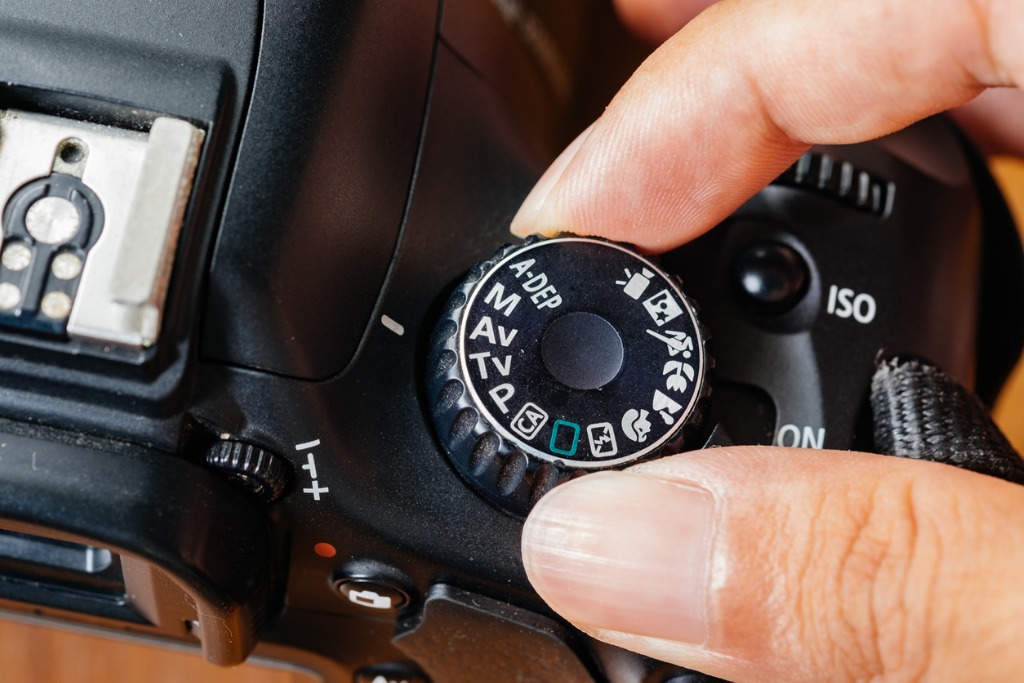 Image Credit: Bhanupong Asatamongkolchai via iStock
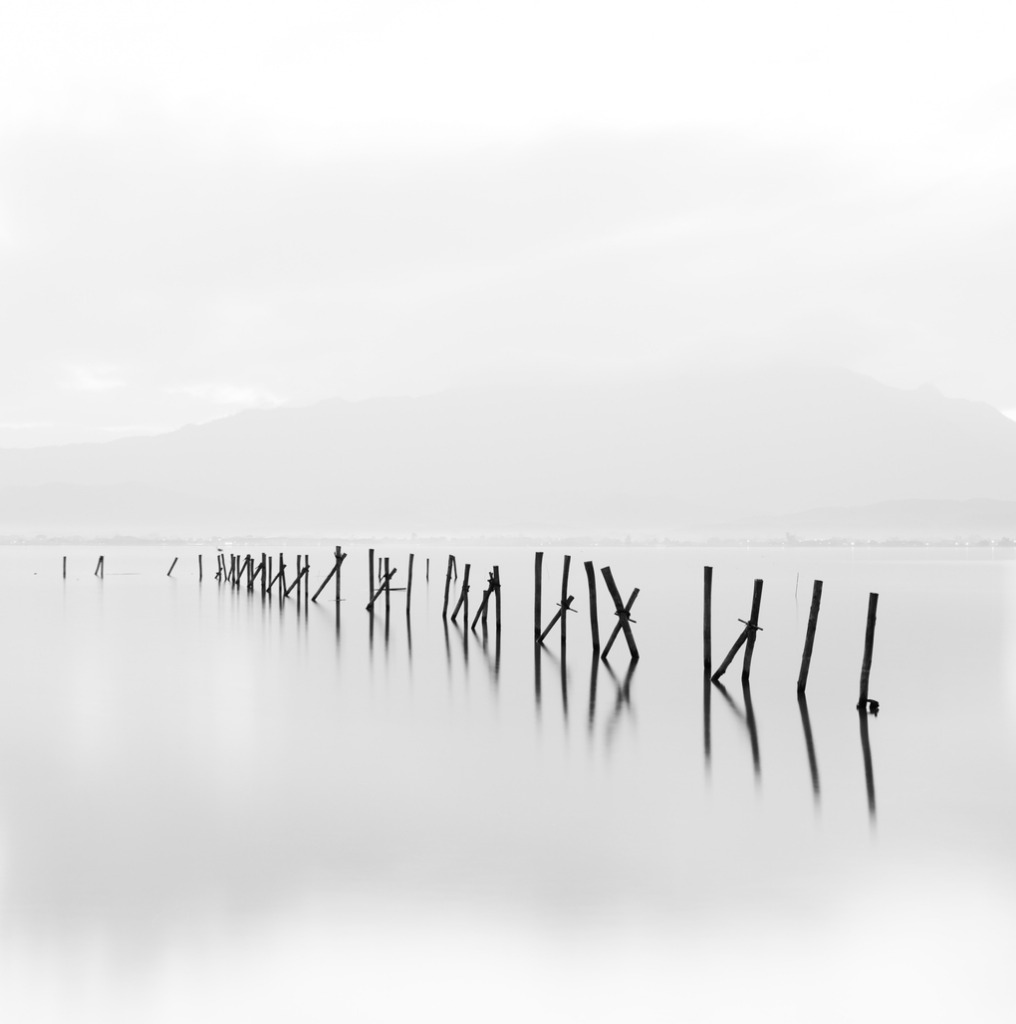 Image Credit: musicphone1 via iStock
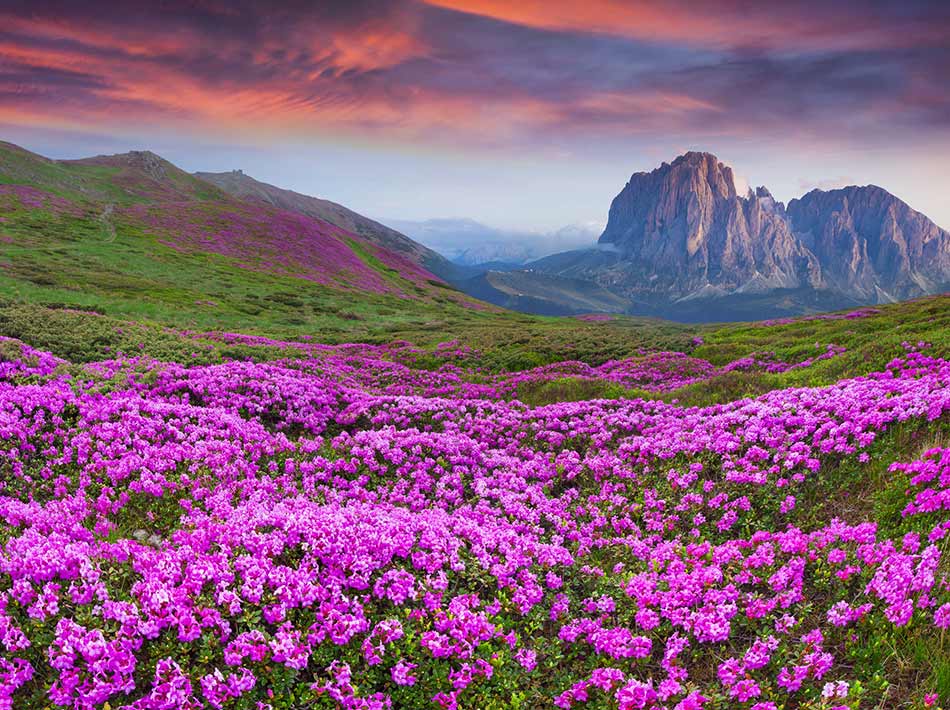


 YouTube Screenshot/Thomas Heaton
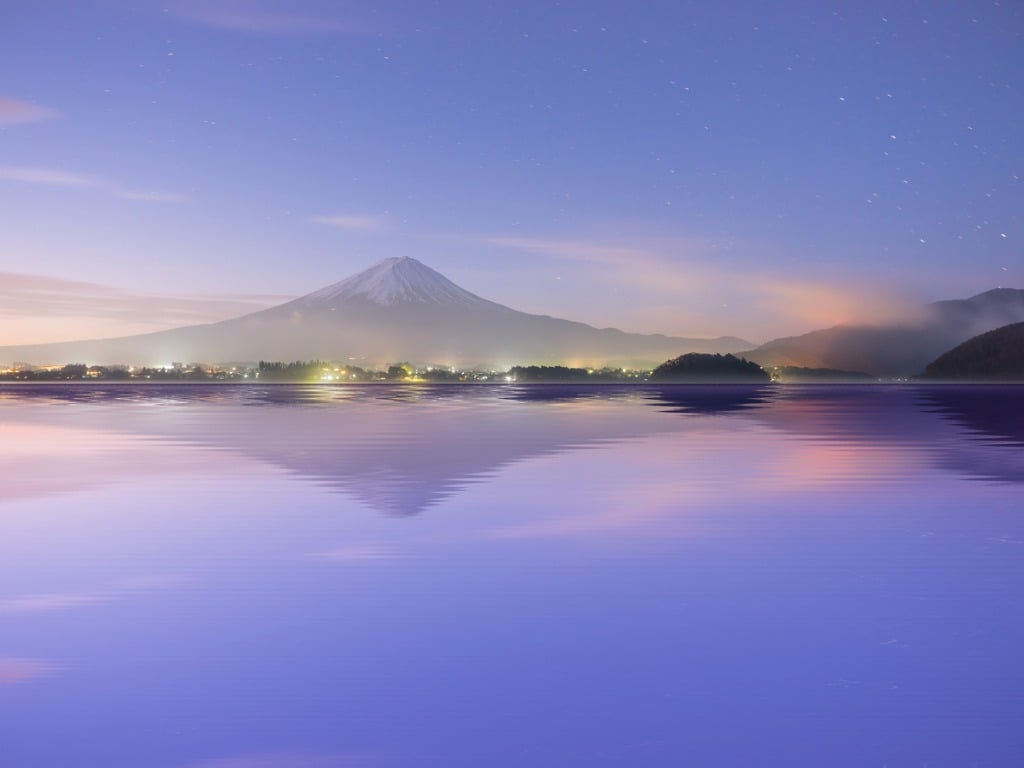


 YouTube Screenshot/Professional Photography Tips
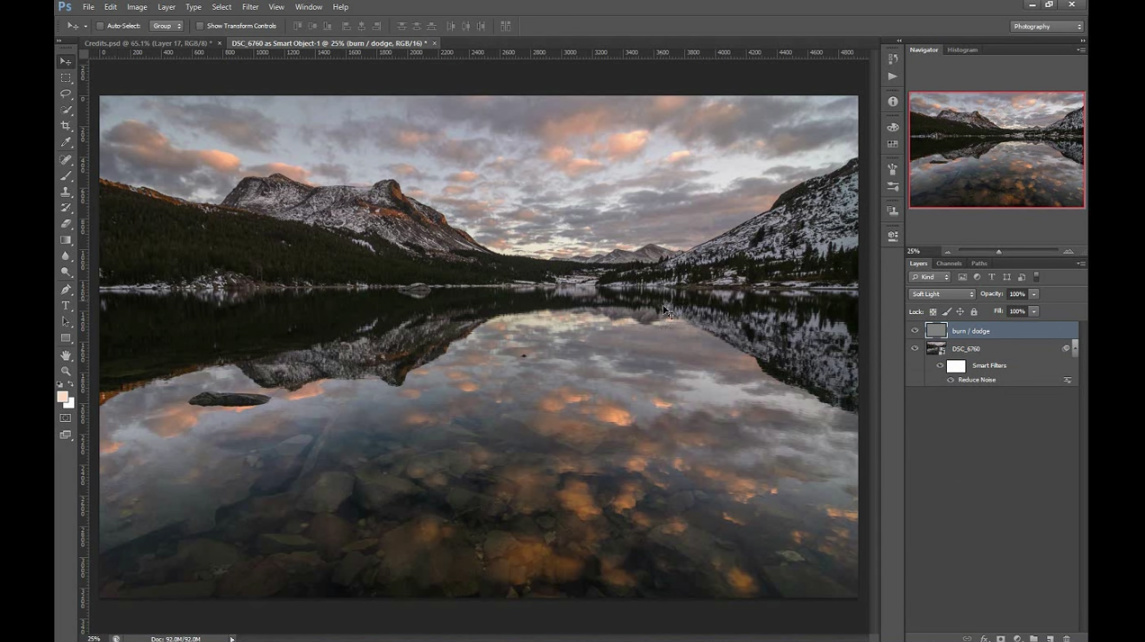 YouTube Screenshot/Professional Photography Tips
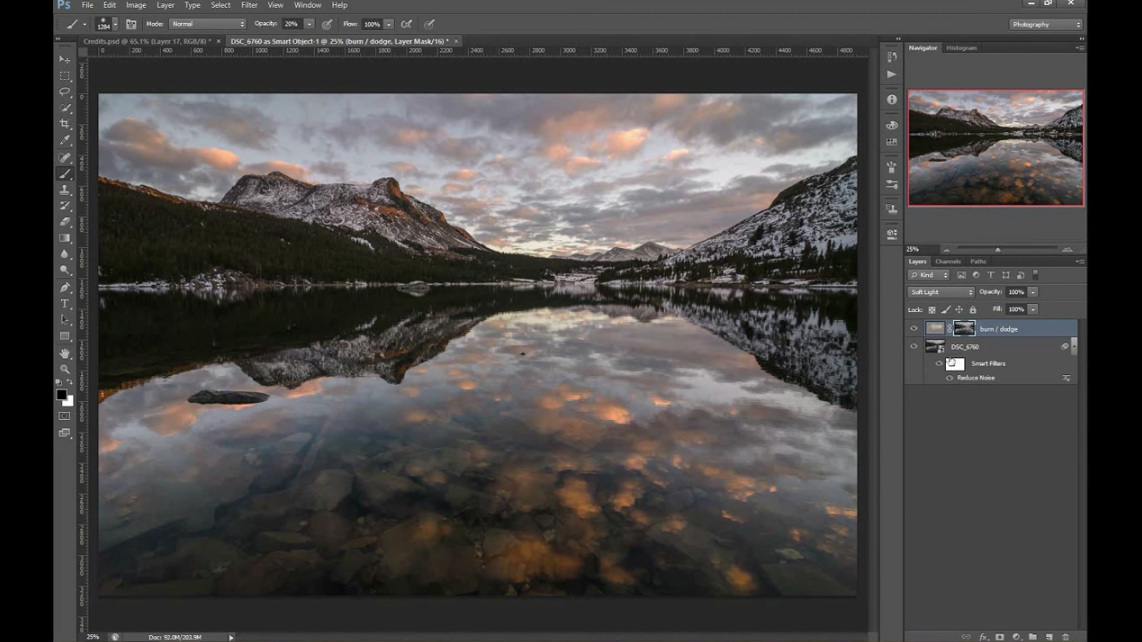 YouTube Screenshot/Professional Photography Tips
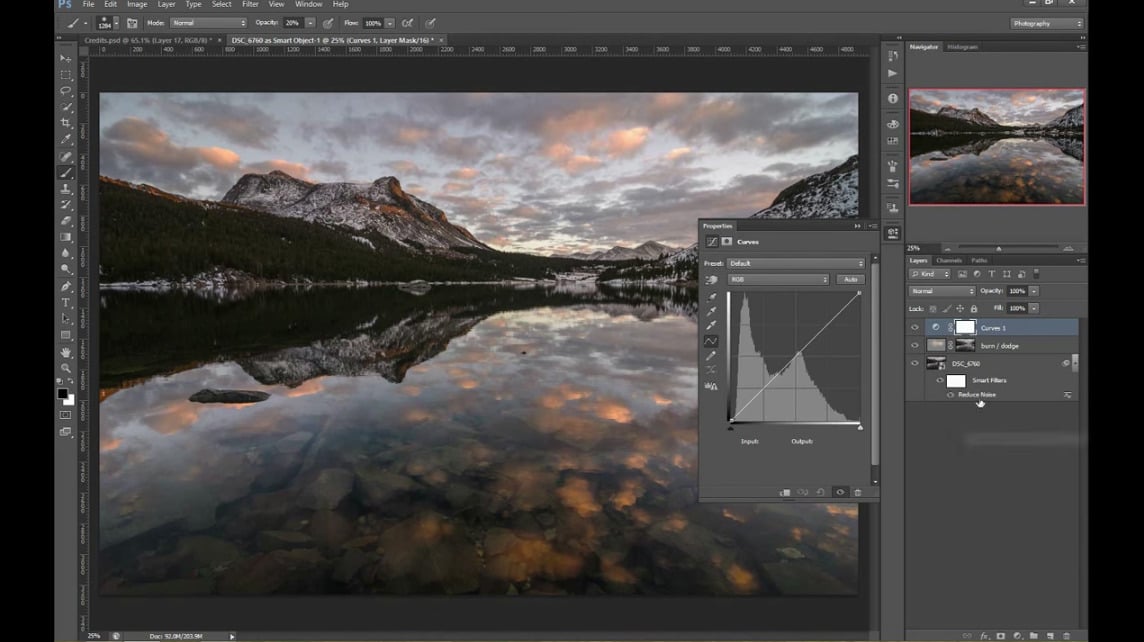 YouTube Screenshot/Professional Photography Tips
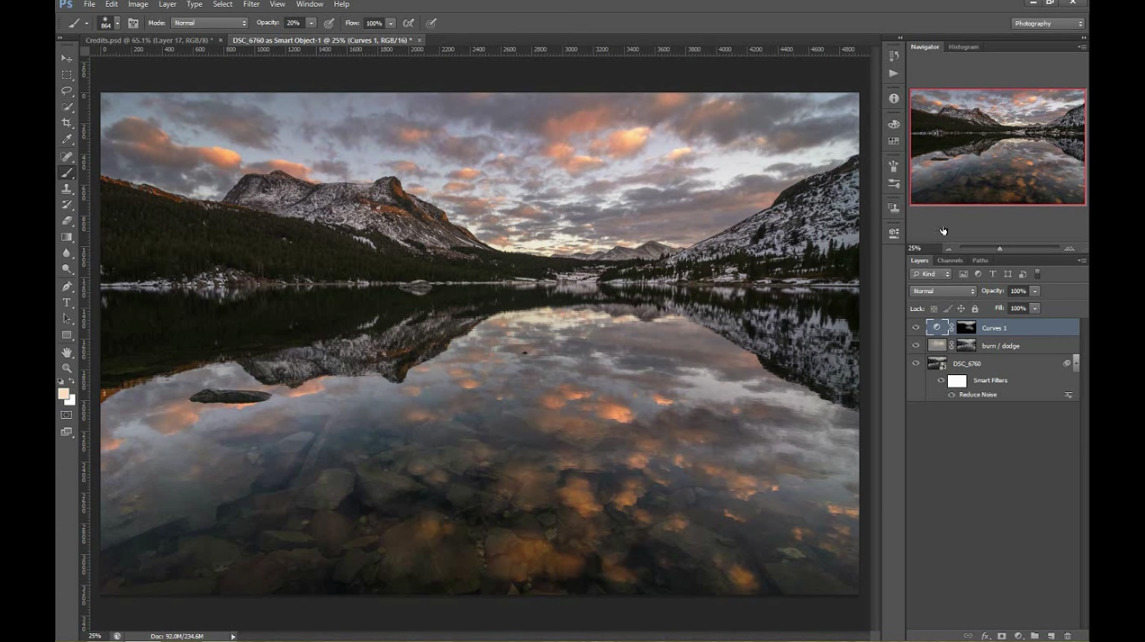 YouTube Screenshot/Professional Photography Tips
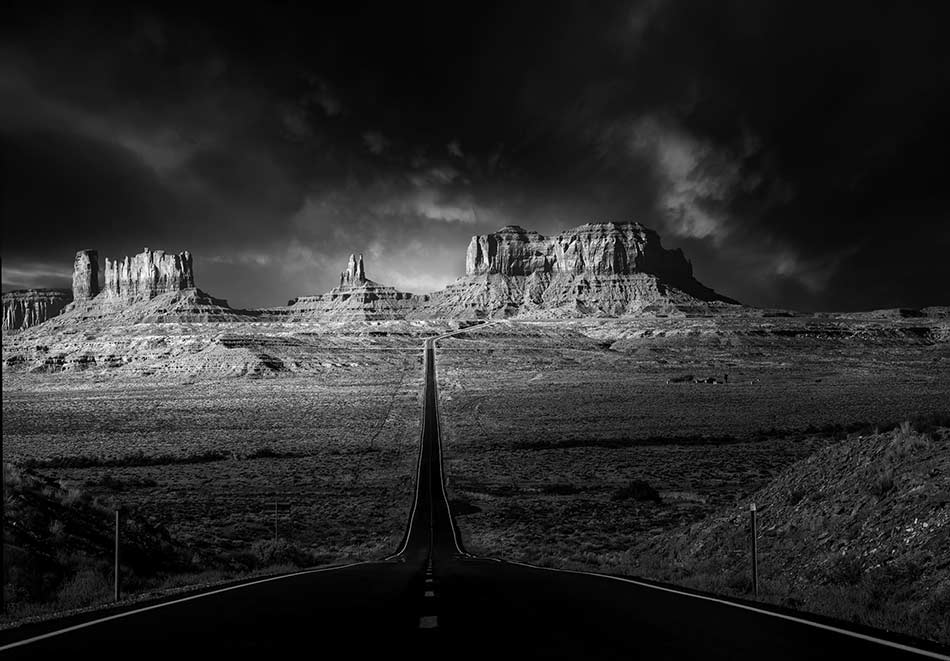
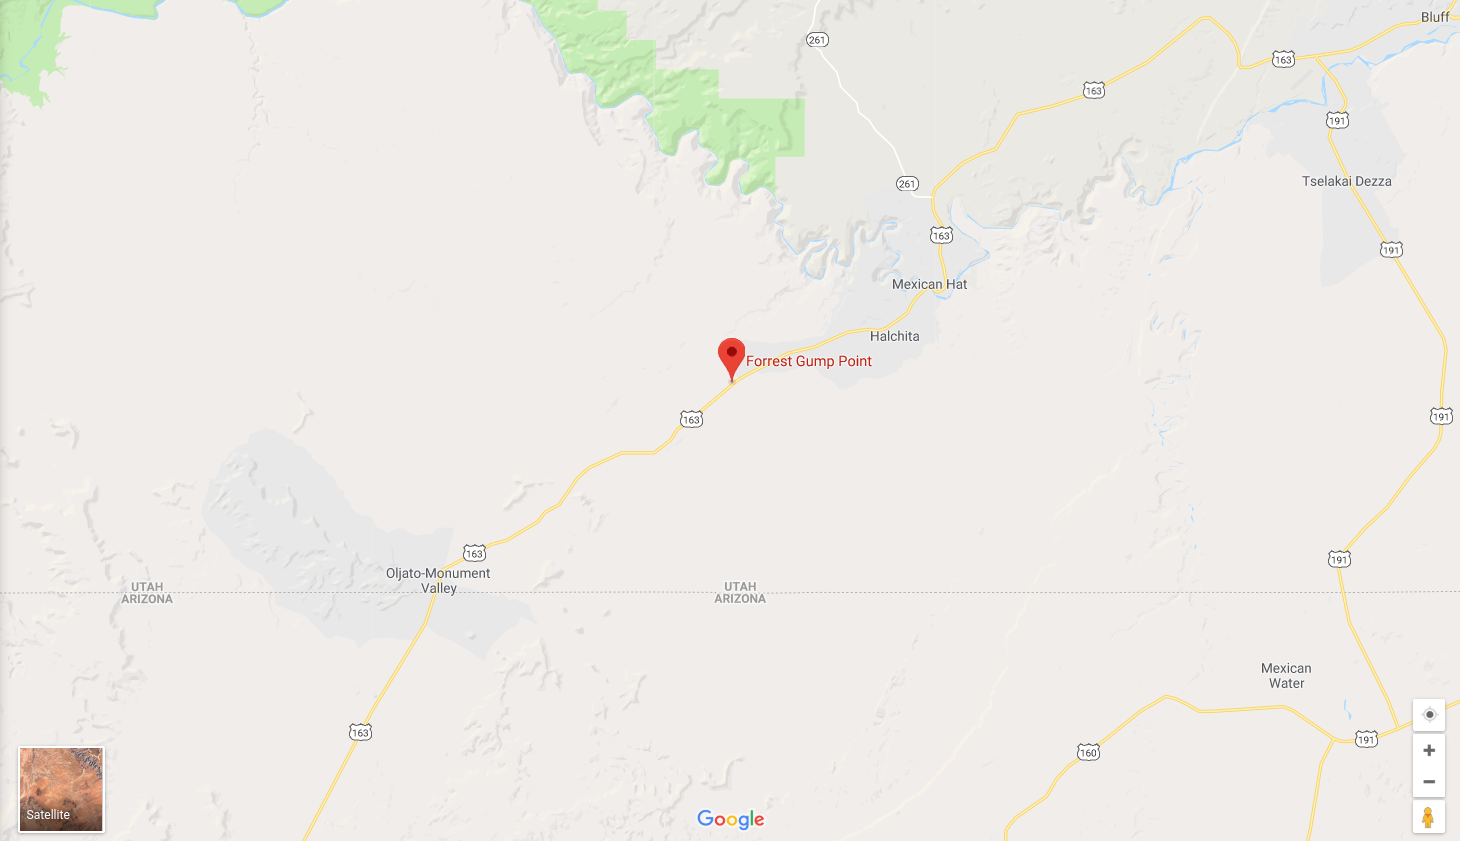
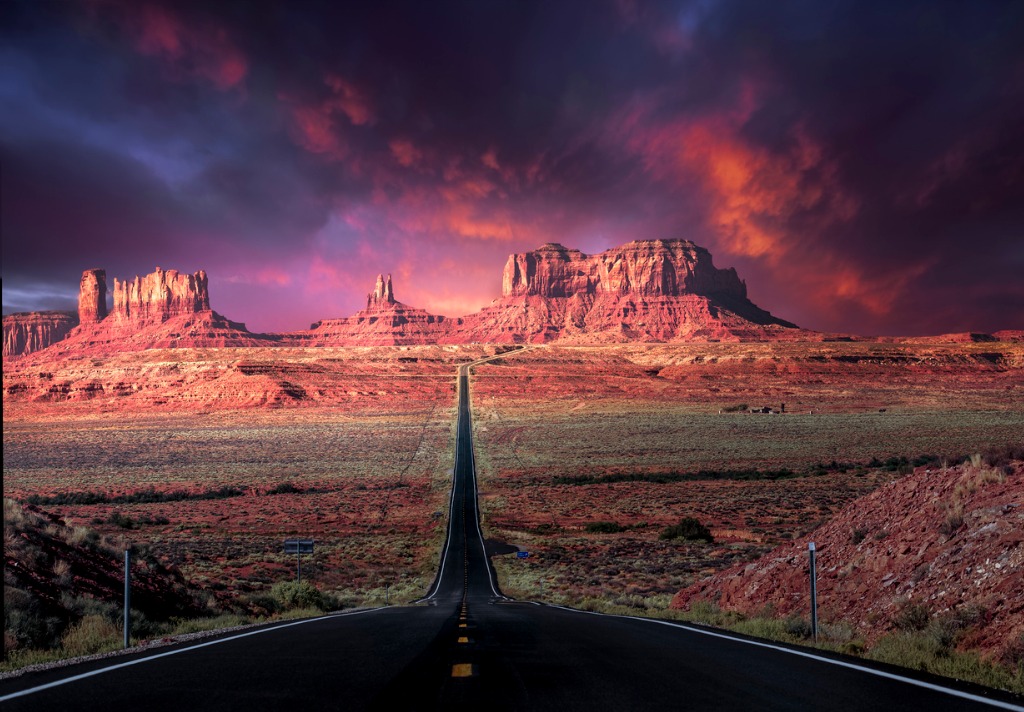
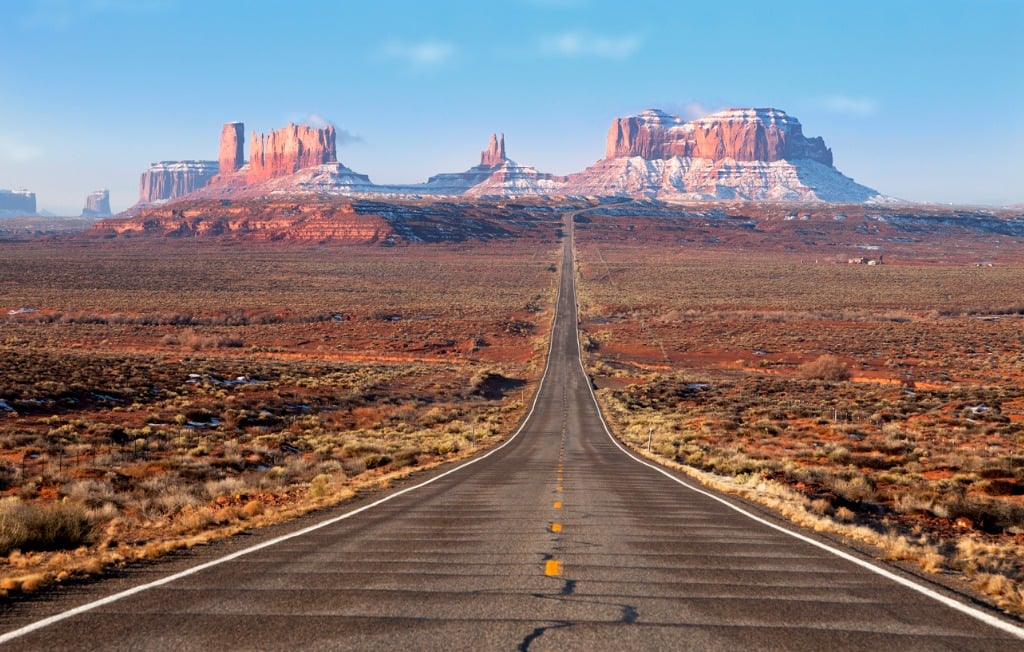 Image Credit: KingWu
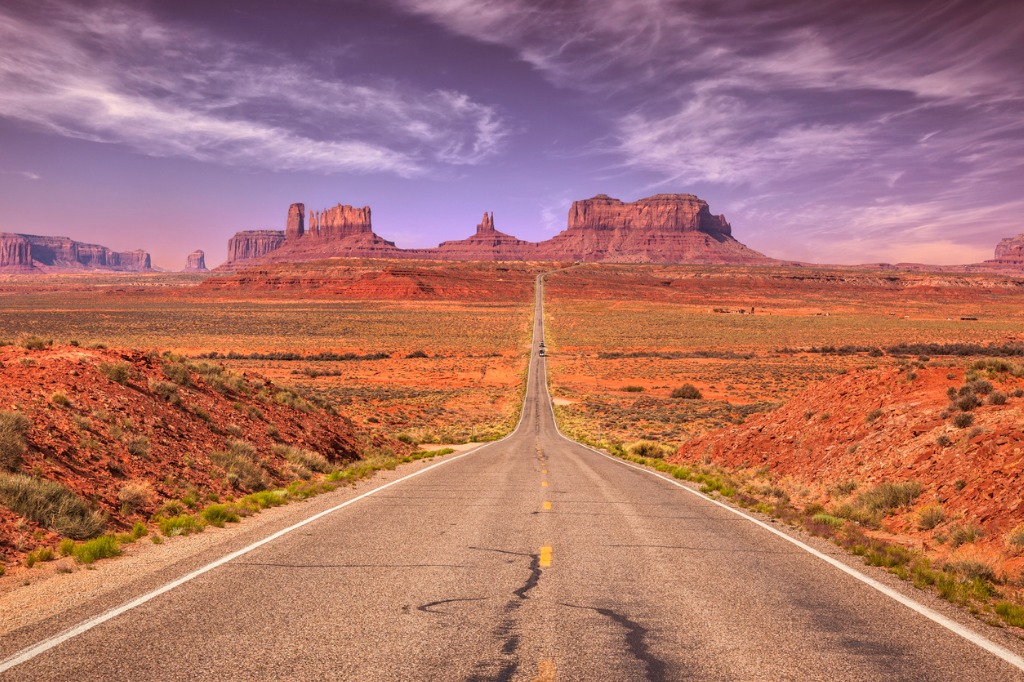
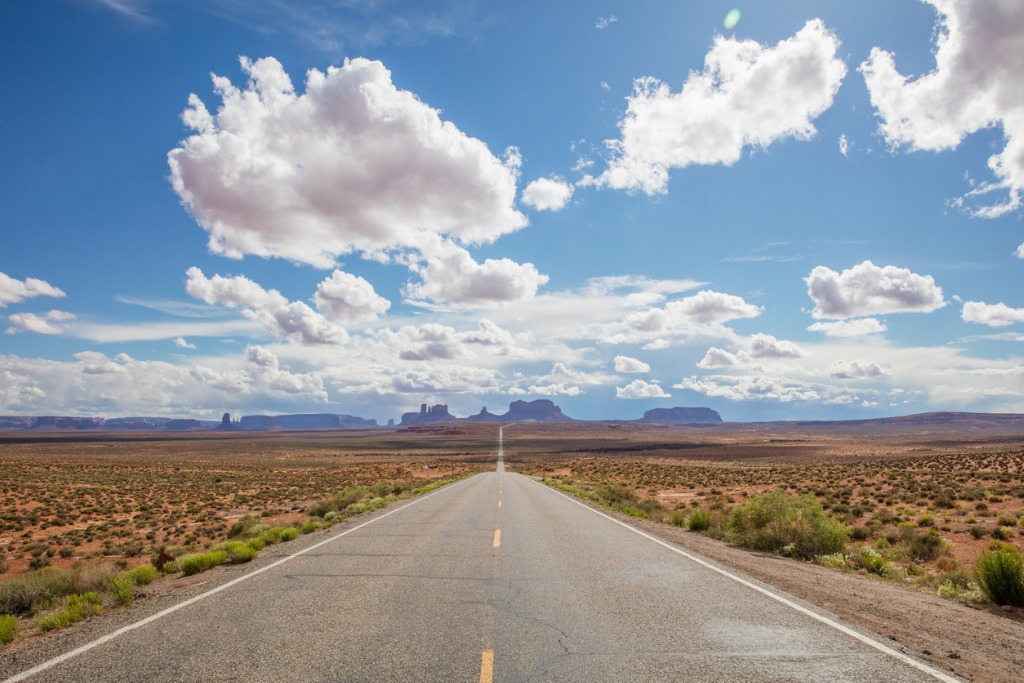 Image Credit: Mlenny
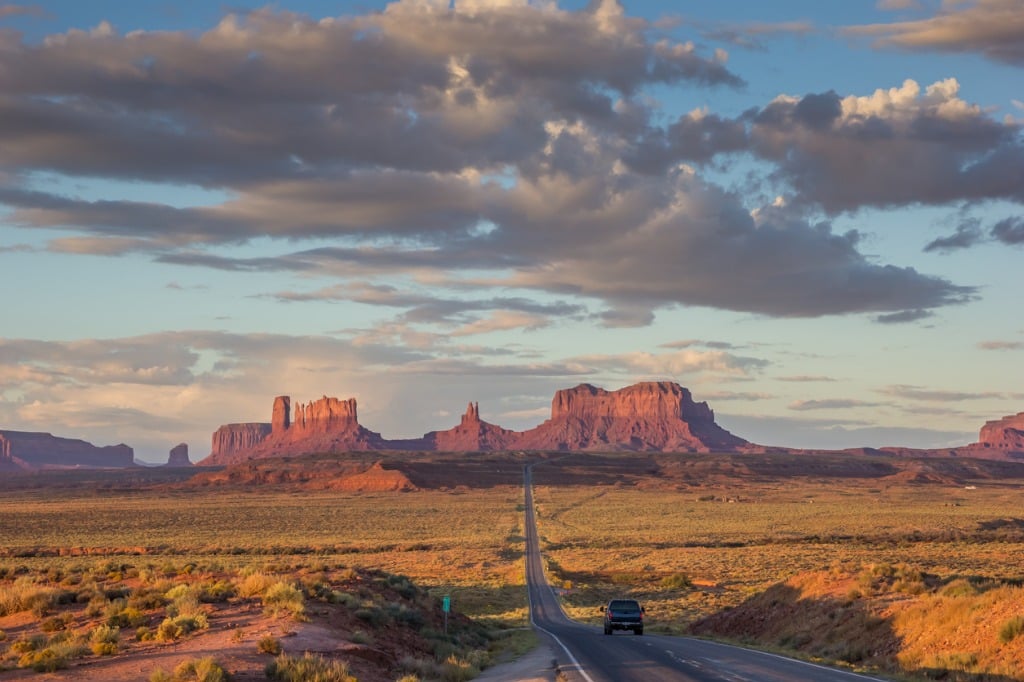 Image Credit: venemama
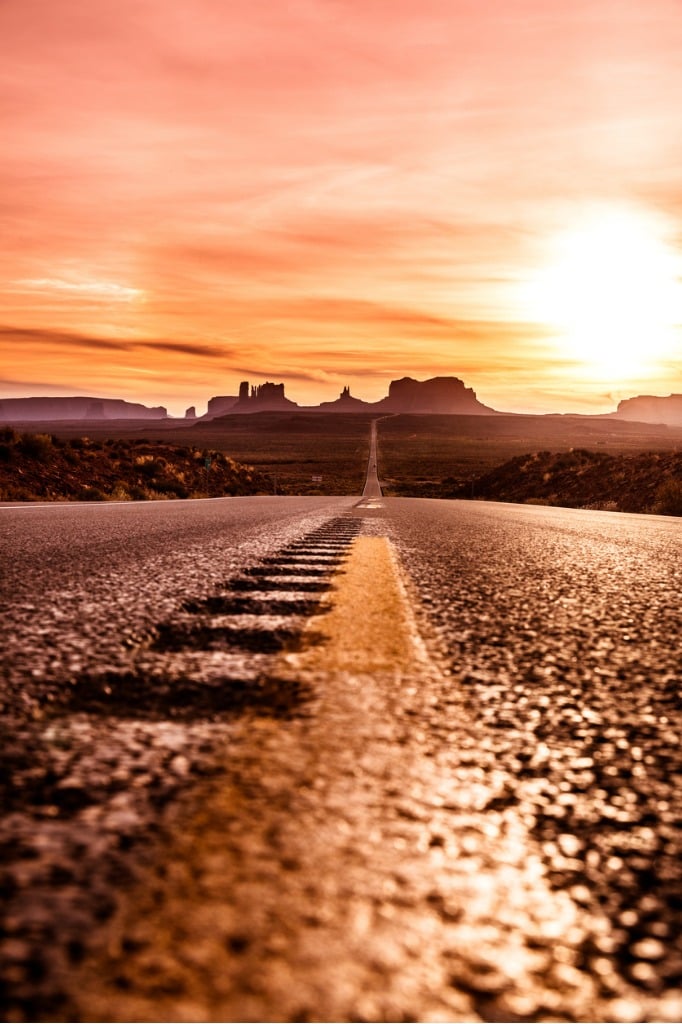


 RSS Feed
