|
Learning to shoot landscapes with a drone definitely comes with a steep learning curve. It’s incredibly difficult at first, but it slowly becomes easier and easier once you get the hang of it(especially abstract landscape photography) - just like everything else in photography!

When you’re shooting landscapes with a drone, the landscapes completely transform into something otherworldly. Where other photographers can take beautiful landscape photographs, you can take magnificent ones.
For the purposes of this article, I’m going to be talking about the DJI Mavic 2 Pro drone because it's the version I own. It’s also on sale on Adorama for $1,599 right now as an added bonus.
What Shooting Landscapes with a Drone Looks Like
Brendan van Son also owns a DJI Mavic 2 Pro and shows you exactly what shooting landscapes with a drone looks like in the video above.
Shooting landscapes with a drone allows you to take mesmerizing video footage of scenery, but it also allows you to take beautiful panoramas.

photo by olaser via iStock
And isn’t drone photography all about a different kind of perspective?
Getting above it all and having the capability of capturing images of the landscape from a completely different point of view is invigorating and it can stoke your creativity.
Besides, it’s a fun challenge! It’s hard enough to take great shots with a camera you’re holding in your hands while you stand on the ground. Taking great photos while the camera is flying around overhead will put your photography skills (and piloting skills) to the test.
What Drone Settings Should I Use?
photo by PhonlamaiPhoto via iStock
So, you’ve purchased your drone, watched as many tutorials as possible and have your first shoot location scouted. What settings should you use?
DJI’s Mavic 2 Pro drone features a Hasselblad camera with a 1-inch sensor that can take 20MP photos. If you are purchasing a drone specifically for landscape photography, make sure you buy one with a sensor of at least 1-inch, that way you maximize resolution without having to buy a drone that’s overly large.
The DJI Mavic 2 Pro also comes with a wide-angle 28mm lens, which allows me to shoot landscape shots that don’t look bug-eyed while also allowing me to capture a wide view of the landscape below.

Photo by Jeremy Bishop on Unsplash
Most drones will allow you to get a smartphone app that syncs to your drone and keeps everything very familiar for you, meaning you can choose your shooting modes from full auto to completely manual.
But, there are some new methods you should be aware of when it comes to shooting landscapes with a drone.
For instance, “windowing” is when your drone will crop a section of your total photo resolution for you, while “subsampling” is when your drone resamples the image signal which results in less bright colors.
In the video above by Tom’s Tech Time, you can get a thorough overview of the best camera settings for the DJI Mavic 2 Pro.
Benefits of Shooting Landscapes with a Drone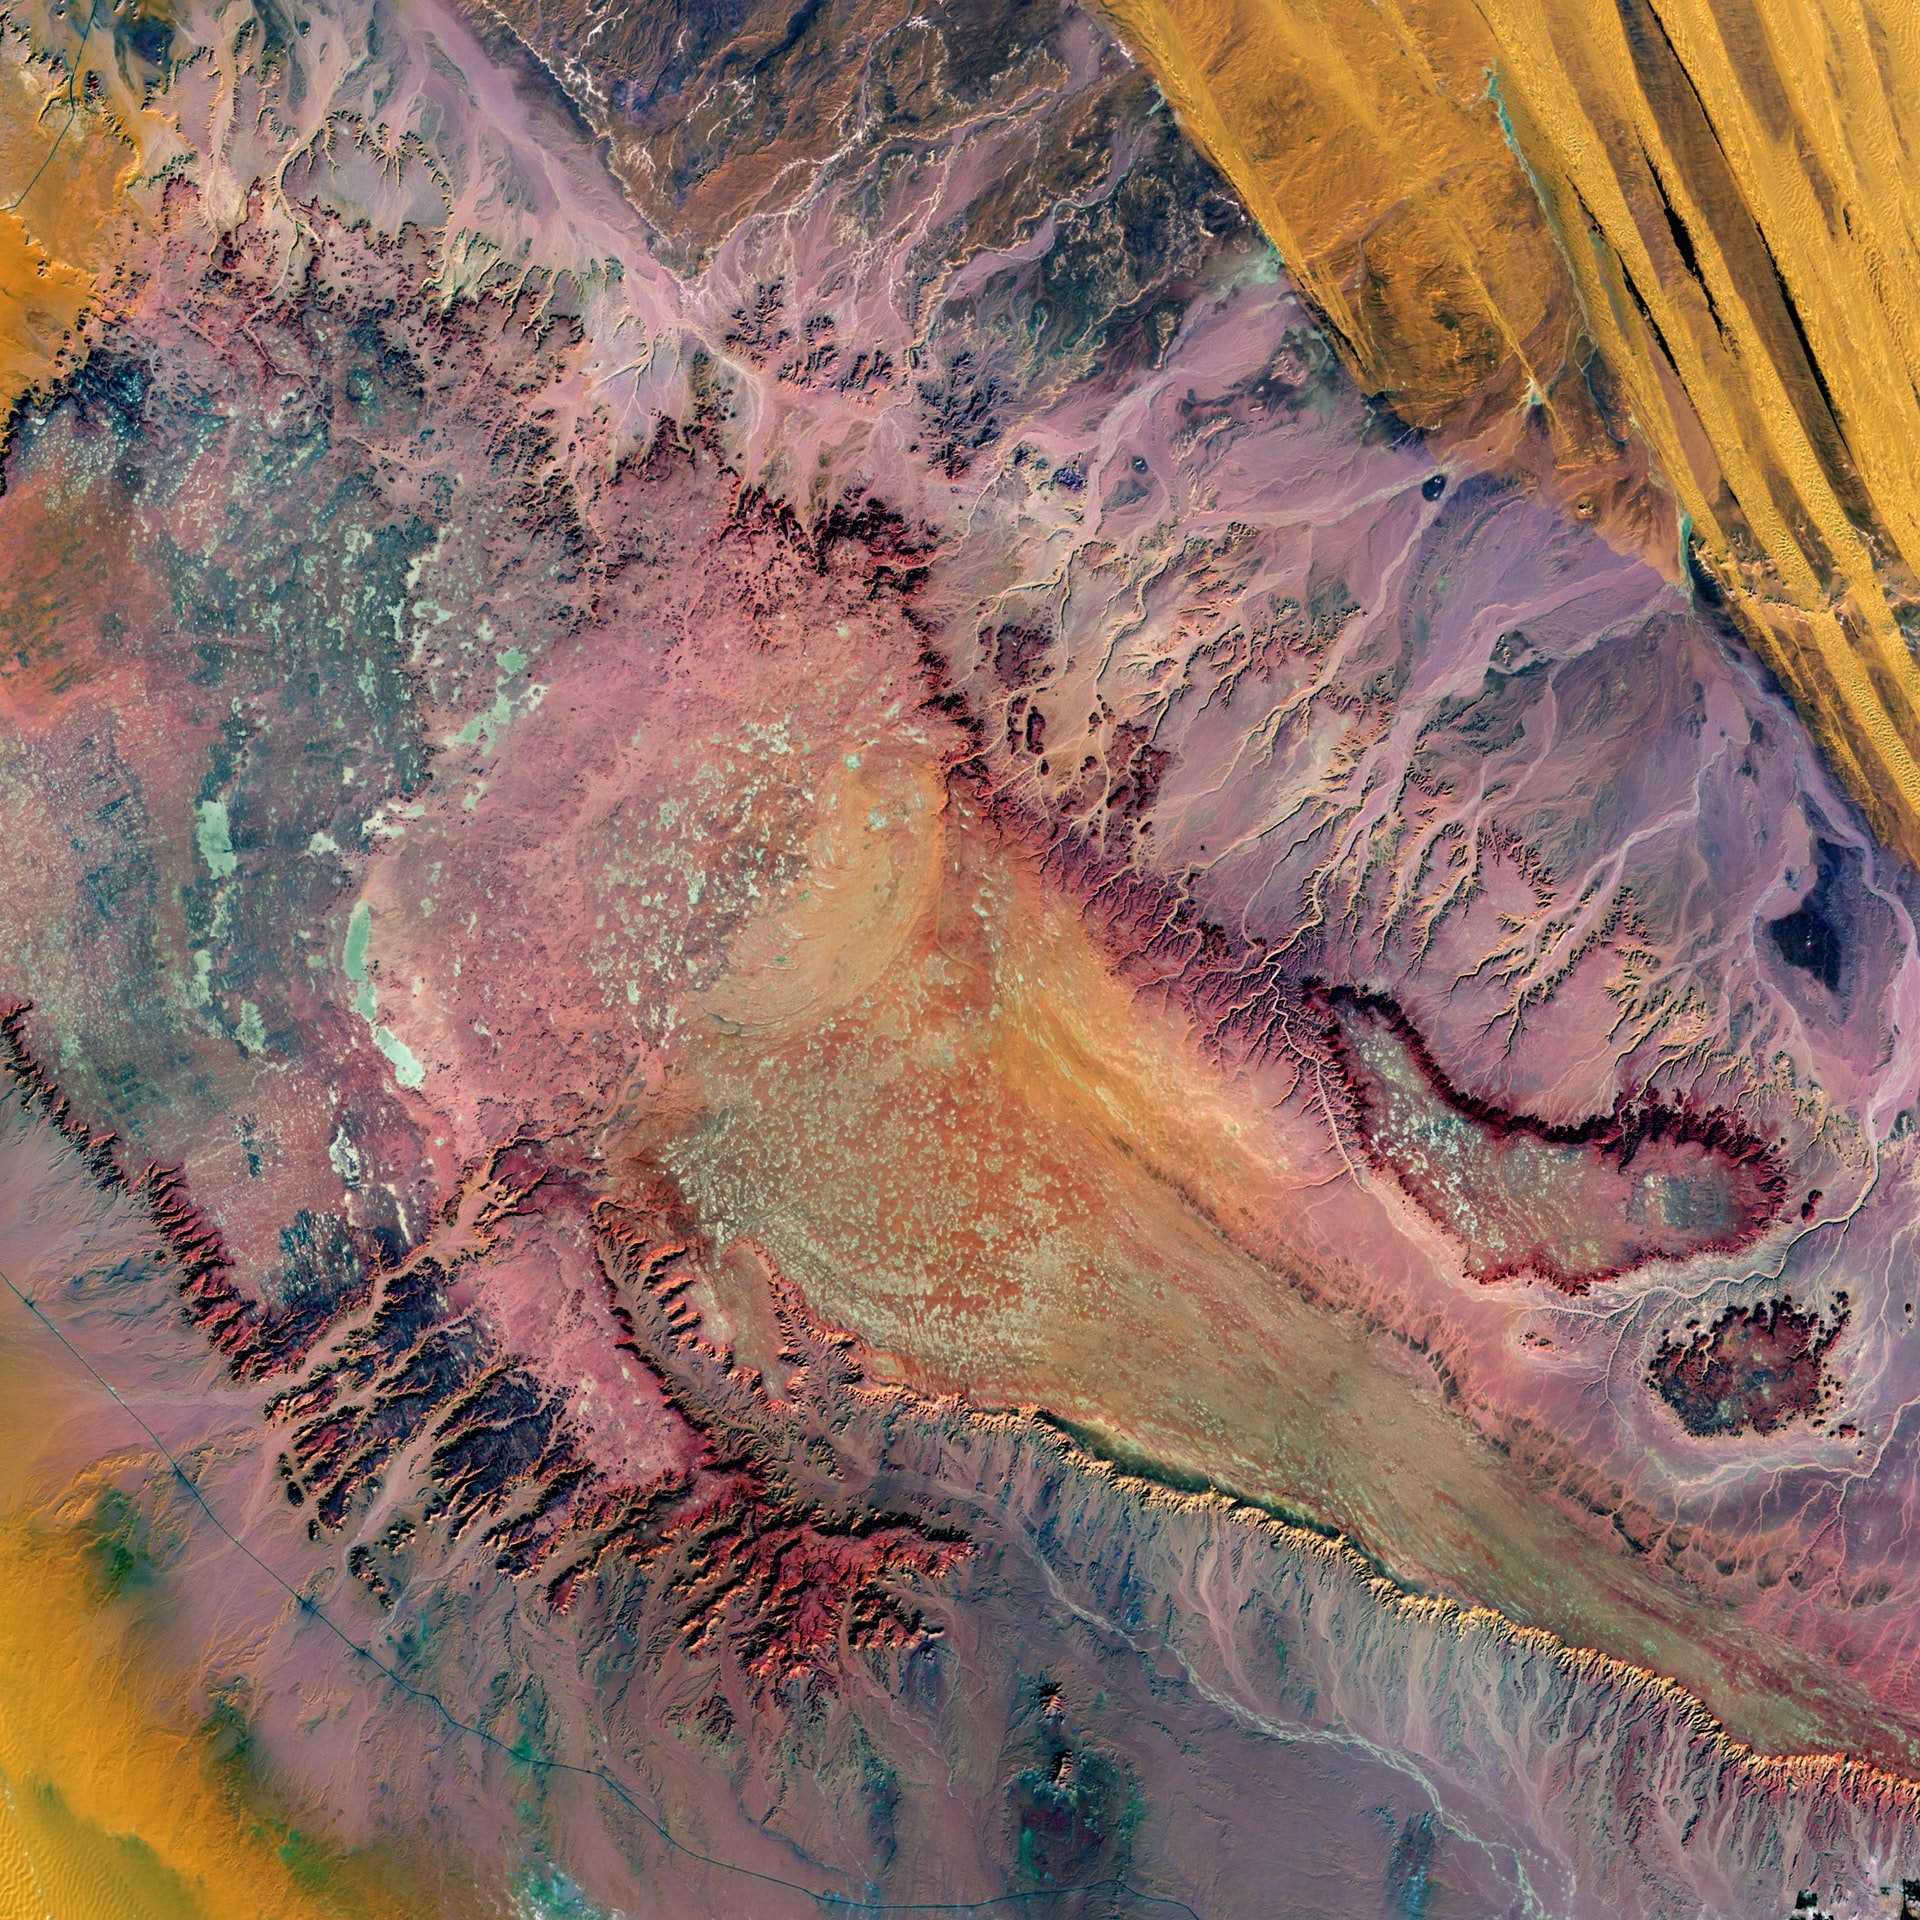
Photo by USGS on Unsplash
One of my favorite benefits of shooting landscapes with a drone is that you can create abstract photographs of the landscape. For instance, the photo above is of highly eroded plateaus rise from the desert floor in Egypt.

Photo by USGS on Unsplash
Or, the above shot, which is of fluorescent plankton in the dark waters of the Baltic Sea.
But, abstract landscapes are not the only benefit of shooting landscapes with a drone.
You can also create new composition in old areas (textures sometimes don’t present themselves from eye level), reach hard-to-photograph places, and capture scenes over water.
Just be sure you understand local drone regulations before you fly. If you’re not sure if it’s legal to fly a drone, don’t launch! Many people have gotten into serious trouble for flying drones where they shouldn’t.
This blog post about "Shooting Landscapes With a Drone" was first published on our website here https://www.photographytalk.com/shooting-landscapes-with-a-drone from https://photographytalkcom.blogspot.com/2020/08/shooting-landscapes-with-drone.html
0 Comments
Remember the days when having a mirrorless camera was cutting-edge?
Those days are gone, and if you don't have a drone to use for photography, well, you're behind the times!
What I love about drone photography is the unique perspective you get when taking photos. You would definitely love this article about underwater drone with camera selection if you already like dron photography.
It reminds me of looking out the window of an airplane as you come in for a landing...
The trick, of course, is to figure out how to frame up shots from above that look amazing.
Our friends over at the Cooperative of Photography (COOPH) have teamed up with photographer Christoph Oberschneider to give us the summer drone photography tips we all need.
Check them out in the video above, and for a step-by-step breakdown, see the text below.
Shoot Your Sport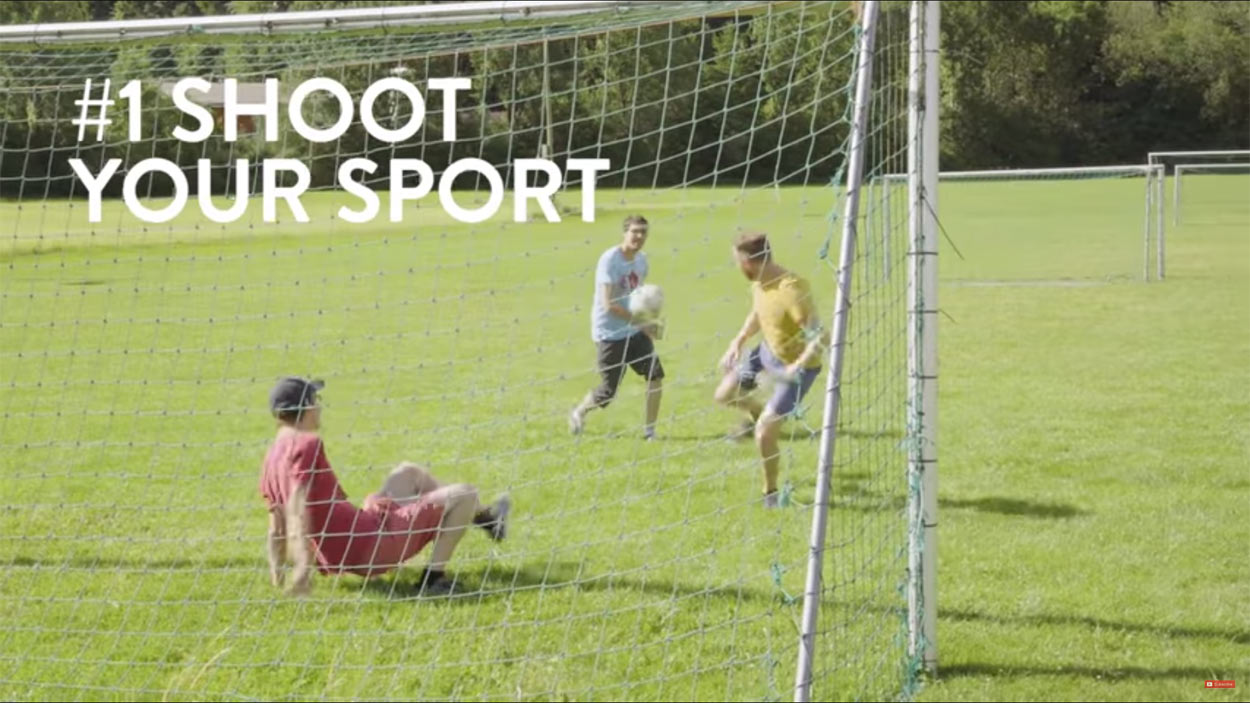
YouTube Screenshot/COOPH
Whether it's your weekly ultimate frisbee league or your kid's summer soccer tournament, sporting events offer some excellent subject matter for drone photography.
Once the action starts, fly directly above for some fun aerial shots. By looking directly down at the athletes, you'll be able to offer viewers a bit of scale as the players will be fairly small in relation to their surroundings.
YouTube Screenshot/COOPH
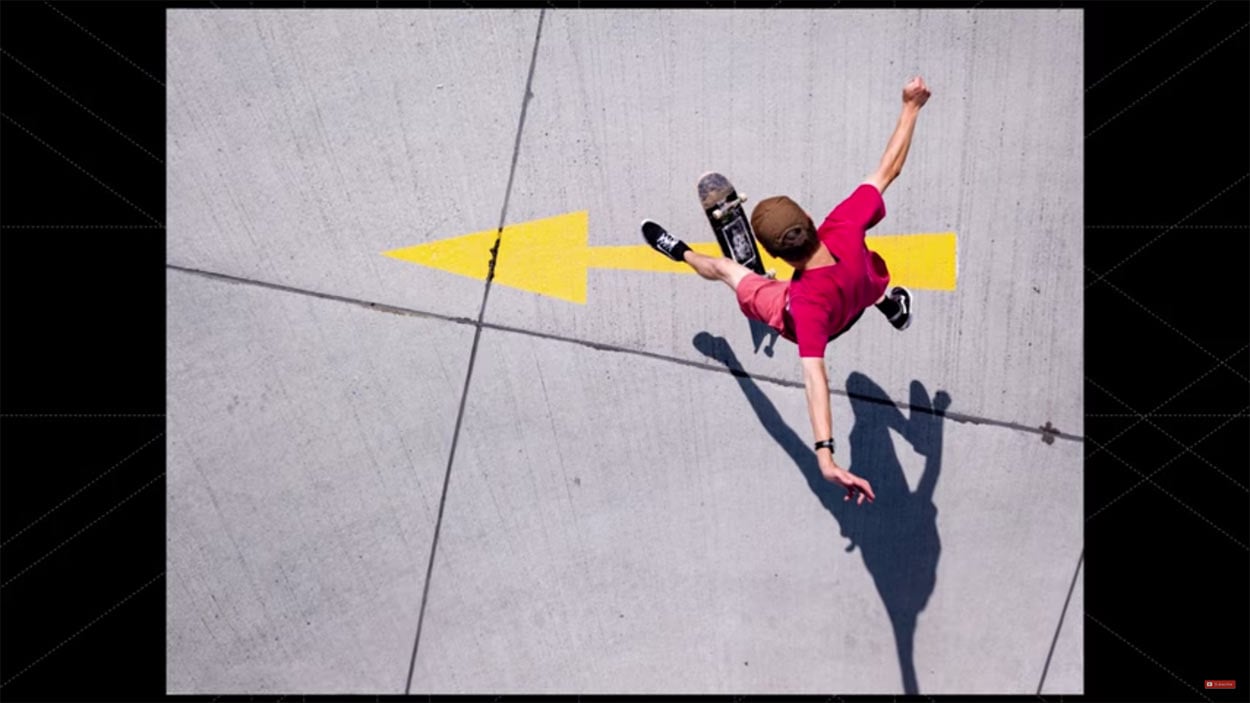
If possible, shoot your aerial sports photos in the morning or evening when there's nice sidelighting.
With the sun a little lower in the sky, your subjects will cast interesting shadows across the frame, which creates a lot of depth in the image, as seen above.
Look for patterns or textures, too. They add a bit of a dynamic feel to the shot and help break up the monotony of the background, or, in this case, the ground!
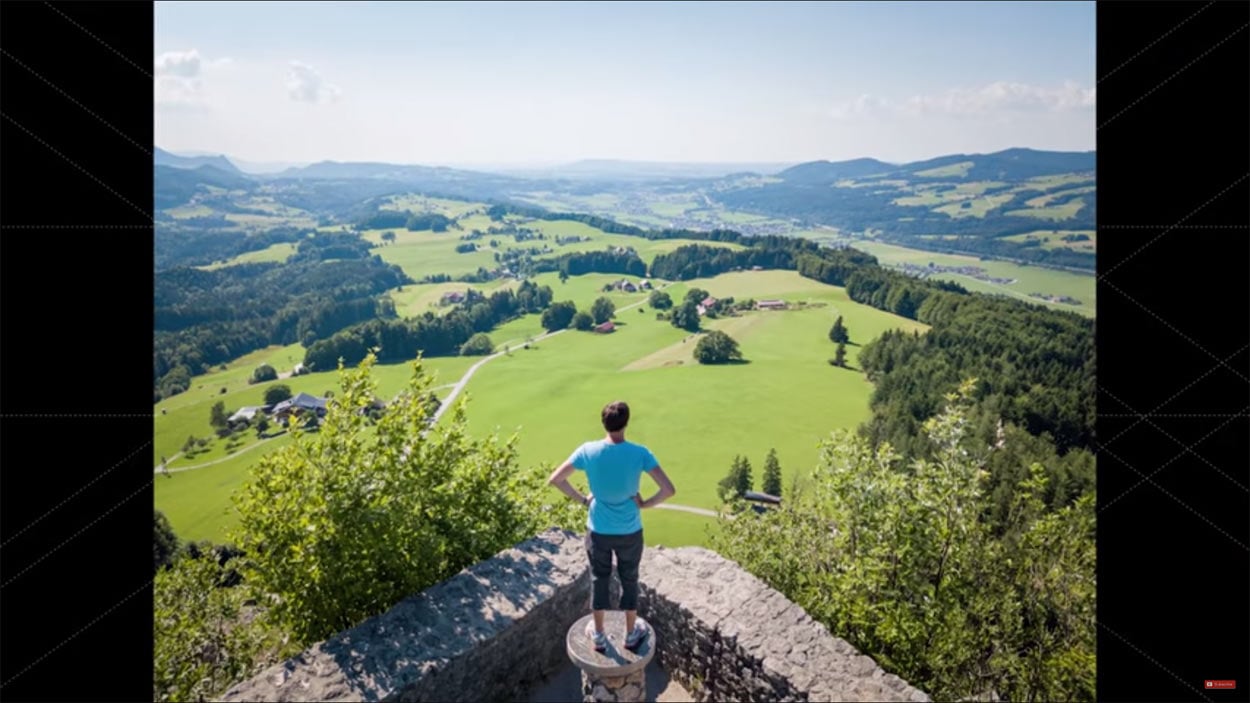
Share Your Perspective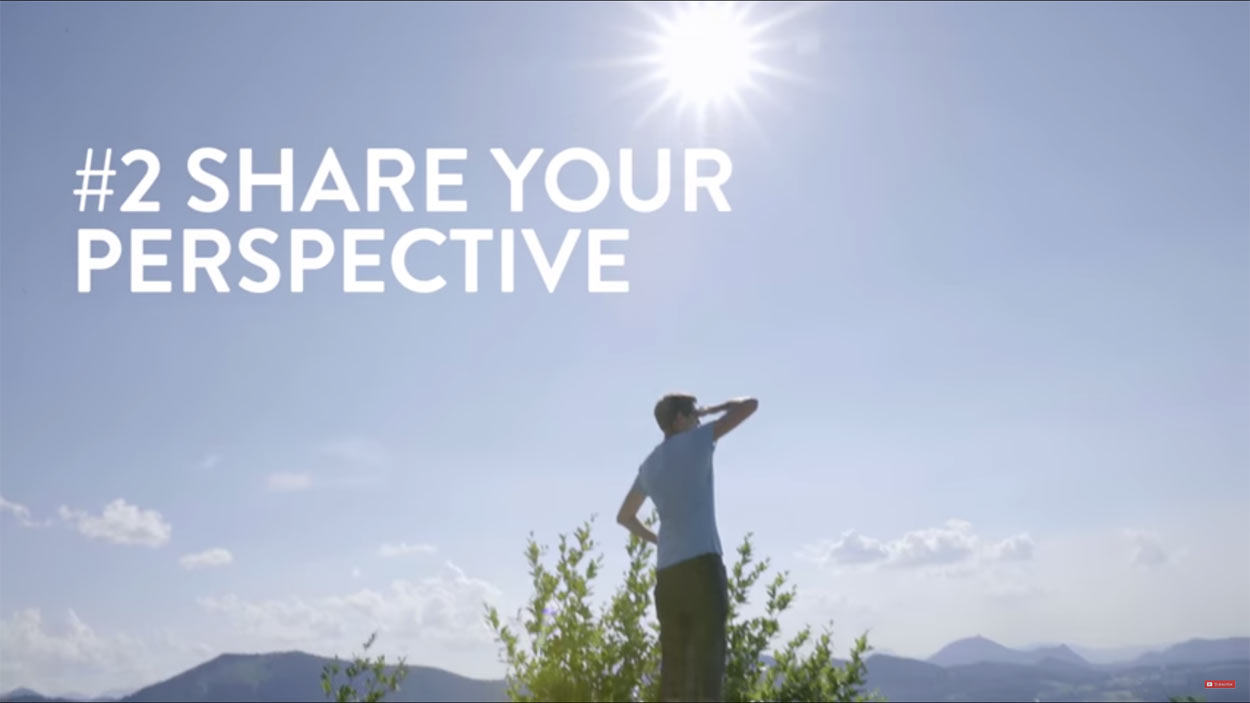
YouTube Screenshot/COOPH
You know how sometimes you're on top of an awesome mountain, and you wish you could show viewers what you see, but still be in the shot, too?
Well, if you have a drone, you can do just that!
Set it to hover above and behind you, and trigger the shutter to get an epic-looking selfie like the one below!
YouTube Screenshot/COOPH
Including yourself in the shot gives context to the scene, allowing viewers to understand the scope and breadth of the landscape because they can see something familiar in the shot - you!
This third-person kind of view is unique, interesting, and eye-catching. Give it a try!
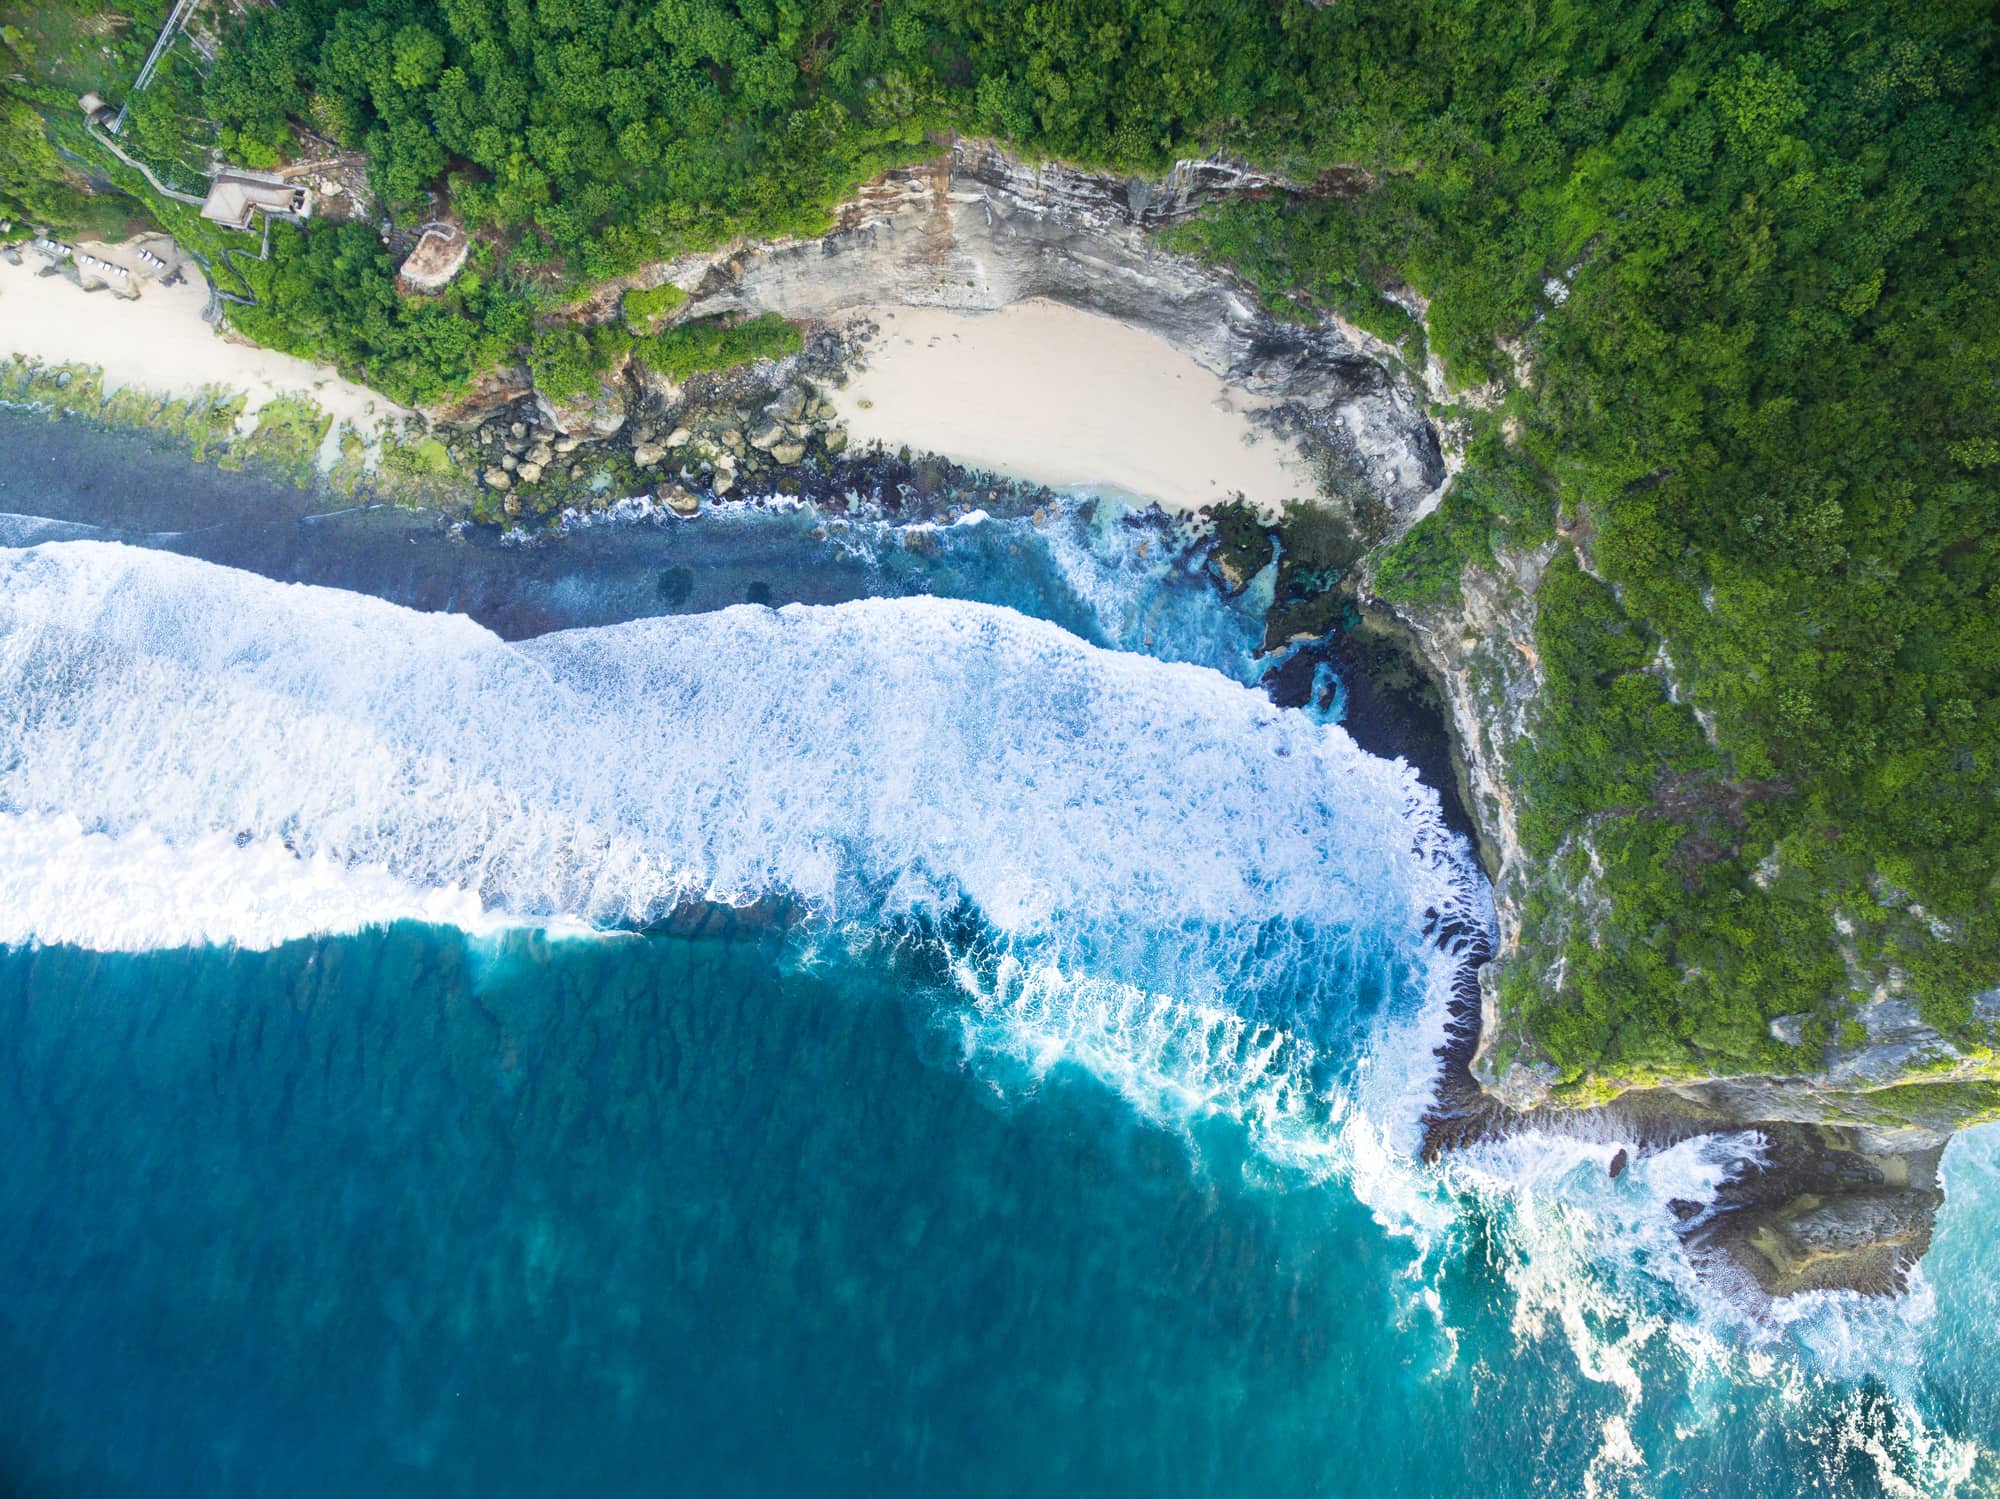
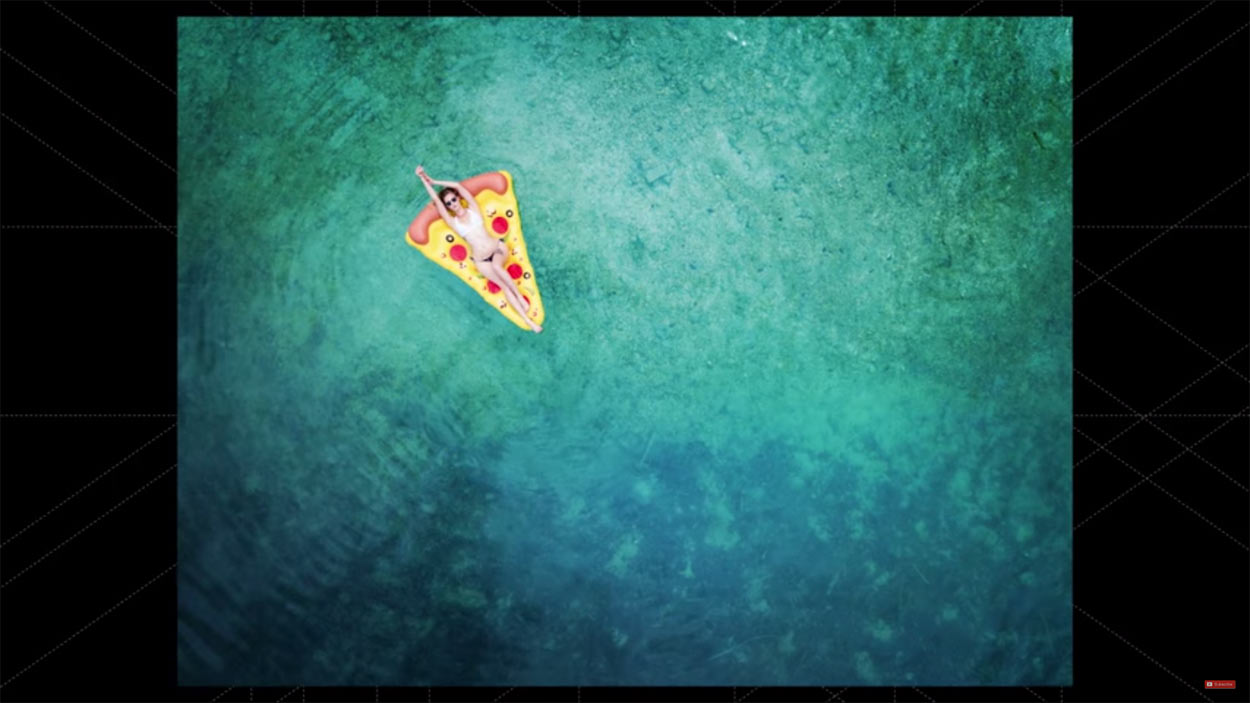
Use Water as a Backdrop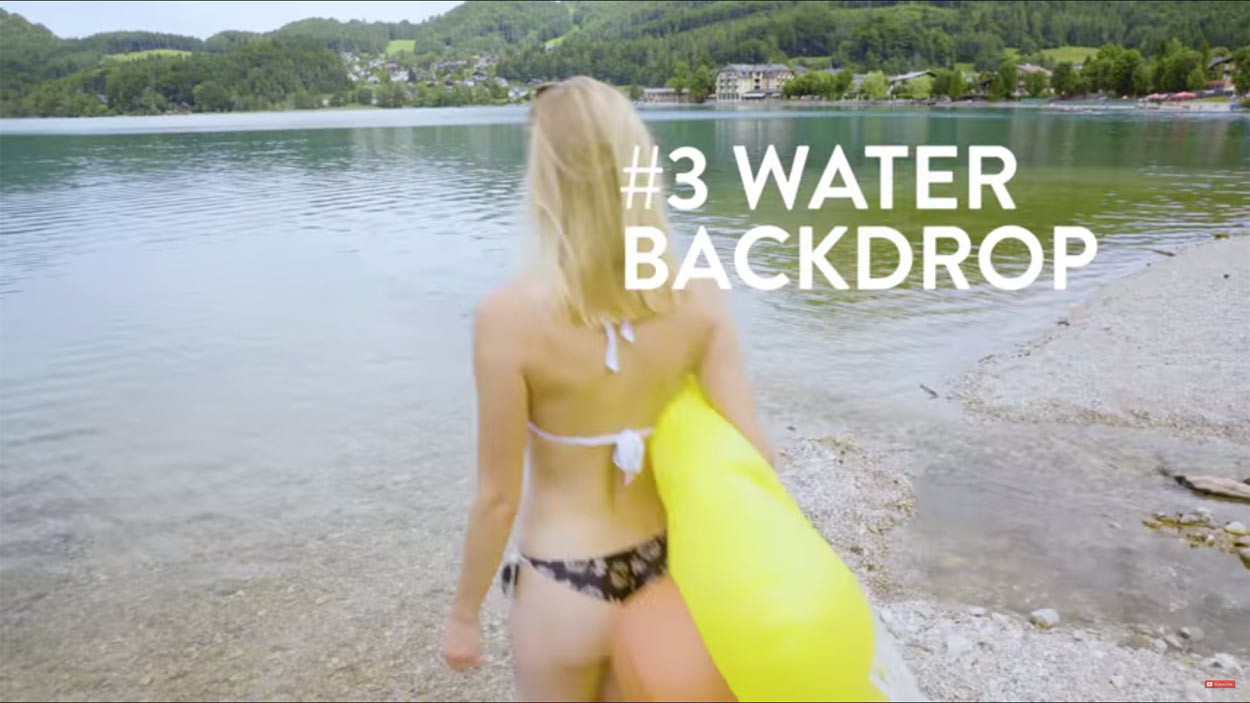
YouTube Screenshot/COOPH
Water is a great backdrop for drone photography for a couple of reasons.
First, the water offers interesting colors and textures that help add depth and dimension to the shot. This is especially true if the water is shallow and the rocks and sand beneath the surface are visible.
YouTube Screenshot/COOPH
Second, since water tends to be in the blue spectrum, it's a great color to help set off your subject, especially if they have colorful props, as seen above.
Just be sure the props you select don't overwhelm the shot with their color, texture, or size. You still want your human subject to be what draws people's attention in the shot!
Barbeque Time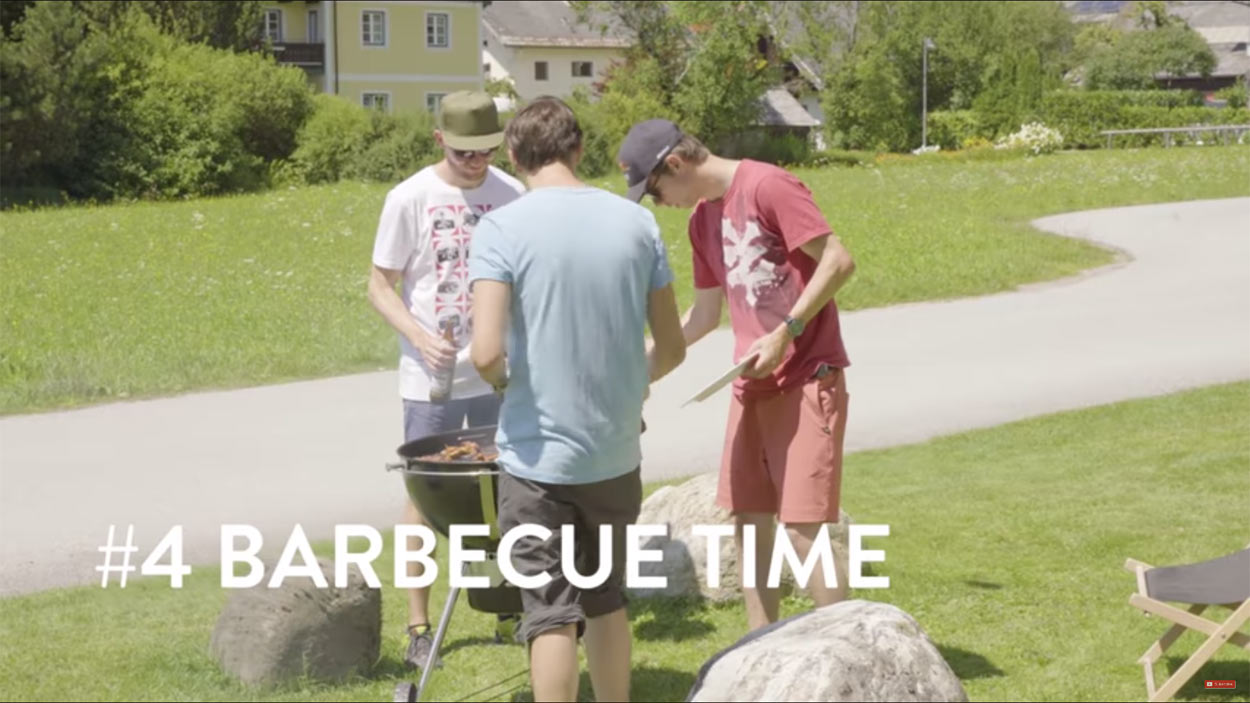
YouTube Screenshot/COOPH
Whether you're cooking hot dogs over an open fire in the woods or simply out in your backyard grilling up some burgers, it's a great time to take to the skies and snag some aerial shots of fun times with friends and family.
As was noted earlier with the tips on shooting sporting events, look for opportunities to take advantage of long shadows being cast across the scene.
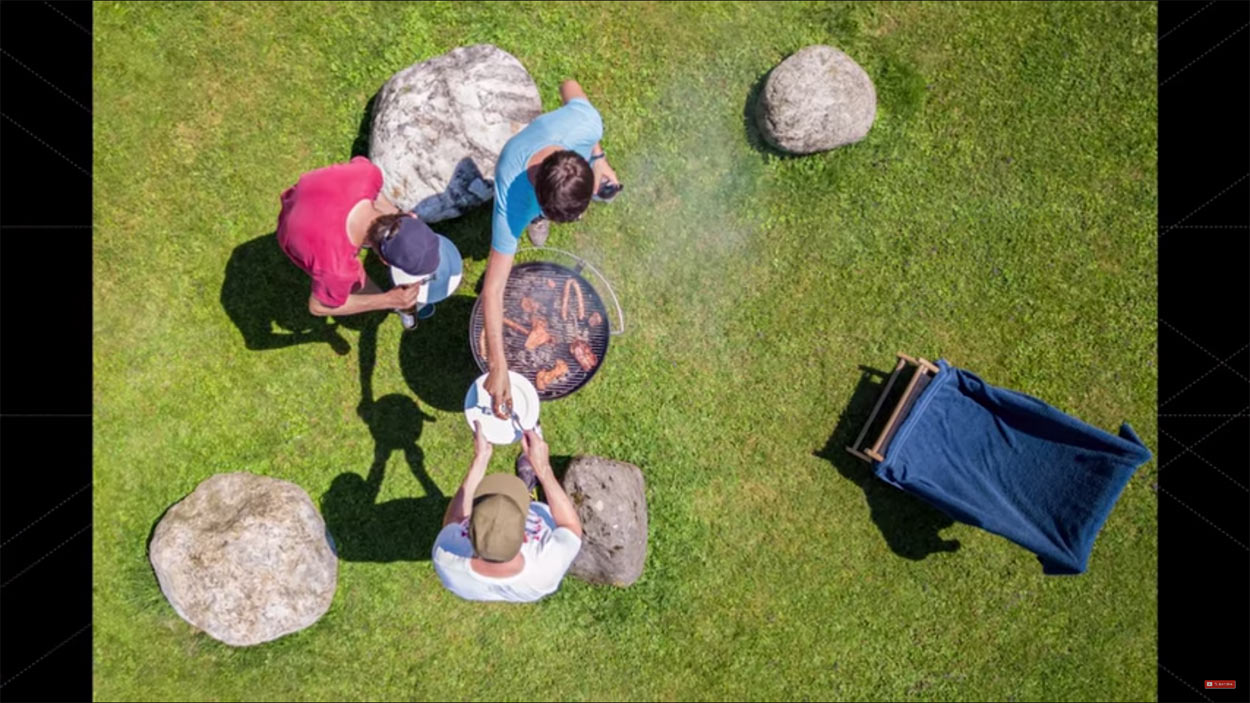
YouTube Screenshot/COOPH
Additionally, incorporate interesting colors, textures, and patterns when applicable.
As mentioned above, this helps give the shot a little more visual appeal without being too visually overwhelming.
Make Words and Shapes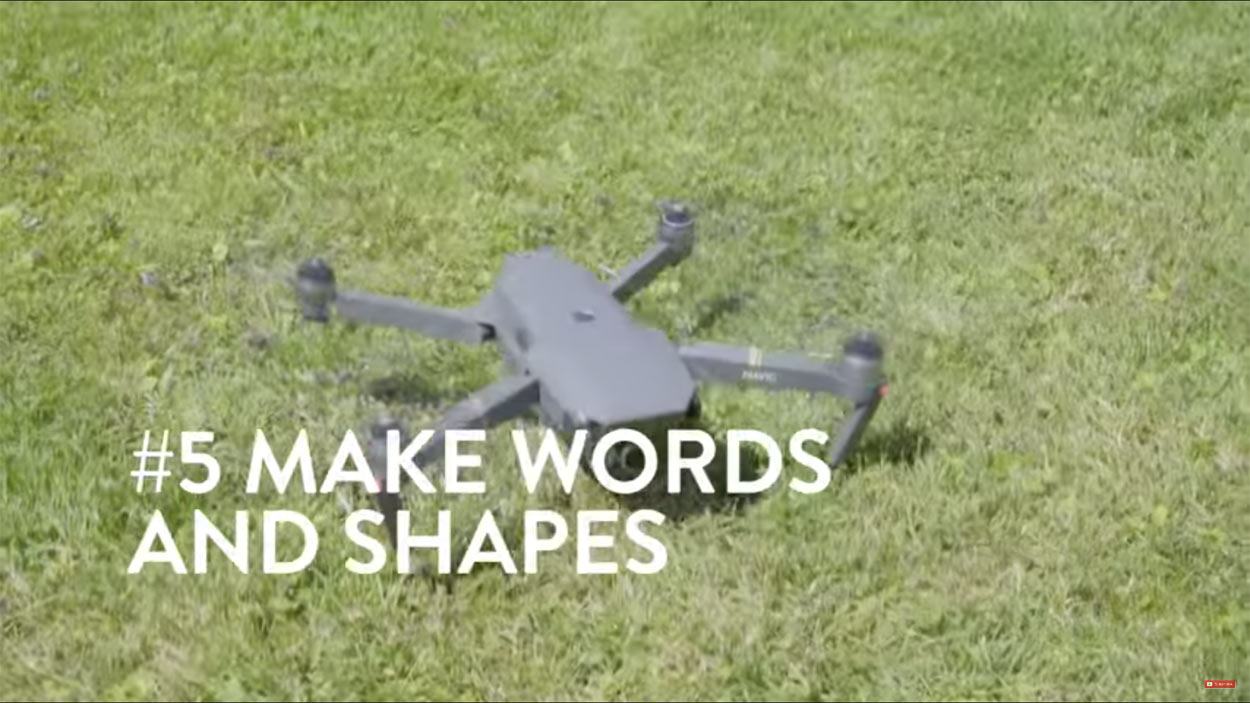
YouTube Screenshot/COOPH
With an aerial point of view, you've got a prime setup to grab a few friends and make some words for the camera.
Naturally, the more friends you involve, the bigger the word you can make!
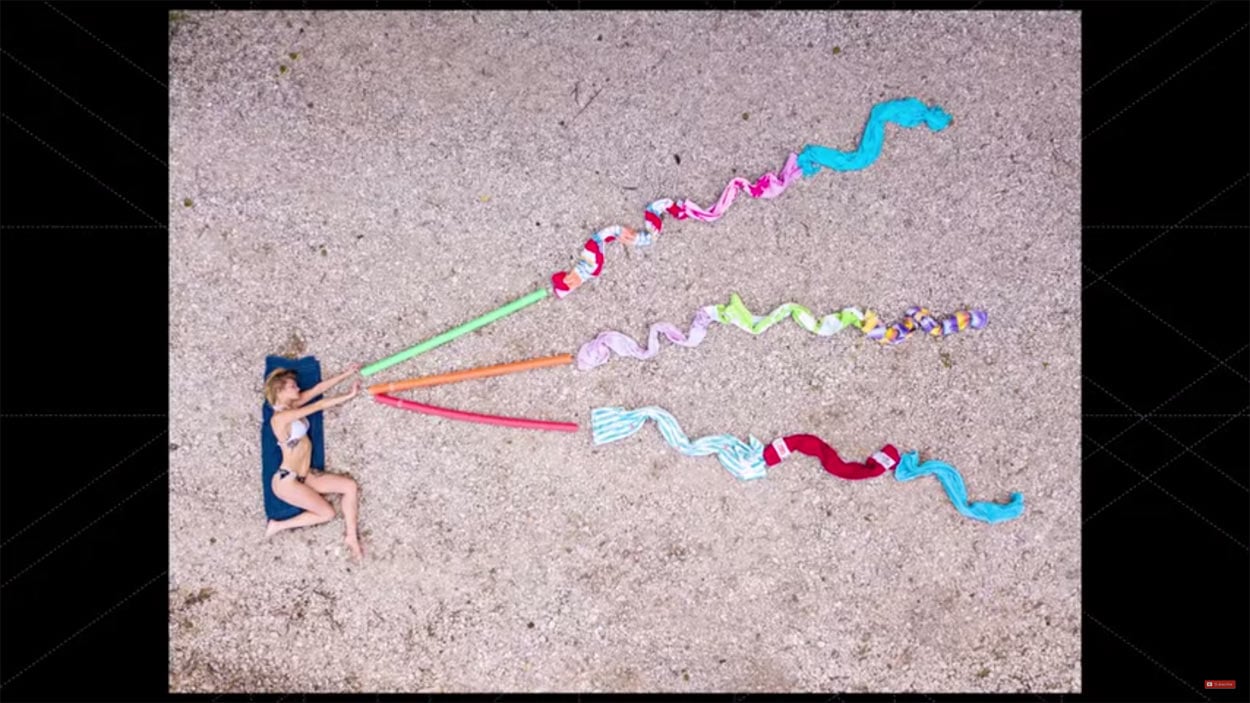
YouTube Screenshot/COOPH
Of course, the bigger the word, the higher you'll need to fly in order to accommodate all those folks.
But if words aren't your thing, try making interesting shapes by having a friend lay on the ground and giving them props to create whatever their creative mind can come up with!
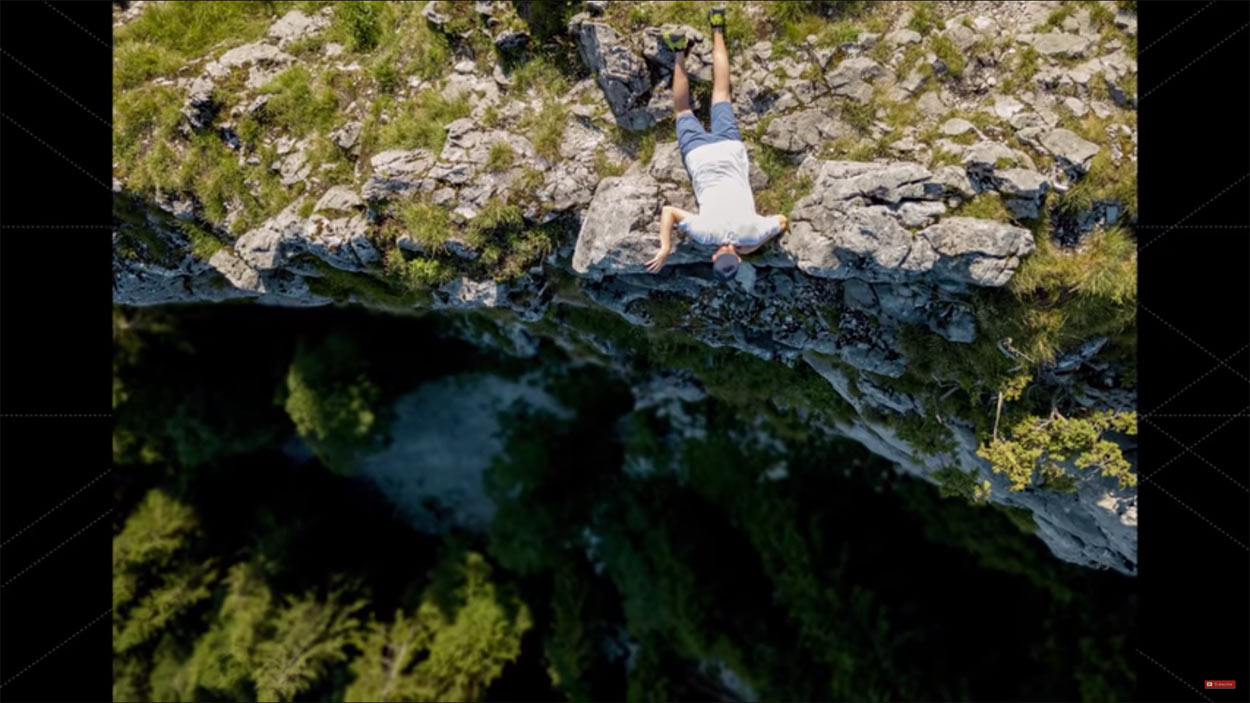
Add a Sense of Drama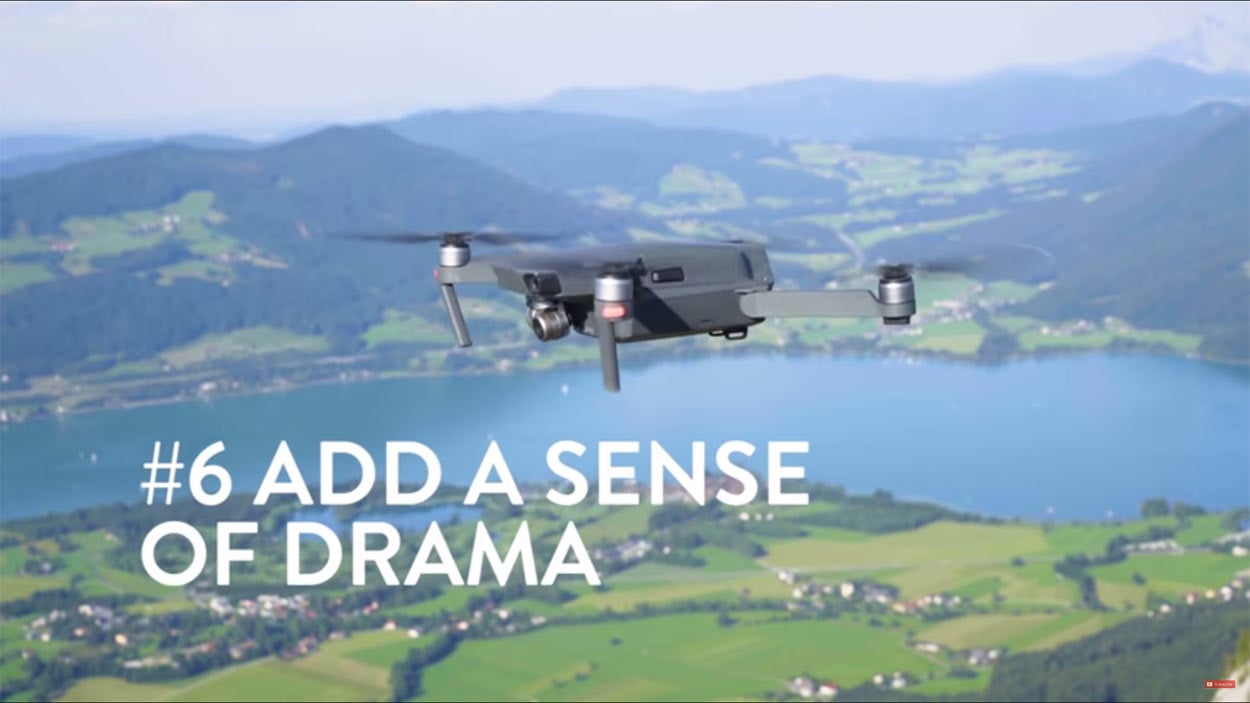
YouTube Screenshot/COOPH
Who doesn't love a dramatic photo?
Since we don't often see shots from high above, drone photography is inherently dramatic.
But you can ramp up the drama even more by shooting over the edge of a cliff.
YouTube Screenshot/COOPH
By giving viewers that feeling of vertical depth, you can induce that feeling of vertigo you get when you peer over a cliff's edge in real life!
Just be sure that your camera is focused on the person in the shot - that way the deeper parts of the image appear blurry and indicate to the eye just how far away they are.
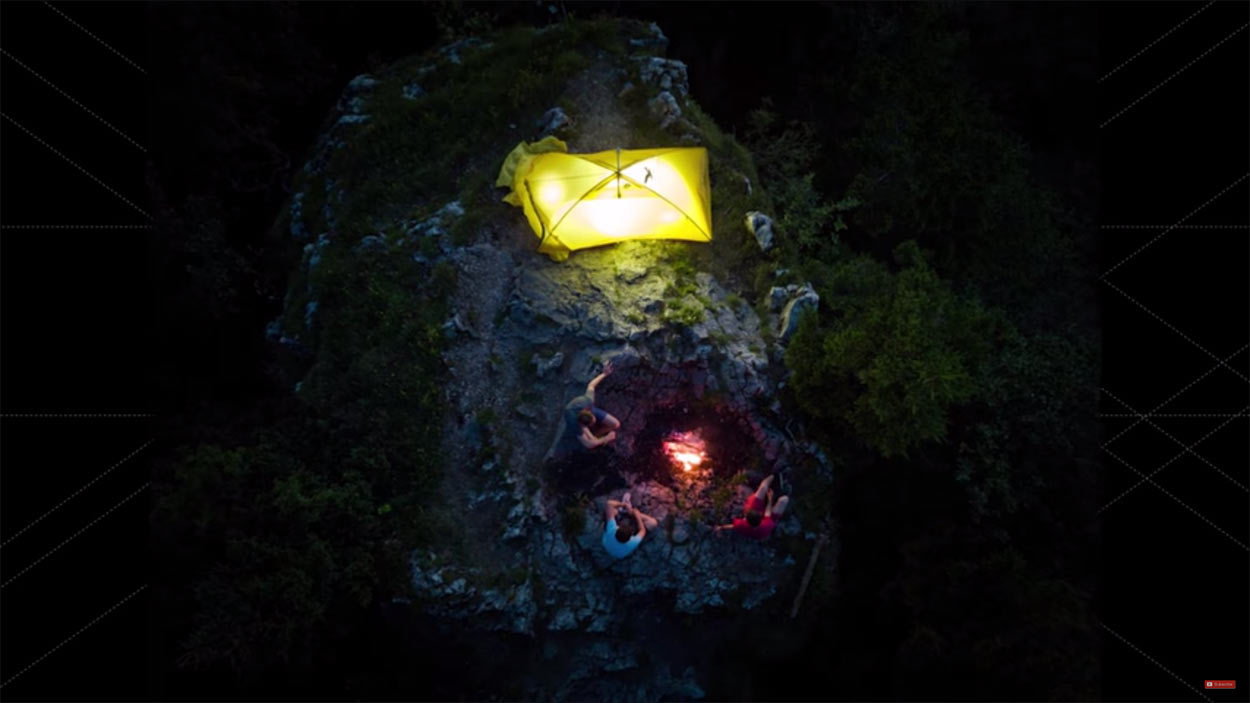
Capture the Camping Experience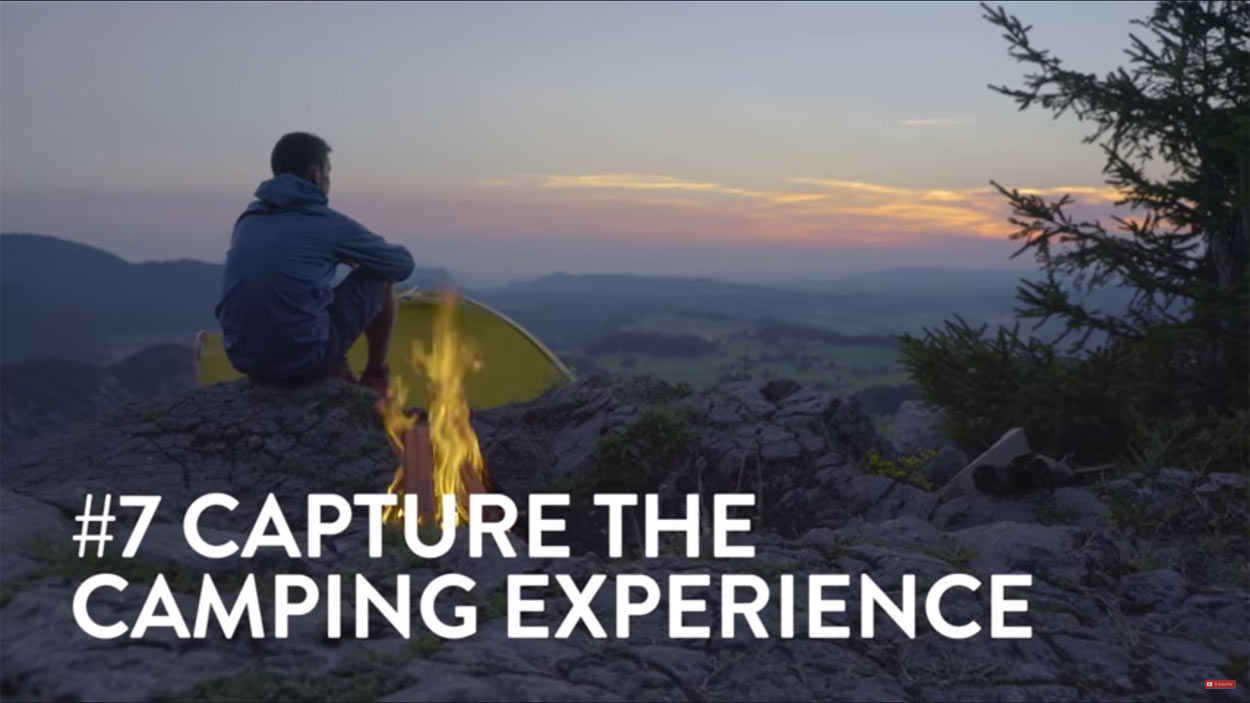
YouTube Screenshot/COOPH
Camping is a great subject for drone photography because not only do you have a beautiful landscape to document, but the situation is also ripe for snagging shots of campfires and tents that are illuminated from inside.
To punch up the drama, send your drone both above and out, that way your camera can capture your campsite and offer a view of the landscape beyond as well.
YouTube Screenshot/COOPH
You can also slow the shutter speed down to lighten the image as the sun fades.
The slower shutter will create some cool effects as the fire crackles and you move around your camp.
In the end, pretty much anything you do with a drone is going to be cool, if you ask me.
I love the top-down perspective of drone photos, and I especially love the creative ideas that COOPH and Christoph Oberschneider came up with in their video!
Carry Your Drone (and Other Gear) in Style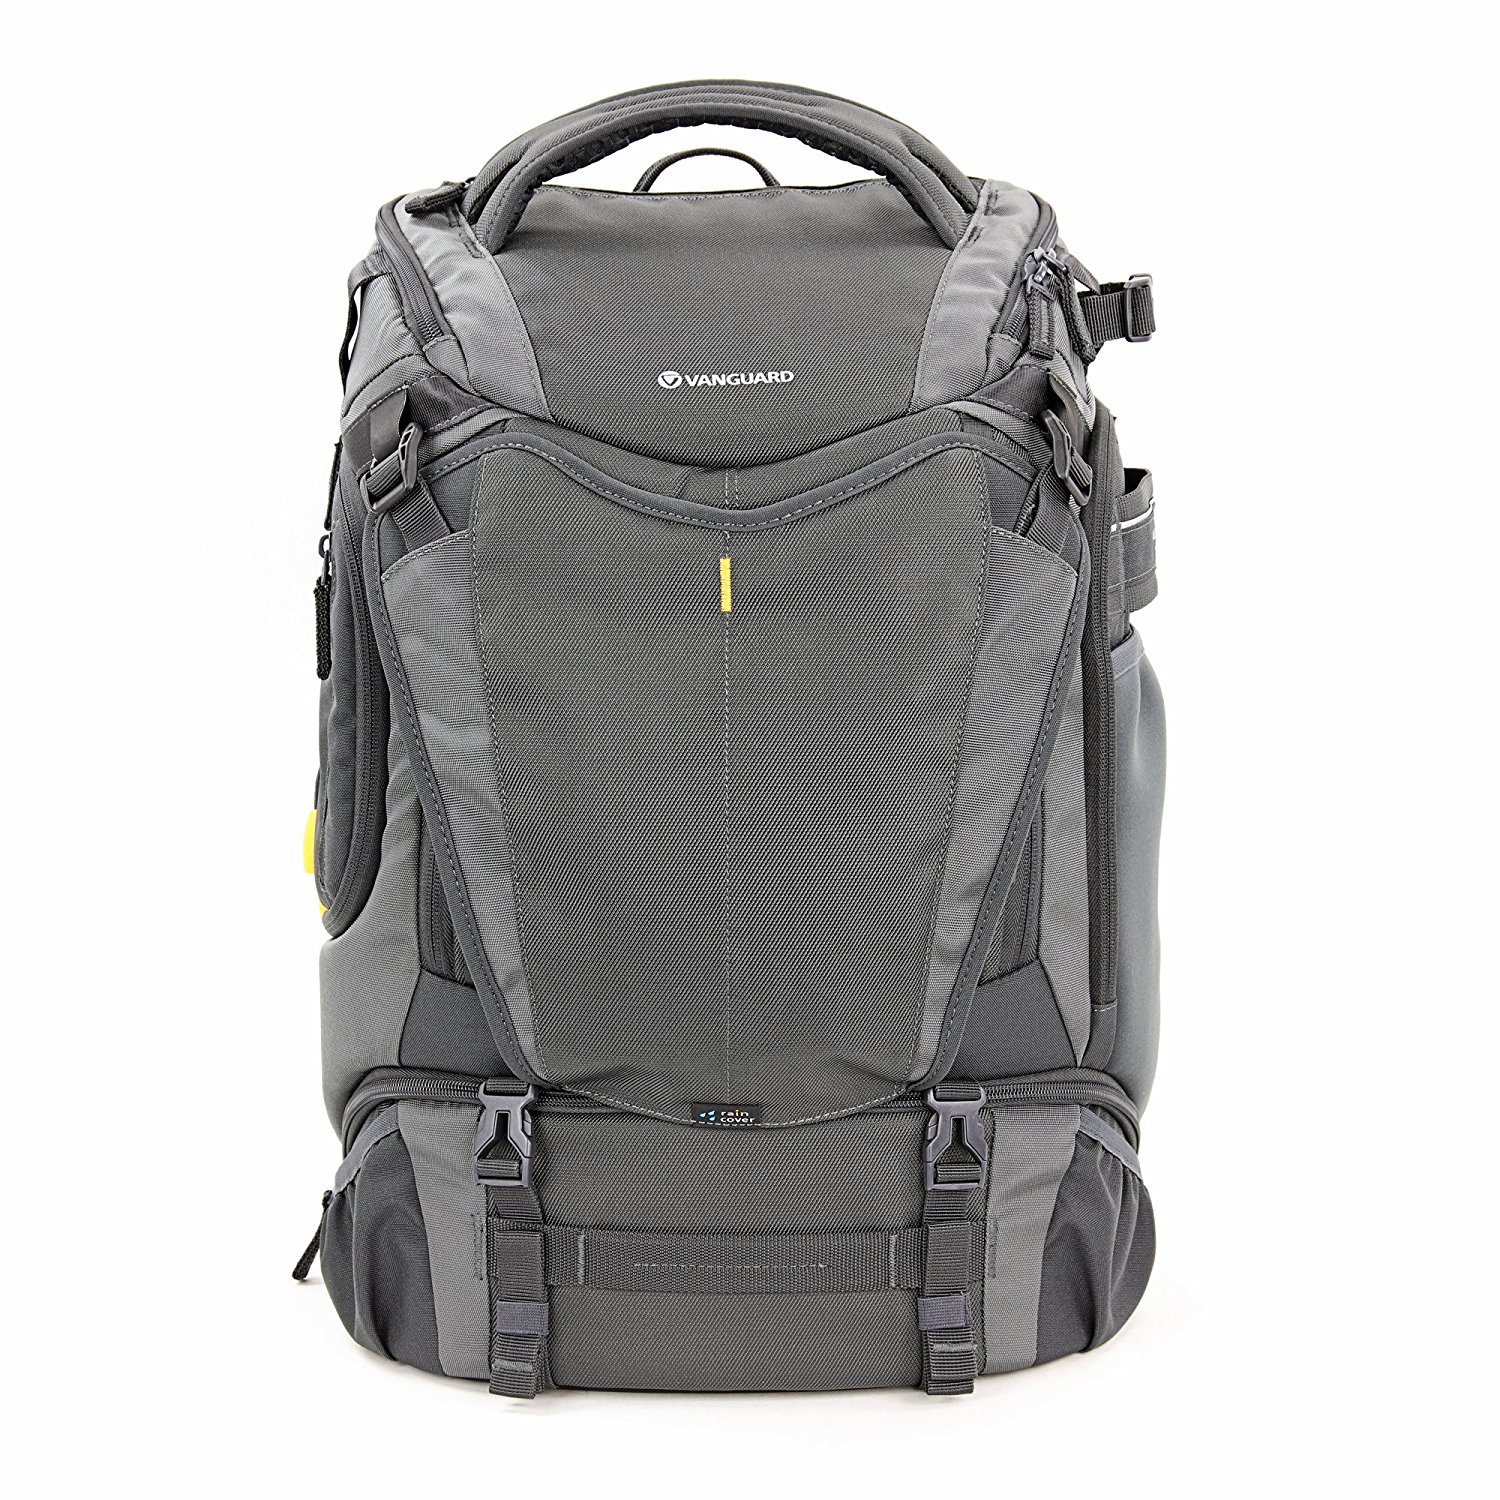
Of course, to get awesome photos with your drone, you need a way to get it and all your other gear to the shoot location.
So why not utilize a bag that not only protects your drone and associated gear while also doing it in style?
The Vanguard Alta Sky 51D is a bag that certainly fits the bill...
As you can see above, this bag is massive, giving you all sorts of room for your gear.
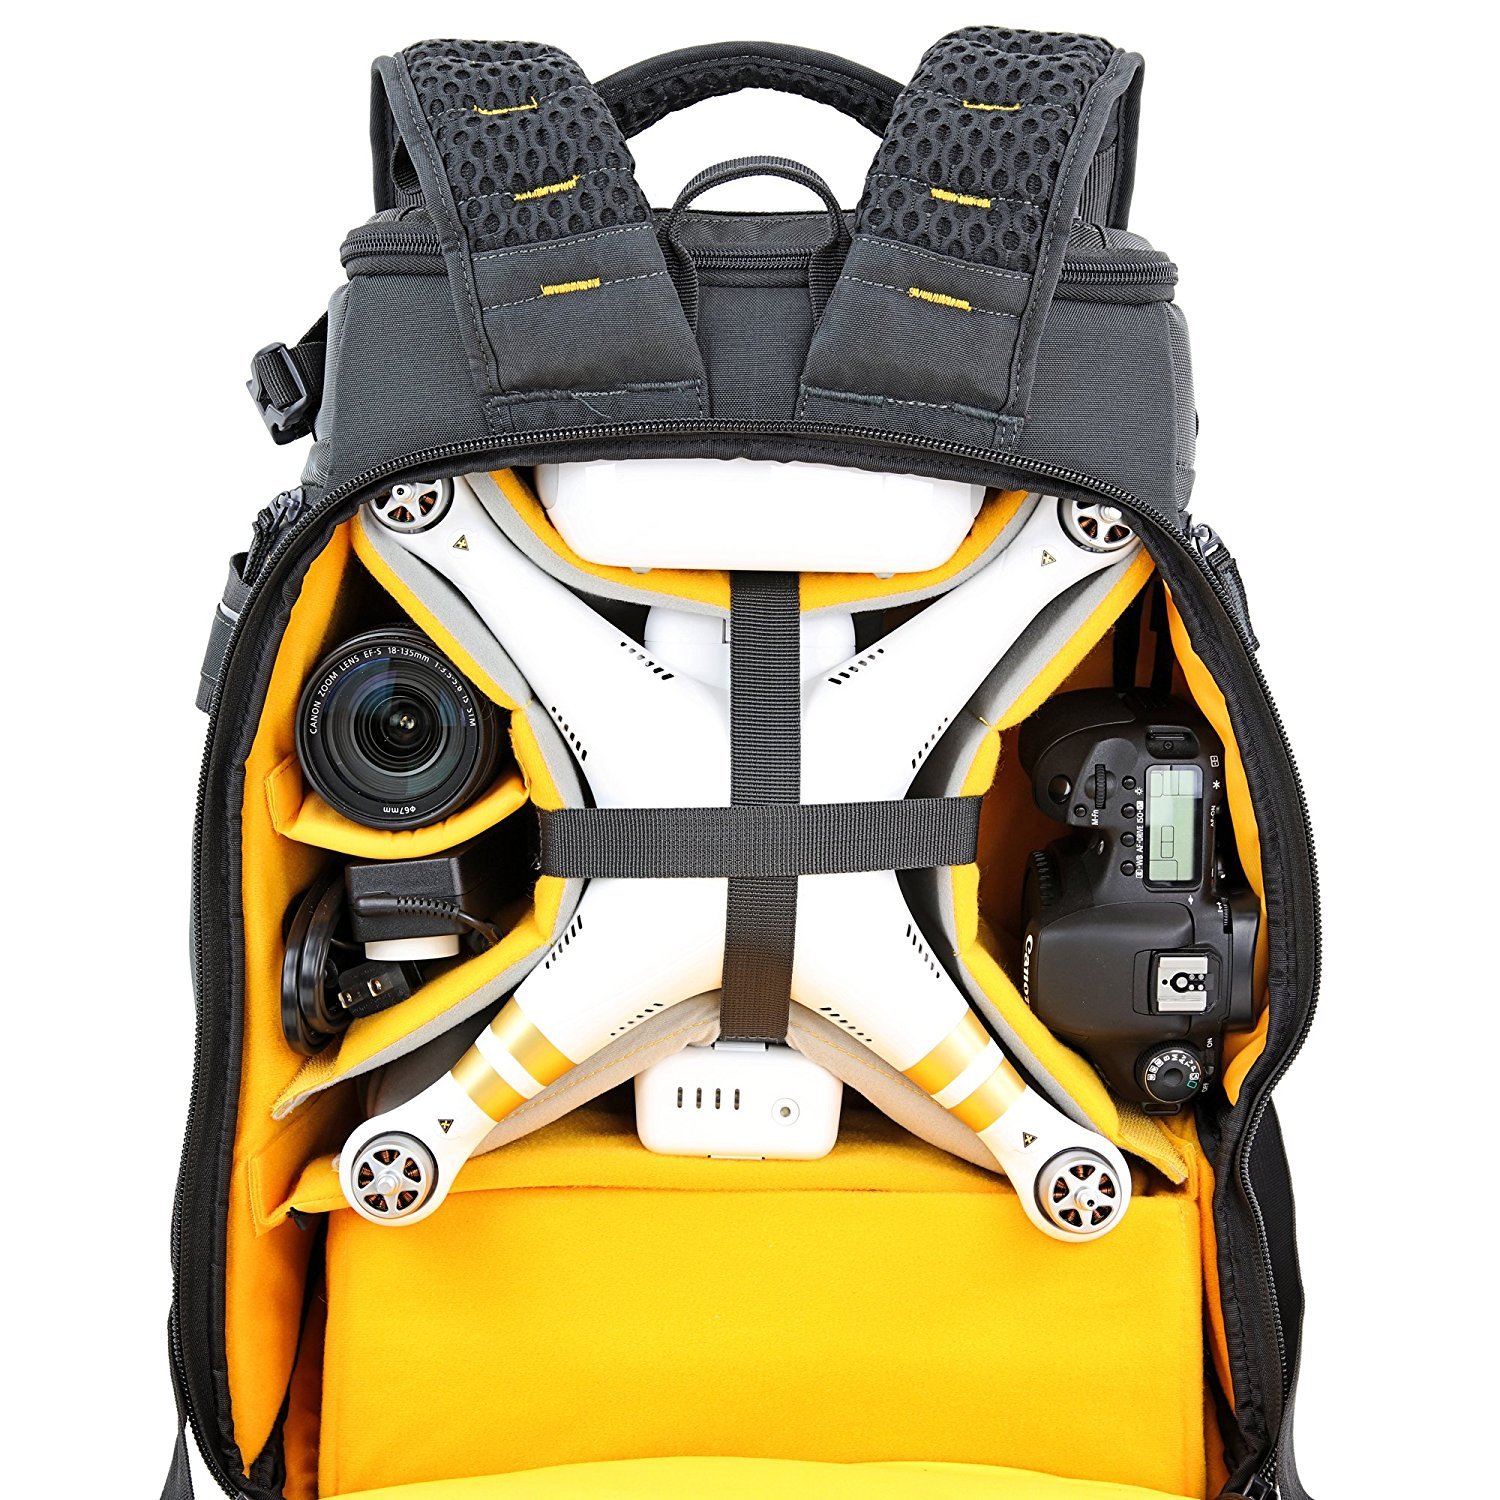
In fact, the Alta Sky 51D can accommodate up to two professional DSLRs (with lenses attached!), 3-4 additional lenses, a flash, and other necessities like spare batteries and memory cards.
Alternatively, you can use the bag to carry your drone and all its accessories, in addition to having room left over for a mirrorless camera setup and an additional lens.
What makes all this storage possible is the innovating 1/3-2/3 division system that Vanguard incorporated into this bag.
That means that you can decide how much of the bag you need to dedicate for gear and how much you can use for storing items that you need for your adventure, like a jacket, sunglasses, and so forth.
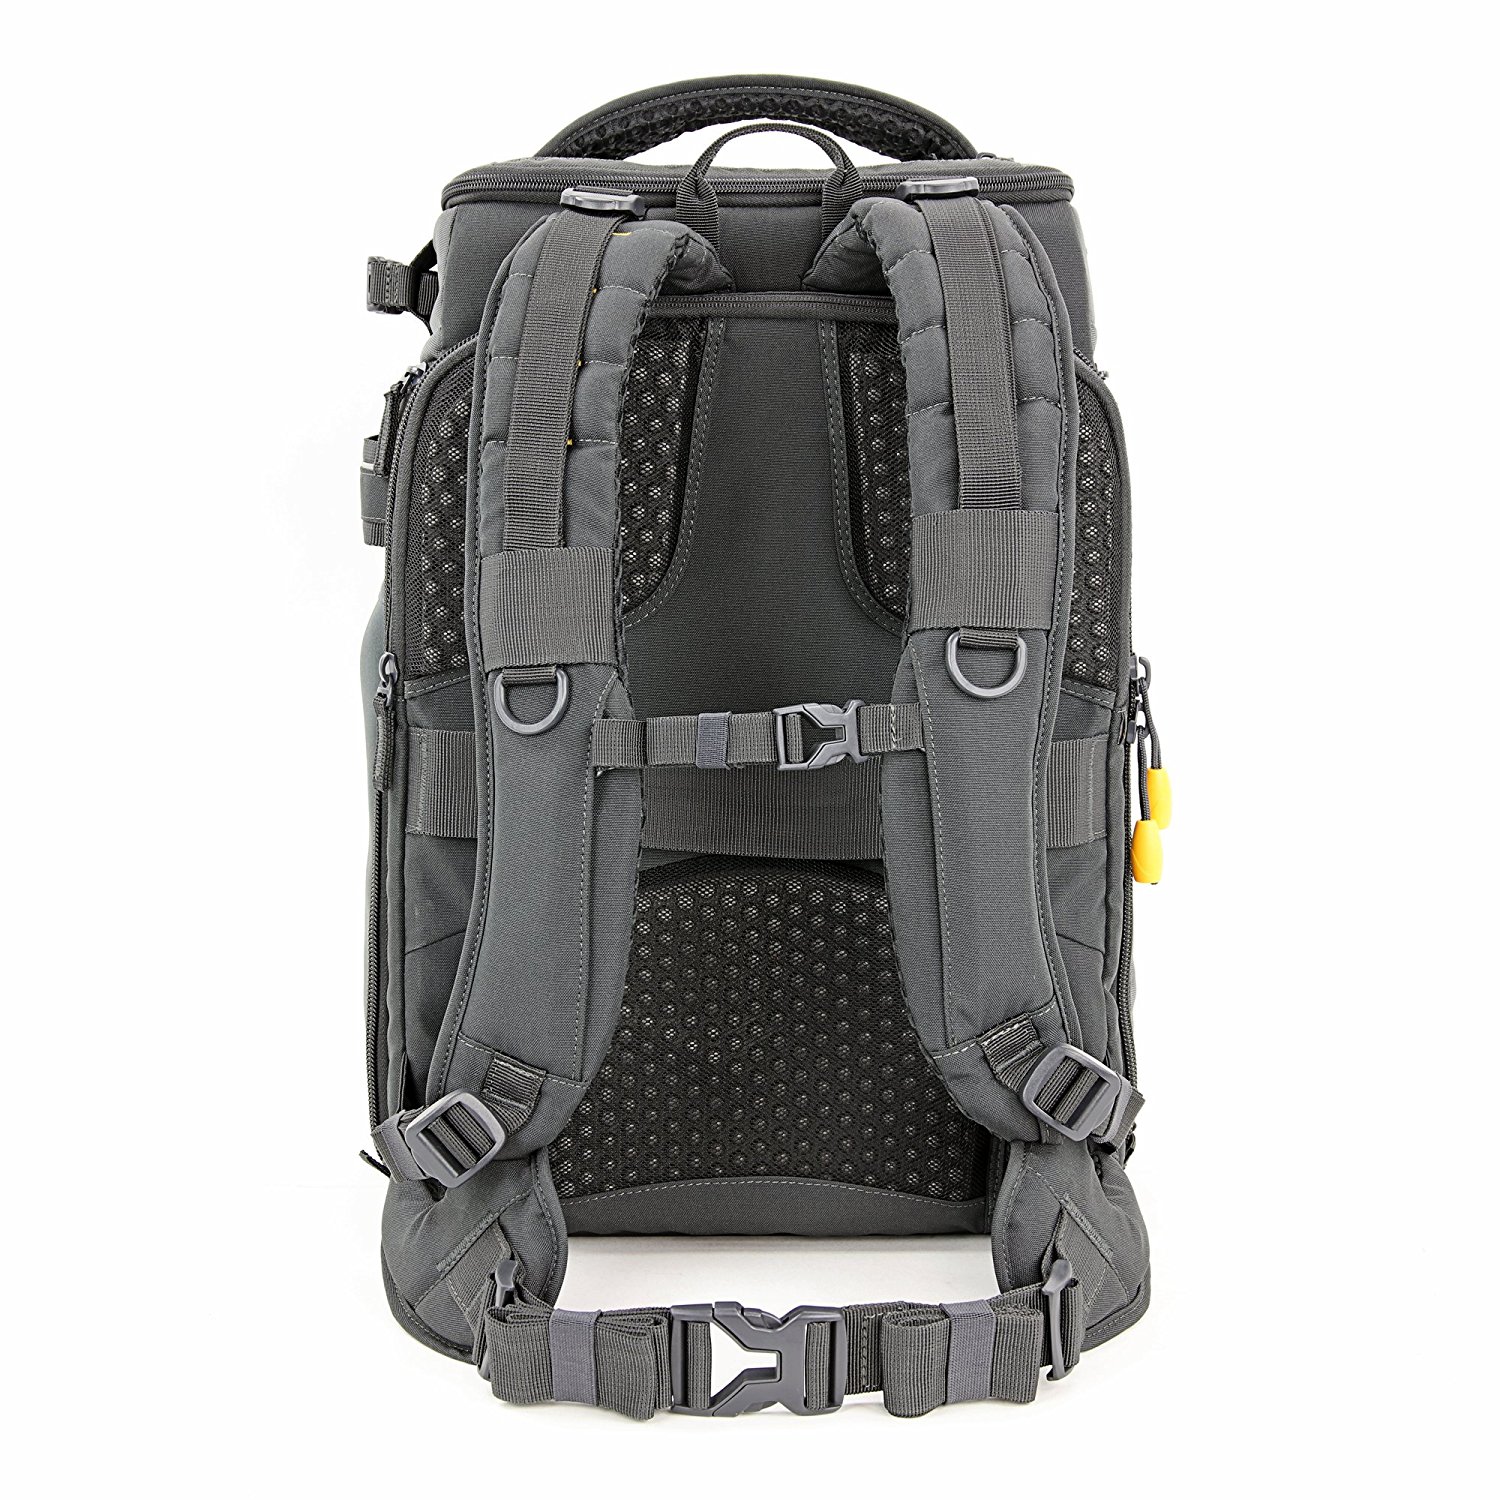
And no matter what you're carrying, the Alta Sky 51D's full rear opening, side access, and top access panels give you quick access to anything you need.
Once the bag is open, there's no fumbling around trying to find your gear, either, thanks to the incredible level of organization the bag offers (the brightly colored interior helps, too!).
It's easy to carry as well - the ergonomic Air System back, harness, and waist belt means that you can carry your gear in ultimate comfort.
In other words, drone photography isn't just about getting the cool shots as outlined earlier - it's also about getting your gear where you're going and doing so in supreme comfort. The Vanguard Alta Sky 51D does just that.
This blog post about "7 Awesome Tips for Your Summer Drone Photography" was first published on our website here https://www.photographytalk.com/photography-articles/7742-7-awesome-tips-for-your-summer-drone-photography from https://photographytalkcom.blogspot.com/2020/08/7-awesome-tips-for-your-summer-drone.html
I think we can all agree that DJI is the king of drones.
After all, they control about 70 percent of the consumer drone market.

But now that they've unleashed their newest drone, the DJI Mavic Air, I wouldn't be surprised if their share of the consumer drone market went higher.
That's because the Mavic Air is full of innovative features, is about the size of a smartphone when its folded down, and it's priced between their existing Spark and Mavic Pro drones, starting at $799.
In other words, this thing might just be a game-changer. Here's why...
For starters, the Mavic Air is a tiny thing, weighing less than one pound, and measures 168x83x49 millimeters.
That makes the Mavic Air slightly larger than the Spark and significantly smaller than the Mavic Pro.
But like its big brother the Mavic Pro, the Mavic Air has foldable arms that give it a small form factor for easy transport - something that other drones cannot claim.

And because it's so small and lightweight, DJI says the Mavic Air can reach speeds of more than 42mph when in sport mode.
That's significantly faster than the Spark (30mph) and even faster than the Mavic Pro (40mph), making this not only an easily transportable drone but a lighting-fast one as well.
Add to that a 2.5-mile flight range (when using the included controller) and flight capabilities in winds of up to 22mph, and you have the makings of one heck of a capable drone.

Onboard is a 12-megapixel camera that sports a 1/2.3-inch CMOS sensor that's paired with a 24mm f/2.8 lens.
The drone has 8GB of built-in storage and includes a USB-C port for easy transfer of photo and video files.
Speaking of video, the Mavic Air can shoot in 4K up to 30fps and slow-motion 1080p video up to 120fps, and those videos will be ultra-smooth thanks to the built-in three-axis gimbal.
This bad boy can also shoot HDR, and with a 32-megapixel panoramic mode, you can take breathtakingly wide and detailed shots of the landscape as you fly.

The Mavic Air is loaded with features to help you fly safer, too.
DJI's already excellent obstacle-avoidance system has been upgraded with seven cameras as well as infrared sensors that help pilots avoid other drones as well as obstacles like trees, buildings, and the like.

The Air incorporates the Spark's ingenious gesture controls as well, so you can launch the drone and take pictures with specific hand movements.
It also incorporates intelligent flight modes that allow you to take specific types of sweeping shots, like a boomerang mode that whizzes around the pilot in a circular motion and ActiveTrack mode, which allows you to track up to 16 different subjects at the same time, even if they're moving.
With a flight time of 21 minutes, an included remote control (that's foldable!), and a companion app that allows you to immediately share your photos and videos on social media, this drone has all the makings of a game-changer. Get more details about the Mavic Air in the video above by The Verge.
Not only do you get new gadgetry with unparalleled performance, but you also get some of the best features of the Mavic Pro in a smaller, less expensive drone.
This blog post about "The New DJI Mavic Air Drone" was first published on our website here https://www.photographytalk.com/photography-articles/8228-the-new-dji-mavic-air-drone-is-a-game-changer
from https://photographytalkcom.blogspot.com/2020/08/the-new-dji-mavic-air-drone-is-game.html
Now more than ever, Realtors and real estate photographers are using drones to create both still images and videos of properties.
Not only does the perspective from above offer an excellent view of the entire property, but it also allows you to highlight the location of the property, the proximity of neighbors, amenities, streets, and so forth.
You can even use a drone to take photos and videos inside a property, which helps create a dynamic marketing portfolio that can help get the property sold faster.
If you’re new to using drone photography for real estate, consult the article below for some tips on how to get started.
 Benefits of Using a Drone for Real Estate Photography
photo by JamesBrey via iStock
Since the vast majority of home searches begin online, a drone is a perfect tool for a real estate photographer to capture the attention and imagination of potential buyers.
Using a drone, you can:
And that’s just the start.
While still photos and videos taken from ground level can be very well done and engaging to potential buyers, drone footage can help you elevate the quality of the portfolio of images you create. Pairing the two together is an ideal approach.
Step 1: Get a Drone for Real Estate
photo by nullplus via iStock
Today, there are dozens and dozens of drones that could be used for real estate photography. All that selection can be a bit overwhelming, though.
When shopping for a drone for real estate, considering which features are useful can help narrow the options. Features to look for include:
Below is more information about three drones that fit the criteria above.
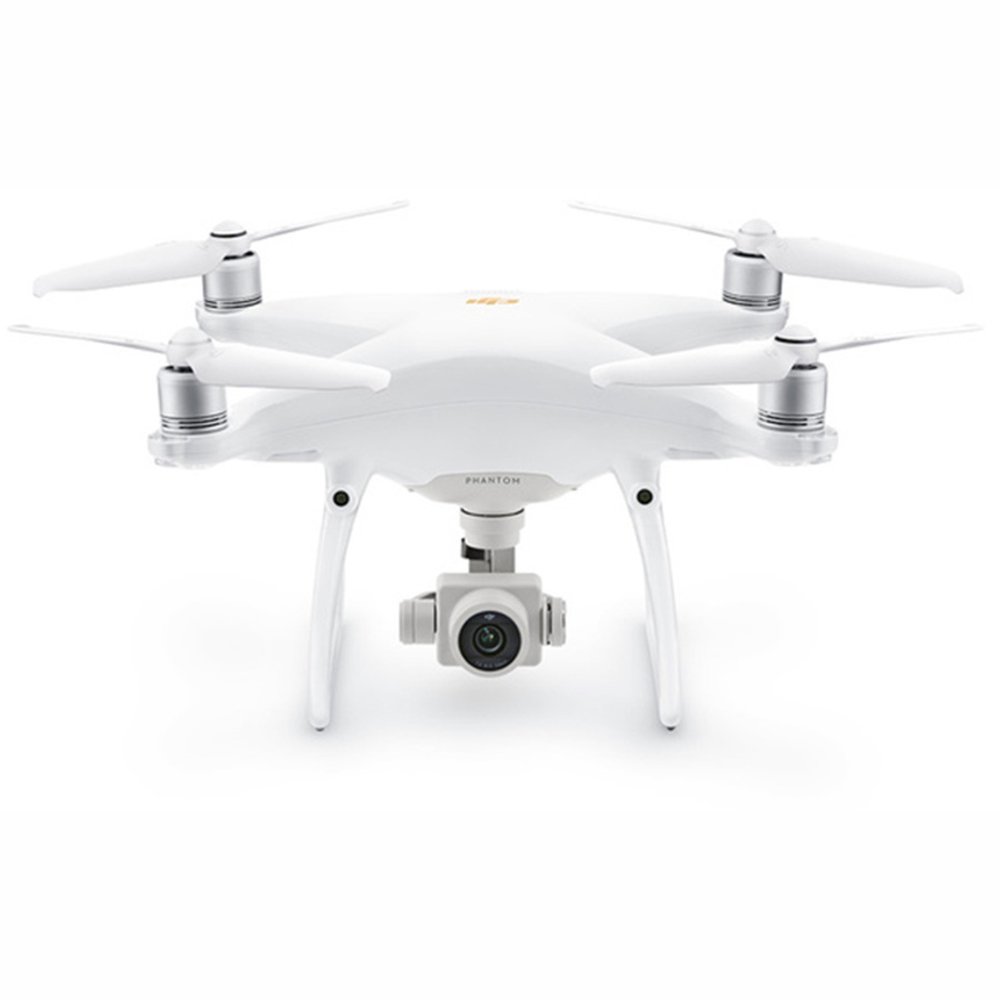
The DJI Phantom 4 Pro V2.0 gets high marks from real estate photographers for its 20-megapixel camera, its ability to shoot 4K video at 60 fps (which is great for slow-motion video), its 30-minute flight time, its multi-directional obstacle avoidance system, and its range of well over four miles.
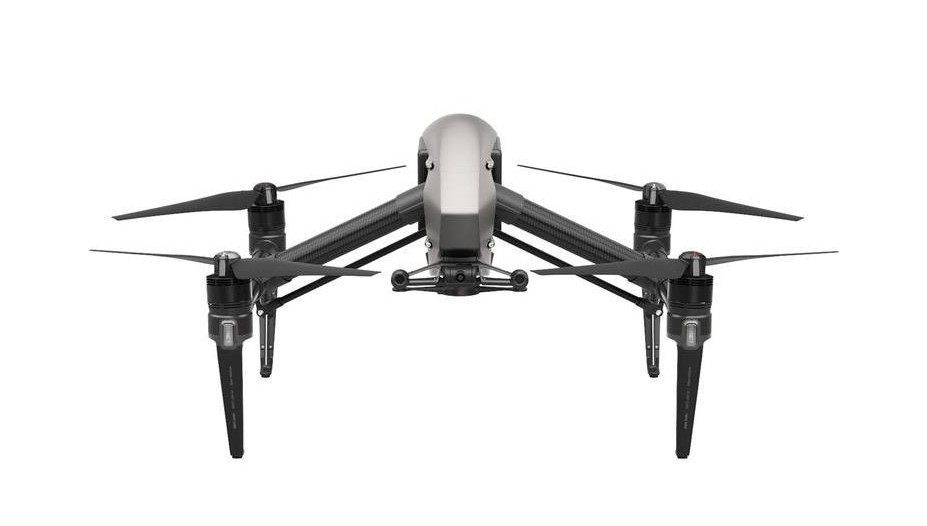
The DJI Inspire 2 is another solid option for real estate photography. It has a one-inch, 20-megapixel sensor that is capable of recording video at up to 6K. Its dual battery system enables flight times of up to 27 minutes while its self-heating technology allows you to fly in cold temperatures. With multiple intelligent flight modes, you can create sweeping, cinematic videos of properties with the touch of a button.
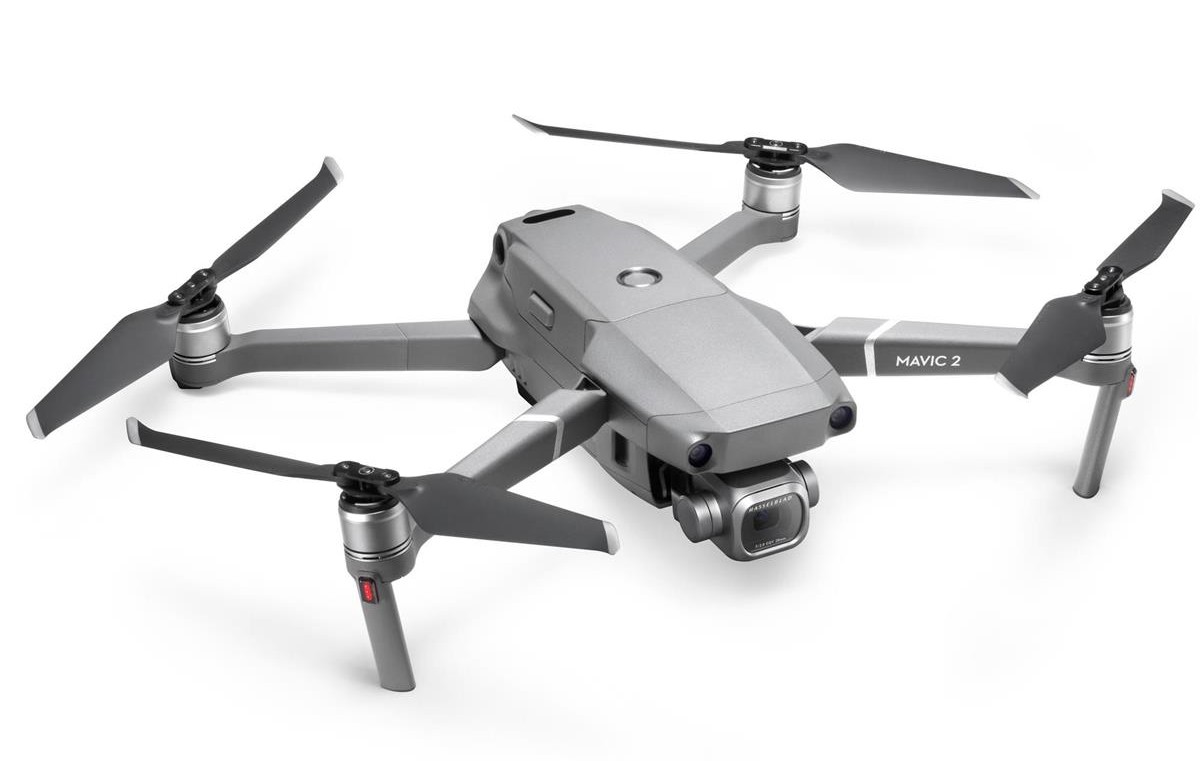
A final option is the DJI Mavic 2 Pro. Perhaps the best feature of this drone is the Hasselblad 20-megapixel sensor that has an adjustable aperture from f/2.9-f/11 and an ISO range up to 12,800. The camera supports 10-bit 4K video capture and has 10-bit Dlog-M color profile, which gives it enhances dynamic range. With a flight time of 31 minutes, a range of more than five miles, and an object avoidance system on all sides, this compact drone is ideal for real estate applications.
Step 2: Learn the Regulations for Drone Flights & Practice Piloting Your Drone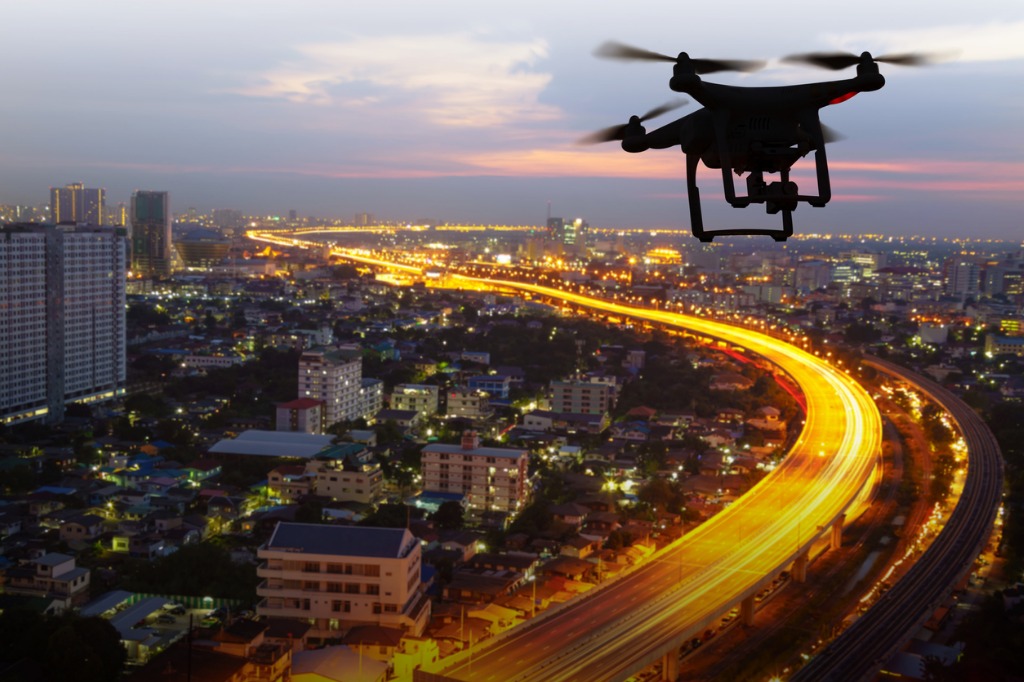
photo by Naypong via iStock
Before you take flight with your drone, it’s necessary to familiarize yourself with the regulations governing drone flights.
Bear in mind that these regulations vary from country to country, and even municipality to municipality. Therefore, don’t assume that the flight rules that apply in your area apply in a different town or city.
If you’re in the United States, you must obey Federal Aviation Administration (FAA) rules when flying your drone, such as deferring to other aircraft. Likewise, you must register your drone with the FAA before you undertake flights.
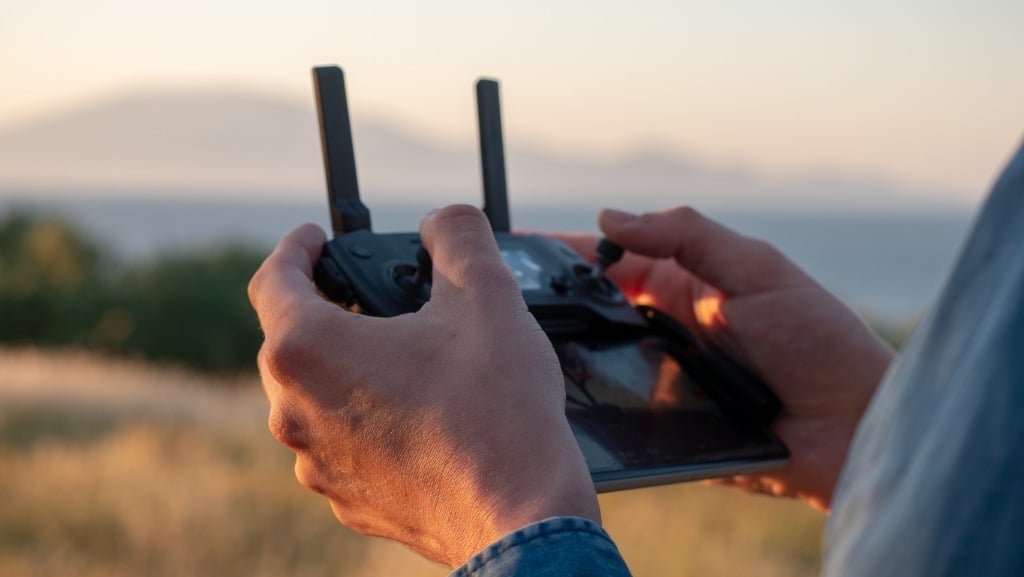
photo by @jansmartino via iStock
Once you’ve become familiar with flight regulations, practice your drone flying skills in an open area away from homes, businesses, roads, and other areas where property and people are found. An open field with broad sight lines is ideal.
To begin, simply learn how to fly and maneuver the drone. Learning the controls as well as the limitations of the drone will take a bit of time and practice.
Once you’re comfortable flying, then expand your practice into taking still photos from various angles and altitudes. Do the same with video as well.
Step 3: Master Drone Photography Composition
photo by JamesBrey via iStock
The obvious advantage of having a drone for real estate photography is that you can highlight property features in a unique way.
But there’s more to it than simply hovering the drone over the backyard pool.
Instead, it’s necessary to work on the composition of your shots to best showcase the property’s features.
photo by Creative-Family via iStock
For example, if a home has a fabulous backyard, a high, wide-angle shot might be just the trick for showing off the yard in its entirety.
Then, pair that still shot with one from the opposite side of the yard to give potential buyers a view from another angle.
Additionally, many drones have automatic flight path features that you can program via GPS. That means you can select a flight path for the drone and create a video tour of the features you wish to feature.
Step 4: Understand the Limitations of Your Drone’s Camera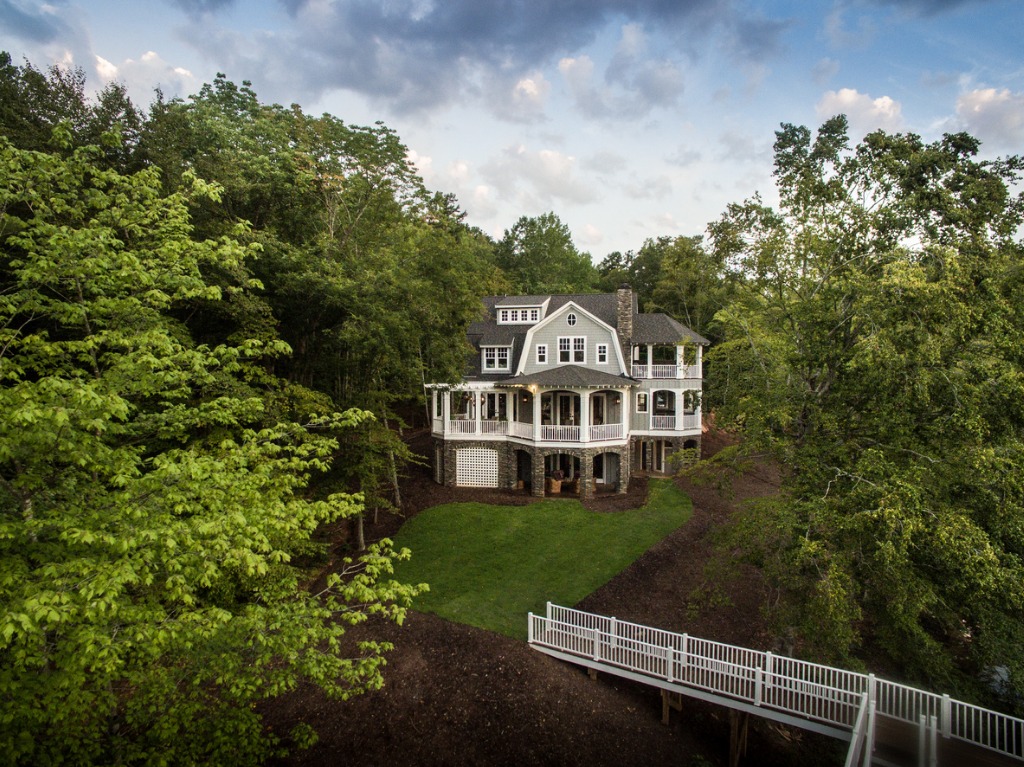
photo by PBFloyd via iStock
Just like your smartphone, DSLR or mirrorless camera, your drone’s camera can’t do everything perfectly. You may well find that you need to fine-tune the photos you take from the air in post-processing to get the best results.
For example, if you’re shooting from a drone on a day in which there is very strong sunlight, you might find that the camera can accommodate the highlights or shadows, but not both.
This occurs because the dynamic range - the range of light intensities from dark to light - is too much for the camera to handle in a single image.
To get around this issue, you can bracket the exposures and take 3-5 identical shots, each of which is taken at a different shutter speed. That is, take one shot that’s exposed for the shadows, another identical shot that’s exposed for midtones, and a final shot that’s exposed for the highlights.
Then, you can merge the exposures in a program like Photomatix Pro to create a single image that has beautiful details throughout the shadowed and highlighted areas.
Wrapping It Up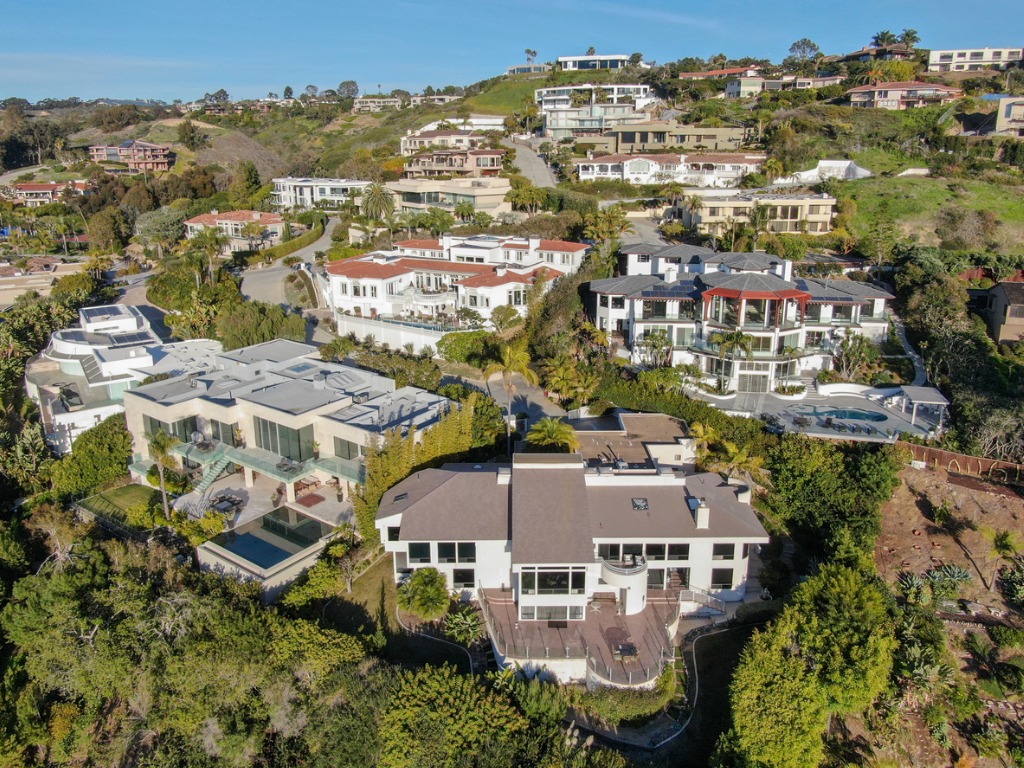
photo byThomas De Wever via iStock
As noted earlier, mastering the art of drone photography for real estate requires that you have the right gear, that you practice and familiarize yourself with local drone regulations, that you concentrate on creating well-composed shots, and that you perfect your images in post-processing.
If you can commit to this process, you’ll be in good shape to create gorgeous photos and videos of real estate using a drone.
This blog post about "Getting Started in Drone Photography for Real Estate" was first published on our website here https://www.photographytalk.com/drone-photography-for-real-estate from https://photographytalkcom.blogspot.com/2020/08/getting-started-in-drone-photography_31.html
Drone photography has certainly become a popular over the last few years. With that increased popularity has come increased oversight by the federal government. It has also led to a discussion about liability in the event that a drone crashes and ends up causing damage or injury.
Clearly, using a drone for photography is fun, but in light of new regulations and concerns about safety, it’s also an activity that shouldn’t be taken lightly.
If you’re in the market for a drone, there are a few things to consider first. Check mavic air review if you are looking for buying a drone under $1000.
 It Needs FAA Registration
The Federal Aviation Administration (FAA) requires that all drones weighing more than .55 pounds and less than 55 pounds to be registered. Failure to register might result in stiff penalties, including civil judgments up to $27,500 and criminal penalties of up to 3 years in prison and/or a $250,000 fine.
Needless to say, before you put your drone up in the air to get aerial footage, be sure it’s registered properly. The registration fee is just $5, so you won’t be breaking the bank with it, and it can be done online in just a few minutes. You actually register your name, rather than the drone you’re flying, so as you get new drones in the future, you don’t have to worry about registration again.
Among other restrictions, you’re required to keep the drone at an altitude of 400 feet or less, and you can’t fly it within five miles of an airport. Again, violating these conditions could result in severe penalties. Other restrictions apply, so be sure to educate yourself thoroughly by visiting the FAA’s Small Unmanned Aircraft System Registration Page.
It Needs to Be Insured
Perhaps the most important question about using a drone is, “What happens if I crash it and cause damage to property or injure someone?”
It’s a scary proposition to think about, and one that should immediately have you thinking about insuring the drone because the last thing you want to do is have your drone crash into the crowd at a wedding and not have insurance to cover yourself. That’s where Package Choice Insurance comes in.
Package Choice insures your equipment from the drone itself to the camera attached to it (as well as all your typical photography gear). If your drone is stolen or accidentally broken, you’re covered as well. Perhaps more importantly, Package Choice Insurance protects your business from claims of injury by your clients or even the general public, and also protects you from damage to other people’s property, which is something you definitely need if you’re using a drone.
Additionally, insurance from Package Choice protects you from omissions and errors that covers situations such as an assistant or second shooter accidentally crashing your drone (assuming they are registered to fly it in the first place). Even better, Package Choice covers funding for a reshoot, so if things go awry, you can still provide your clients with the photography services they paid for. There are many other benefits of having your drone insured - check out the possibilities with Package Choice!
You Can’t Fly Them Wherever You Want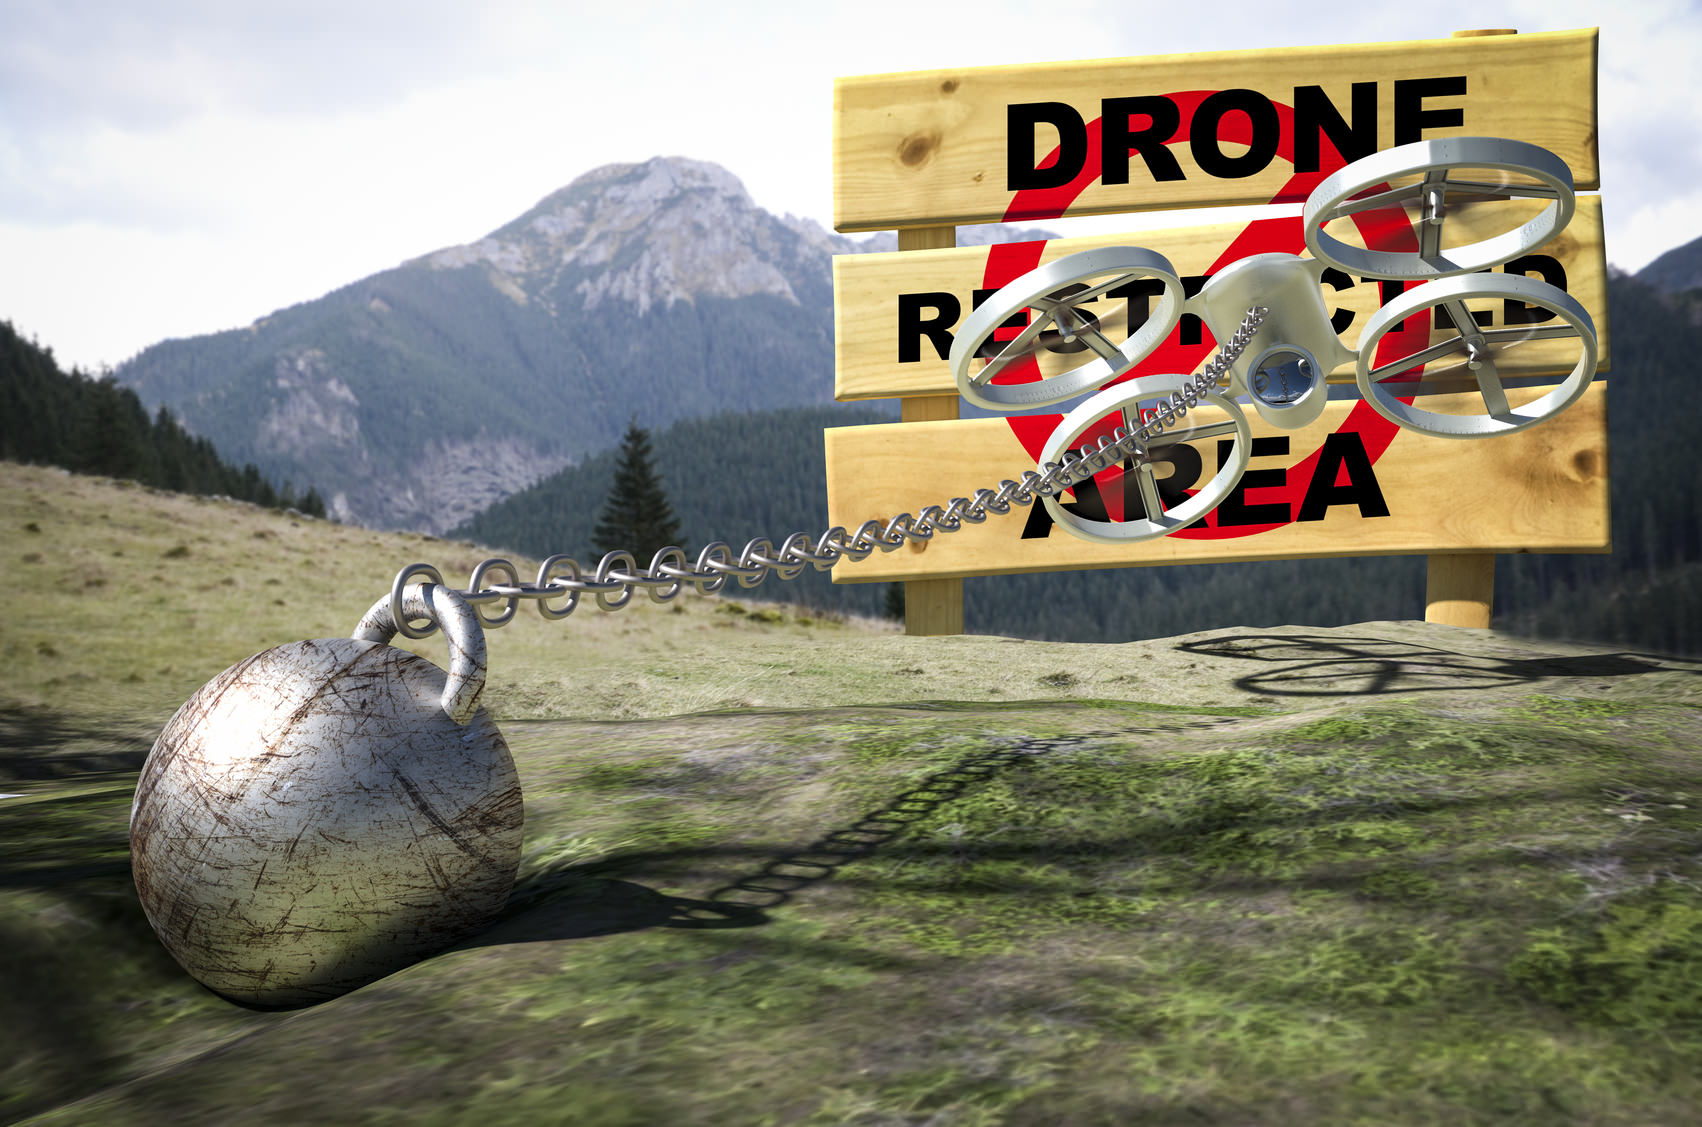
As noted above, you can’t fly a drone within five miles of an airport or above 400 feet. National Parks are off limits too, as are state parks in some states. Even county parks or city parks might have restrictions on flying drones. Many large cities, like New York, for example, have strict no-fly zones as well.
The moral of the story is that you may very well have a client that wants an aerial photo, but you might not be able to provide that service depending on where the client wants the photo taken. There are some online resources you can consult, such as AirMap, but it’s also good practice to check with local agencies or authorities before deploying your drone because there might be local or county ordinances that differ from state or federal regulations.
Flight Times are Limited
It’s easy to assume when you watch incredible drone-based videos that the drone is up there for hours getting incredible footage, but that’s just not the case. There are a few drones near the 30-minute mark for flying time, but the average is far less at around 20 minutes. Consider as well that this flight time is just the manufacturer’s estimate and that it was derived under perfect conditions - that is, no wind to drain the battery faster, no added weight to cause the drone to work harder, and the like. Given that, you might expect 10-15 minutes of flight time when it’s all said and done.
That means if you have a wedding to shoot, you won’t be able to document all the activities of the reception. If it’s a landscape you’re after, don’t think you can fly your drone around all day. The point is that drones are a lot of fun, but considering the flying restrictions, the need for insurance, and the registration requirements, it’s certainly a big responsibility to have one. When thinking about how a drone fits into your business model, think about these critical factors so you’re sure to be protected.
This article about "Buying Drones for Photography" was first published on our website here https://www.photographytalk.com/photography-articles/6902-getting-a-drone-here-are-4-things-to-consider-first
from https://photographytalkcom.blogspot.com/2020/08/getting-drone-here-are-4-things-to.html
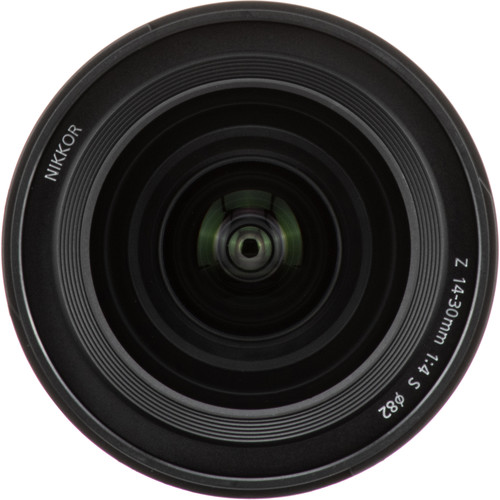
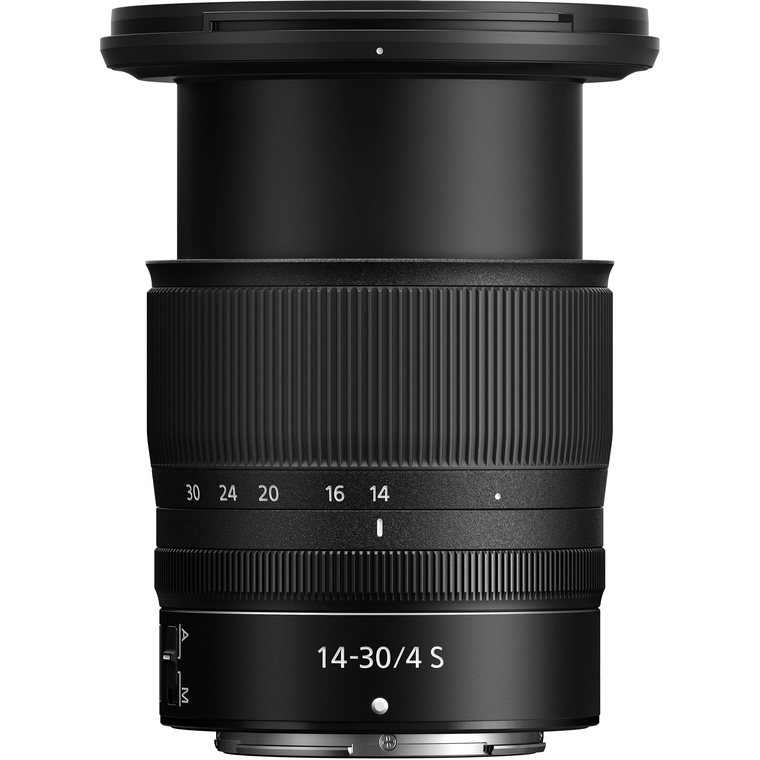
Last week, I offered up my initial thoughts on the Nikon camera lens Z 14-30mm f/4 S.
If you missed it, you can read that article here. Basically, I noted how I think it's the ideal landscape lens for Nikon Z shooters.
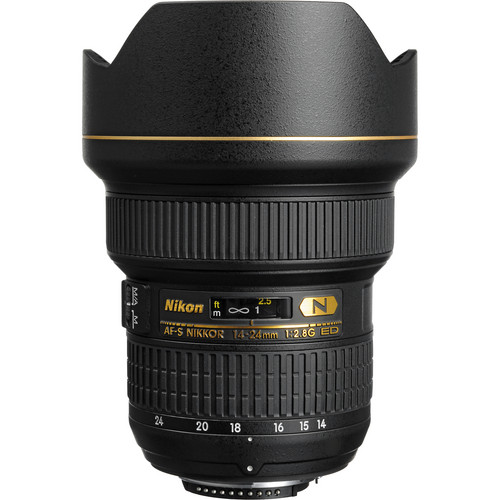
I also mentioned in that article that the Nikon AF-S 14-24mm f/2.8 had long been my go-to landscape lens.
So, this go-round, I wanted to compare these two lenses to see which one comes out on top. Let's get started!
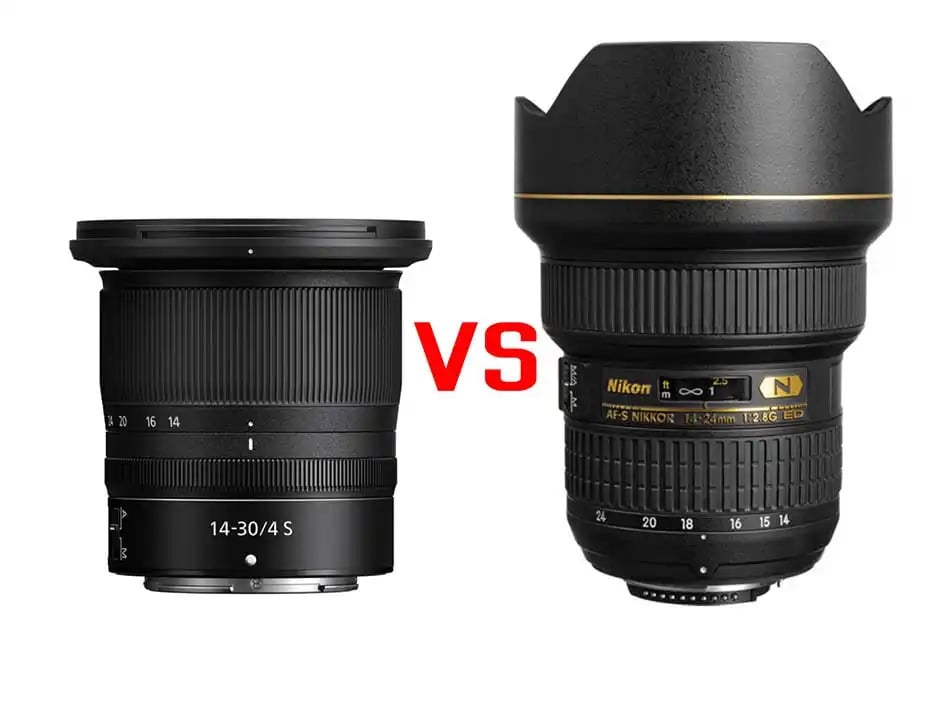 Table of Contents
Nikon Z 14-30mm f/4 S vs Nikon AF-S 14-24mm f/2.8 Specs
First, let's have a peek at the primary specs for these lenses.
Nikon Z 14-30MM f/4 S Specs
Nikon AF-S 14-24mm f/2.8 Specs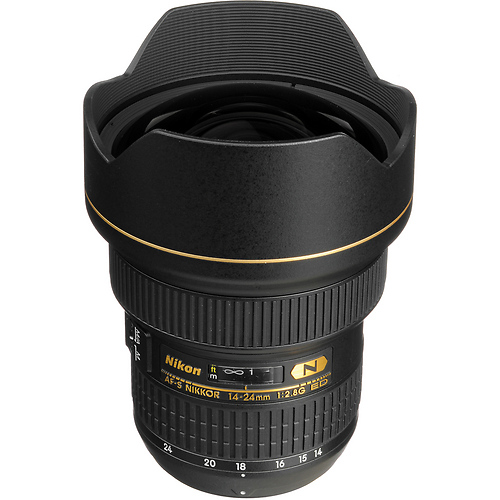
Now, let's unpack some of these features and see how these lenses stack up to one another.
Nikon Z 14-30mm f/4 S vs Nikon AF-S 14-24mm f/2.8 Similarities
Though there are plenty of differences between these lenses, there are some notable similarities, as Jared Polin discusses in the video above.
For starters, though their focal lengths are different, they're quite similar and offer virtually the same versatility from a focal length perspective.
Secondly, both lenses sport an 11.02 minimum focusing distance for those up-close, detailed shots you wish to take.
Third, both lenses have the same maximum aperture of f/22 and nearly identical maximum magnification.
Having tested both lenses (and owned the f/2.8 for over a decade), I can attest to similar build quality as well.
Both lenses feel great in the hand, though there is a significant weight difference (more on that below).
Nikon Z 14-30mm f/4 S vs Nikon AF-S 14-24mm f/2.8 Differences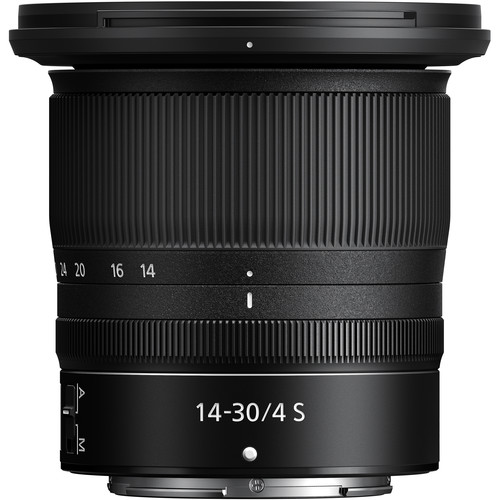
Aside from the obvious differences - the mount, the maximum aperture, and the focal length, these lenses have other distinct differences in terms of their build and functionality.
I think the most salient difference for me is the weight.
Where the 14-24mm f/2.8 weighs a hefty 2.2 pounds, the 14-30mm lens halves that at just 1.1 pounds.
That's a huge difference, particularly when you're a landscape photographer like me and you have to carry your gear far and wide to get the shots you want.
With so much less weight, the 14-30mm is a much easier lens to use, in my opinion.
Along the same lines, the dimensions of the 14-30mm lens make it an easier lens to handle than the f/2.8.
When collapsed, the 14-30mm is about 3.5 inches long while the 14-24mm is 3.86 inches long. That might not seem like a huge difference, but like the weight difference, the length of the lens certainly impacts its handling performance.
That being the case, the 14-30mm lens simply feels better in the hand. You feel more capable of holding it still as well.
Of course, another big difference between these lenses are their maximum apertures.
I was hesitant about the 14-30mm f/4 at first because I'm so used to having the option of shooting at f/2.8 with my 14-24mm lens.
But here's the thing - as a landscape photographer, I virtually never shoot at f/2.8. I honestly couldn't tell you the last time that occurred.
So, from that perspective, the fact that my old 14-24mm lens is faster really doesn't make a difference for the type of work I usually do.
Nikon Z 14-30mm f/4 S vs Nikon AF-S 14-24mm f/2.8 Build Quality & Handling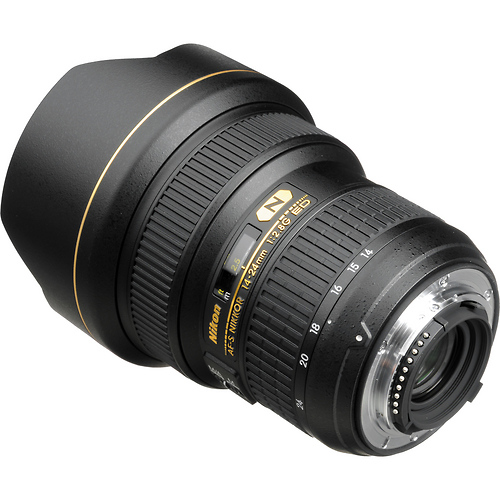
As noted above, the older AF-S 14-24mm f/2.8 is a beast of a lens that weighs over two pounds.
When you're used to that heft, it's almost off-putting the first time you pick up the 14-30mm lens because it's so light.
Now, the 14-30mm lens is well built, but to think that it's of equal build quality as the older 14-24mm is a mistake.
The 14-30mm lens is extremely streamlined with tons of plastic components. And while it's high-end, durable plastic, it's still plastic. A small concern is whether this lens will prove as durable over the years as the 14-24mm has.
That concern stems from the fact that the 14-30mm lens has an external zoom.
And while there are tons of seals that should keep the elements out, I worry that dust and sand will find its way into the barrel. Time will only tell, but if dust and sand get in there, it'll be difficult for the lens to zoom anymore.
By contrast, the mostly metal 14-24mm f/2.8 has performed well over the years in all sorts of conditions - rain, snow, heat, cold, dust - you name it.
And even though it's a big, heavy lens, it's very balanced and feels solid in the hand. This isn't to say the 14-30mm doesn't feel good in the hand...it's just a different feeling since it's so small and lightweight.
Nikon Z 14-30mm f/4 S vs Nikon AF-S 14-24mm f/2.8 Image Quality
Of course, it really all comes down to image quality, and these lenses are quite close in that department.
When comparing these lenses at 14mm, the 14-24mm f/2.8 is definitely sharper. In fact, I've found over the years that the 14-24mm is sharpest at 14mm, and in an intensive weekend of testing the 14-30mm in Death Valley, I found the 14-30mm to be the least sharp at 14mm.
Changing the aperture to f/4, f/5.6, and beyond, the 14-24mm lens is still sharper in the corners.
See the 14-30mm f/4 in action in the video above by Kai W.
At 16mm, the 14-30mm lens starts to get much sharper, especially in the center.
This is particularly noticeable at f/4, though that mid-frame sharpness is a continuing theme for the 14-30mm lens throughout its aperture range.
The 14-24mm, however, continues to be sharper in the corners at all apertures.
The 14-30mm lens really begins to shine at longer focal lengths. When shooting at 24mm, the 14-30mm is noticeably sharper in the middle and particularly at the corners. This is especially true once the aperture reaches f/5.6 and above.
At that point, the 14-24mm f/2.8's performance is markedly "worse" (it's still pretty damn good) than the 14-30mm lens.
Get more details on the 14-24mm f/2.8 in the video above by DigitalRev TV.
Nikon Z 14-30mm f/4 S vs Nikon AF-S 14-24mm f/2.8 Pros & Cons
As with any gear, there are plenty of pros and cons with both of these lenses.
Nikon Z 14-30mm f/4 S Pros & Cons
For me, the lightweight design and small size are the biggest pro of this lens. It's simply a dream to handle!
Likewise, you can use 82mm filters with it and not get a ton of vignetting, so that's a definite bonus.
The sharpness is great, too, especially at 16mm and above. The autofocus system is super accurate and incredibly quiet as well.
On the downside, I'm not convinced it's a super durable lens. Though it's weather-sealed, the fact that it's an external zoom gives me a little bit of pause.
Corner sharpness isn't mind-blowing by any means when shooting at 14mm. It's not terrible, but certainly not as good as the 14-24mm f/2.8 in that department.
Nikon 14-24mm f/2.8 Pros & Cons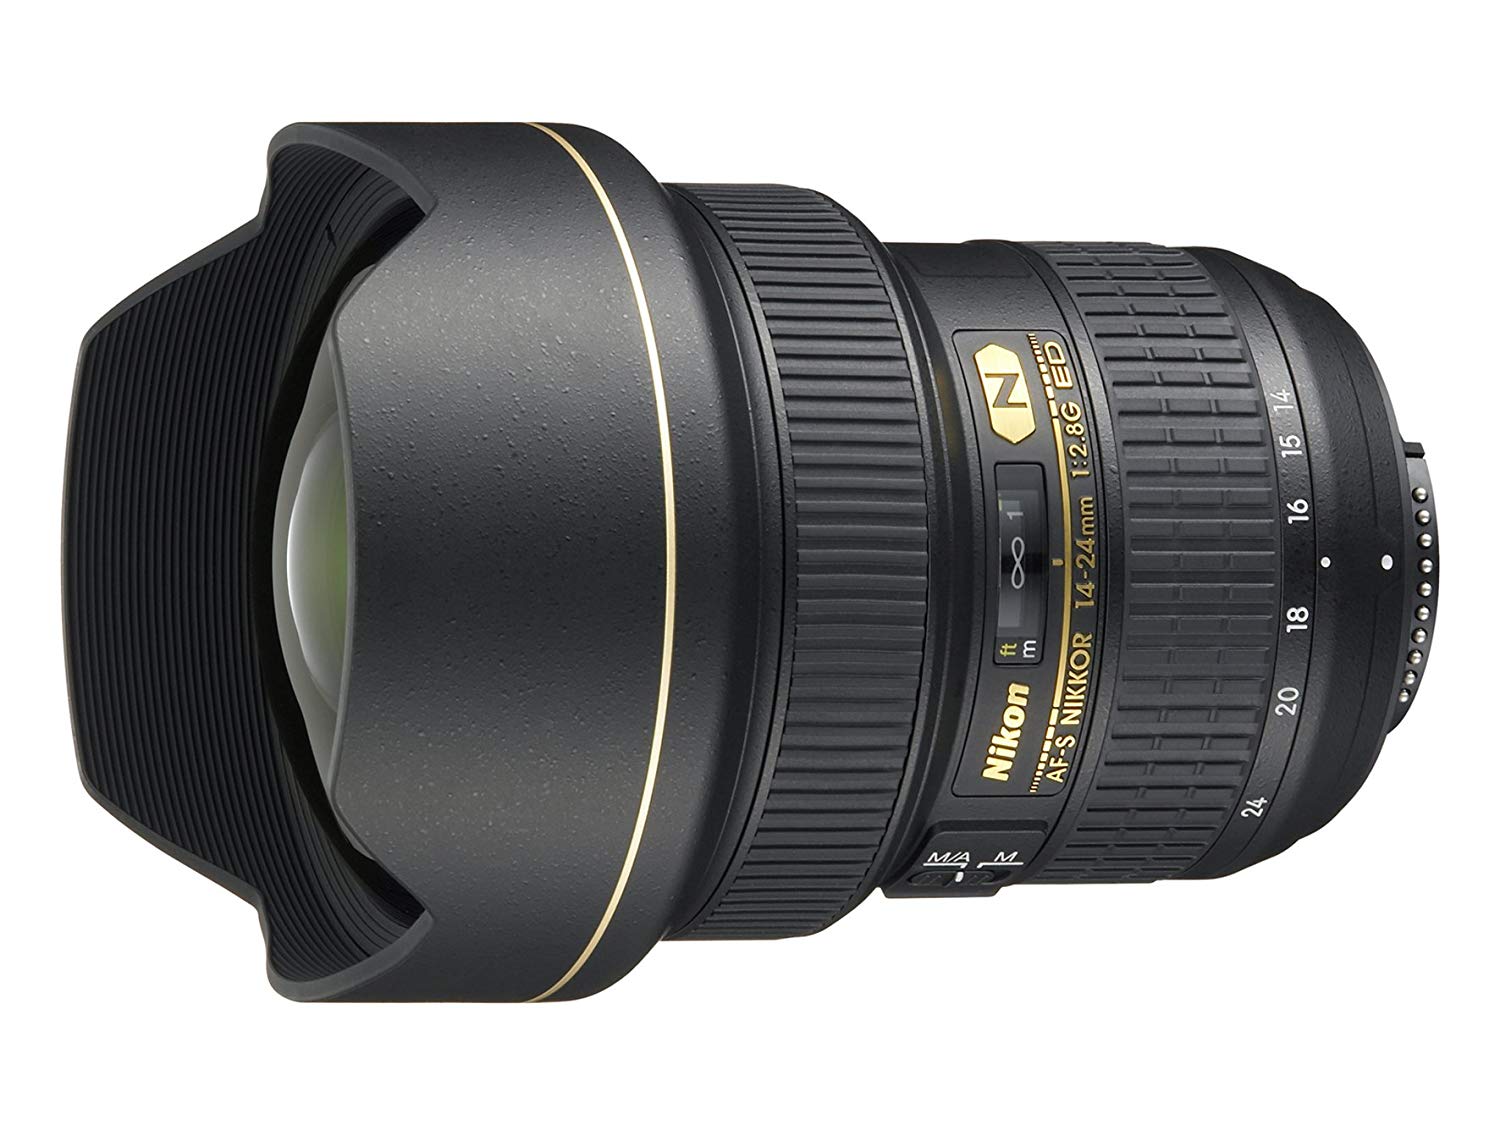
The excellent optical performance of this lens cannot be understated, particularly at 14mm. It's just fantastic.
The weather sealing and build quality of this lens are also off the charts. As I mentioned earlier, I've put this thing through its paces over the years without ever worrying if it would make it through unscathed.
Like the 14-30mm lens, the f/2.8 has a great autofocus system that is blazing fast and supremely accurate too.
As far as cons go, the biggest one is the weight of this lens. I got used to it over the years, but, man, she's a big one.
There's also noticeable distortion, which, though that can be corrected, it's still a bit of a downer.
I also don't like the fact that you have to use a special filter holder to use filters with this thing.
Nikon Z 14-30mm f/4 S vs Nikon AF-S 14-24mm f/2.8 Verdict
At the end of the day, the comparison between these lenses is a surprisingly close call.
Both have their strengths and weaknesses, to be sure. But taken in totality, I'm not sure either lens comes out on top here.
I honestly thought that in comparing these lenses that I'd find the 14-30mm f/4 to be far, far better than the 14-24mm f/2.8. That's just not the case.
Instead, both lenses are pretty dang good, if for different reasons.
If you're a landscape photographer and you have a Z-series camera, I think the 14-30mm is a great investment - certainly better than using the 14-24mm f/2.8 and the FTZ adapter.
That said, if you already have a 14-24mm f/2.8, there's not much reason to buy a 14-30mm for your Z6 or Z7. You can get similar work out of your older F-series lens.
This blog post about "Nikon Z 14-30mm f/4 S vs Nikon AF-S 14-24mm f/2.8 Lens" was first published on our website here https://www.photographytalk.com/nikon-z-14-30mm-f-4-s-vs-nikon-af-s-14-24mm-f-2-8 from https://photographytalkcom.blogspot.com/2020/08/nikon-z-14-30mm-f4-s-vs-nikon-af-s-14.html
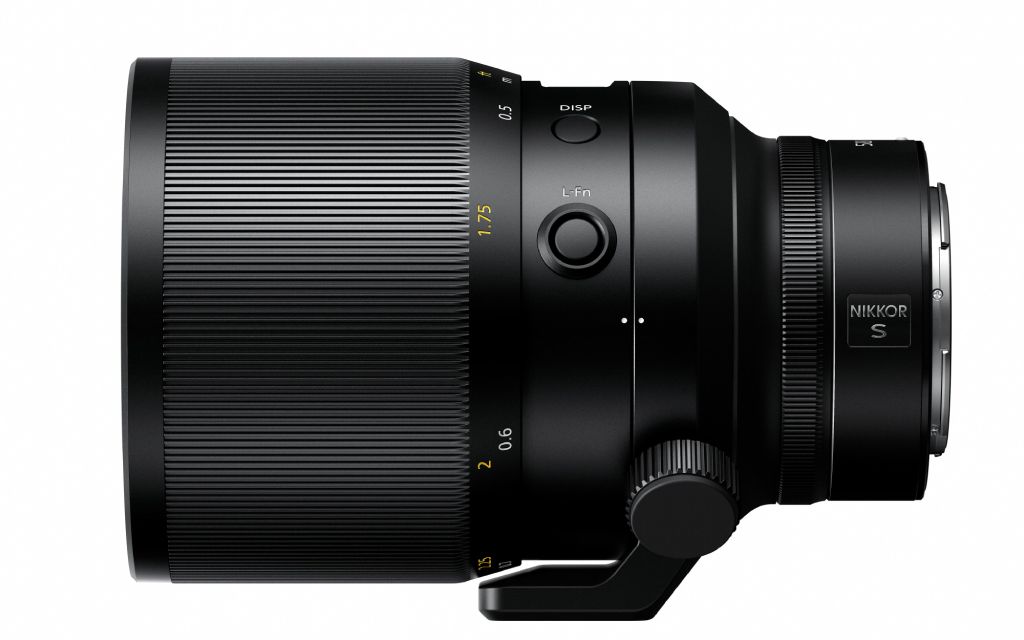
Rumors have swirled for a good long while about the Nikkor Z 58mm f/0.95 S Noct lens.
But while specs have leaked over the last year or so, the price had remained a mystery - until now.
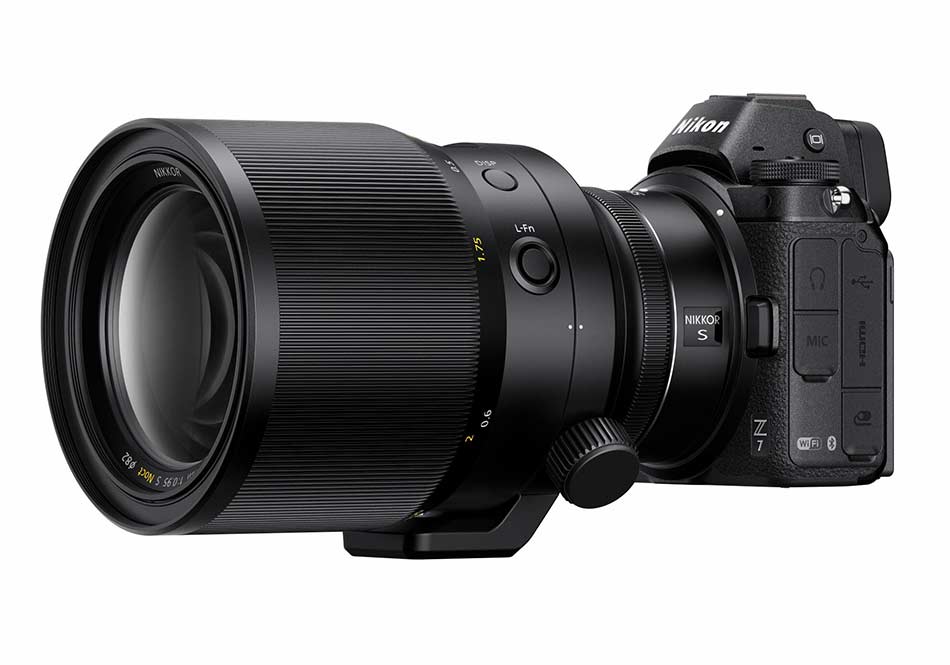
The lens is due to launch imminently, but before Nikon could get the lenses onto store shelves, its massive $7,996.97 price tag was leaked by Nokishita.
Granted, we’re talking about the fastest Nikkor lens ever made, so a big price tag was expected. I, for one, didn’t expect the price to be quite that large.
For the longest time, most Nikon cameras enthusiasts expected it to be in the $6,000 ballpark. Turns out that estimate wasn’t even close!
Designed specifically to highlight the capabilities of the Z-series cameras, this lens is described by Nikon as having “thrilling new capabilities” including “vast depth-of-field control and elaborate bokeh for portraiture.”
Furthermore, Nikon purports that this lens offers “superb point-image reproduction and low-light performance for night landscapes and astrophotography.”
On the construction side of the lens, it’s positively enormous (as you’d expect with such a fast lens) and looks awfully sleek and beautiful, as you can see in the video below by NewsShooter:
I can imagine there are plenty of Nikon shooters out there salivating at the opportunity to try this lens. I cannot imagine, however, that there are as many photographers jumping at the chance to drop $8,000 on it.
Aside from the price, another potential turnoff for some shooters is that this lens is manual focus only. We’ll see if this factor and the price point lead to sluggish sales or if these things fly off the shelves. Rumor has it that this lens will launch this week.

A better option (and a less painful one) is to get rid of older gear that you no longer need or use.
And I’m not talking about selling it on eBay, either. Instead, I use Lensfinder to sell my old lenses, filters, and cameras, that way I keep my gear collection nice and streamlined while getting a fair price for my gear.

Lensfinder doesn’t buy your gear directly. Instead, it’s a marketplace designed by photographers, for photographers, where you can buy and sell used gear without the games you find on Craigslist or the hassle (and expense) of eBay.
With built-in tools like fraud protection, seller ratings, and direct communication with sellers, it’s your one-stop-shop for unloading your old stuff.
Give Lensfinder a try today, and see if you can start saving up for that $8,000 lens you covet!
This article about "Nikon’s New Nikkor Z 58mm f/0.95 S Noct Lens" was first published on our website here https://www.photographytalk.com/nikon-new-nikkor-z-58mm
from https://photographytalkcom.blogspot.com/2020/08/rumor-nikons-new-nikkor-z-58mm-f095-s.html
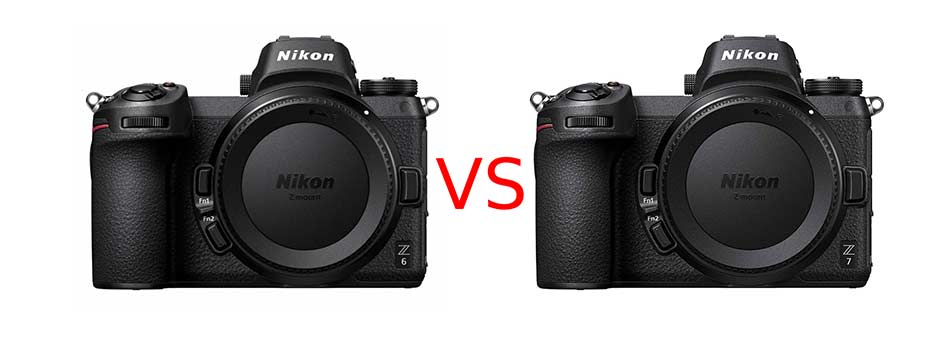
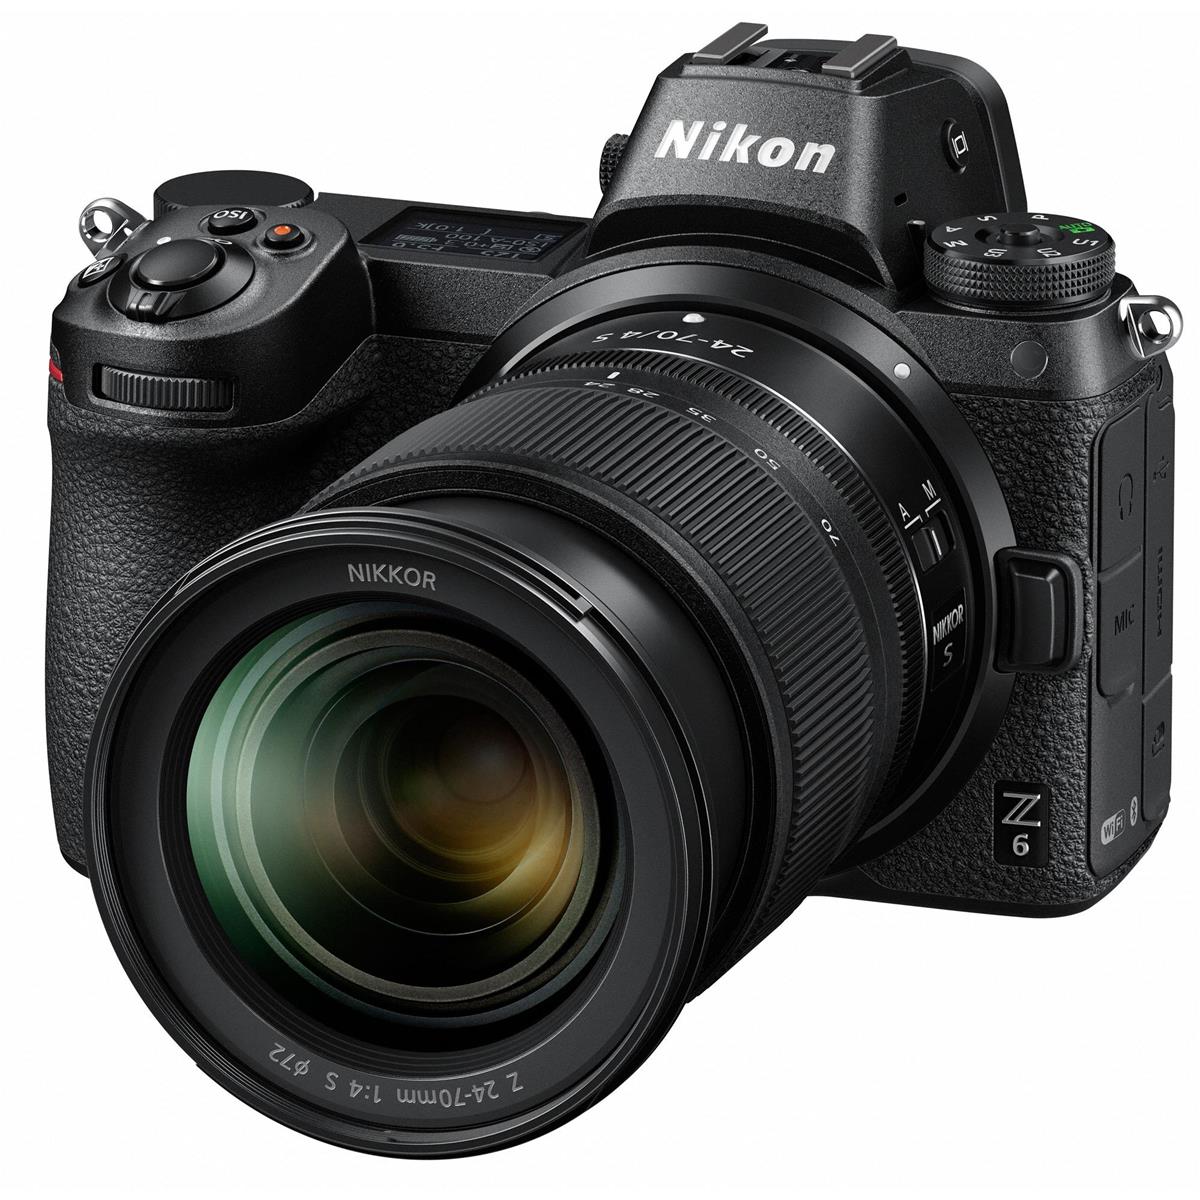
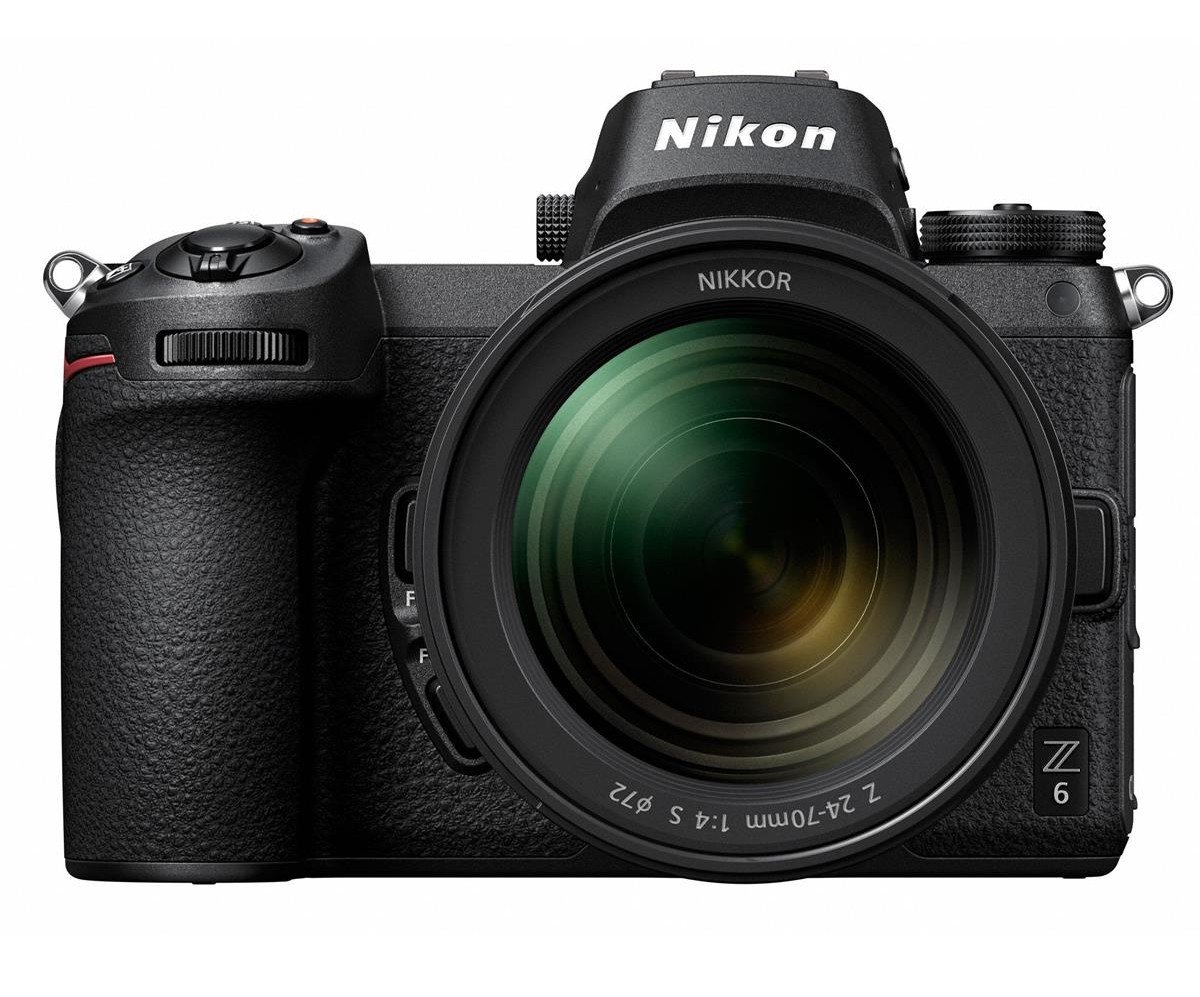
I think we can all agree that Nikon knocked it out of the park with their Z6 and Z7 cameras.
I've field tested both of these rigs and found them to have many similarities, yet enough differences that make them distinct cameras on their own with distinct advantages over the other.
You can check out my Nikon Z6 review and my Nikon Z7 review for in-depth discussions of these cameras and their individual merits.
In this article, however, I want to put these cameras head-to-head on a number of different metrics so you can make an informed decision about which one is best for your needs.
Nikon Z6 vs Nikon Z7: Essential Specs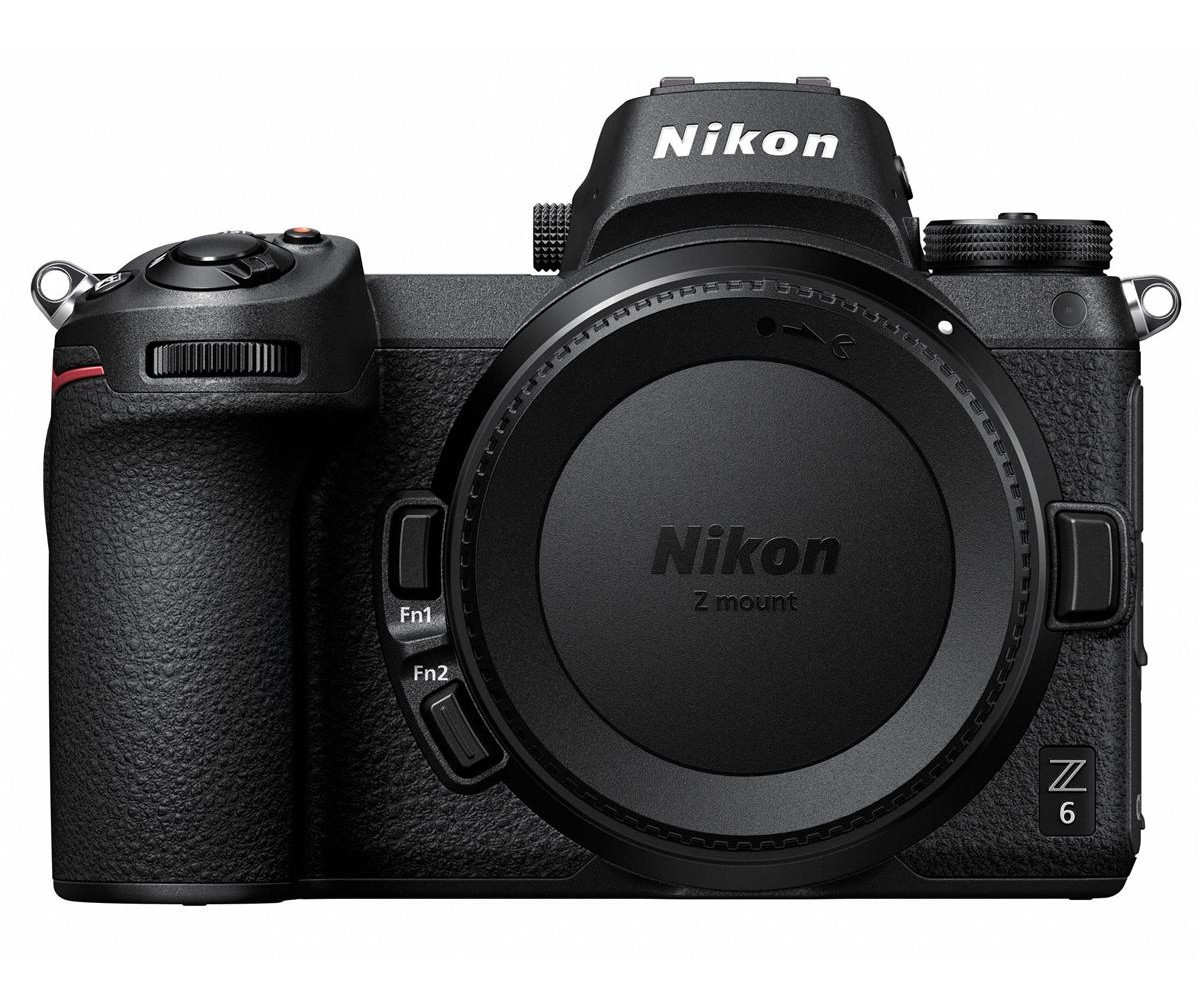
In looking at the primary specifications of these cameras, you'll note a lot of similarities. In fact, both cameras share the following specs:
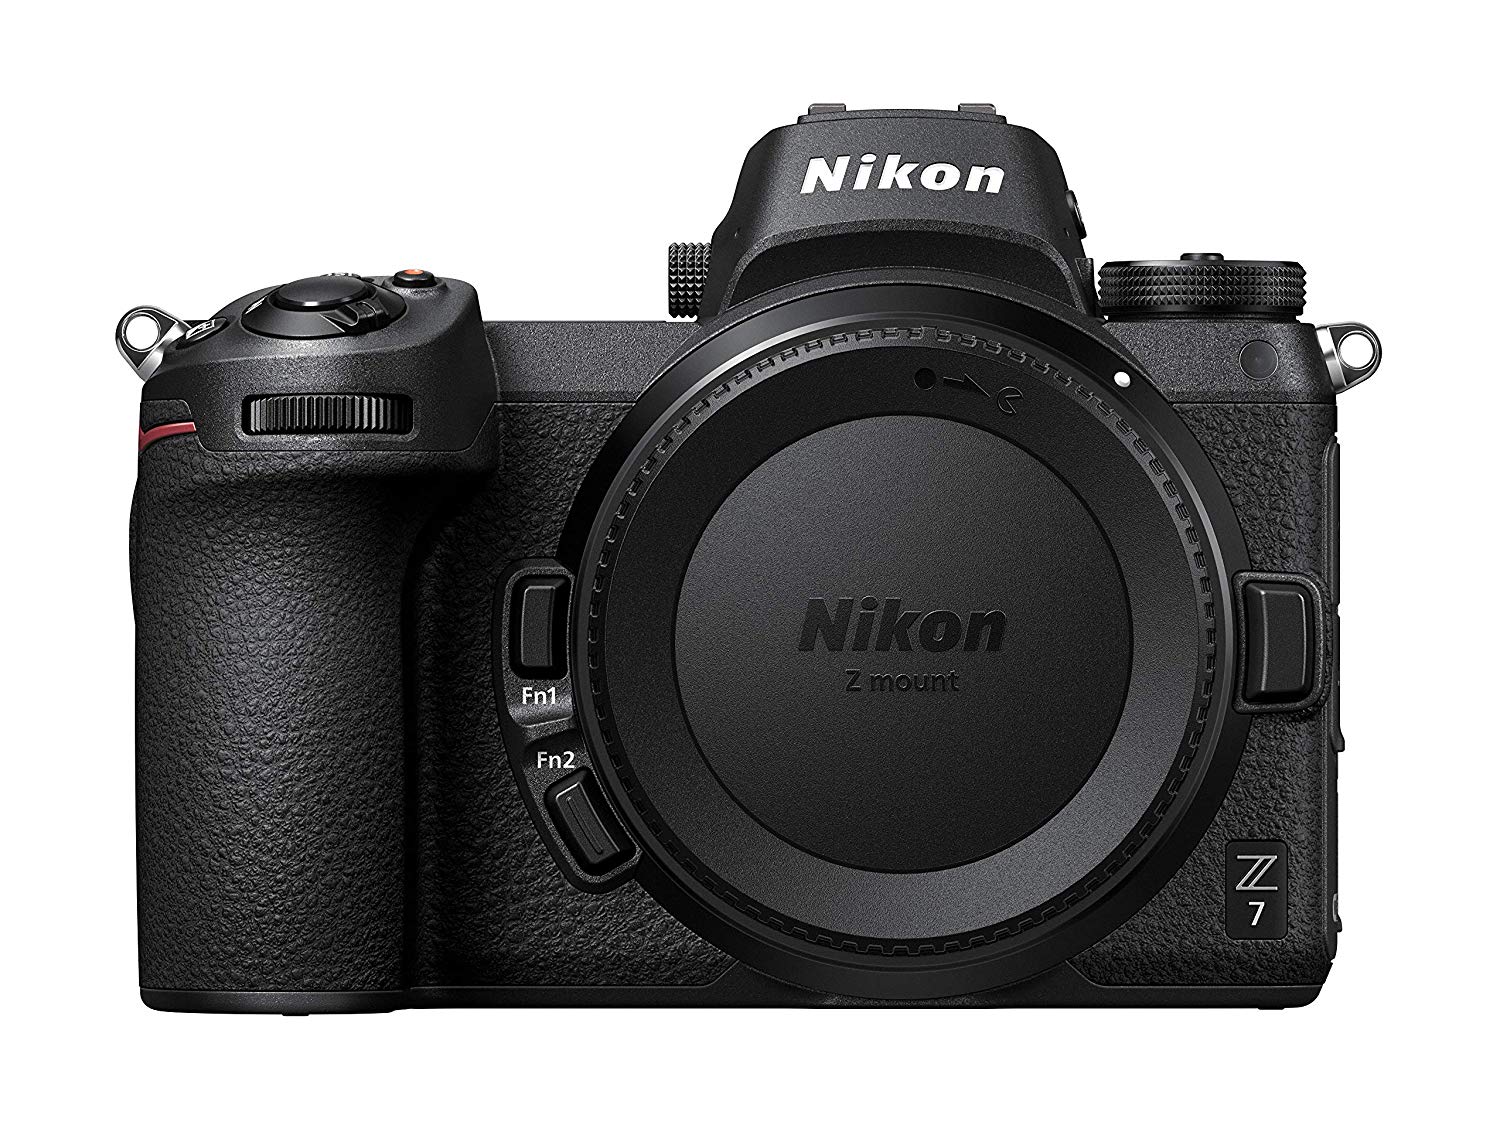
Additionally, the Nikon Z6 and Z7 are the same size and weight with the same dimensions, the same grip, the same button layout, and offer the same functionality in terms of ease of use and handling.
Both cameras use the new Z-mount lenses from Nikon as well.
So, at least from these perspectives, these cameras are all but indistinguishable.
There are, however, some significant differences.
Nikon Z6 vs Nikon Z7 Sensor
Though both of these cameras have 35mm high-resolution backside-illuminated sensors, the Z6 has "only" 24.5-megapixels while the Z7 has 45.7-megapixels.
It's important to note that the Z6's sensor has a low-pass filter and the Z7's does not.
This is important because the lack of a low-pass in the Z7 means its sensor produces images with improved details and added sharpness. See the Z7 in action in the video below by AdoramaTV:
In that regard, the Z7 is a better camera from an image quality standpoint. This isn't to say that the Z6 isn't also capable of producing beautifully detailed, sharp photos, but the Z7 is a step above.
Winner: Nikon Z7. If you intend to create large prints, its sensor is better equipped to create the image files needed to do so.
Nikon Z6 vs Nikon Z7: Autofocus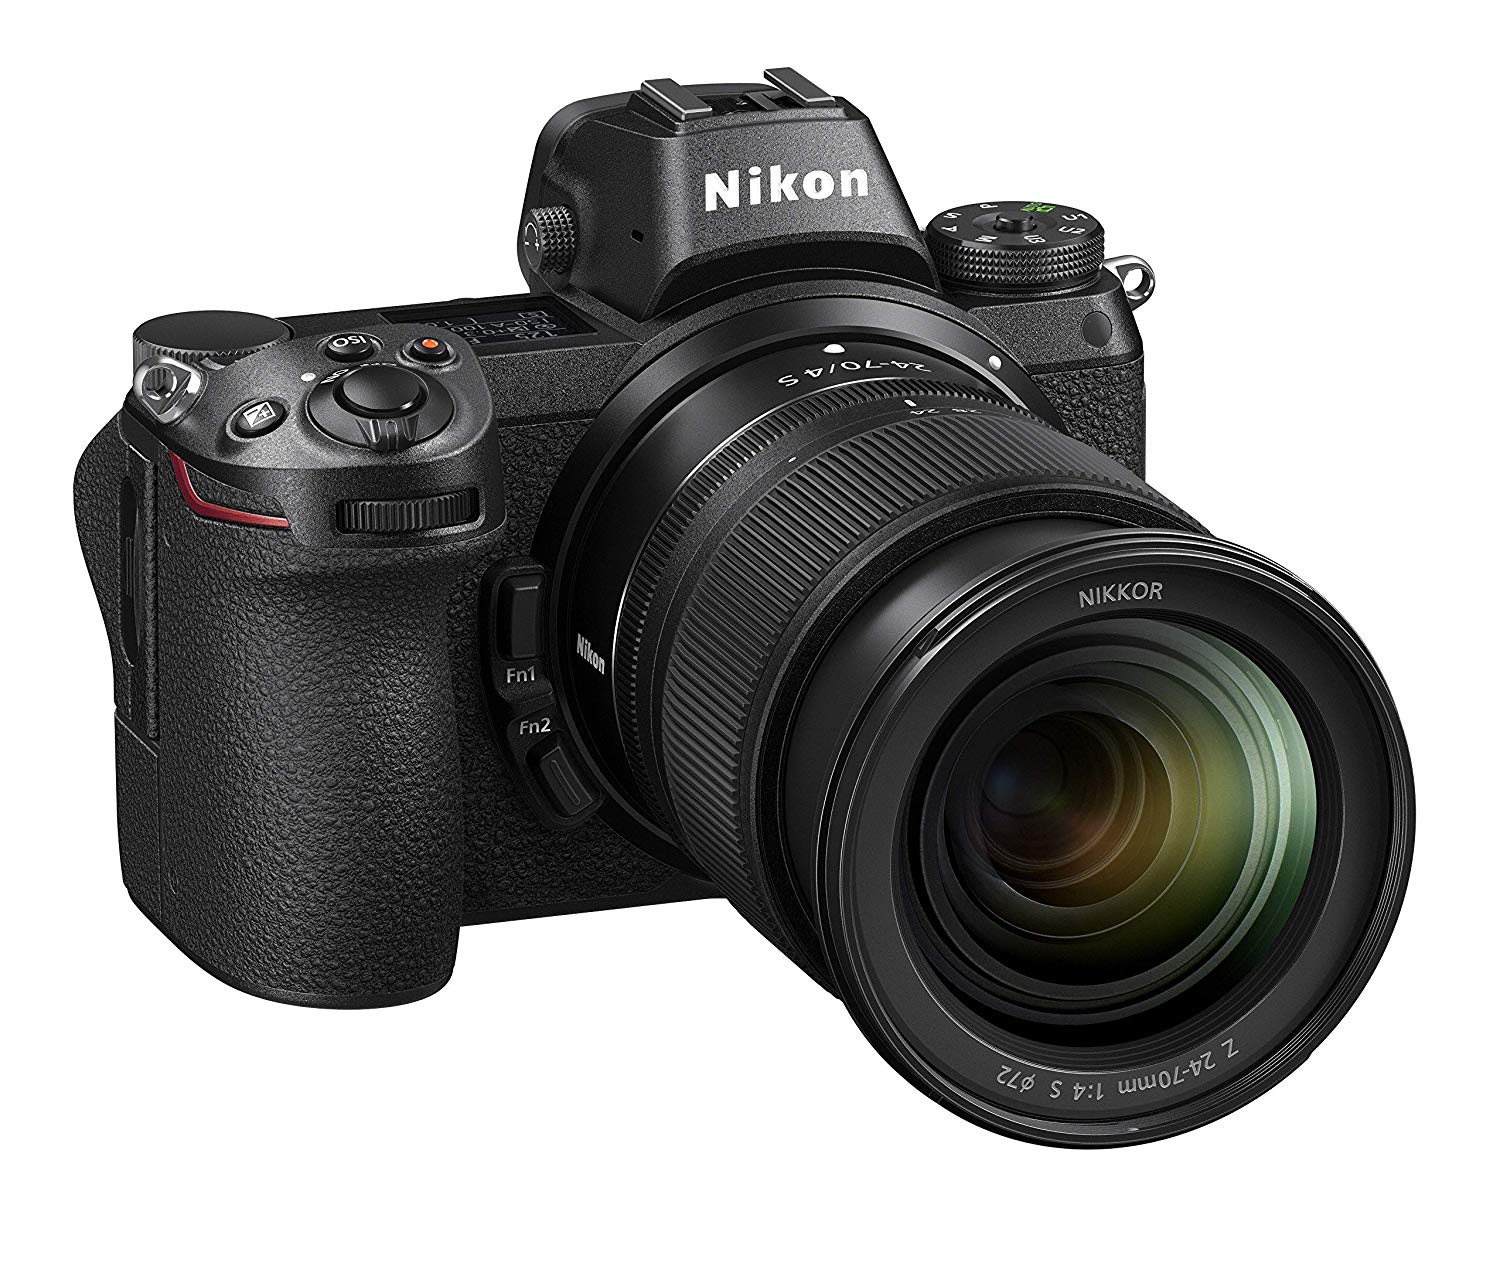 Nikon Z7 Nikon Z7
Both the Z6 and the Z7 sport a hybrid autofocus system that makes use of contrast-detect and phase-detect autofocus points. These autofocus systems have identical 90-percent sensor coverage, multiple settings to customize the focus area, and excellent subject-tracking performance.
Additionally, both cameras have face detection focus for both still photography and video.
 Nikon Z6 Nikon Z6
The major difference is in the number of autofocus points. The Z6 is well-equipped with 273 autofocus points, but the Z7 has 220 more for a total of 493.
So, on paper, the Z7 would be the camera to get if you're looking for premium autofocus performance.
However, most photographers won't notice a difference between these two cameras from an autofocus standpoint. After all, once you get into the hundreds of AF points, you've got plenty of capability!
Winner: Nikon Z7. The nod goes to the Z7 simply for the sheer number of AF points, but the Z6 is no slouch.
Nikon Z6 vs Nikon Z7: Continuous Shooting Speed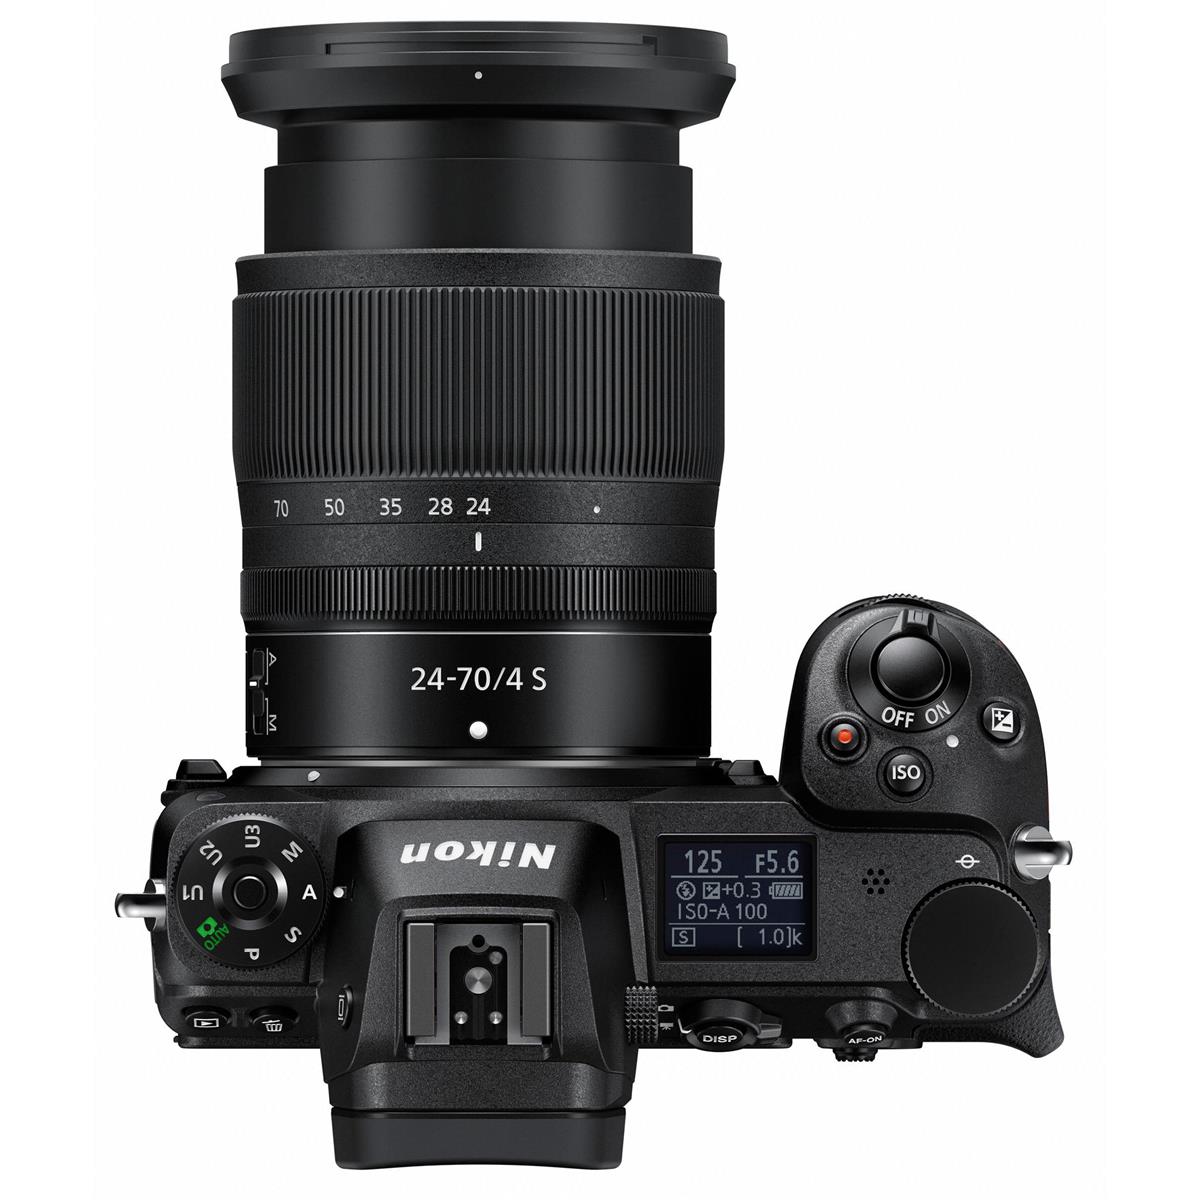 Nikon Z6 Nikon Z6
These cameras are both equipped with superb continuous shooting speeds - the Z6 clocks in at 12 fps while the Z7 offers a more than respectable 9 fps.
Again, most photographers won't notice a difference in performance here, but if you're a sports or wildlife photographer, that extra 3 fps can make a world of difference.
Having said that, both of these cameras have some idiosyncrasies that make their continuous shooting speeds not all that great in practice.
 Nikon Z7 Nikon Z7
First, both cameras have a minuscule buffer, so neither camera can hold their maximum shooting speeds for more than a couple of seconds before significant slowdown occurs.
Second, both of these cameras lock the exposure before continuous shooting commences, meaning, if you need to reset the exposure, you'll have to wait until burst shooting ends.
Winner: Nikon Z6. That extra 3 fps wins it for the Z6.
Nikon Z6 vs Nikon Z7: Video Capabilities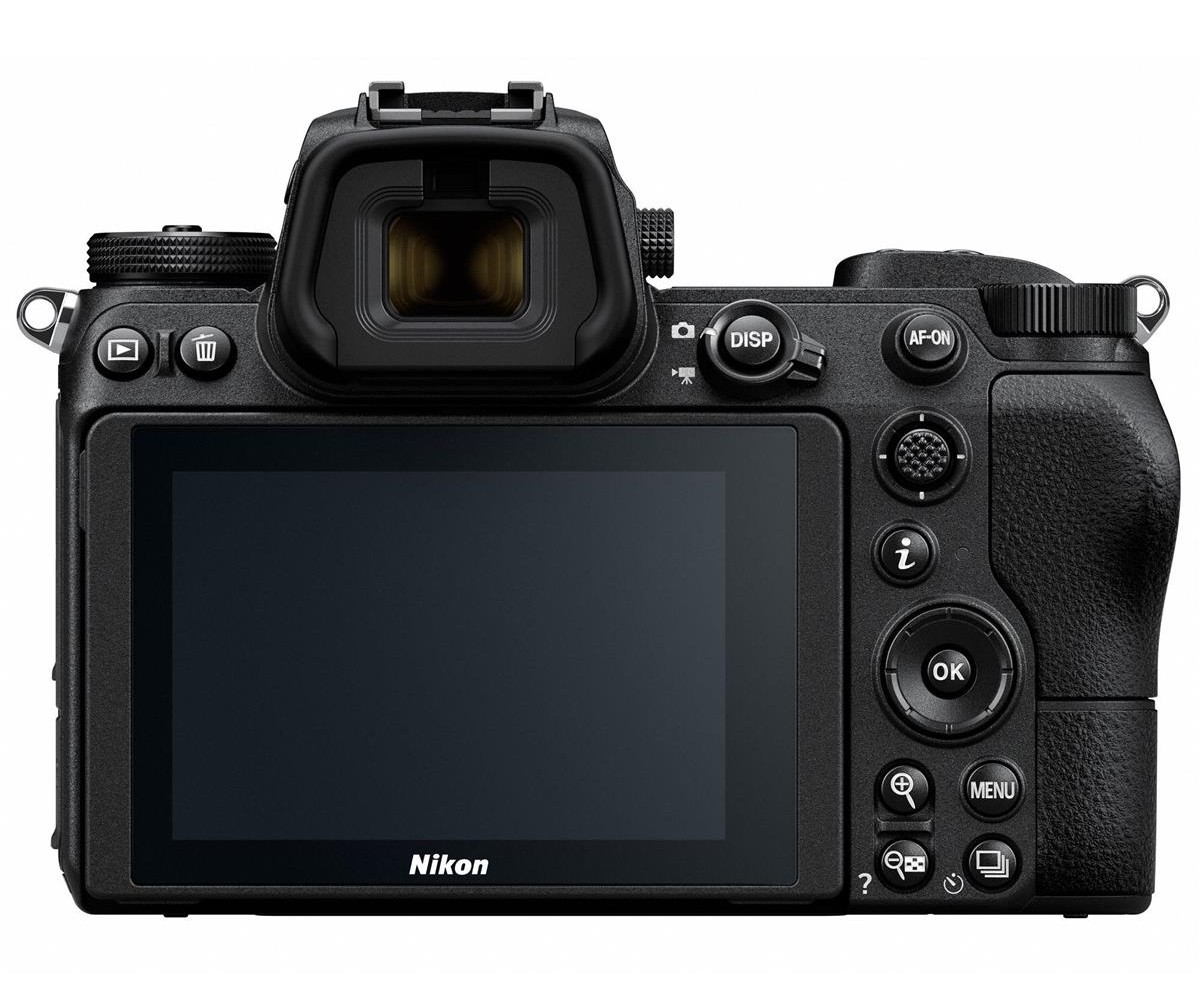 Nikon Z6 Nikon Z6
Aside from their sensor resolution, perhaps the biggest difference between these cameras is in their video capabilities.
I dive deep into this topic in my article on filmmaking with the Nikon Z6 and Nikon Z7, so for a full comparison, check that out.
For our purposes, here, just know that the Z6 is a much better camera for shooting video.
Both cameras have 4K UHD recording at 30 fps and 1080p video at 120 fps.
However, the Z6 is capable of shooting full frame video and the Z7 is not. Instead, the Z7 shoots 4K UHD video with a significant crop, which means reduced video quality.
Get a detailed look at the Nikon Z6 in the video above by AdoramaTV.
Winner: Nikon Z6. It's hard to beat full frame 4K UHD!
Nikon Z6 vs Nikon Z7: Price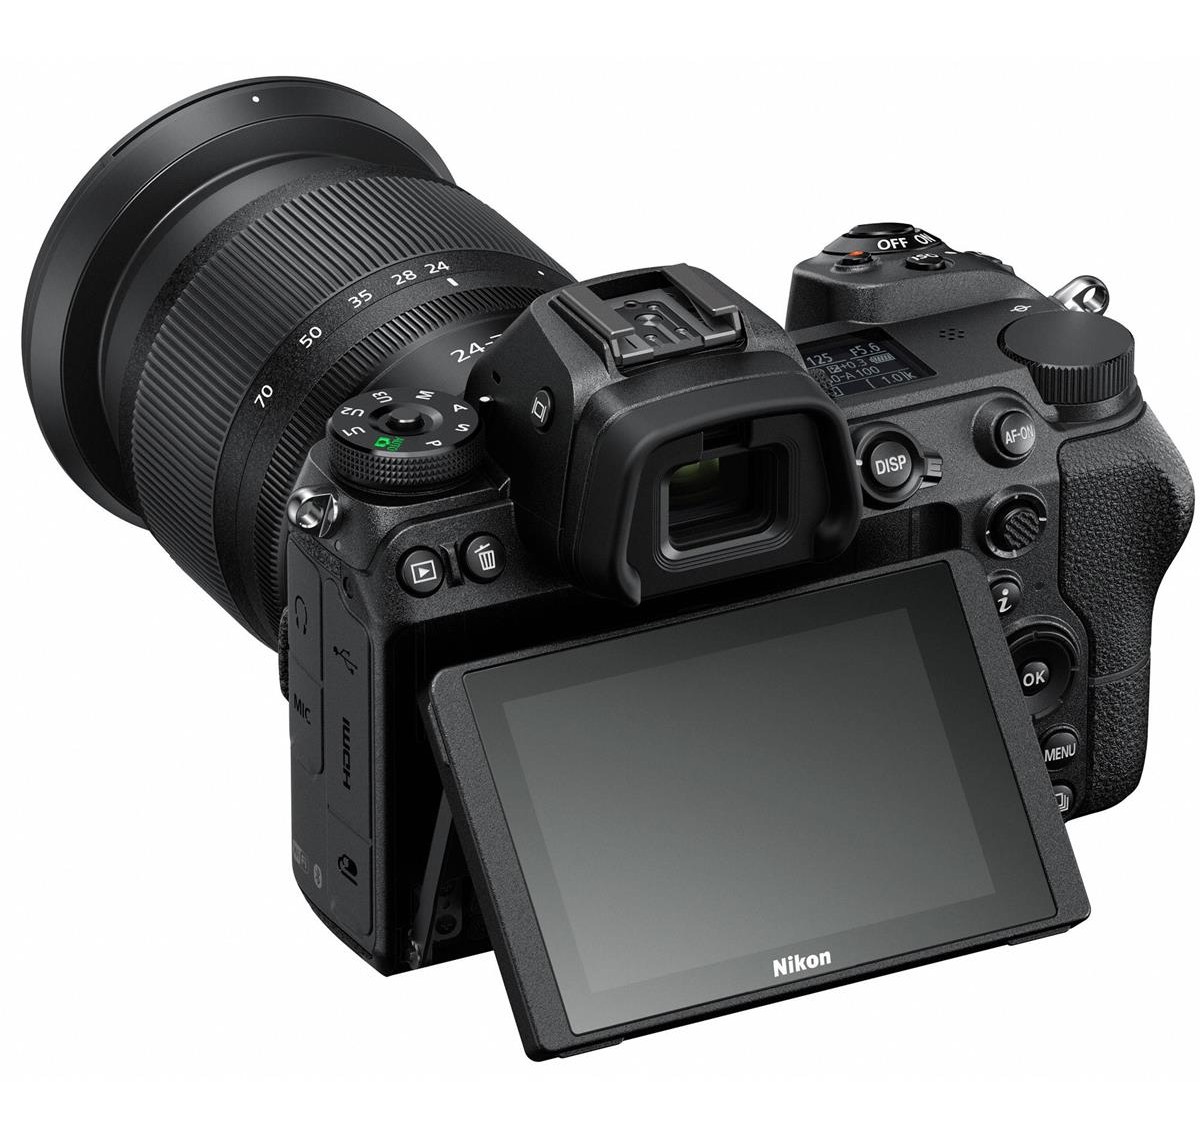 Nikon Z6 Nikon Z6
Since these cameras are so close on so many measures, it might come down to price as the determining factor in your decision.
Currently, Adorama has the Nikon Z6 is $1,996.95 for the body only while the Nikon Z7 is $3,396.95 for the body only.
That's obviously not a small difference...
For some shooters, the traits that make the Nikon Z7 a better camera for some photography pursuits are worth the additional $1,400.00. For many other photographers, though, the added expense cannot be justified.
Winner: Nikon Z6. It's a fantastic camera with an excellent price.
Nikon Z6 vs Nikon Z7: Which is Best for You?
As noted earlier, there are plenty of features common to both of these cameras that make them indistinguishable in many ways.
But as we've seen in this head-to-head comparison, the Z7 has a more resolute sensor that results in better image quality. This makes it a better choice for landscape photographers and portrait photographers that want superb detail and the ability to make huge prints.
However, if video or continuous shooting speed are high on your list of priorities, the Z6 is clearly the better choice with 12 fps continuous shooting and full frame video.
Ultimately, either of these cameras is well worth the investment. The one you get will most likely depend on the purpose for which you need it and/or the size of your budget.
This blog post about "Nikon Z6 vs Z7 DSLR Cameras" was first published on our website here https://www.photographytalk.com/nikon-z6-vs-nikon-z7
from https://photographytalkcom.blogspot.com/2020/08/nikon-z6-vs-z7-deciding-which-is-best.html
The Canon 5D Mark III is going on 8 years old, which if you read this site regularly, you’ll know is a sweet spot for getting a camera that has all the features beginner photographers need while saving a ton of money.
The Canon 5D Mark III, just like its follow-up, the Canon 5D Mark IV, features incredibly detailed images in both RAW and JPG and offers full HD video.
The one complaint I had about the Canon 5D Mark III when it came out was that it was a bit pricey, but nearly a decade later and this may be the perfect full-frame DSLR for you.
Let’s dive into our Canon 5D Mark III review.
Canon 5D Mark III Specs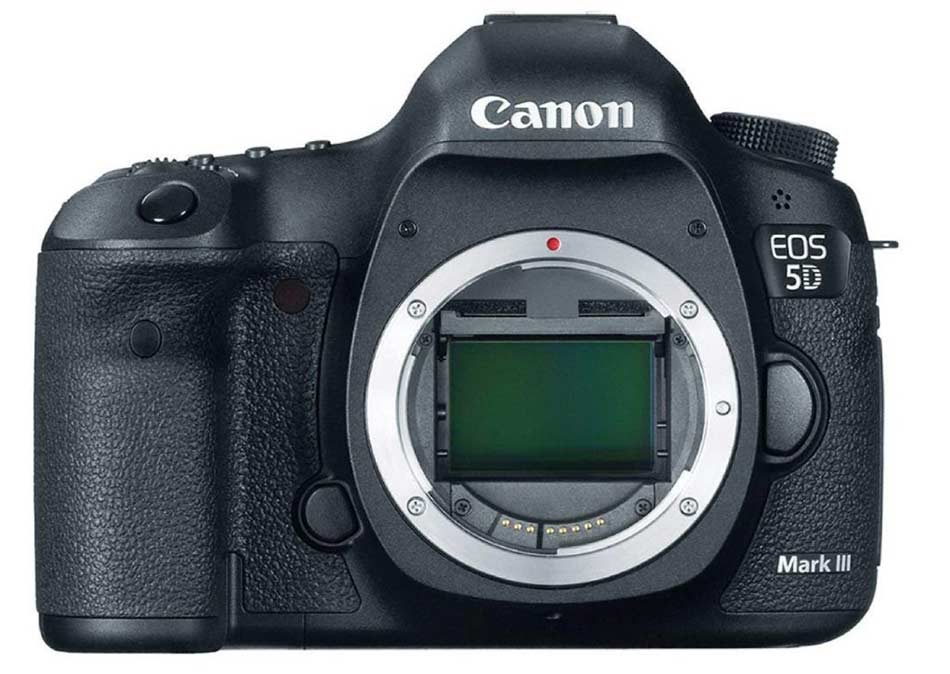
The Canon 5D Mark III features impressive specs for a camera of this age, including a 3” LCD with over 1M-dots, full HD video, and a 22.3MP sensor.
The camera also functions as a good wedding or travel camera because it offers great low-light shooting.
Jon Rettinger covers all there is to love, and a few things to not, in his overview above.
Other Canon 5D Mark III Specs:
Recommended 5D Mark III Books
Canon 5D Mark III Body & Design
The Canon 5D Mark III features a slightly smaller screen, 3.2”, than other Canon DSLRs, but this doesn’t mean Canon left out the customizable controls.
All of your shooting settings can be set with only your right hand, which is grand for me, but wouldn’t be for anyone who is left-handed and generally left out of camera designs.
It also features dual card slots, a live view/video switch you can easily get to with your thumb, and some buttons that were new on this camera, like Picture Styles, Multiple Exposure, and HDR.
Canon 5D Mark III Build & Handling
The Canon 5D Mark III is built with magnesium alloy and polycarbonate, making it light but sturdy.
The body is dust and weather-sealed, fairly efficiently, and there is a rubber-textured grip for your fingers to ensure you can keep a tight hold on it.
It is a little bigger than similar cameras that have come out in the past few years, which is to be expected, but it still weighs under 2 lbs so it should be comfortable for just about everyone.
Canon 5D Mark III Video Performance
Chad Soriano walks you through a variety of shots with his video test above.
While the Canon 5D Mark III doesn’t feature 4K video, and so probably isn’t the camera for videographers, it does feature Full HD video and can shoot for up to 30 minutes at a time.
As Joshua Zucker showcases, this camera’s low-light capabilities are best exemplified when shooting video. It can shoot at 30, 25, or 24fps.
Canon 5D Mark III Price
Since the Canon 5D Mark III is so old it is no longer available new, but Gear Focus features multiple Canon 5D Mark IIIs starting at $800.
And, since Gear Focus is a marketplace made by photographers, for photographers, if you don’t see the exact version of this DSLR you want today, it may be on the site tomorrow.
I use Gear Focus when I’m looking for a good deal, but don’t want to get ripped off by sellers. That’s because unlike Craigslist, Gear Focus has built-in fraud protections so you can buy with confidence.
In fact, all orders and transactions on Gear Focus are monitored by seasoned photographers and videographers who keep an eye out for fraud. What’s more, sellers on the site are securely verified via email and phone before they’re allowed to list a single item. If that doesn’t give you confidence to buy on Gear Focus, I don’t know what will.
This post about "Canon 5D Mark III DSLR Camera" was first published on our website here https://www.photographytalk.com/is-the-canon-5d-mark-iii-still-worth-it-in-2020
from https://photographytalkcom.blogspot.com/2020/08/is-canon-5d-mark-iii-still-worth-it-in.html
The Canon EOS M6 Mark II is the latest mirrorless camera from Canon’s M lineup, and it is primarily aimed at semi-professionals who live their life on the move.
Some notable features of this camera include 33 MP APS-C sensor, 4K video, and 14 fps burst shooting. Moreover, as most of the other mirrorless models, it is very compact and lightweight. For compact and lightweight affordable cameras, you might like to read Canon M50 review done by PhotographyTalk.com.
Although it has some amazing features, downsides of Canon’s new mirrorless camera are that it lacks an EVF (electronic viewfinder) and environmental sealing. Also, its battery life is somewhat disappointing.
The M6 II was announced in August (2019) and it will be available for purchase at the end of September. In this Canon EOS M6 Mark II review, we will discuss all the advantages and disadvantages of this camera so you can decide if it’s worth buying.
Table of contents:
Canon EOS M6 Mark II Specs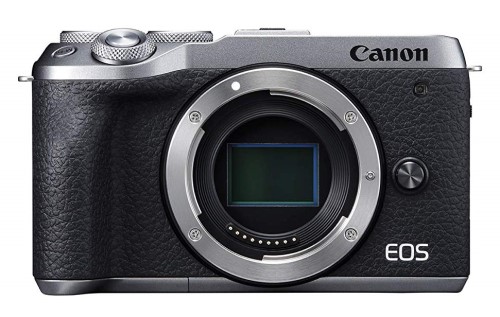
On paper, the specifications of the Canon M6 II seem very interesting. The camera revolves around a 33.0MP APS-C (22.3 x 14.9 mm) CMOS sensor and Digic 8 processor, while it has a native ISO sensitivity range of ISO 100 to 25600.
The Canon M6 II is the highest resolution APS-C camera. It will capture the tiniest details and give you the flexibility to crop images without losing much quality. Additionally, the camera can save files in RAW format so you can also improve images in post-production.
With a burst shooting speed of 14 fps (30fps RAW burst shooting) with AF and AE tracking and a top shutter speed of 1/16000 second, this camera does a great job in photographing moving targets. Moreover, it uses the phase-detection autofocusing system with 143 AF points, and it has Dual Pixel AF with Eye AF Servo.
Overall, the Canon EOS M6 Mark II comes with a lot of improvements over its predecessor. It has a bigger resolution (33MP vs 24MP), more autofocus points (143 vs 49), faster burst shooting (14 fps vs 9 fps), and higher video resolution (3840 x 2160 vs 1920 x 1080).
There are also some improvements in battery life, but the difference is not substantial. As with the original Canon M6, you can expect to take around 300 shots before you will need to recharge the camera. At least, now there is an option to charge the camera via USB.
Canon EOS M6 Mark II Body and Design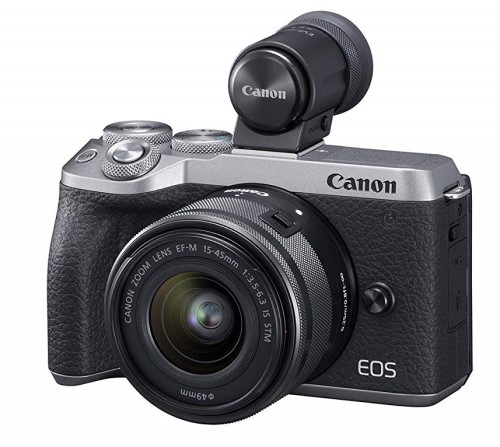
The Canon EOS M6 Mark II weighs 0.90 lb and has dimensions of 4.72 x 2.76 x 1.93 inches, so it can easily fit into a bigger pocket. Because of its compact size and lightweight, this camera is a perfect travel partner.
The strangest thing about the Canon M6 II design is that it lacks an electronic viewfinder. Although there is a possibility to attach an external one, it is not included when you buy the camera. Many photographers prefer using a viewfinder, especially on a sunny day, so this comes as one of the big disadvantages of this camera model.
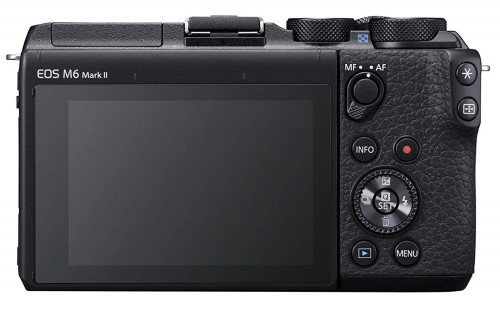
For framing shots, you can only use a 3” LCD. This screen has a resolution of 1,040k dots, it uses touchscreen technology, and it is tiltable in all directions. The LCD screen is convenient for shooting images from different angles, it is rich in colors, and it allows you to set the focus point quickly.

Bluetooth and Wi-Fi technologies are there to help you to share the data files between devices. The Canon Camera Connect app allows you to instantly share images and videos, while it also provides creative possibilities such as using your phone as an LCD screen and to perform remote shooting.
Canon EOS M6 Mark II Build and Handling
The Canon EOS M6 Mark II doesn’t have environmental sealing, so try not to use it in freezing temperatures, while it is raining, or in a very hot environment. Also, try to protect the camera against dust and moisture.
The camera has a very intuitive ergonomics. The buttons are a bit bigger than on the M6, while now there is also an AF/MF toggle switch. Overall, the camera has enhanced usability and many of its controls can be customized in order to suit your needs in the best way.
Additionally, the Canon M6 MII has improved grip in comparison to the previous model. The grip is now a bit deeper, so it should feel more comfortable to use the camera for extended periods of time.
Canon EOS M6 Mark II Video Performance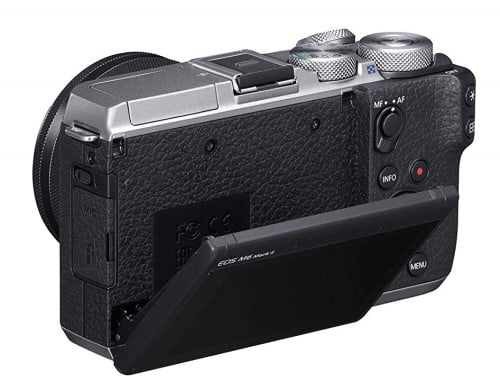
The Canon EOS M6 Mark II records 4K video at 30 fps and Full HD at 120 fps. This is a substantial improvement over its predecessor which could shoot only Full HD video at 60p.
The 4K video is very sharp, and it doesn’t have a crop factor. Another good thing is that you can attach an external microphone. However, it doesn’t have a jack for headphones.
Learn more about the Canon M6 Mark II in the video above by Gordon Laing.
Canon EOS M6 Mark II Lenses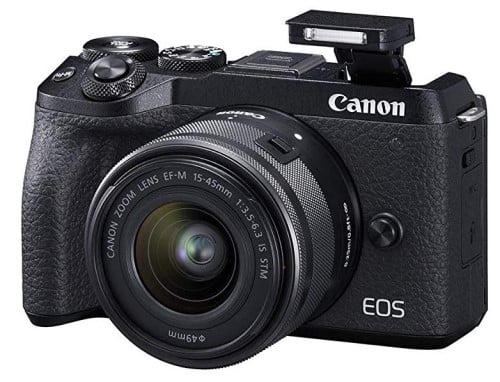
The Canon M6 MII has a Canon EF-M lens mount. Since the company recently joined the market of mirrorless cameras, there are only around 20 lenses to choose for this camera. Still, if you buy an optional EF-M adapter you can also use Canon EF and EF-S lenses.
If you are not sure what lenses to choose for this camera, we suggest you try some of these:
Canon EOS M6 Mark II Price
Canon EOS M6 Mark I
The Canon EOS M6 Mark II will be available in September and it will cost around $849 (body only). If this price is not within your budget, you might consider buying its predecessor.
On MPB, you can buy a used Canon EOS M6 (Mark I) in excellent condition for the price as low as $364.00. If you're not familiar with MPB, check out our MPB review to learn why it's our top-recommended used gear resource.
This article about "Canon EOS M6 Mark II Review" was first published on our website here https://www.photographytalk.com/canon-eos-m6-mark-ii-review
from https://photographytalkcom.blogspot.com/2020/08/canon-eos-m6-mark-ii-review.html |
ABOUT USPhotographyTalk is the all about talking photography to celebrity photographers. Those who are tops in their respective photography fields. You can catch up with PhotographyTalk at www.photographytalk.com. Archives
April 2021
Categories |
 RSS Feed
