|
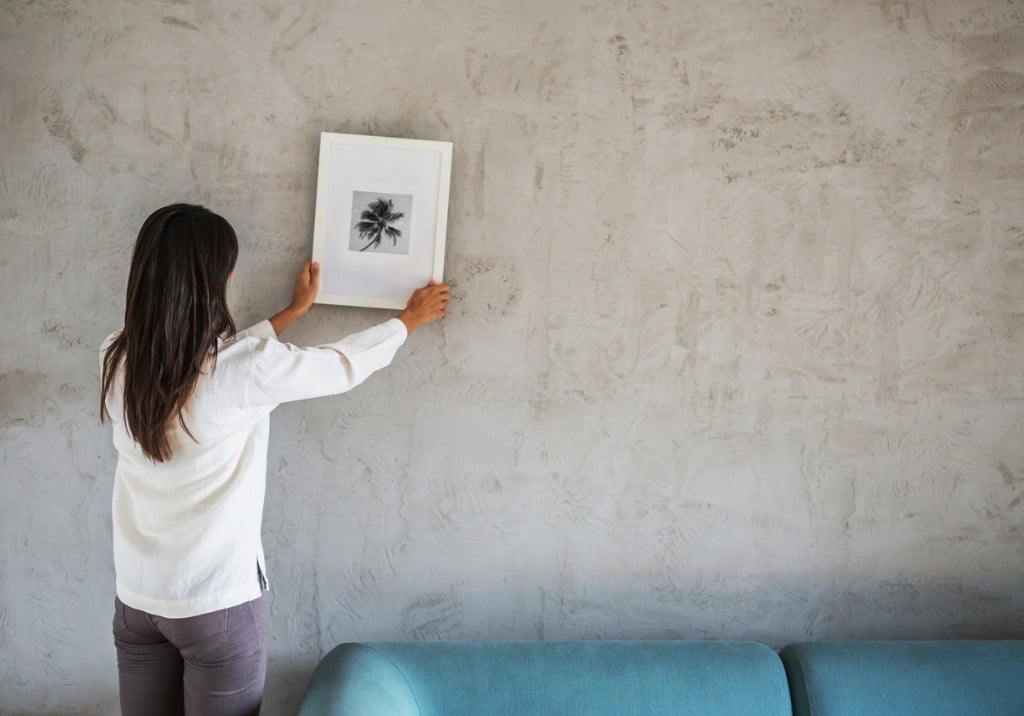
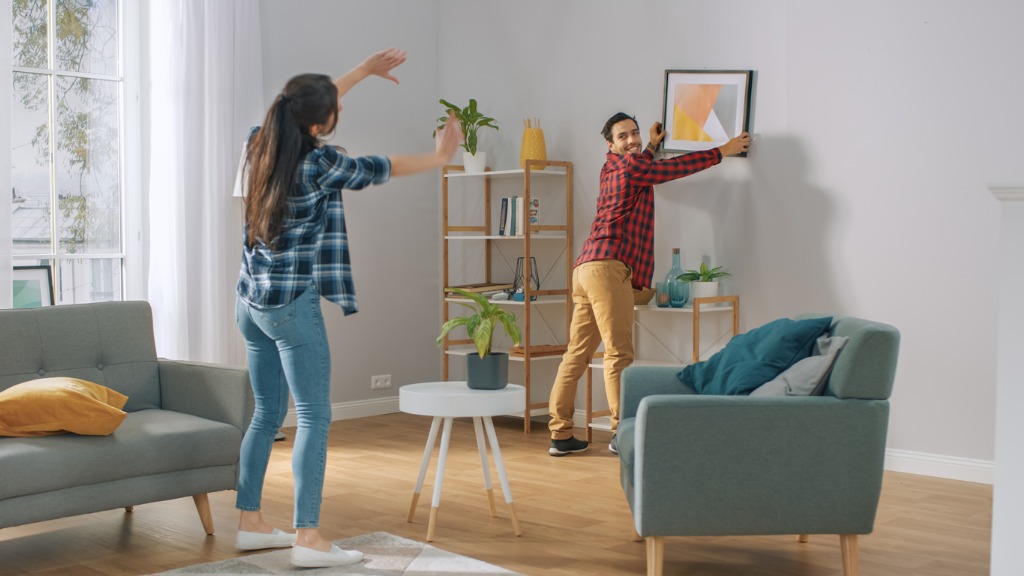
I’ve been spending a lot of time during quarantine figuring out how to hang photos. Hanging photos is not only a great way to show off your hand work, but it can also be a really fun project to burn time when you aren’t doing anything else. It helps that my kid absolutely loves hands-on projects like this one. Learn more about photography project ideas on our website PhotographyTalk.com. But, there are definitely good and bad ways of decorating your home with photos. If you’re thinking of embarking on this journey during a stay at home order, make sure you read these tips about decorating your home with photos first. Do Hang Photos in Every Room
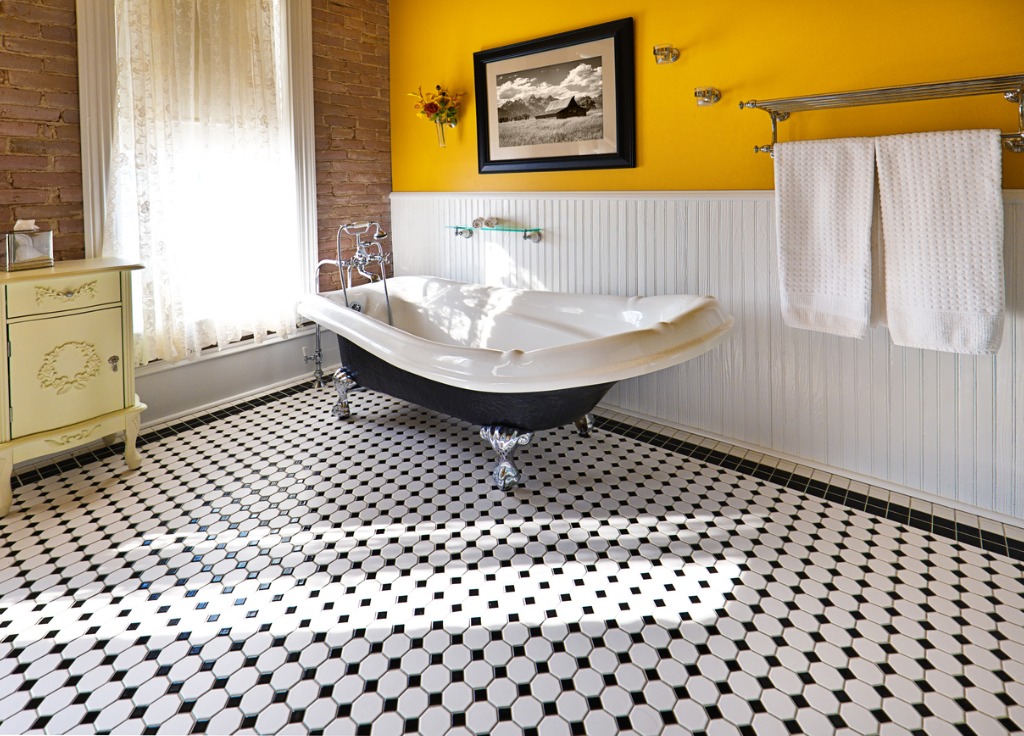
photo by YinYang via iStock The biggest mistake I see people making when it comes to wall art is that they are afraid to hang photos in specific places, like the bathroom or their children’s rooms. If I’m being honest, I don’t think there’s a wrong spot in your home to hang photos. Decorating your home with photos everywhere keeps the aesthetic the same from room to room and helps bring the concept together. Plus, some of the best interior decorators suggest hanging photos in less obvious spots, like the bathroom, because you can have a lot more fun with photos in these spots. For instance, you may not feel comfortable hanging a prominent photo of an odd subject over your bed or couch, but you can put that photo in your bathroom and it will look right at home. Plus, if you’re really proud of your photography at home, then wouldn’t you want to display it everywhere? Do Plan Each Wall Out In Advance
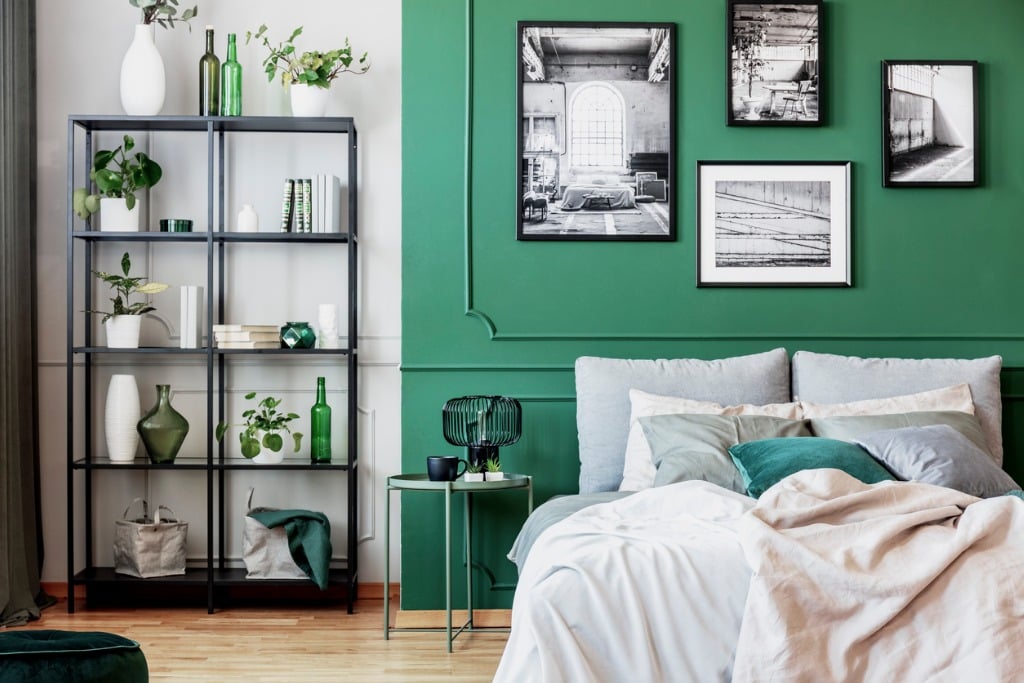
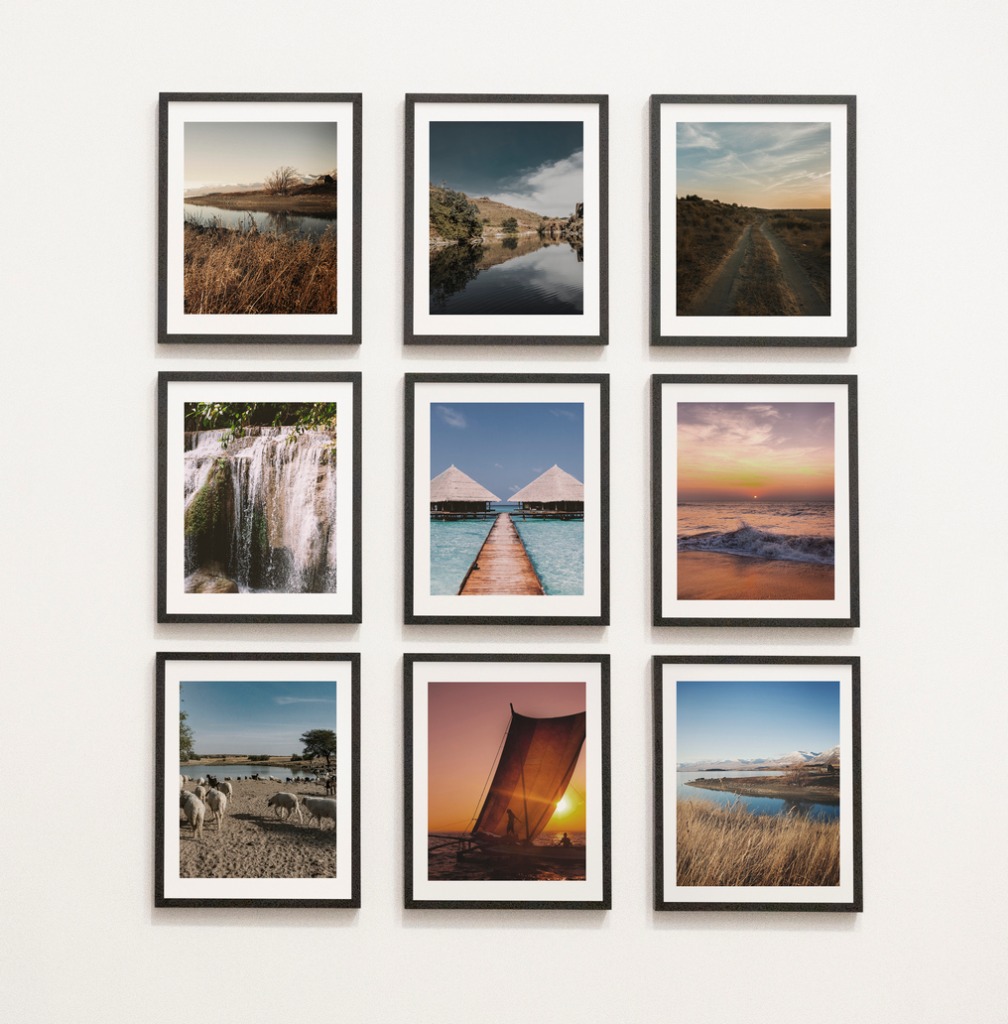
photo by KatarzynaBialasiewicz via iStock Another tip for decorating your home with photos is to plan every wall out in advance. While it may be impossible for you to plan other aspects of your interior decorating with your photography (you aren’t going to repaint everytime you change up a gallery wall), you can and should ensure all of the photos you’re hanging in your home will work well together. A good way to do this is to move all of your furniture so that you can build the gallery wall on the floor in front of each wall. This way you won’t need to keep hanging and rehanging your photos in a new way because you can visualize your whole home before you make any firm decisions. Do Use Unique Hanging Techniques
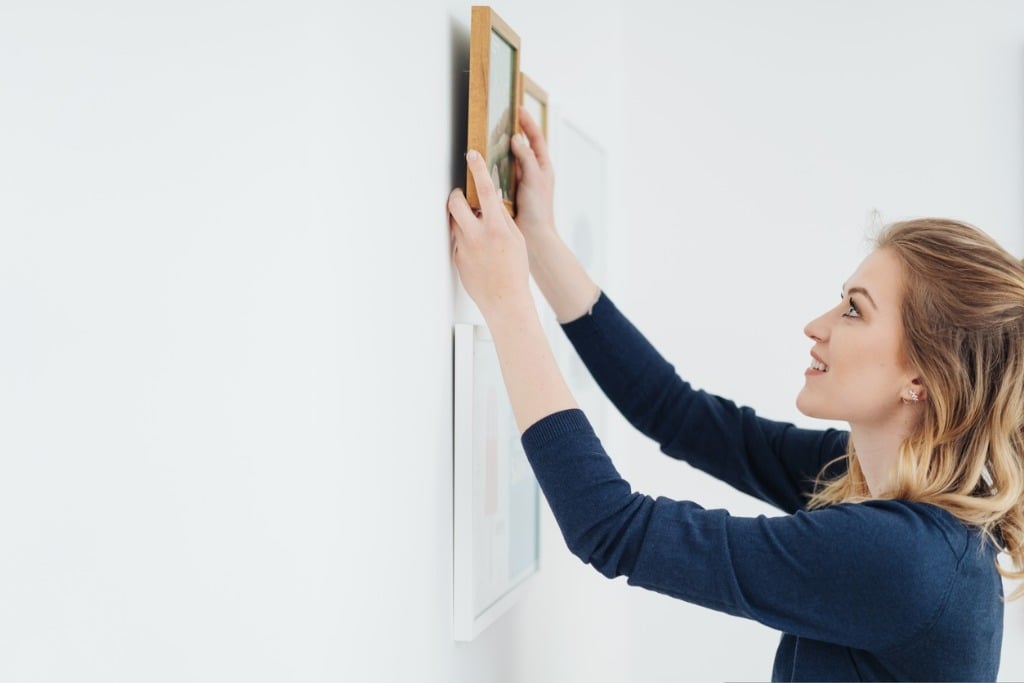
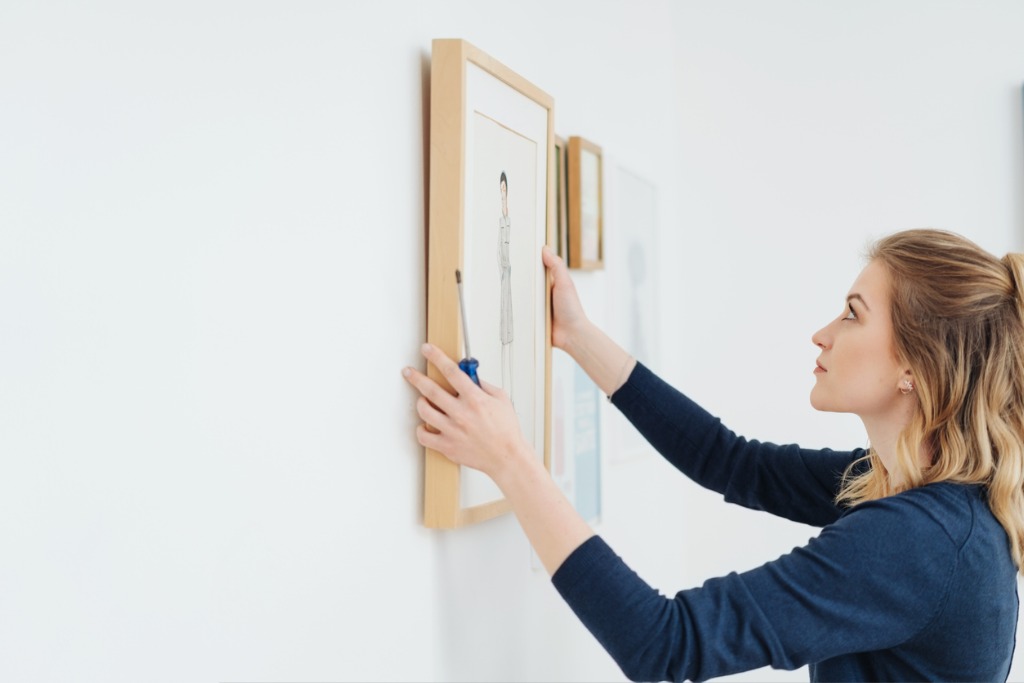
photo by stockfour via iStock When decorating your home with photos, you don’t need to use old hanging techniques that will put holes all over your walls. I use picture-hanging hooks, which are hooks that come with an incredible sticky backing. I started doing this when I lived in an apartment and wanted to get my deposit back, but over the years have found that this is a really easy way for me to change my gallery walls around more frequently because I don’t need to go back and caulk over all of the holes my photos have left. Another hanging technique that I love to use is to actually not hang my photos at all. What I mean by this is that you can set specific pieces down on bookshelves or tables at an angle. It’s a good way to make it look like your gallery wall is coming to life and it adds great dimension to your photography. Plus, it’s easier. I’m always a sucker for stuff that’s easy. Don’t Hang Photos Too High or Too Low
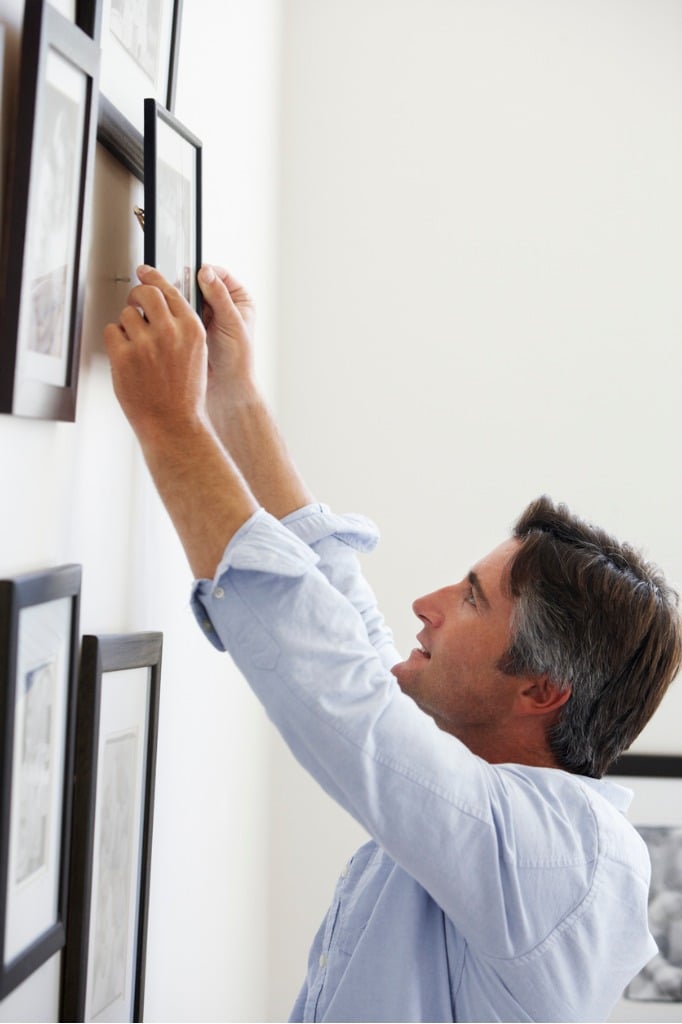
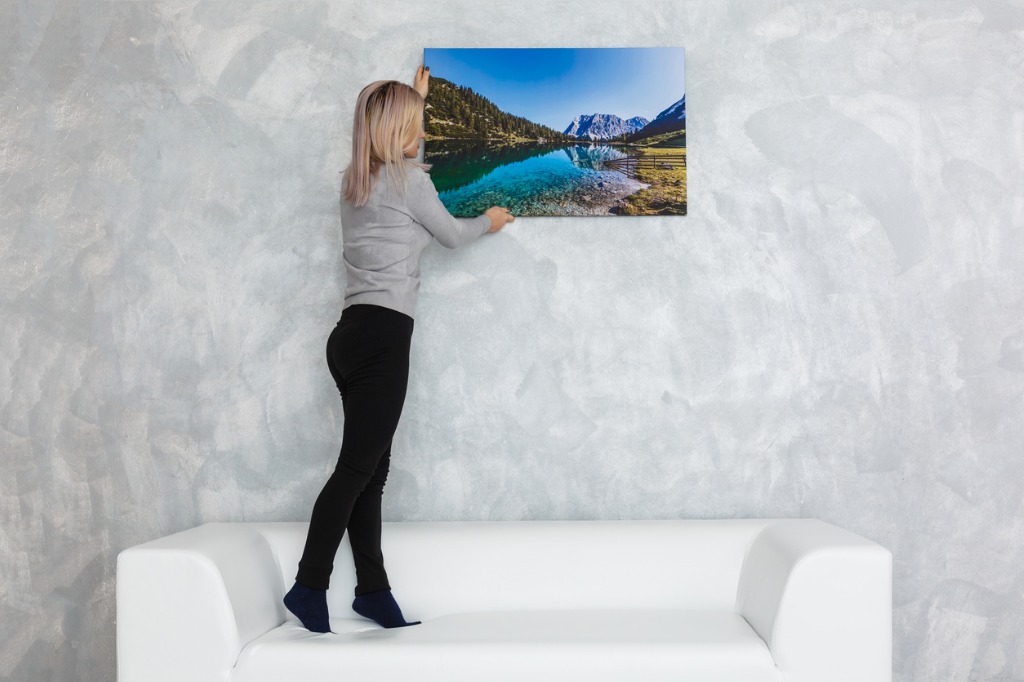
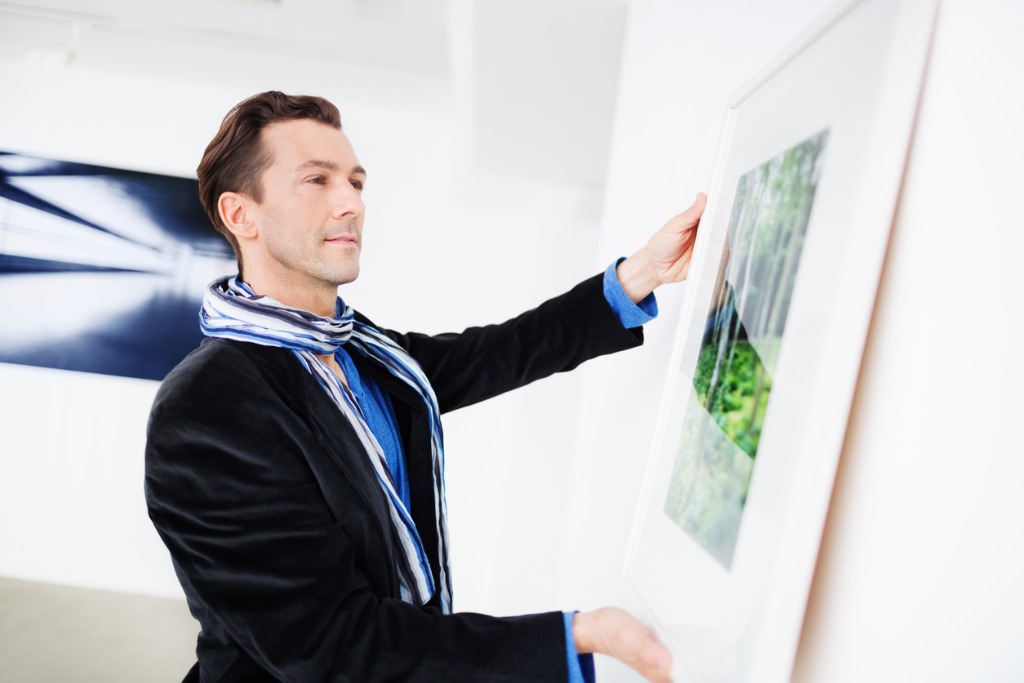
photo by monkeybusinessimages via iStock I hate when I see people hang photos way too high or low. Unless you’re creating a gallery wall, you should strive to have your photos hung up at eye-level. This means having the midpoint of the image around 57-60 inches off the floor. Hanging your photos up too high or down too low makes it more difficult for most people to see them without straining their neck or eyes to get a good look. You can also view another post about best creative photography ideas at home. Plus, it can also throw the design of your home off. Hanging images way too high or way too low throws off the balance in the room - it just doesn’t look right! So, as you hang your photos, be sure you have your trusty measuring tape so you’re sure your images are the appropriate height. Don’t Forget About Sizing
photo by theverest via iStock When decorating your home with photos, you should be paying special attention to the sizing of your photos. If you’re working with large-format photography prints, you need to be careful when hanging them in a tiny room because you don’t want to overpower any other decorations you have. Conversely, if you’re working with a small print, it may be best to put it in a large frame to ensure it has the visual weight needed to be hung up on a large wall. Don’t Use a Cheap Canvas Printer
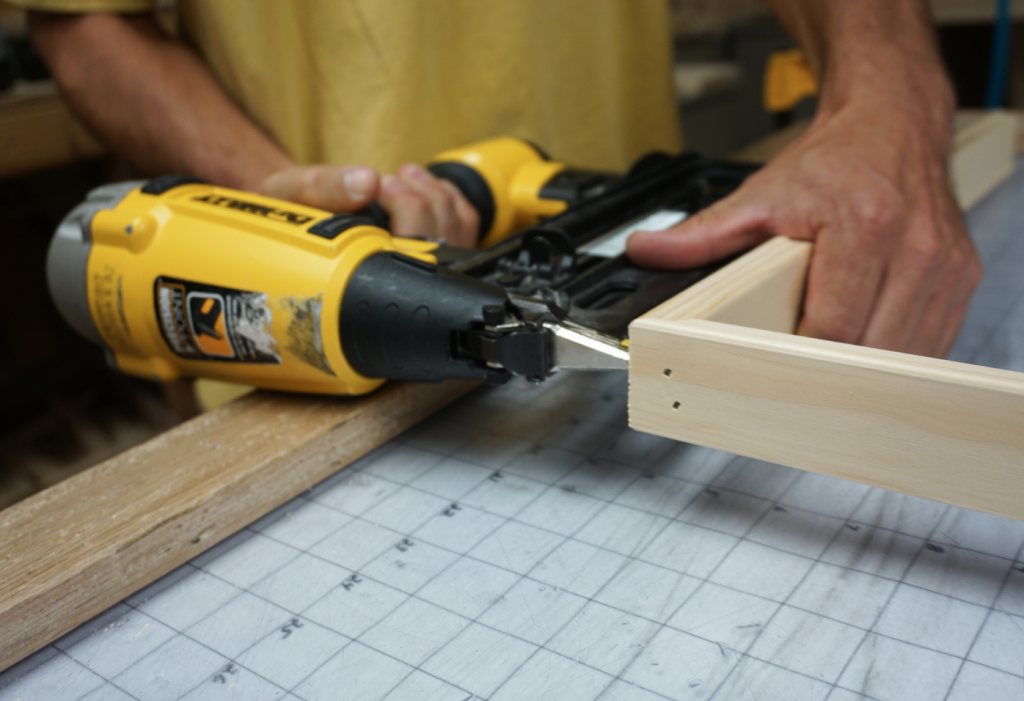
Canvas prints are one of my favorite mediums to work with when I’m decorating my home, but if you use a cheap canvas printer, your wall art will also look cheap. That’s why I use CanvasHQ. CanvasHQ only uses the best quality ink and canvases, so that you can pass your wall art onto your children as family heirlooms. They also hand stretch each canvas and hand build each frame so that, if there happens to be a problem in the creation process, they can fix it right away.
Plus, since canvas prints are relatively cheap (even when you work with a good printer like CanvasHQ) you really have no excuse to buy cheap prints. Plus, unlike a lot of other canvas print makers right now, CanvasHQ is still shipping prints in a timely manner through the pandemic. You can actually check their website to see exactly how long it would take you to receive your canvas if you sent in a photo today. As of the writing of this article, you’ll need to wait just 3 days for your production. That’s not bad at all considering the quality and craftsmanship that goes into each print. I have dozens of CanvasHQ prints in my home, and I have yet to be disappointed! Besides, as I found in my 2020 Canvas Print Shootout (see video above), CanvasHQ more than held its own against their competitors. This article about the topic "Quick & Easy Tips for Decorating Your Home With Photos" was first published on our website here https://www.photographytalk.com/quick-easy-tips-for-decorating-your-home-with-photos from https://photographytalkcom.blogspot.com/2021/04/quick-easy-tips-for-decorating-your.html
0 Comments
When taking a portrait, half the battle is figuring out how to pose the model so that she looks her best. In this tutorial, I give a quick overview of a variety of poses you can try to get portraits that are eye-catching and flattering as well. Use these female posing tips, and in the right circumstances, they can make a ton of difference in how your final images turn out. Learn more about poses for men photoshoot on our website photographyTalk.com.
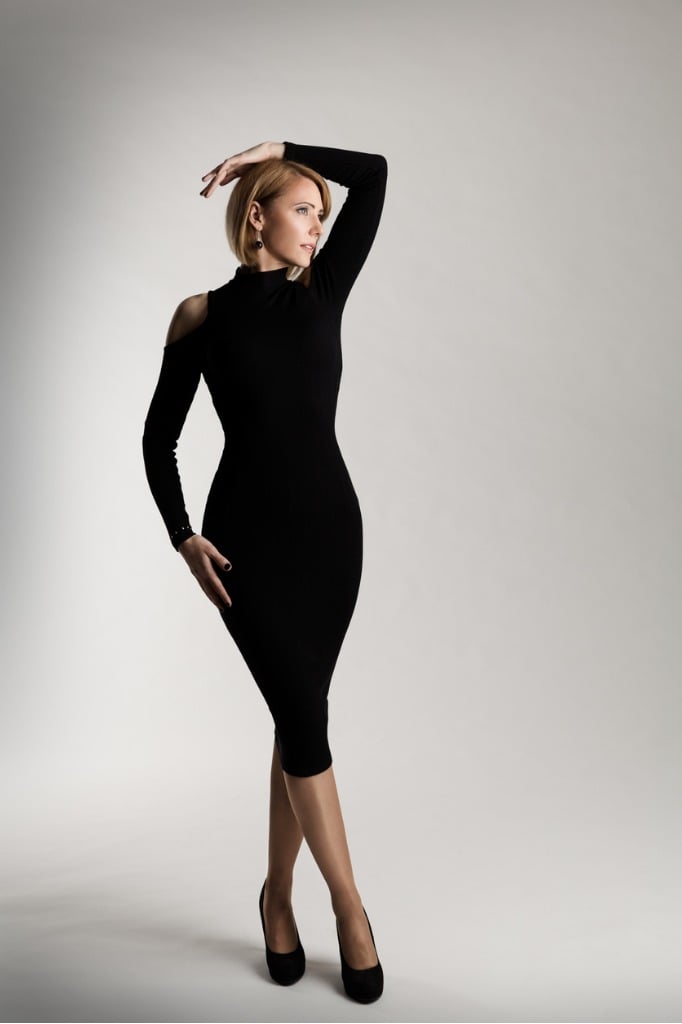
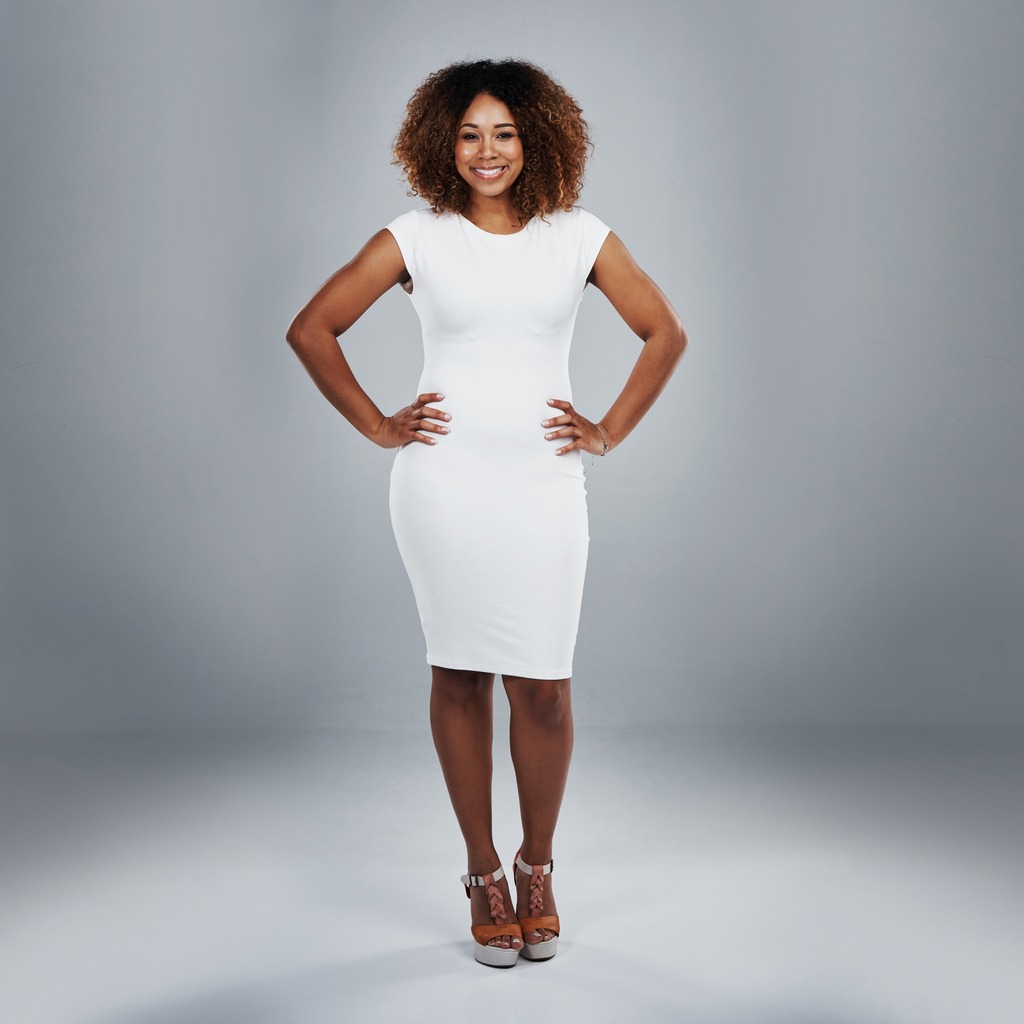
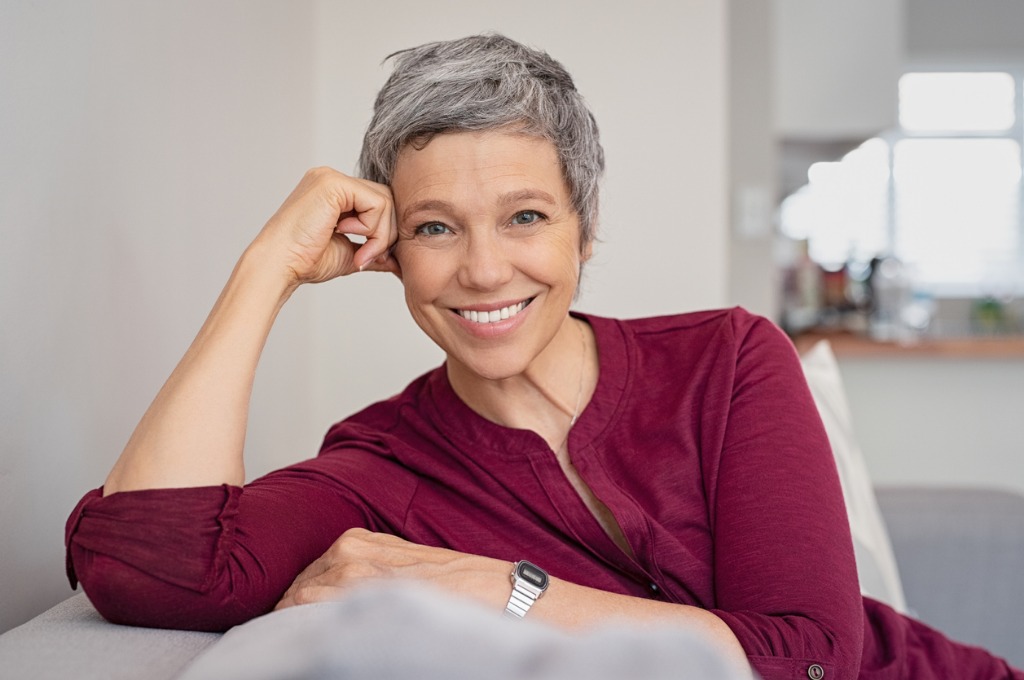
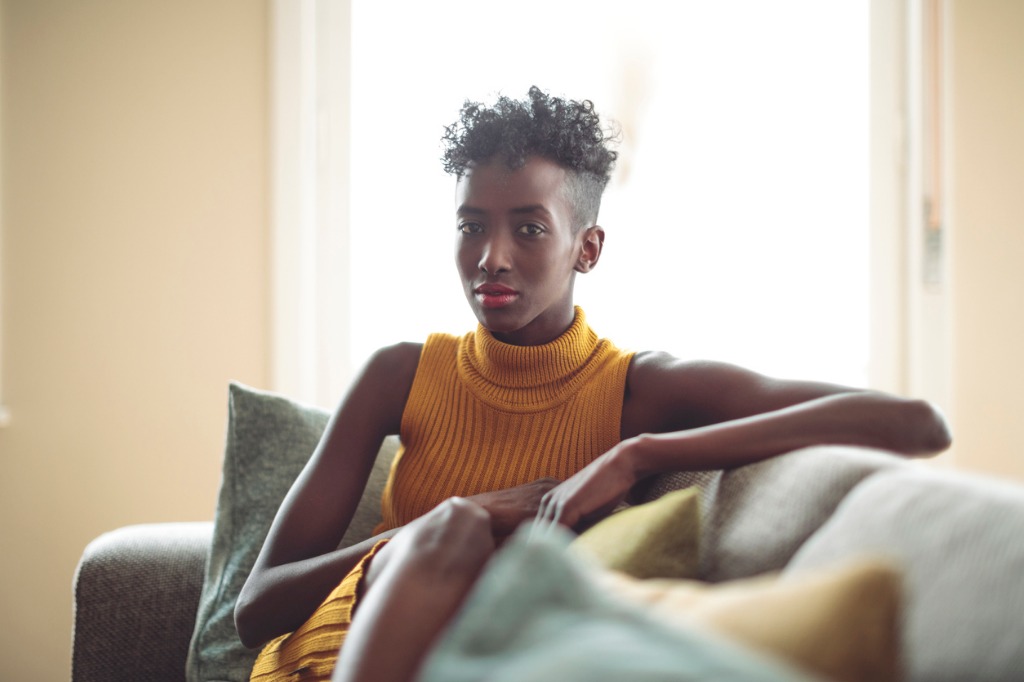
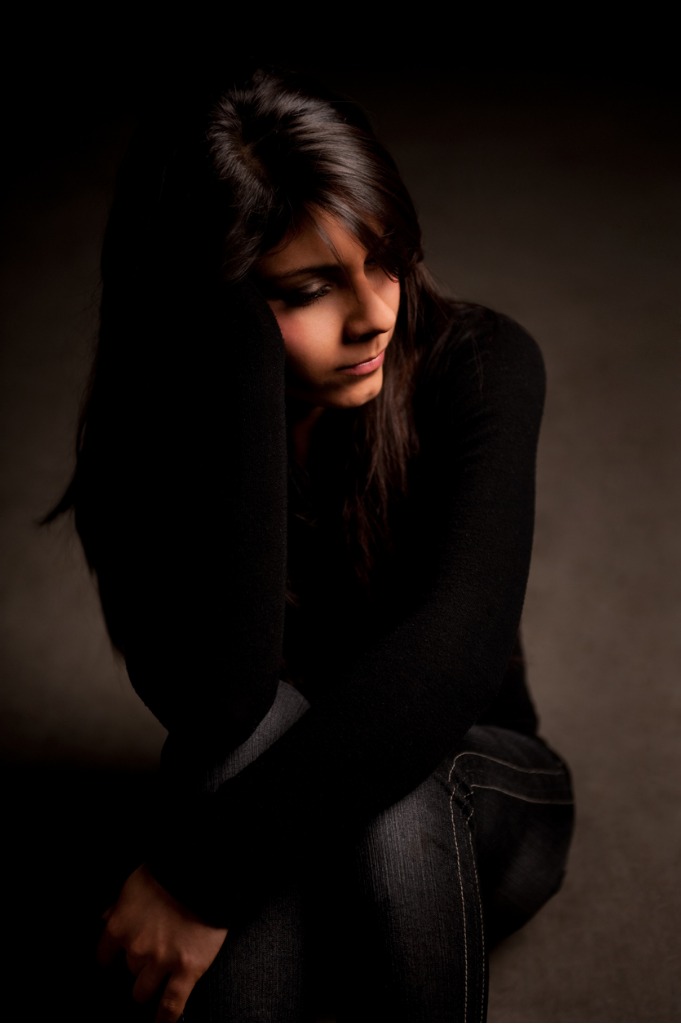
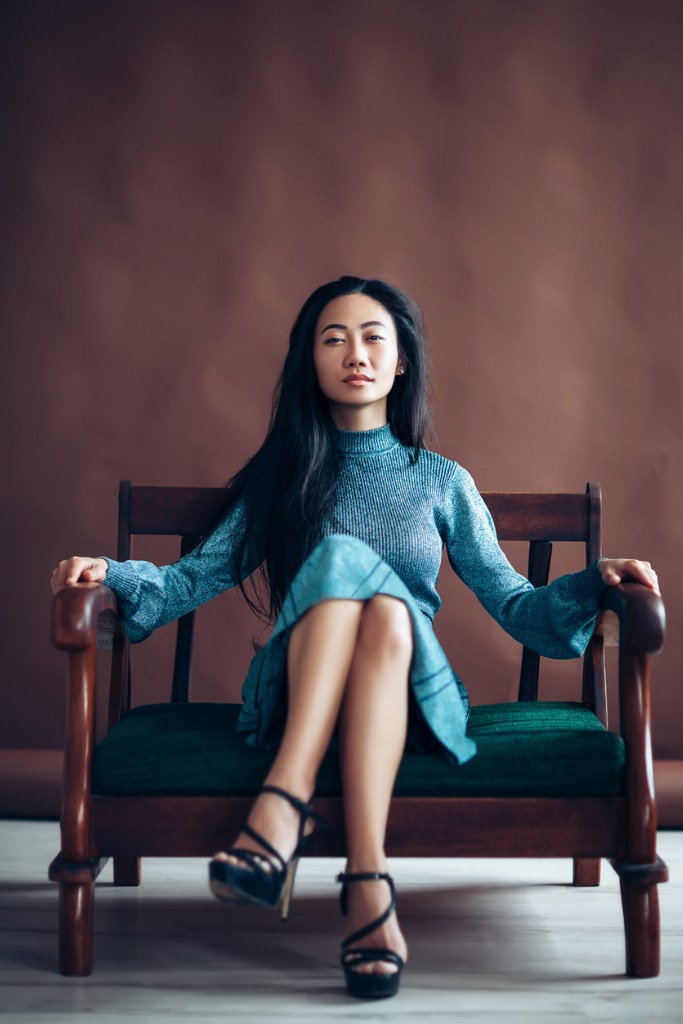
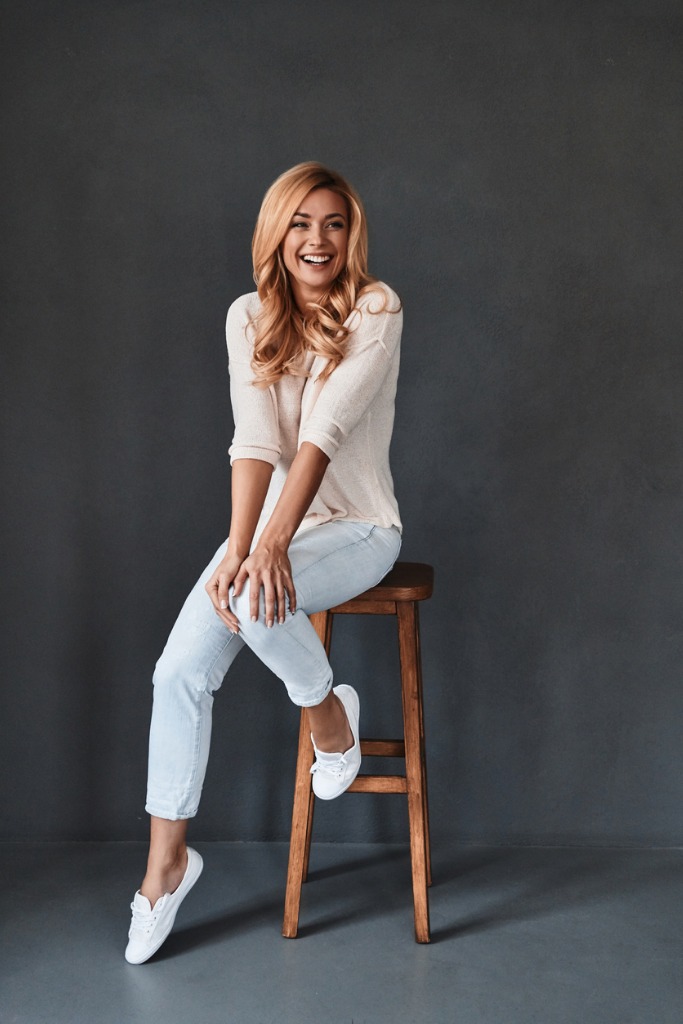
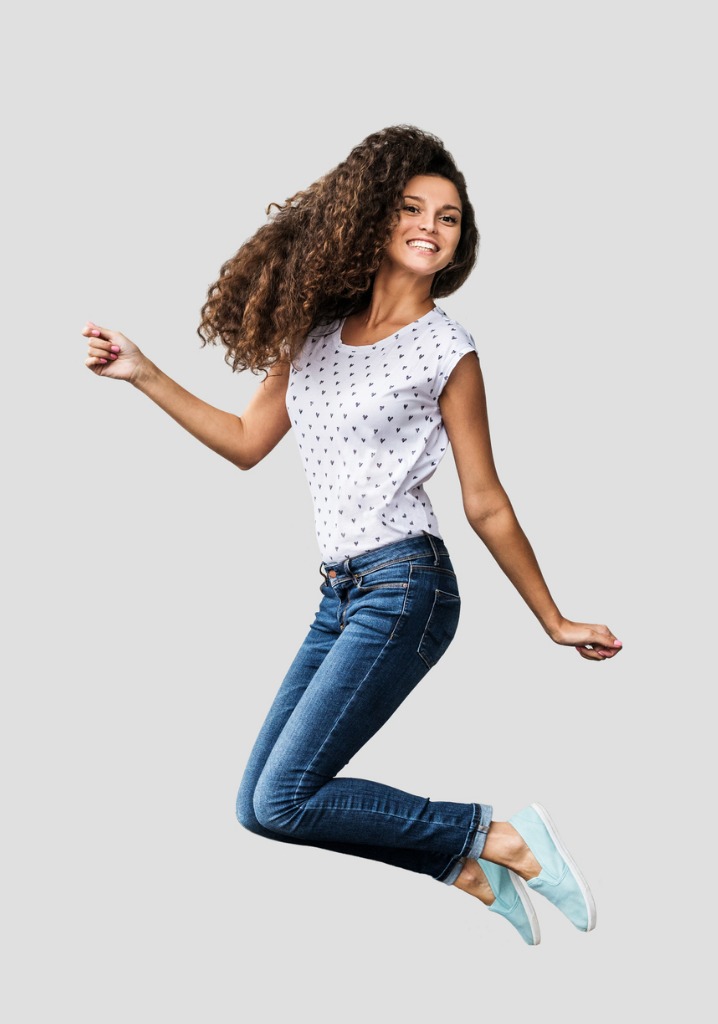
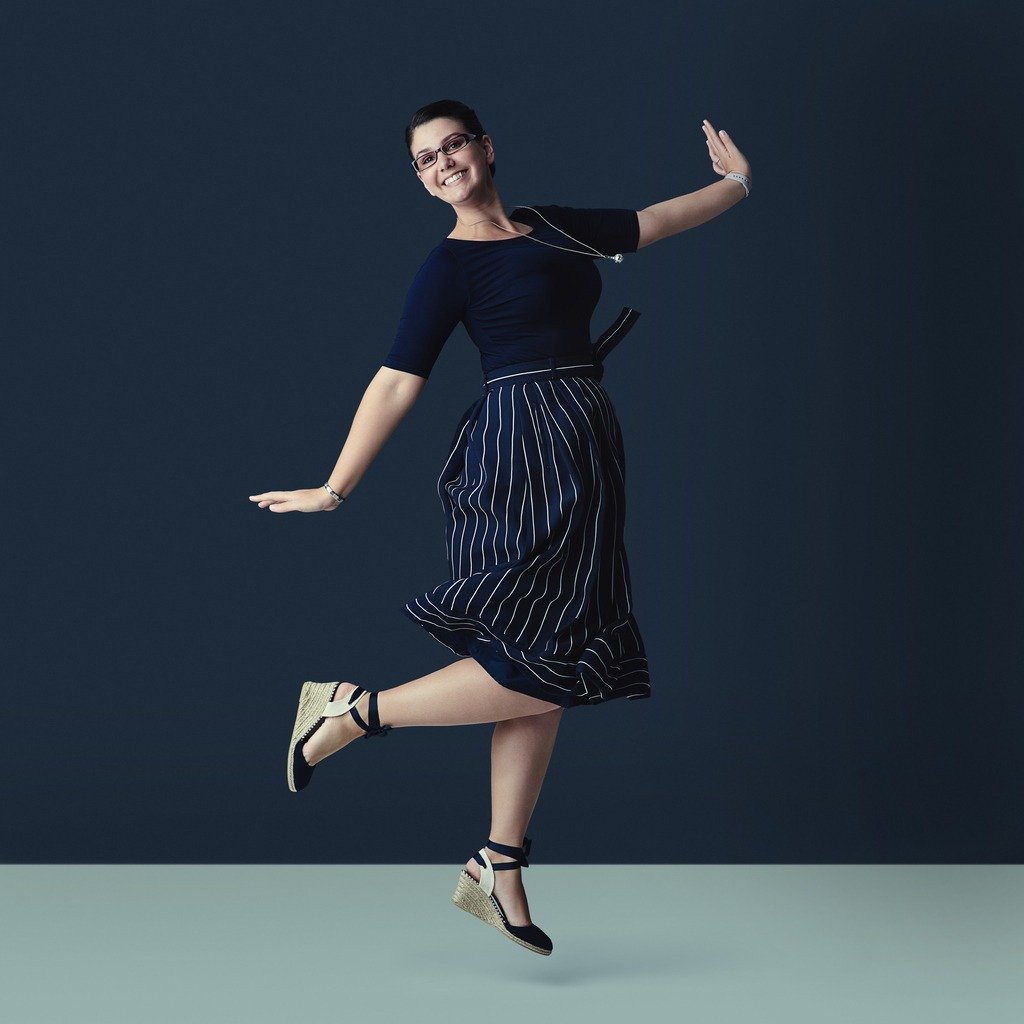
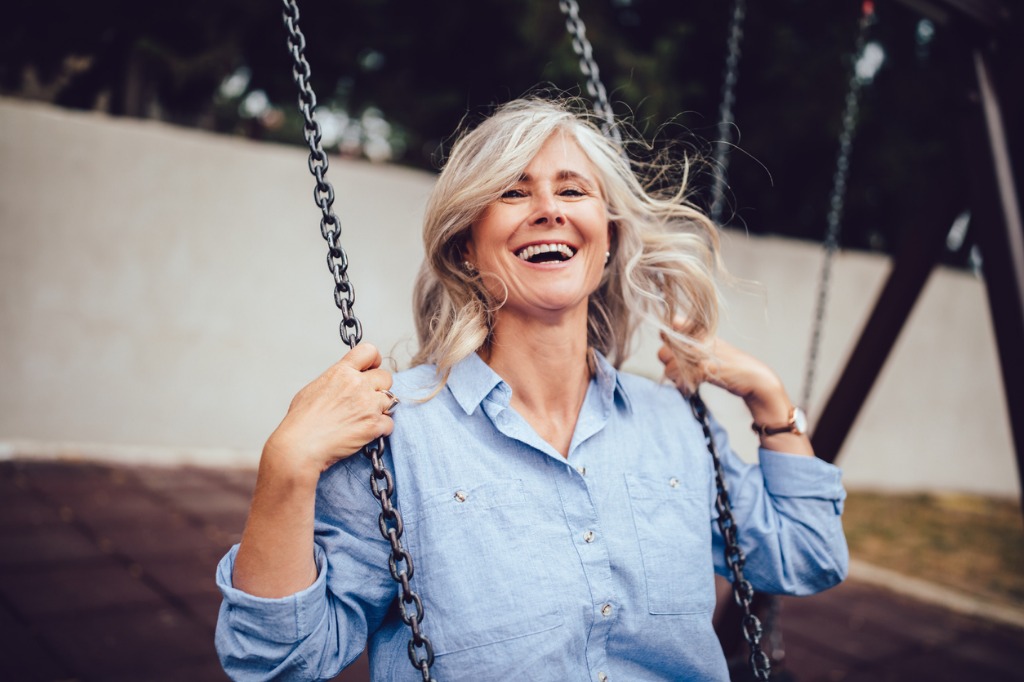
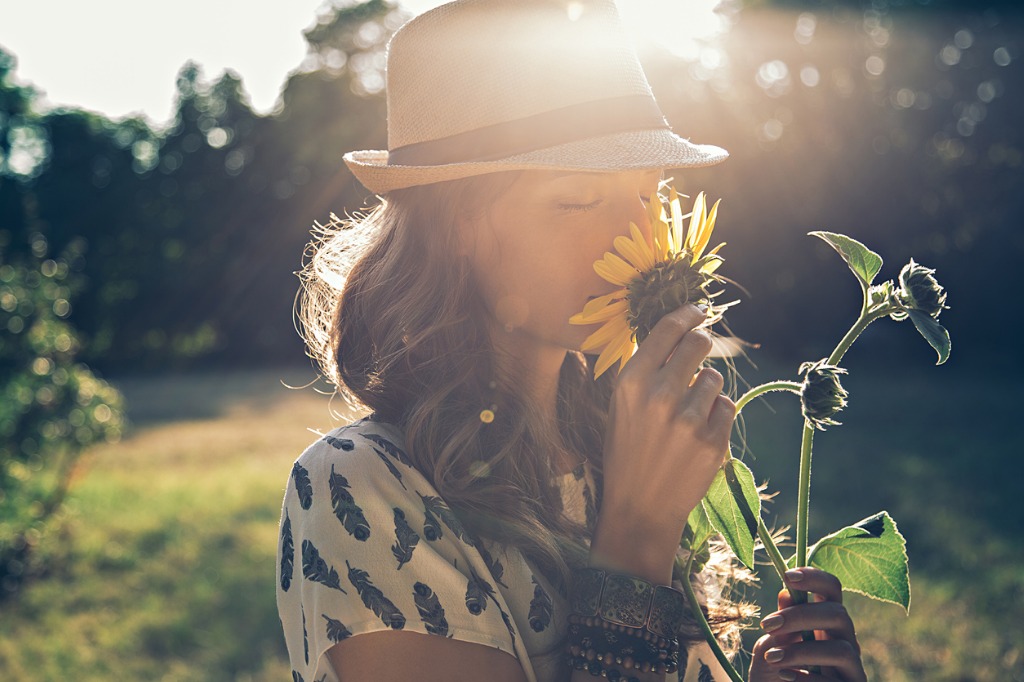
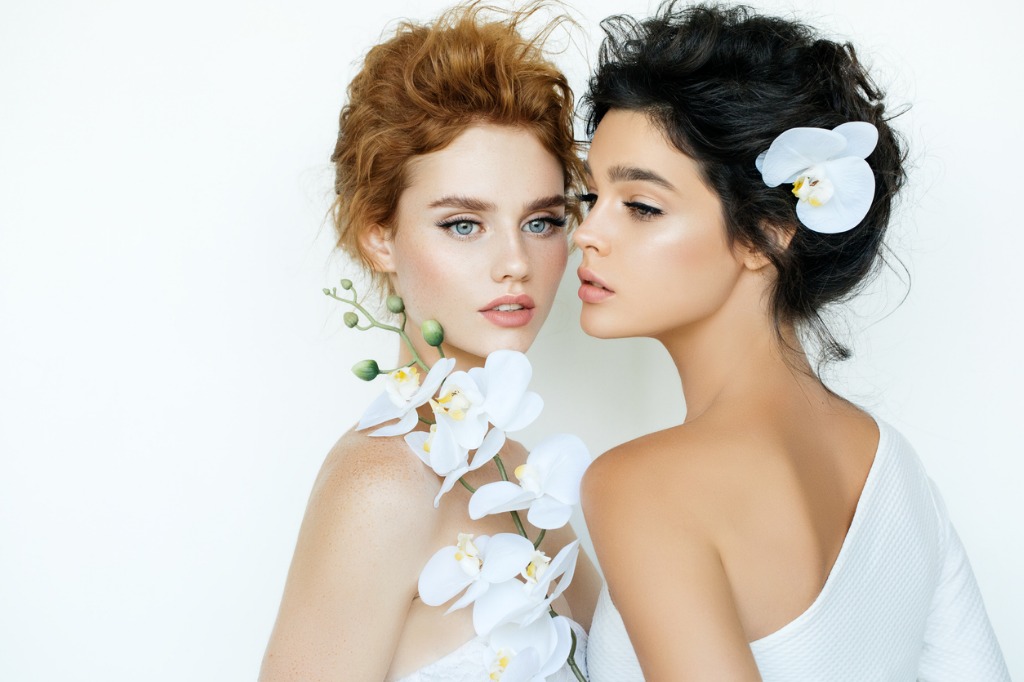
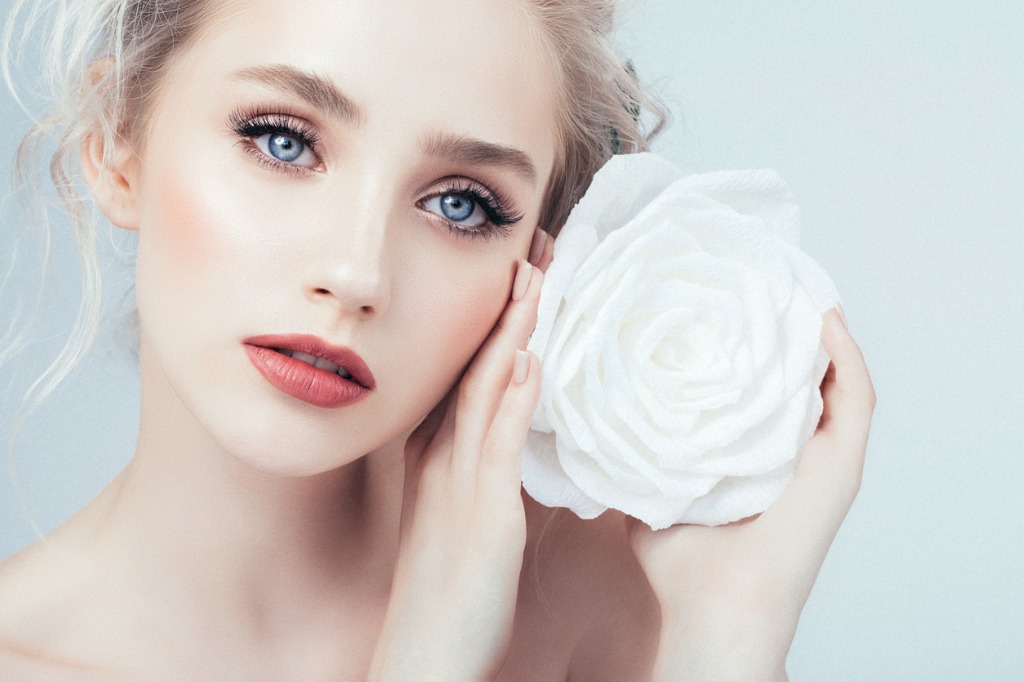
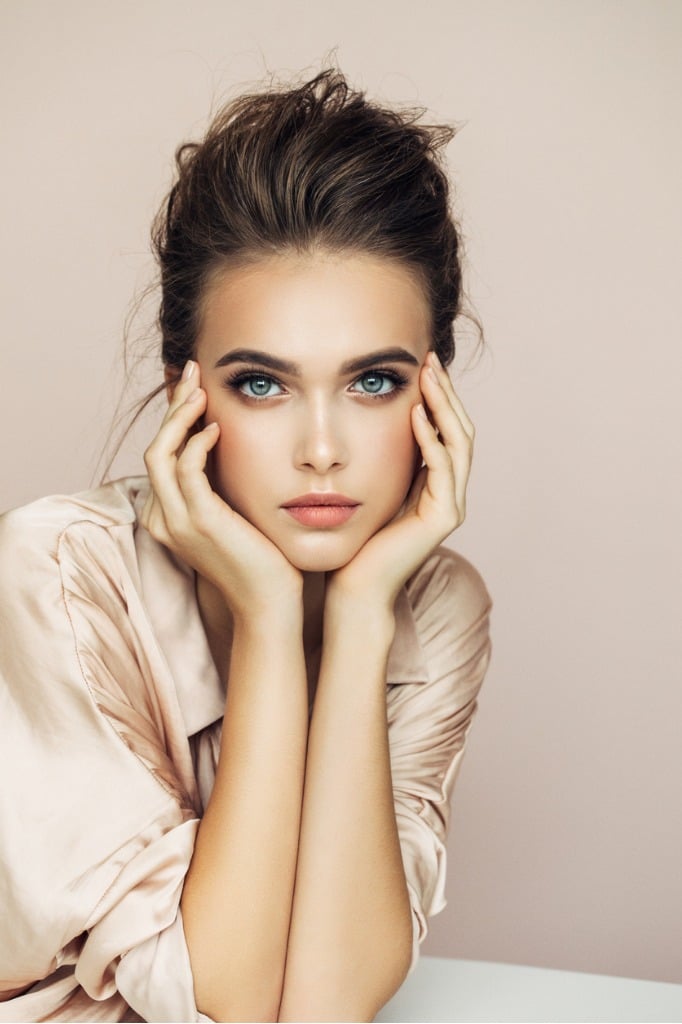
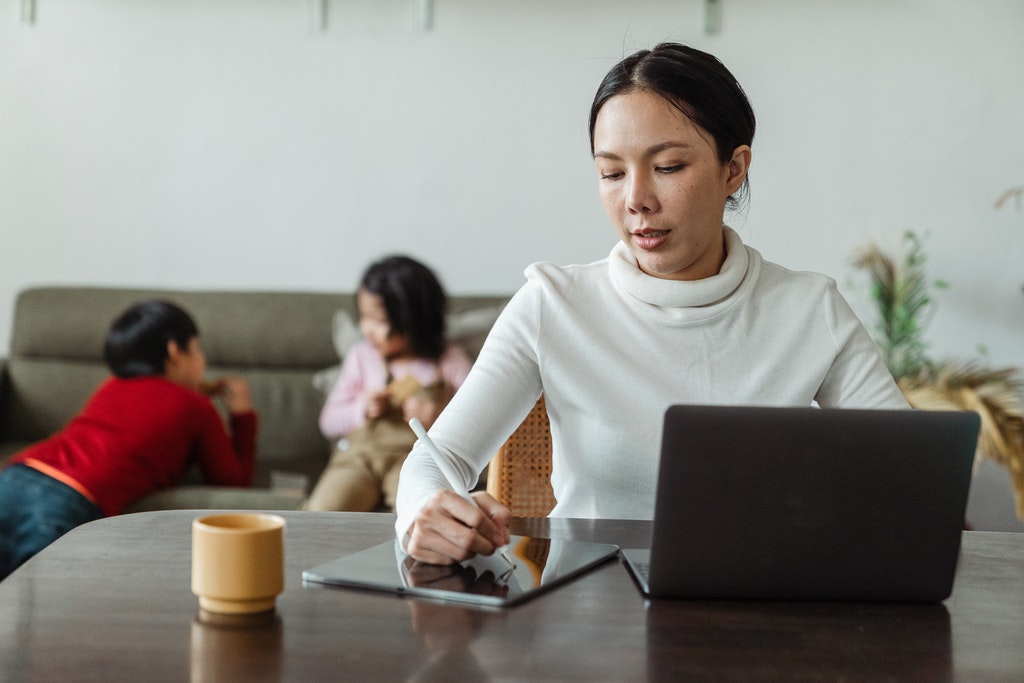
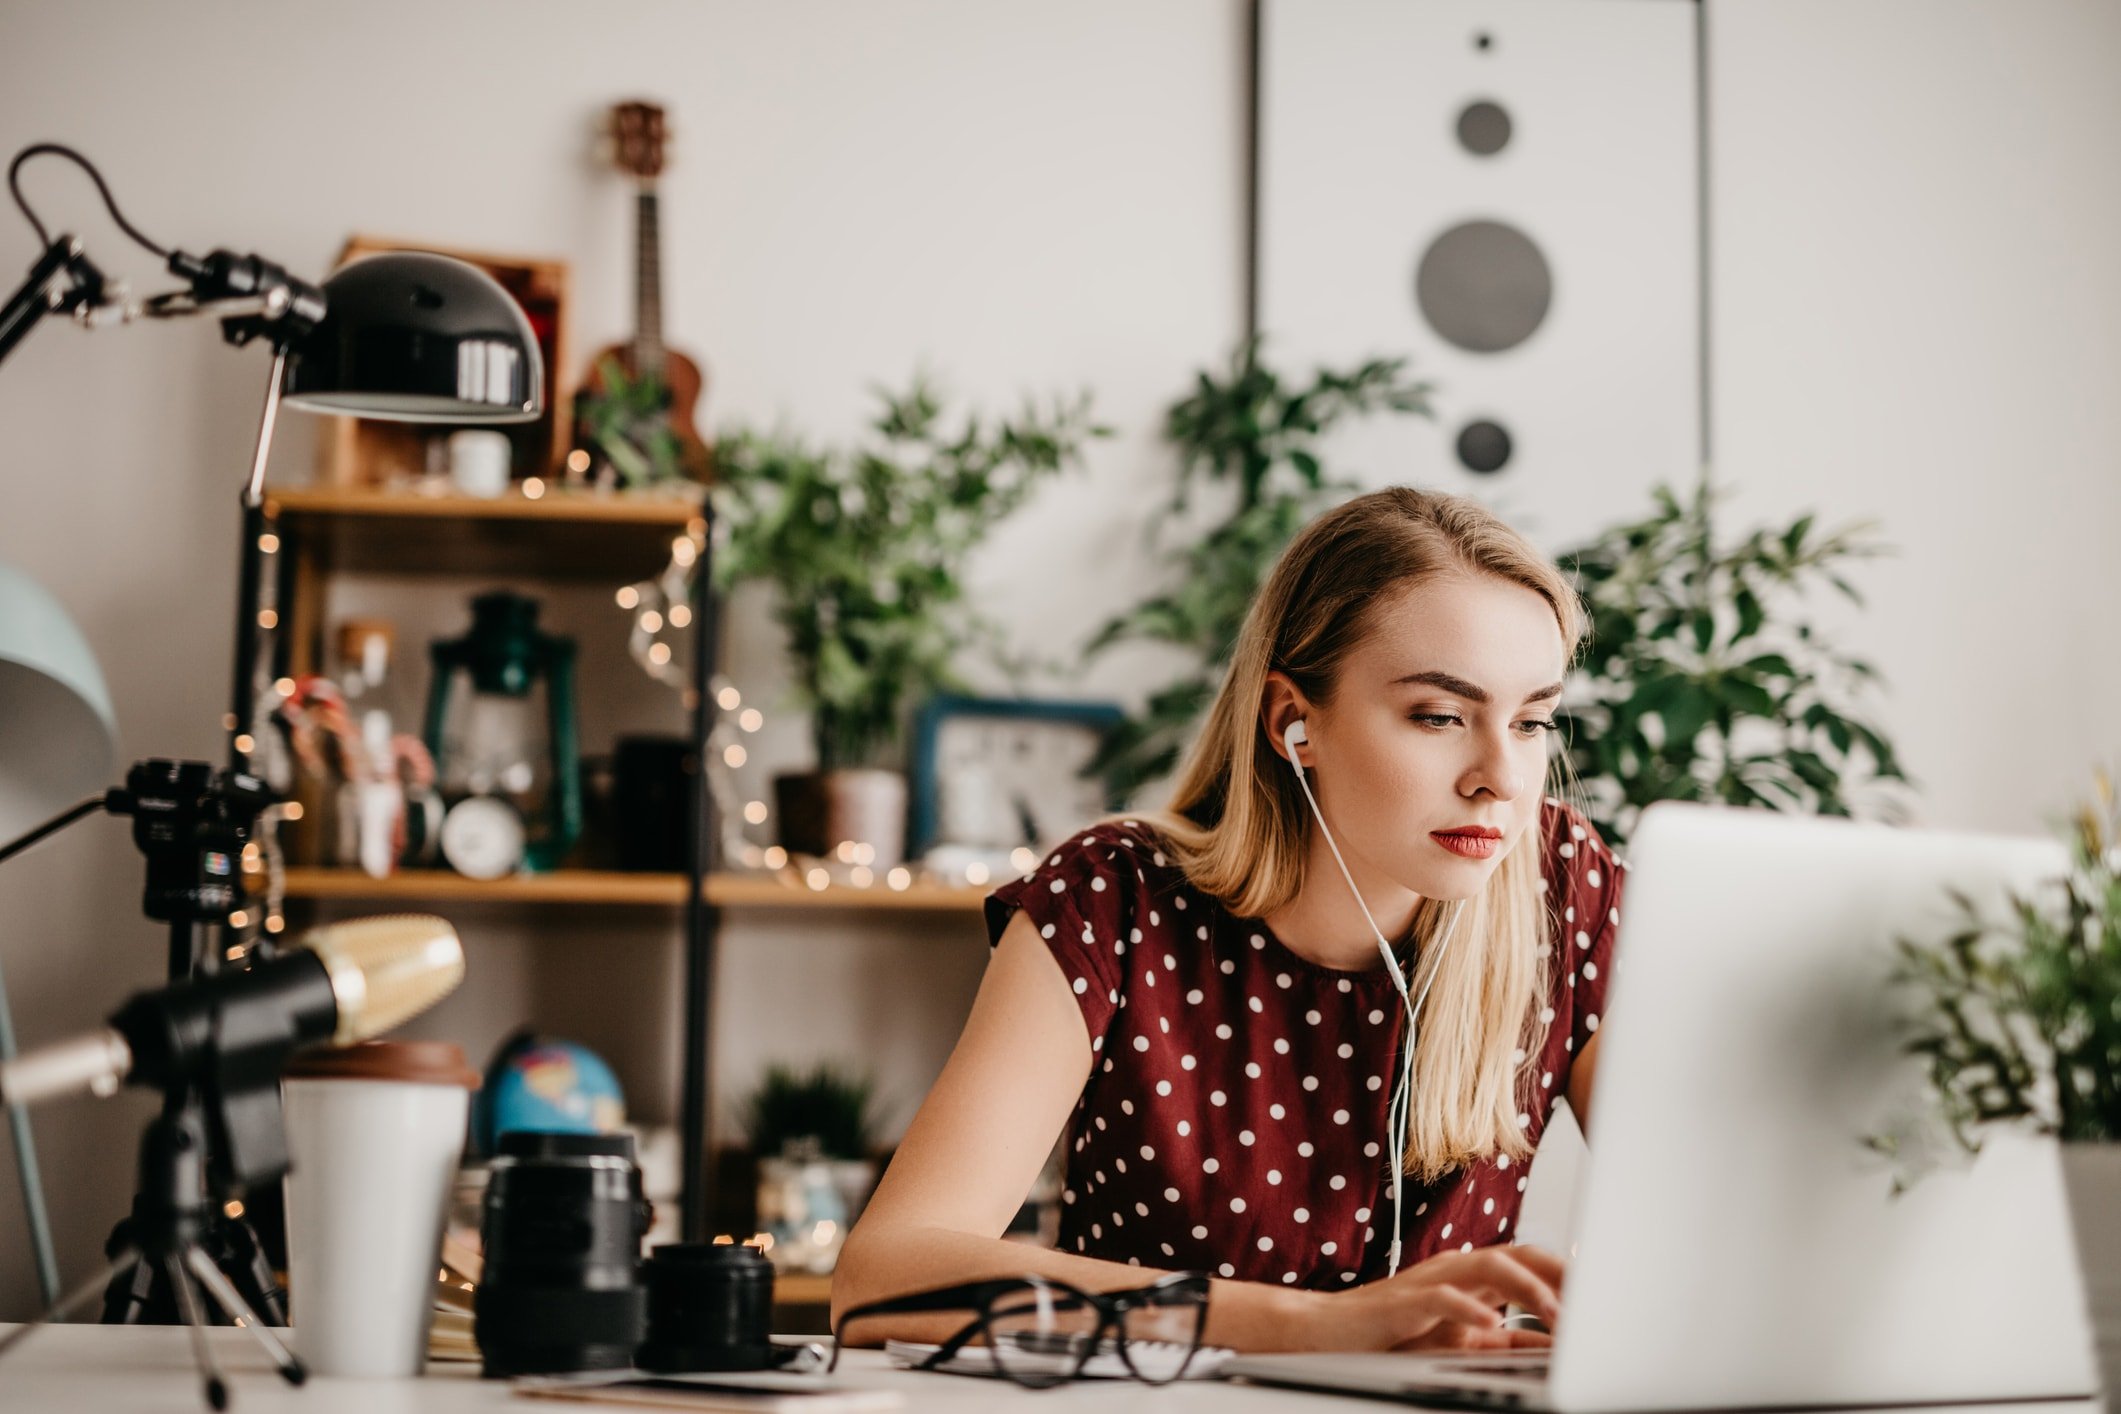
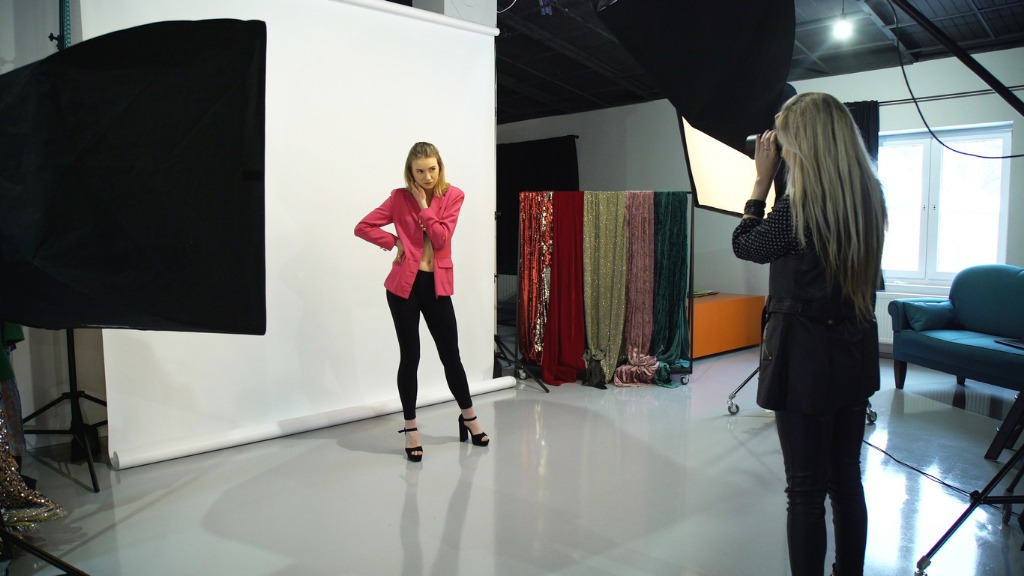
Let’s get started! Female Posing Tip #1: Start With the Basics photo by Cecilie_Arcurs via iStock An ideal way to kick off a portrait session with a female client is to start simple. Basic poses give the shot a classic look and can add a level of sophistication and elegance to your collection of images that will truly make the model shine. photo by inarik via iStock Basic poses, like the one seen above, don’t have many elements to them: the model has simply raised one arm and rested it above her head while crossing her legs to add some interesting lines. You can get different looks by simply changing the positioning of her arms, too. Notice how she’s looking off-camera as well. You can mix things up by having her look left or right, up or down, and right down the barrel of the lens. That means that with one basic pose, you can get multiple looks rather quickly. photo by alvarez via iStock Another option is to keep things simple with the body and have the model place one hand on her hip with the other arm resting gently at her side. Again, this creates a classic, clean look that has visual appeal thanks to the left arm being bent and the left leg being kicked out a bit. But thanks to the simplicity of the rest of the pose, it doesn’t become distracting or overwhelming. photo by Tinpixels via iStock Perhaps simplest of all, you can simply direct the model to place both hands on her hips with her elbows pointed outward. Then have her shift her weight to one leg and bend the other leg. You can also check another post about photo poses for boys. This creates another simple, yet eye-catching pose that has interesting lines and gives the model an improved presence in the shot. Female Posing Tip #2: Have a Seat photo by Ridofranz via iStock Seated poses add another layer of dimension to female portraits because there’s so many different directions you can go. On the one hand, a seated pose can be super informal and casual, as though the photo was completely unplanned and spur-of-the-moment, as shown above. photo by Eva-Katalin via iStock On the other hand, a seated pose can communicate very specific feelings like confidence, as shown above, or vulnerability, as shown below. photo by aldomurillo via iStock Another thing to consider with seated poses is that it allows you to introduce props into the shot without them feeling like props. For example, by seating the model in a beautiful chair, you can add color, texture, and shape to the shot, as shown below. photo by Viktor_Gladkov via iStock Not only that, but in this instance, with the camera below the model’s eye level, this portrait has a distinct feeling of power because we’re looking up towards her and she’s looking down towards us. If you want the model to look vulnerable, take a position above her and shoot down towards her. It’s also important to think about how the model’s legs are positioned if you elect to shoot a full body shot. photo by g-stockstudio via iStock For example, in the image above, bending the leg closest to the camera helps prevent the model’s legs from looking too stiff. Alternatively, if you compose the shot with the model’s legs pointed toward the camera, understand that her feet could look quite large. To get around this, try having the model point her toes toward the camera to create a slimmer profile. Female Posing Tip #3: Lights, Camera, Action! photo by Poike via iStock If the more subdued seated and standing poses photography just don’t do it for you, you can step things up a notch by having the model get more active as she poses for the camera. Certainly, action shots can have a lot of action.As you can see above, having the model jump in the air as you take the shot can result in something that has a ton of energy, vitality, and visual interest. Of course, this kind of action shot can be difficult to pull off given that the timing has to be just right to get an image with the model’s arms, body, legs, hair, and so forth looking just right. photo by Tinpixels via iStock A less involved action pose that might be easier to capture is to have the model extend one of her arms or legs (or one of each, as shown above). You could even have her pop an elbow, knee, hip, or shoulder outward to give the impression that movement is occurring, even if it isn’t. photo by wundervisuals via iStock Simpler still, get in close for a half-body or close-up of her face and make her laugh. A natural, candid smile like you see above can light up the portrait and make it a much more impactful image for people to view. photo by Sjale via iStock You can also have the model simply play with her hair or interact with a prop or another person to introduce a little movement and action into the shot. Remember, a little goes a long way here, so to get a portrait that has some life and vitality to it, don’t think that you have to go overboard with making the model do all kinds of crazy active things! Female Posing Tip #4: Beauty Poses photo by CoffeeAndMilk via iStock The most difficult type of female pose to do well are beauty poses. These are the types of poses you often see in magazines and catalogs, and the most important feature of the shot is the model’s expression. No matter if you’re going for serious, playful, flirty, happy, or some other look, the model’s expression must be absolutely on point if the shot is going to be a success. photo by JNemchinova via iStock When taking beauty portraits, be careful not to shoot from below the model. Since beauty portraits are often taken from close-up, if you shoot from below, viewers will have a window right into the model’s nostrils. photo by CoffeeAndMilk via iStock Another thing to be aware of is that in beauty photography, the model’s jawline (and its shadow) often helps sculpt her expression. As you pose the model and frame up the shot, pay particular attention to how the jawline looks, and give the model direction for strengthening or softening it to help add to the emotion you’re going for in the photo. In the example above, the model’s relaxed jaw with little indication of a shadow helps give this portrait a soft, delicate look. photo by CoffeeAndMilk via iStock A final consideration to make in beauty portraits is to give the model something to do with her hands. Often, the model’s hands feature prominently in beauty photos - below her chin, alongside her face, and so forth. You don’t want her hands to obscure her face (usually, anyway), nor do you want her hands or fingers to look awkward. photo by CoffeeAndMilk via iStock Since hands are one of the most difficult things for models to pose, you’ll need to be on your game to ensure the model’s hands look beautiful, natural, and relaxed. With that, you have a number of female posing tips that will help you create gorgeous, flattering photos of female models! For even more tips on how to pose women in portraits, check out the video above by Justin and Kirby. This blog about "Female Posing Tips That Work Well On Camera" was first published on our website here https://www.photographytalk.com/female-posing-tips-that-work-well-on-camera from https://photographytalkcom.blogspot.com/2021/04/female-posing-tips-that-work-well-on.html Recording video at home requires good lighting in order for the finished video to have a natural appearance. You might at first think that the natural, ambient light in a home, office, or patio will record as a nice, natural look, but the truth of the matter is that ambient light can be difficult for good video recording. Learn more about photography at home on our website PhotographyTalk.com.
Being able to control the light will provide consistent, even results for your productions recorded inside, outside, or under mixed ambient lighting. When interviewing someone or filming your own instructional style video, maintaining a natural appearance will enhance the viewing of your videos. How to Light for a Natural Look
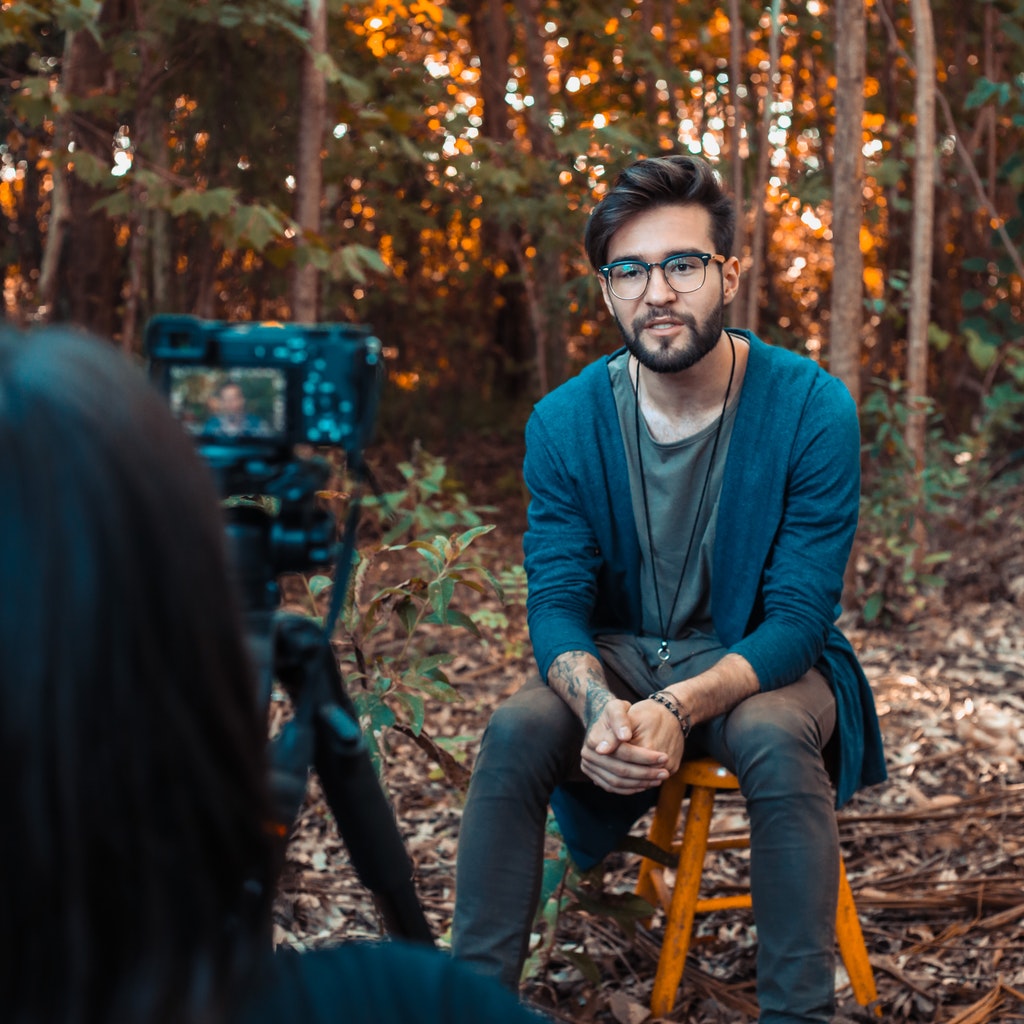
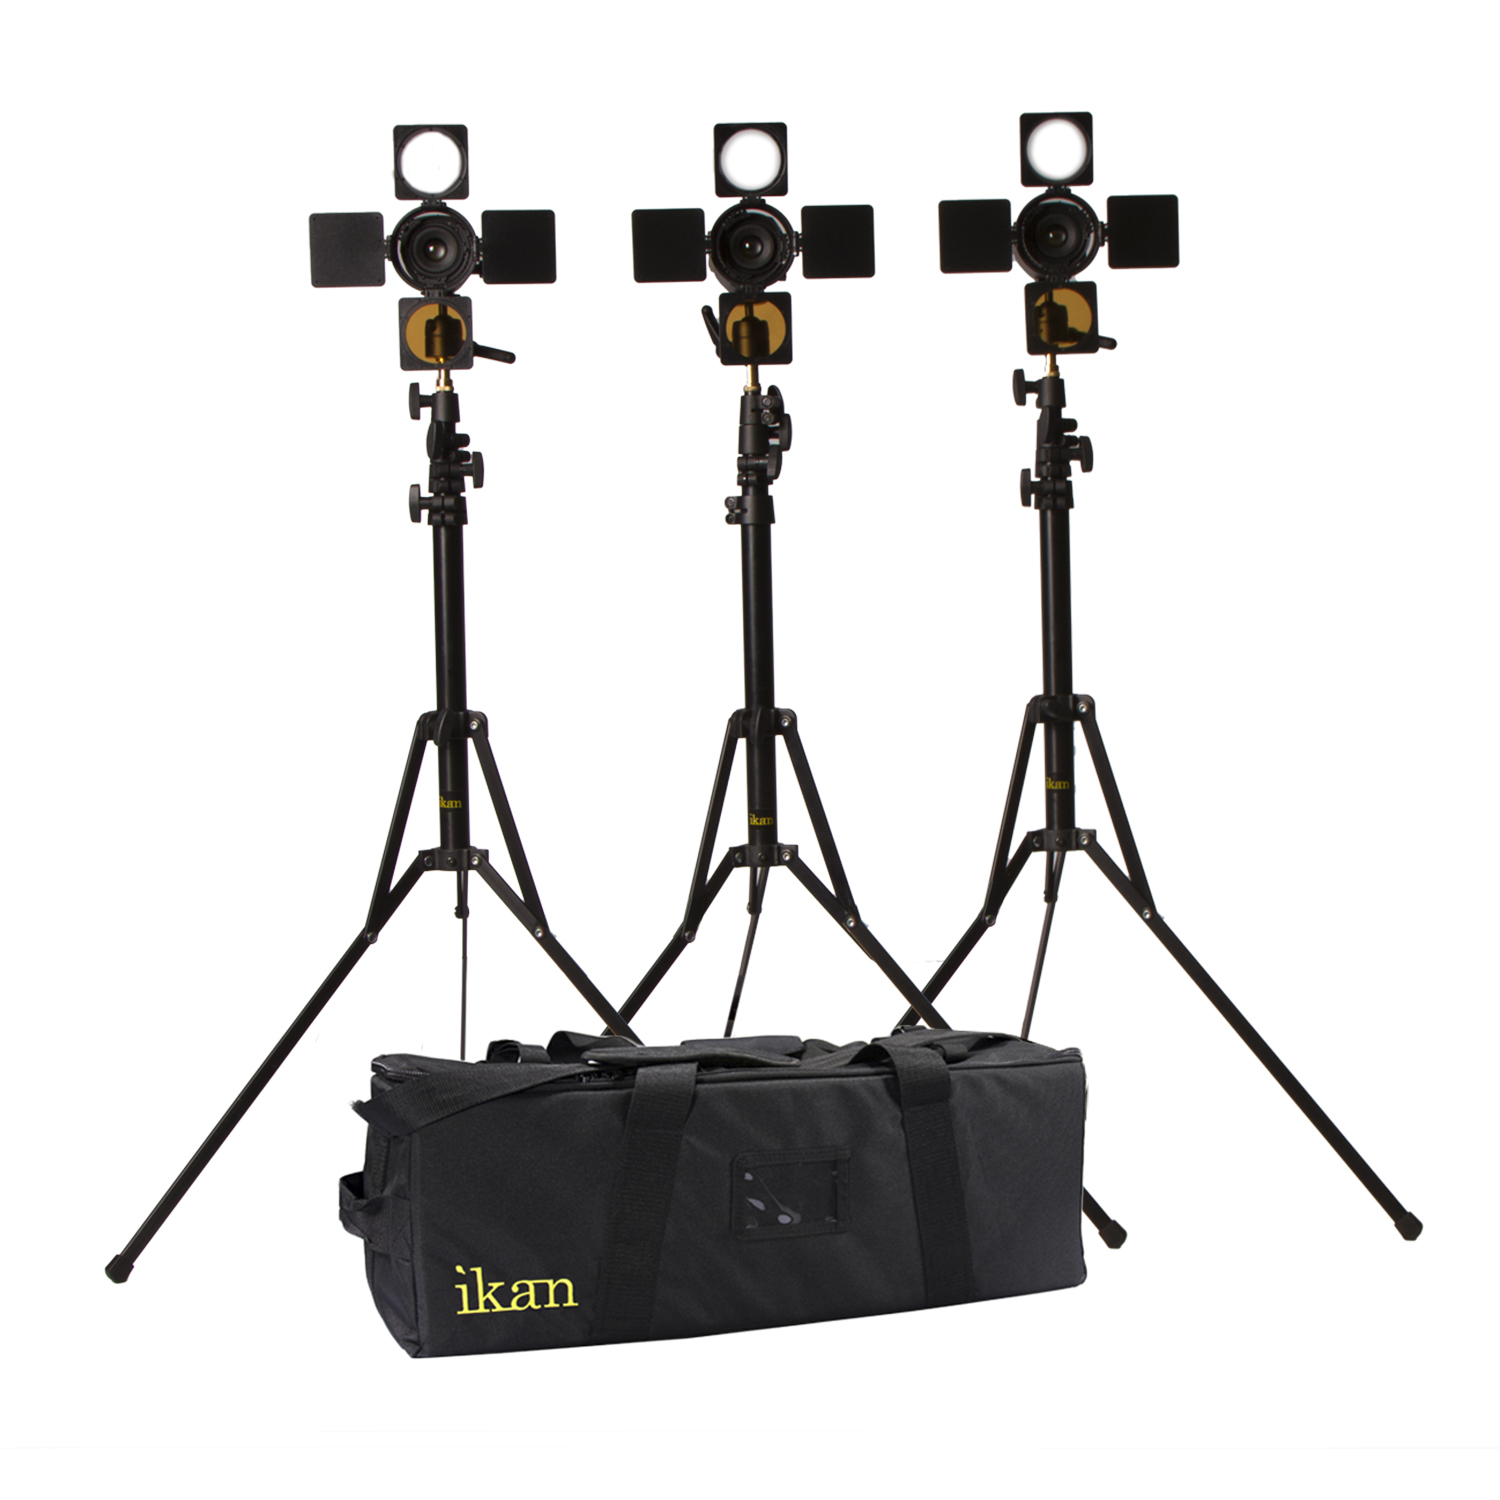
Photo by Andrea Piacquadio from Pexels Put a cinematographer in any room and area and they will start looking at how best to light it. Ambient light is fine for something spur of the moment, but controlling the lighting is how a cinematographer achieves those superbly well lit natural looking scenes we’re used to seeing. There are several simple video lighting arrangements that can be set up for recording video at home. The best lights for video recording are easy to operate, offer good color, and are powerful enough to control the scene. The main lights used by many record from home cinematographers and videographers are key lights, fill lights, rim lights, background lights, and ring lights. Any combination of these lights can give you total control over lighting ratios and exposure values. You can also check article about photography projects. We will highlight three very basic configurations and some choices for the lights themselves from Ikan. When shopping for video equipment such as lights and accessories, Ikan is a premier retailer for equipment since they make a lot of the stuff themselves and it’s designed by videographers. Single Ring Light
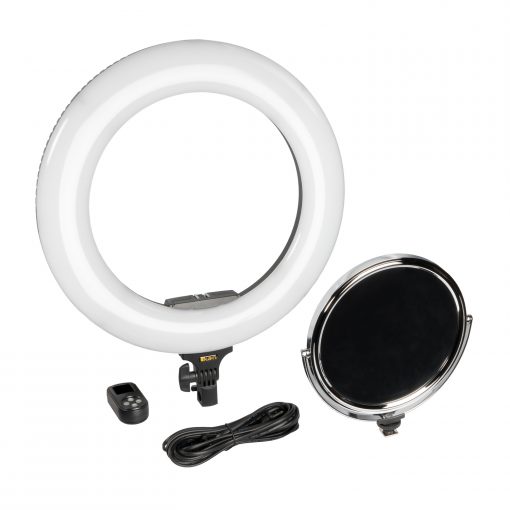
A ring light is a valuable tool for any videographer or photographer. Ring lights can deliver an almost shadowless light for relatively close up views. Figuring how to use a ring light is remarkably simple. You film through the ring of light itself. This configuration is often used for close up shots or footage of an object you’re explaining or for recording a head and shoulder only view of an interview subject or yourself. How to use a ring light: while the light is on, move the light closer or further away to vary just how shadowless it is. As with any other lights, the further away a ring light is, the more like a point source it becomes. A couple of added benefits to ring lights is that they are excellent lighting for makeup artists and you can add a ring light to any other configuration for an eye catch light that results in a circular highlight in the eye. The Oryon 18” ring light from Ikan is an excellent example of the type of ring light useful for recording video at home. The large ring emits a large swath of shadowless light and is also big enough to use with a full frame mirrorless or DSLR camera, a dedicated video, or a smartphone. 2-Point Light Setup
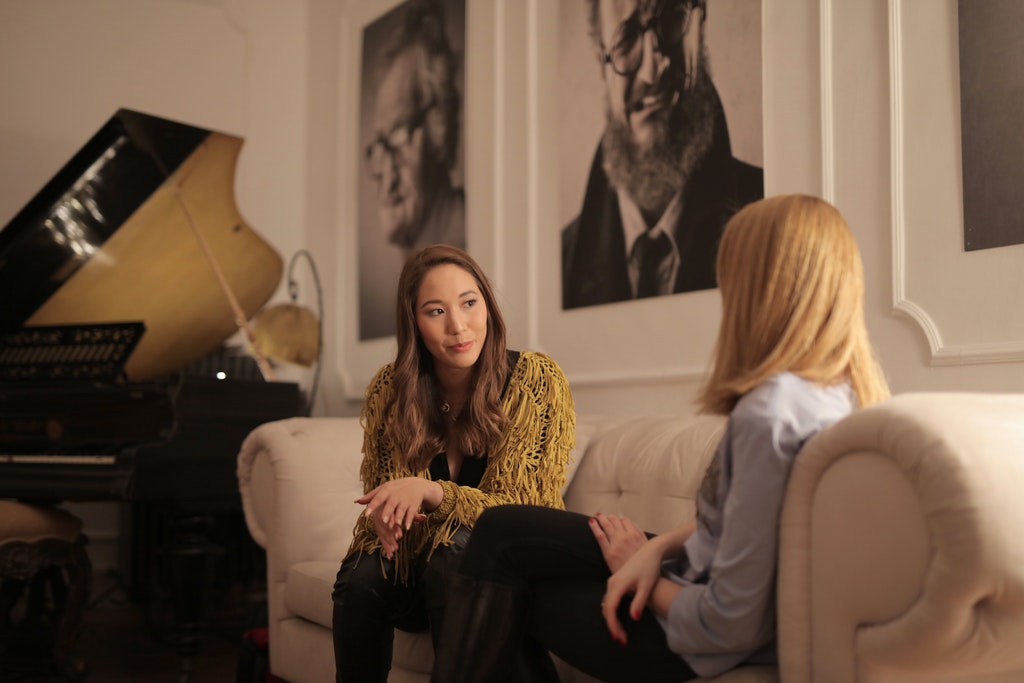
Perhaps the most common lighting configuration used in videography is the 2-point light setup. The two lights can be used in various ways. A couple of simple video lighting setups are a key plus fill light or a key plus back or edge light. An easy way to get natural light when recording video at home is the key plus fill light configuration. The key light is the stronger light and the fill is less strong. The iLED 2-Point kit from Ikan comes complete with stands and can be adjusted with the included barn doors, gels, and diffusers. In the common interview style of the subject looking slightly off the side of the frame, you can create either broad or short lighting by changing which side of their face gets the strong light. I like to have the stronger light on the side of the frame that the subject is not looking at, but either way works fine. You can also view another post about photography project ideas. Using a 2-point light setup with a key light and edge light or backlight is also very easy to use and looks natural when recorded. An important tip with any interview video regardless of the light is to make sure you have both of the subject’s eyes visible, since having one eye hidden looks odd on screen. 3-Point Light Setup
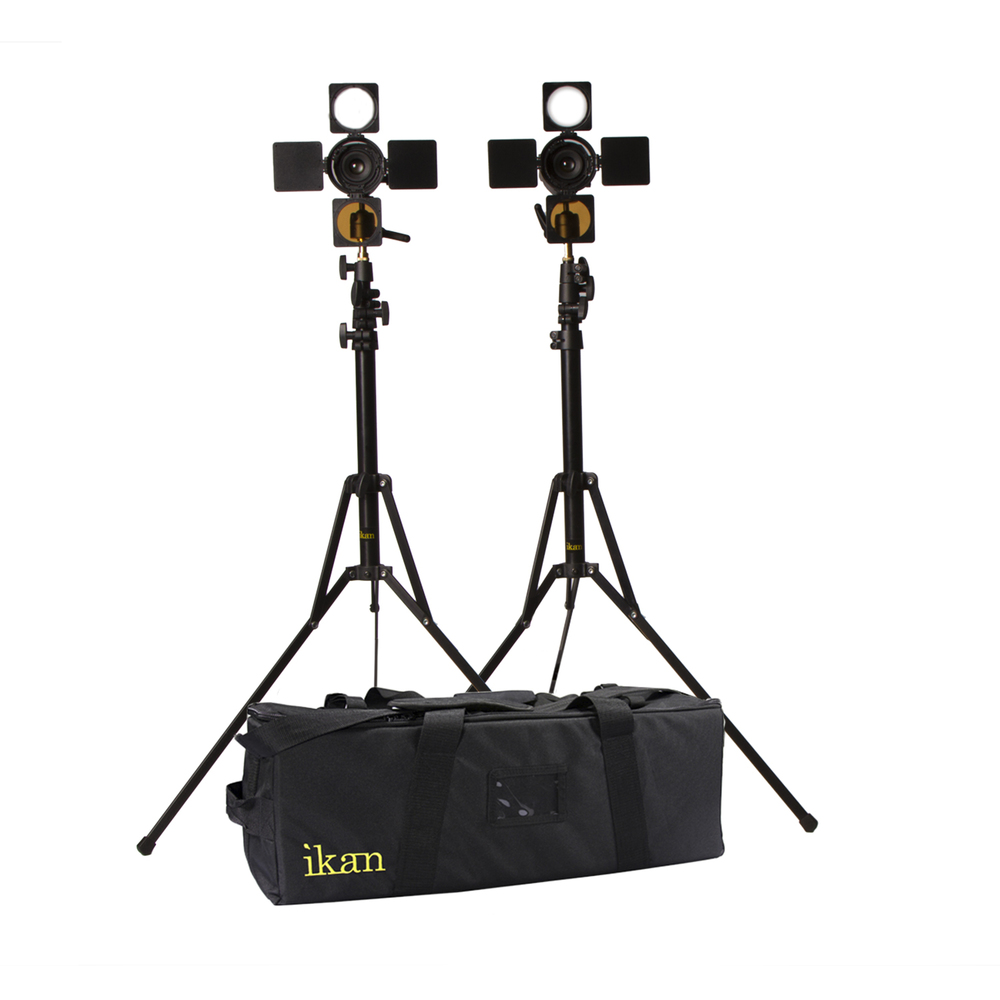
The 3-point light setup is extremely versatile and lets you configure the lights for key, fill, and back or edge light all at once. Alternatively, you could use the 3rd light to light up the background. If you are planning on doing any chroma key or green screen effects, this lighting setup is the most useful since you need to light up the background for best results. The iLED 3-Point kit is the same as the 2-point light setup listed above, just with an added light, stand, and accessories. Another alternative use for a 3-point light setup is to film a group interview or a larger scene. You can spread out the lights and balance them for even lighting or adjust lighting ratios for modeling effects. Raising one light higher than the other two is also an option for filming larger groups of people. Control Is Key
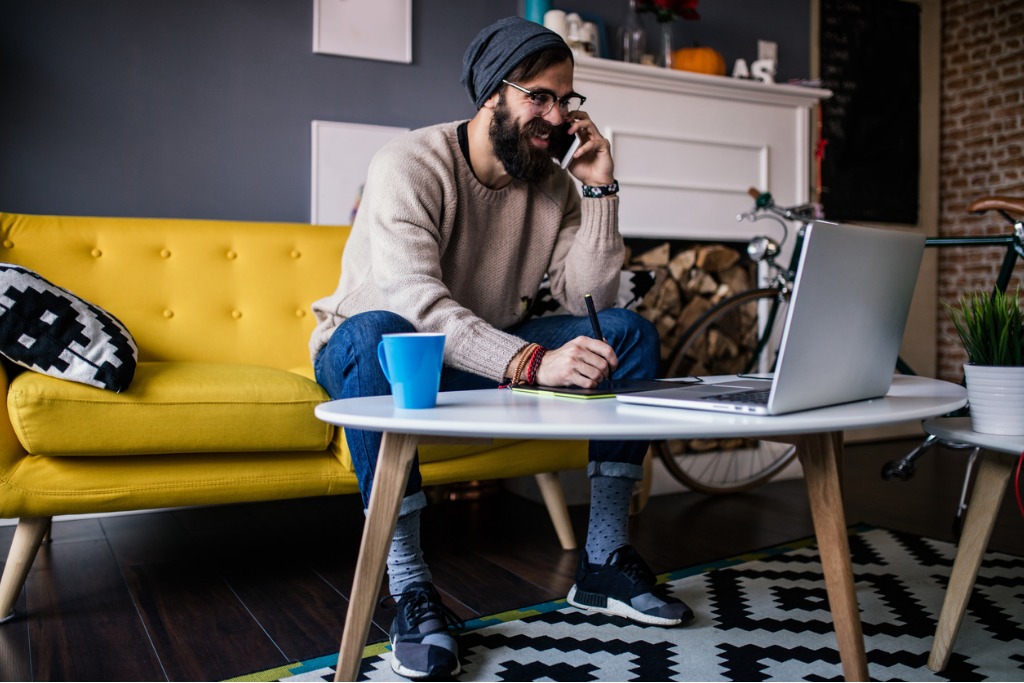
Photo by Ketut Subiyanto from Pexels The key light is your main light and how strong you have it shine will affect exposure and frame rate the most, adding the other lights will add exposure value as well as change up the ratios and balance of the scene. Move the lights around, raise and lower them, and adjust the intensity for what exposure settings you want, all of which will also enhance the naturalness of the finished recording. This blog post about the topic "Lighting Options for Recording Video at Home" was first published on our website here https://www.photographytalk.com/lighting-options-for-recording-video-at-home from https://photographytalkcom.blogspot.com/2021/04/lighting-options-for-recording-video-at.html Your Holland photography, first and foremost, will reveal how the sea shaped the country’s history and heritage; first, as an opponent from which to reclaim the land, and second, as a partner that made Holland a power in Europe and the world. Learn more about photography history on our website PhotographyTalk.com. The opening focus of your Holland photography could be the “battleground” where the country has battled the sea. What is known as the Delta Works is considered the greatest engineering feat of the modern world and it is one of the largest in human history. The immensity of the dams, sluices, locks, dikes, levies and storm-surge barriers is a wonder to behold and include among your Holland photography. These incredible structures are also excellent subject matter for both amateur and professional photographers who want to capture more abstract images of the shapes and angles of the construction as well as how light affects and changes those scenes throughout the day and night. This article about "Holland Photography—A History and Heritage Reclaimed from the Sea" was first published on our website here https://www.photographytalk.com/photography-articles/295-holland-photographya-history-and-heritage-reclaimed-from-the-sea from https://photographytalkcom.blogspot.com/2021/04/holland-photographya-history-and.html
Male Portrait - How To Pose?I'm a man, and though I don't speak for all men, I can tell you that most of us are not comfortable in front of the camera. That uncomfortable feeling shows in our portraits, where we look awkward, have a strained smile on our face, and generally feel like a noob. But, as with everything in photography, there are plenty of solutions to your man photo poses problems. Mango Street offers up some killer male portrait photography tips in the video above. Be sure to watch the video in full to see each tip in action, and read about each tip in the summary below. Try Emphasizing His Jawline
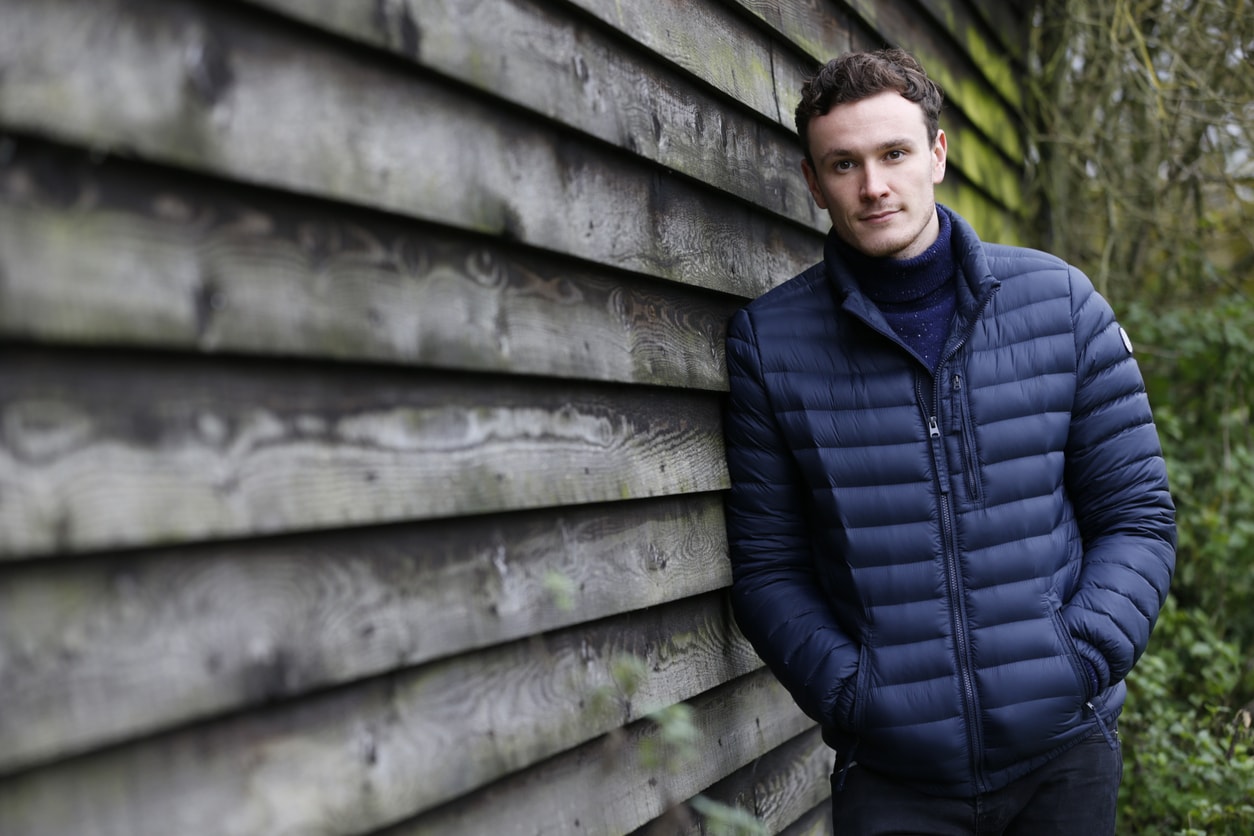
When posing a man, you might consider ways to make the image a little more masculine, and a great way to do that is to highlight his jawline. Learn more about poses for guys on our website PhotographyTalk.com. The jawline is nice and angular and is a harsher feature that lends to the masculinity of the shot. To emphasize the jawline, have the model turn to his left or right, so you have a better view of the jawline, as seen above. To enhance the view even further, find bright, direct natural light or use artificial lighting to cast a shadow of his jawline onto his neck. Again, doing so enhances the angularity of his jaw and results in a portrait that's pleasing to view and masculine at the same time. Learn More:Give Him Something to Do With His Hands
This is a great tip for any portrait subject, not just for men! The most awkward thing about portraits is when people don't know what to do with their hands. Usually, that means the go-to is for the hands and arms to dangle next to our bodies. For an improved look, have your male model do something with his hands.
He can clasp them together as seen above, cross his chest and place his hand on the opposite shoulder, brush his hair out of his face, or frame his face by stroking his beard. You can also view another post about best poses for photography. Note how these aren't vigorous or intense actions, either. Simply instructing him to put his hands somewhere can immediately minimize the awkwardness of the shot, resulting in a far more visually appealing portrait. Keep the Posture Relaxed
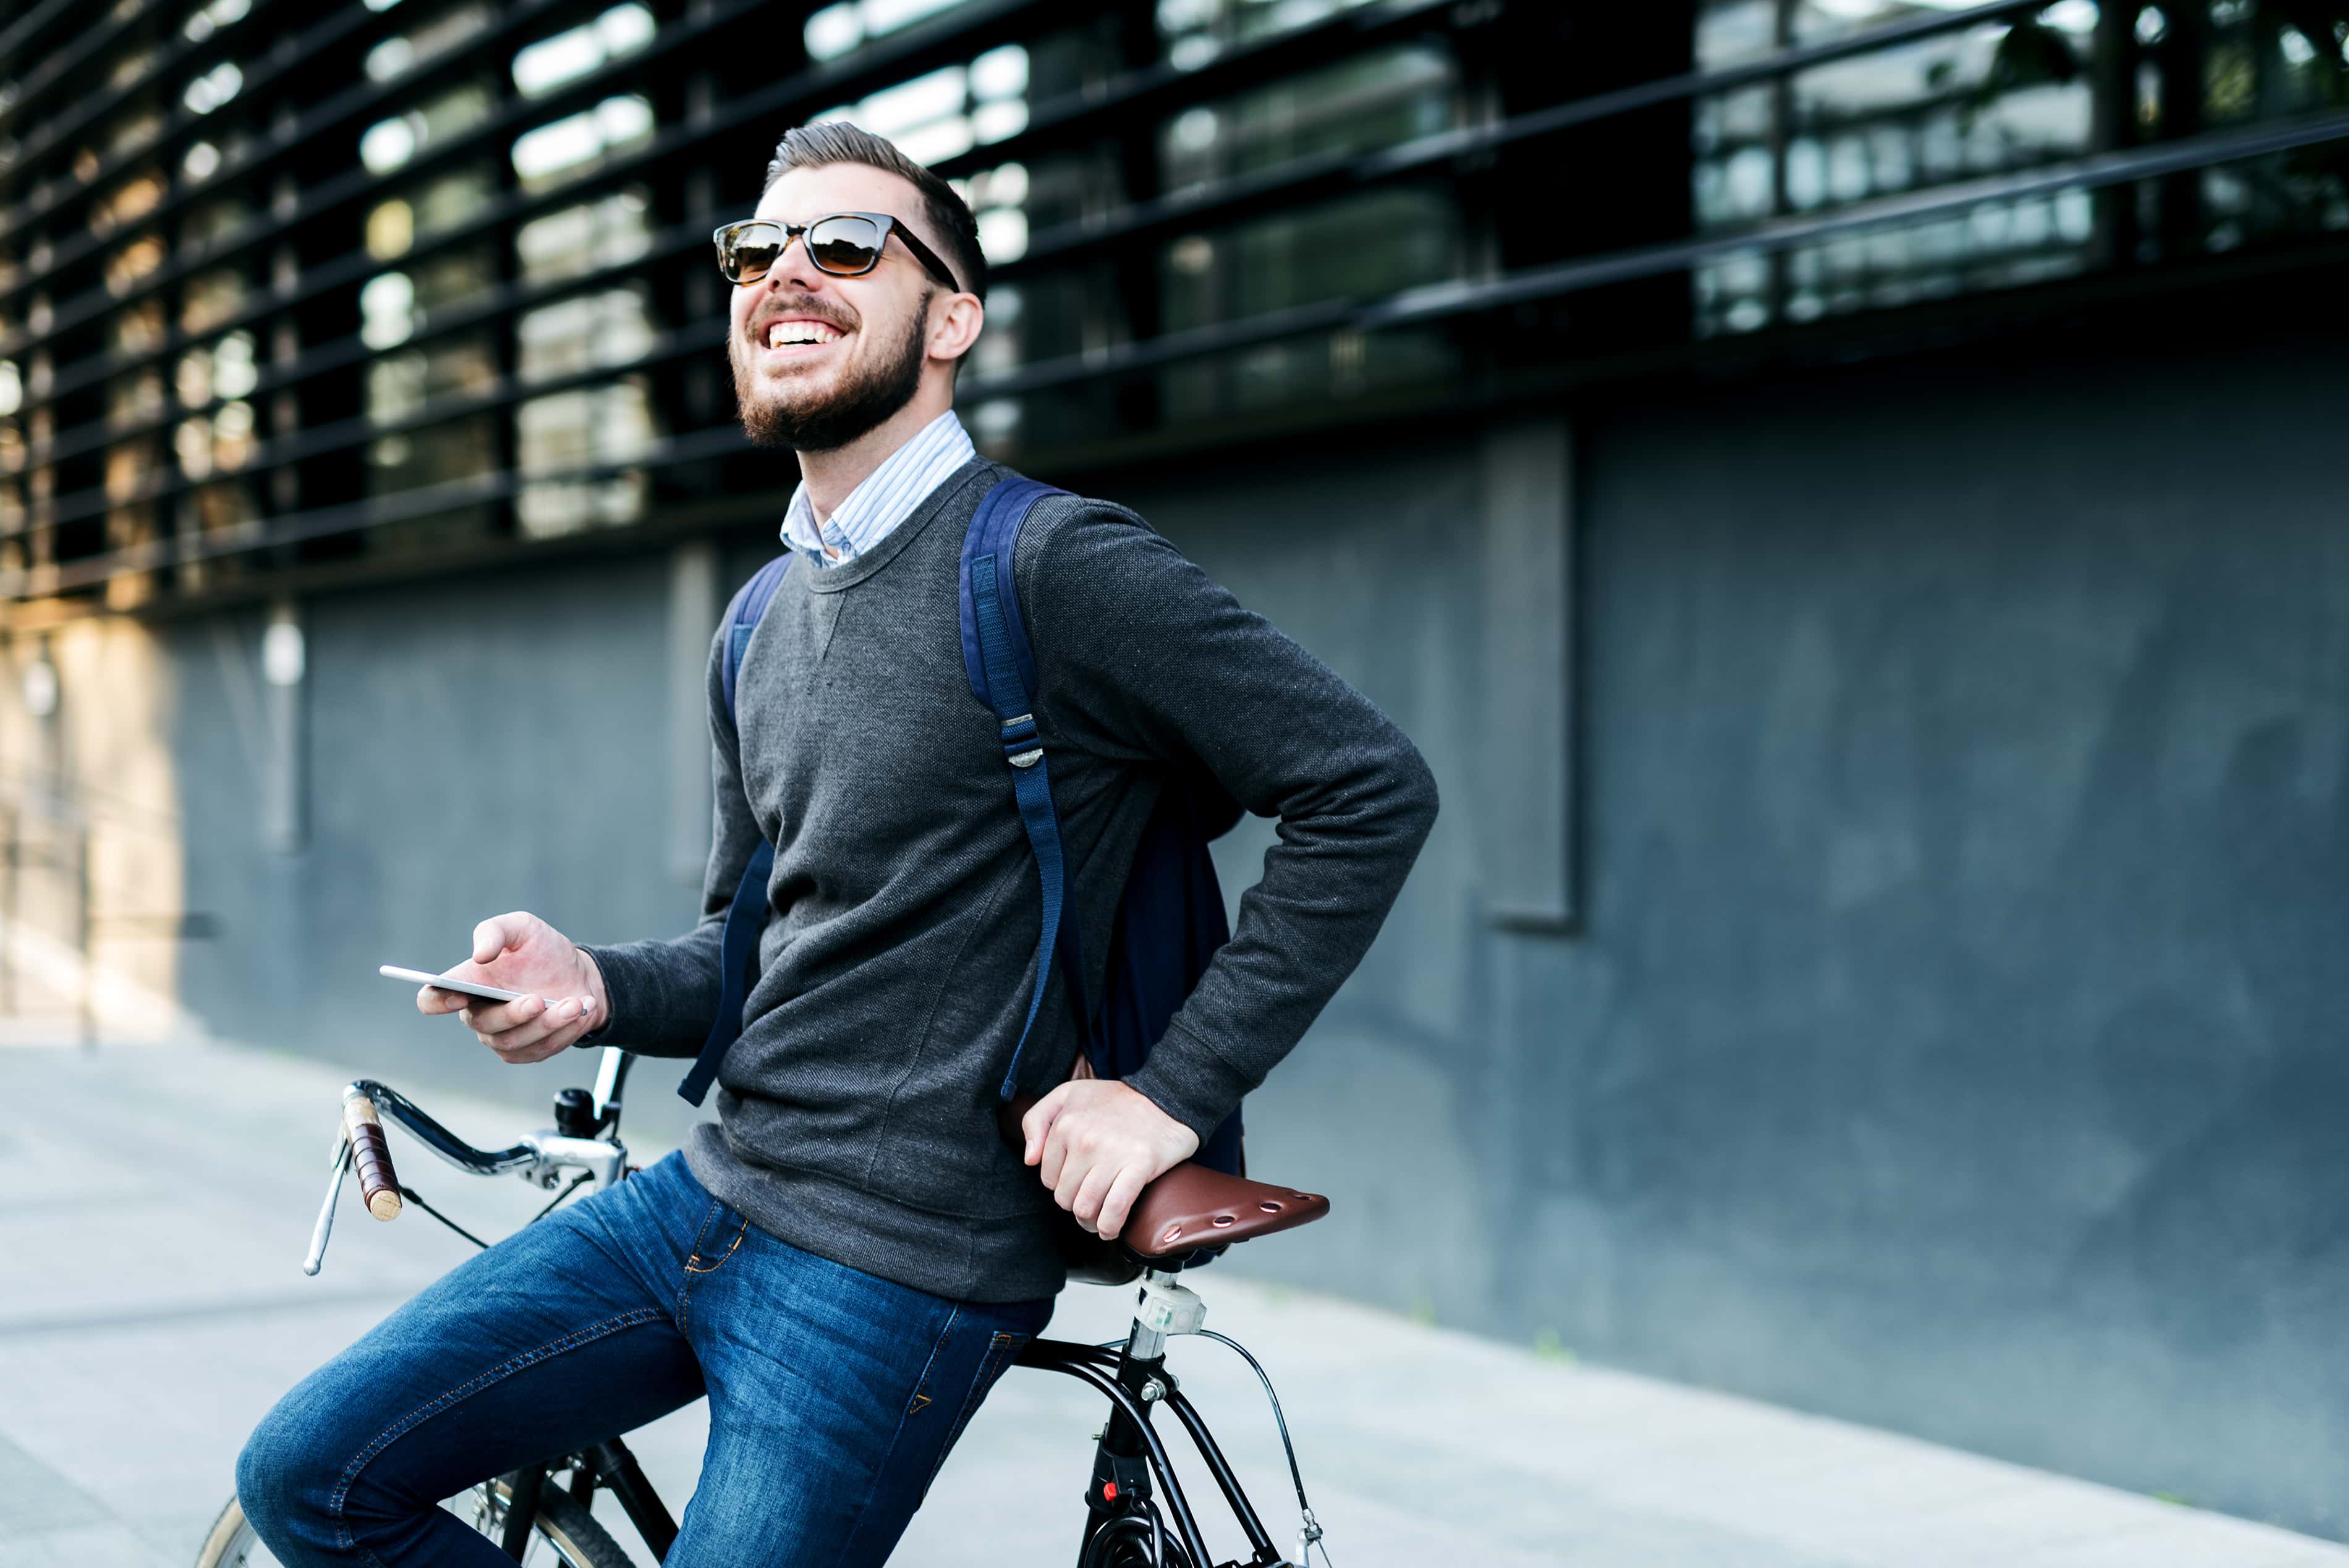
I realize that those stiff-as-a-board formal types of portraits are a necessity sometimes, but if you want to get a high-quality portrait of a man, opting for something that's relaxed will get you much better results. Whether it's leaning forward on a railing, leaning back on a wall, sitting down or even laying down, having your male subject in a comfortable posture will make him more likely to be relaxed in the portrait. When sitting down, have him lean forward, perhaps even putting his elbows on his knees. When standing, have him cross one foot in front of the other, or even one arm across his body to his opposite shoulder to keep things nice and loose.
Another interesting tip is to have him pretend that one arm is heavier than the other and that it's dragging his body down on one side. As you can see in the image above, by having him emphasize the weight of his left shoulder, it has the look that he's in motion, in the middle of shifting his positioning. That results in a nicely relaxed posture, don't you think? Bonus Tip For Man Portrait: Use the Surroundings and Props to Your Advantage
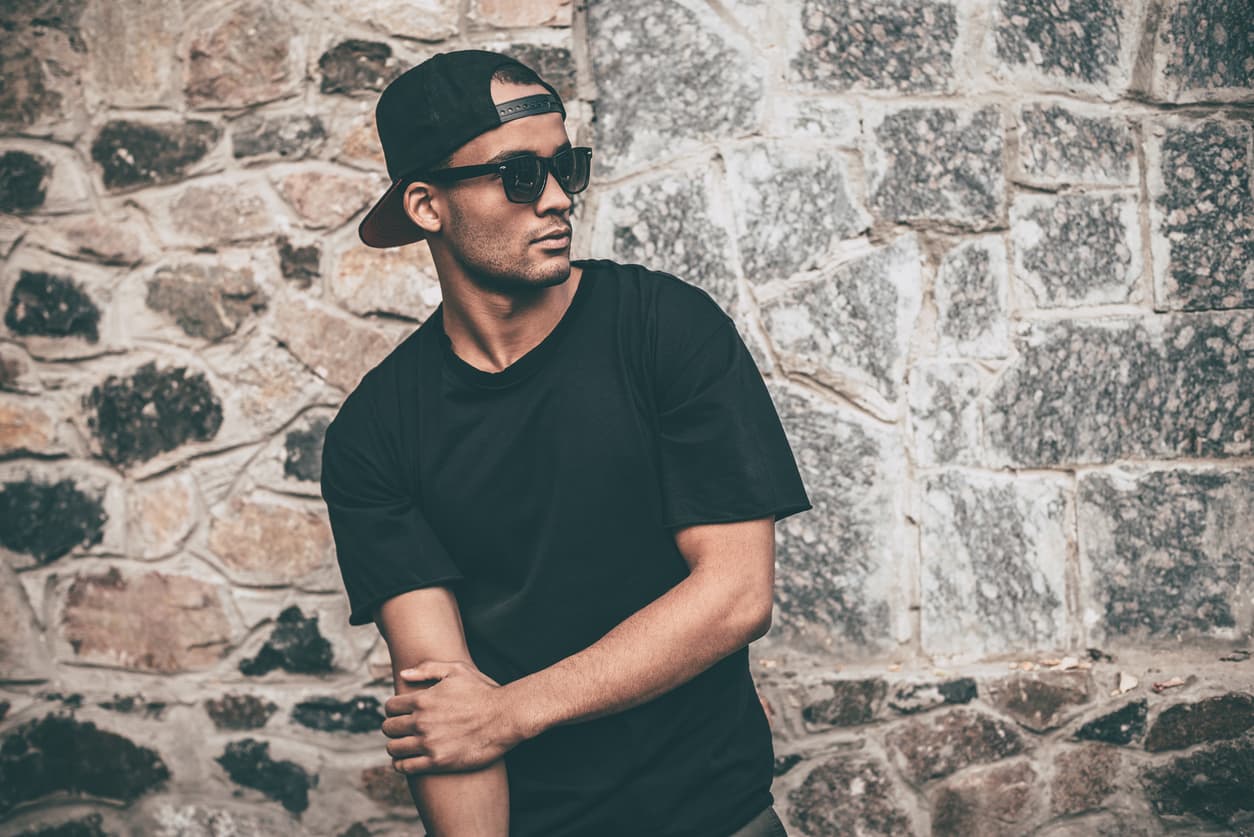
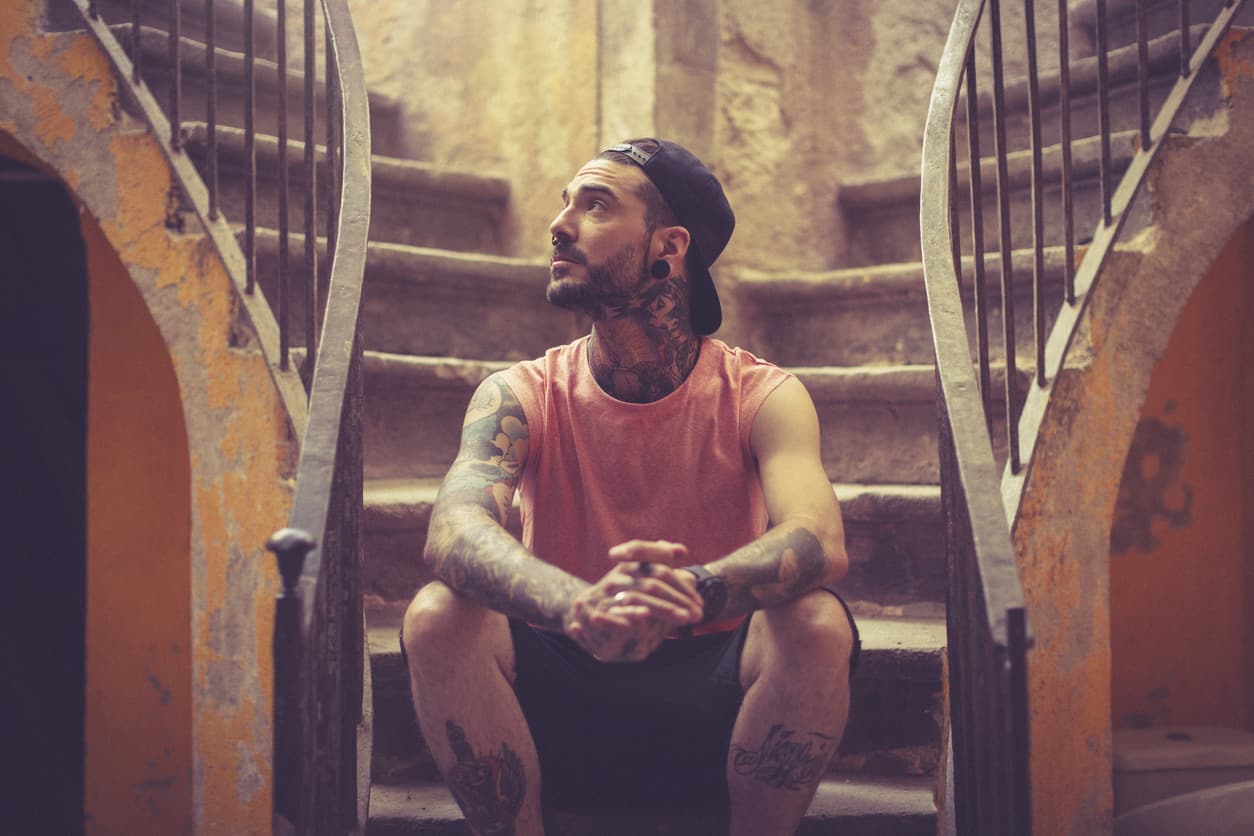
Obviously, the location you choose to shoot a portrait of a man will have a significant impact on the overall visual appeal of the image. Like was pointed out in the first tip, finding ways to add strong angles adds a masculine touch to the shot. You can also check another post about poses for boys. Looking at the image above, note how the two staircases create interesting lines that help direct our eye to the subject. Also notice how the grittiness of the background helps in creating a more edgy shot that matches this model's look. The peeling paint and the texture of the iron rails is a nice addition to create a portrait that's relaxed and masculine, but eye-catching and visually appealing at the same time.
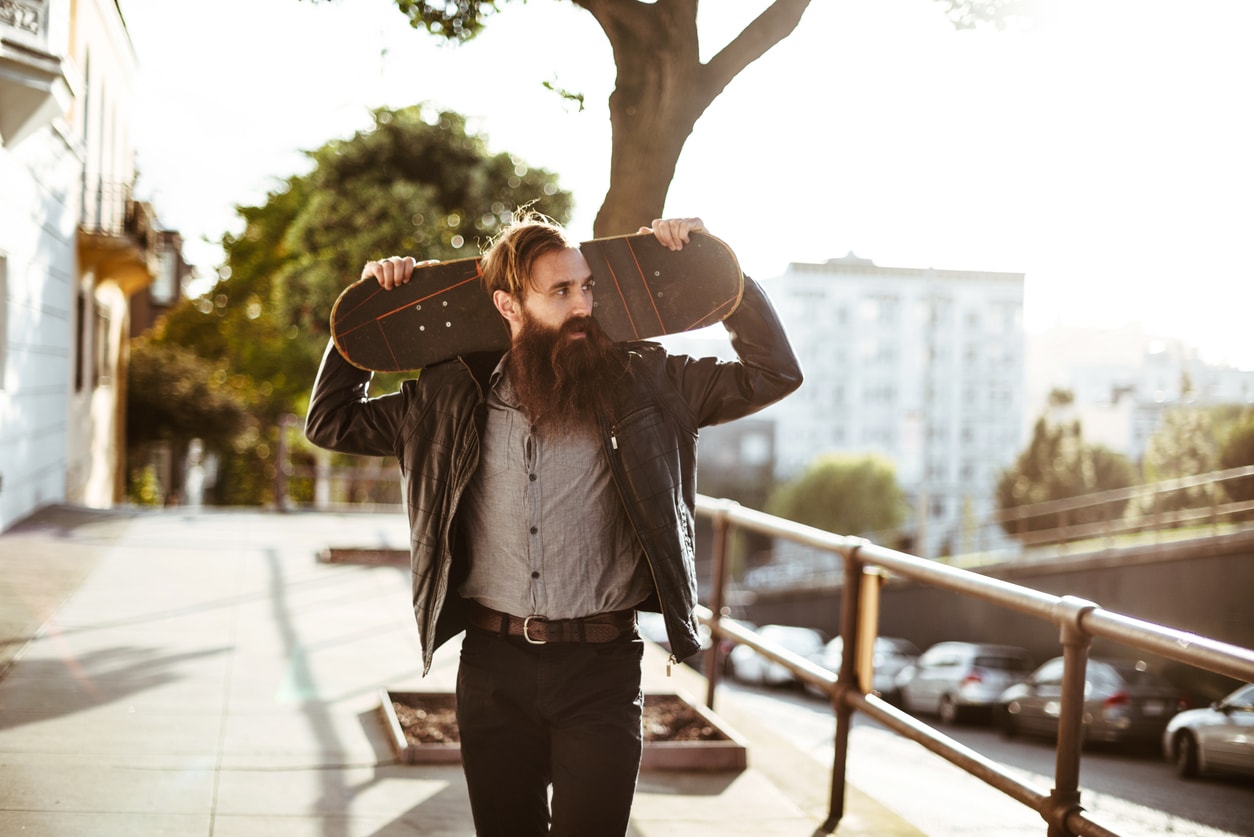
What's more, you can also use props to help your male subject get away from having awkward arms and hands. But the key is to use props in a way that they blend in with the shot. In the image above, the skateboard is the perfect prop as it fits in with the environment in which the image was taken. What's more, the skateboard looks like a natural fit for this particular man, giving the image a laid-back vibe. The point here is that getting a great portrait of a man is possible, it might just require a little extra work. And though many of us are bad at asking for directions, if you provide your male subjects with clear, straightforward directions for what you want them to do, you'll probably find that you have some pretty compelling shots as a result! This blog post about the topic "How to Pose Men for Portraits?" was first published on our website here https://www.photographytalk.com/contest-articles/7804-how-to-pose-men-for-portraits from https://photographytalkcom.blogspot.com/2021/04/how-to-pose-men-for-portraits.html Not that long ago, I wrote an article about how to pose friends for portraits. That article revolved around a YouTube video on the same subject by the fine folks at Mango Street. Their video (and that article) did quite well, so a follow-up is in order. Learn more about poses for photography on our website PhotographyTalk.com.
This time, Mango Street offers up some fresh portrait photography poses that you can try with your friends and other subjects that might not know how to pose. And the best part? Not only do these photo poses make your friends look great, but they're easy for you to explain and direct your friends to get the pose just right. Have a look at the video above, and for a play-by-play of each pose, check out the article below. Build Trust With Your Model Before Posing for Portraits
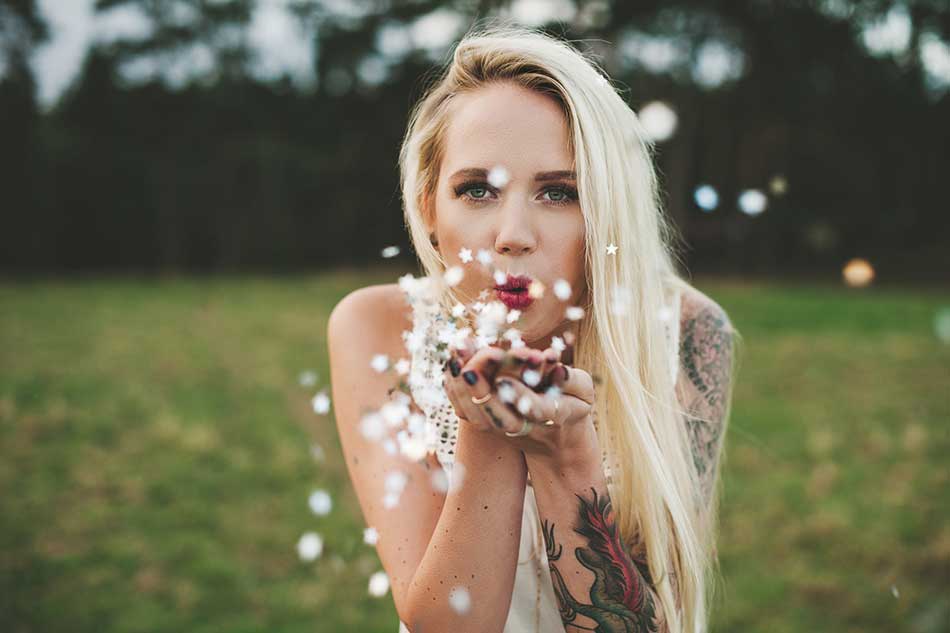
First things first... Not everyone is comfortable in front of the camera, and if the model is uncomfortable, that'll be on full display in your portraits. There are plenty of ways to disarm a model before a portrait shoot. You can have a quick cup of coffee or tell a few jokes. Have them do something silly like dance around to loosen them up. You can also ask them questions about their lives if you don't know them that well, and if you do know them, reminisce about fun times you've had in the past. The point is that the less they're thinking about being photographed, the more comfortable and relaxed they will be in your portraits. The best portrait poses are those in which the model looks natural and as though they aren't terrified to be in front of the camera! Editor's Tip: Finish off your portraits by having them printed as fine art.Match Your Model's Clothes to the Environment
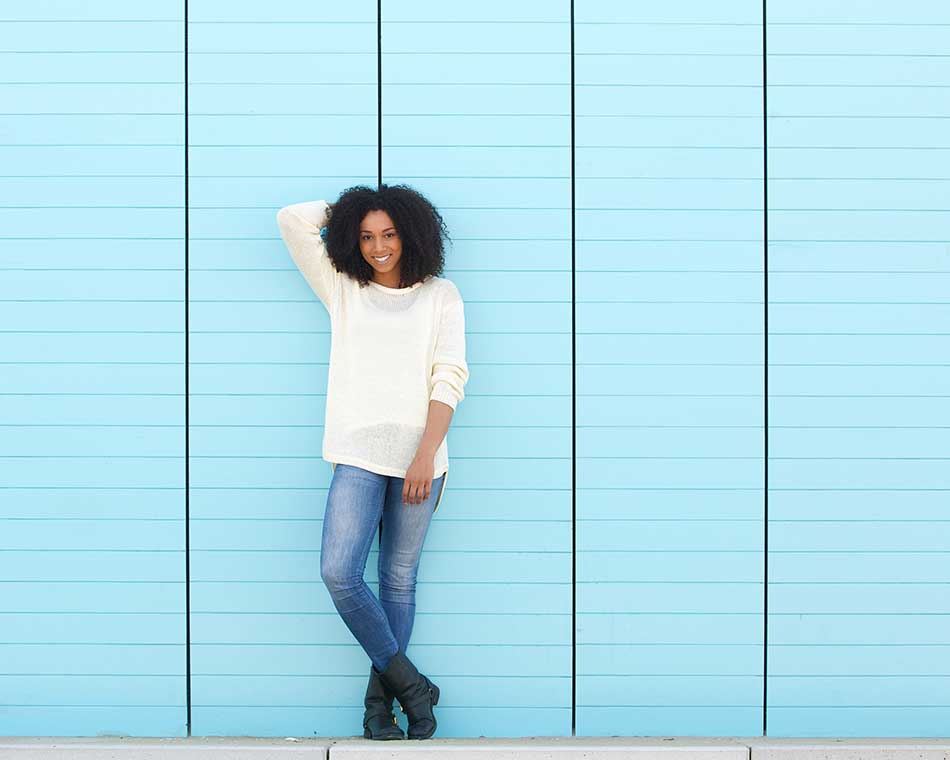
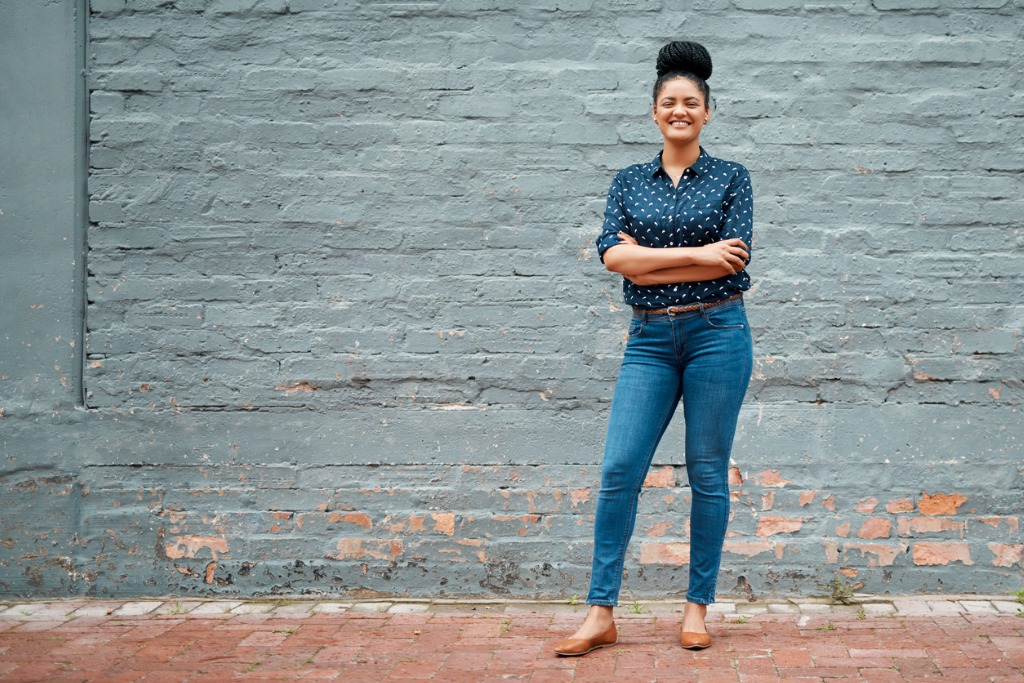
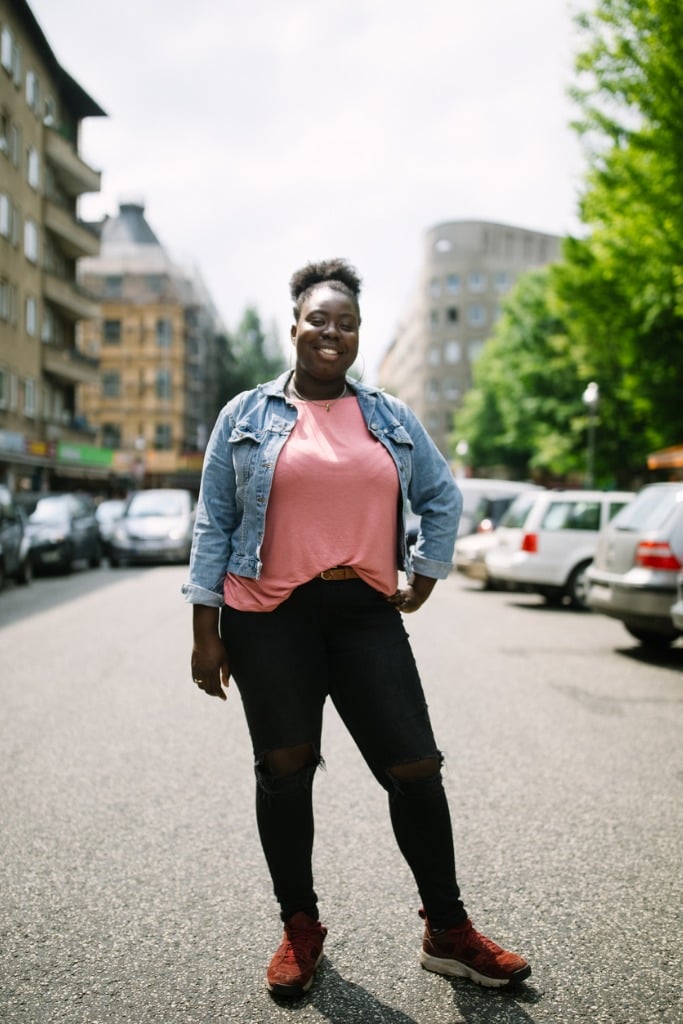
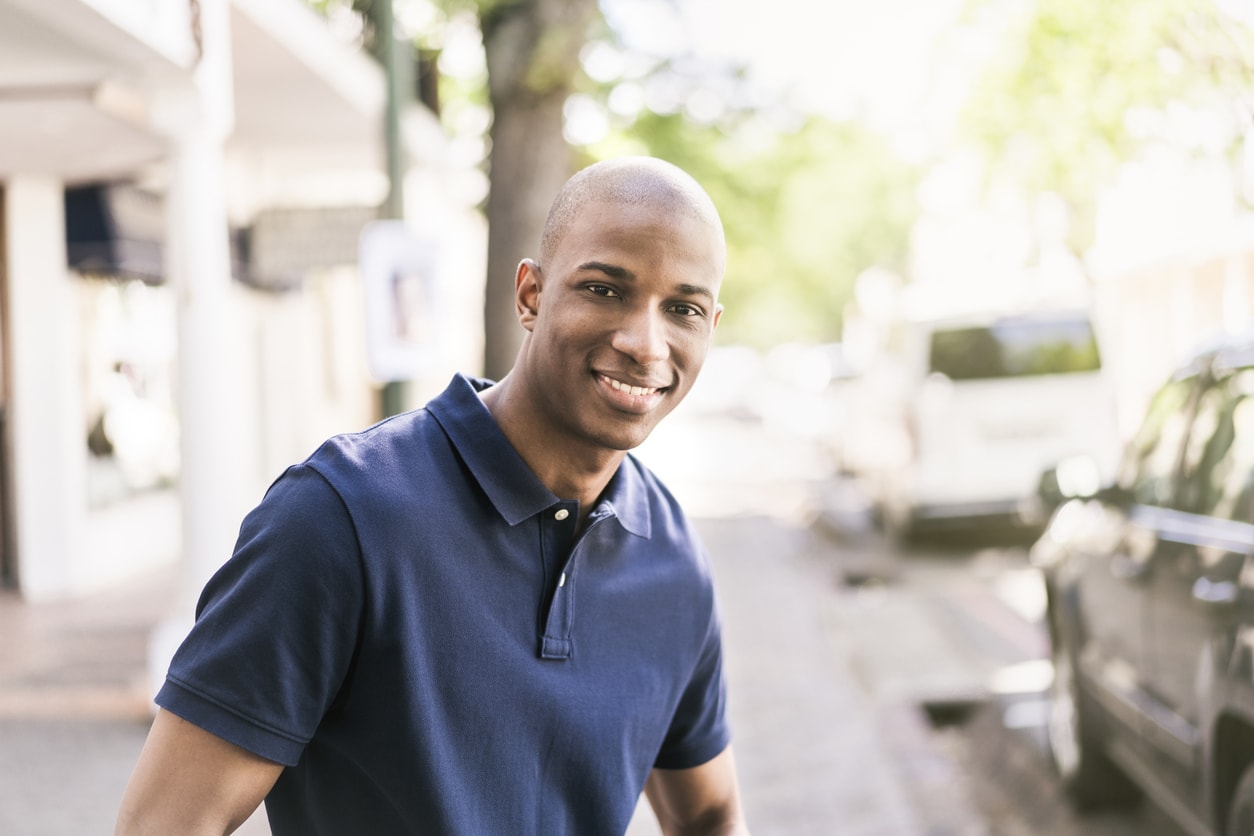
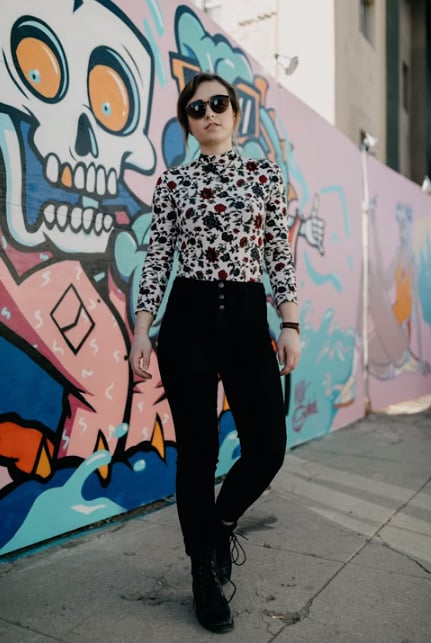
It's often the little details in a portrait that elevate it to the next level, so as you're thinking about posing for portraits, consider things like what the model is wearing and the environment in which you're taking their portrait. You can also view another post about poses for guys. As pointed out in the video, if the model is wearing something that's got a lot of colors or a wild pattern (as shown above), it's best not to pose them in front of a similarly colorful or pattern-filled background.
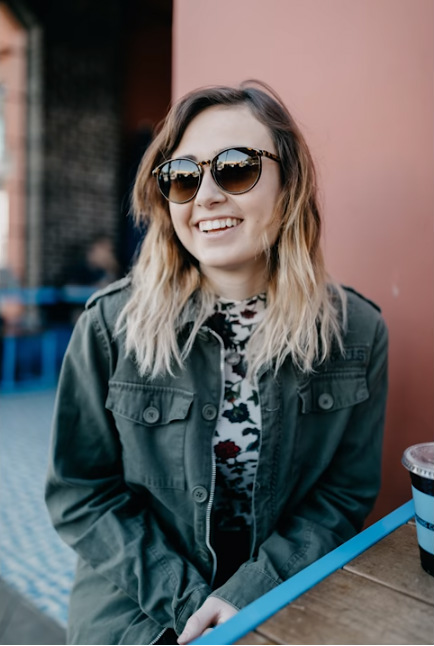
Instead, by covering up the model's shirt with a plain, gray top, you get a more cohesive look. The urban-themed background now compliments the urban clothing the model is wearing instead of competing for attention.
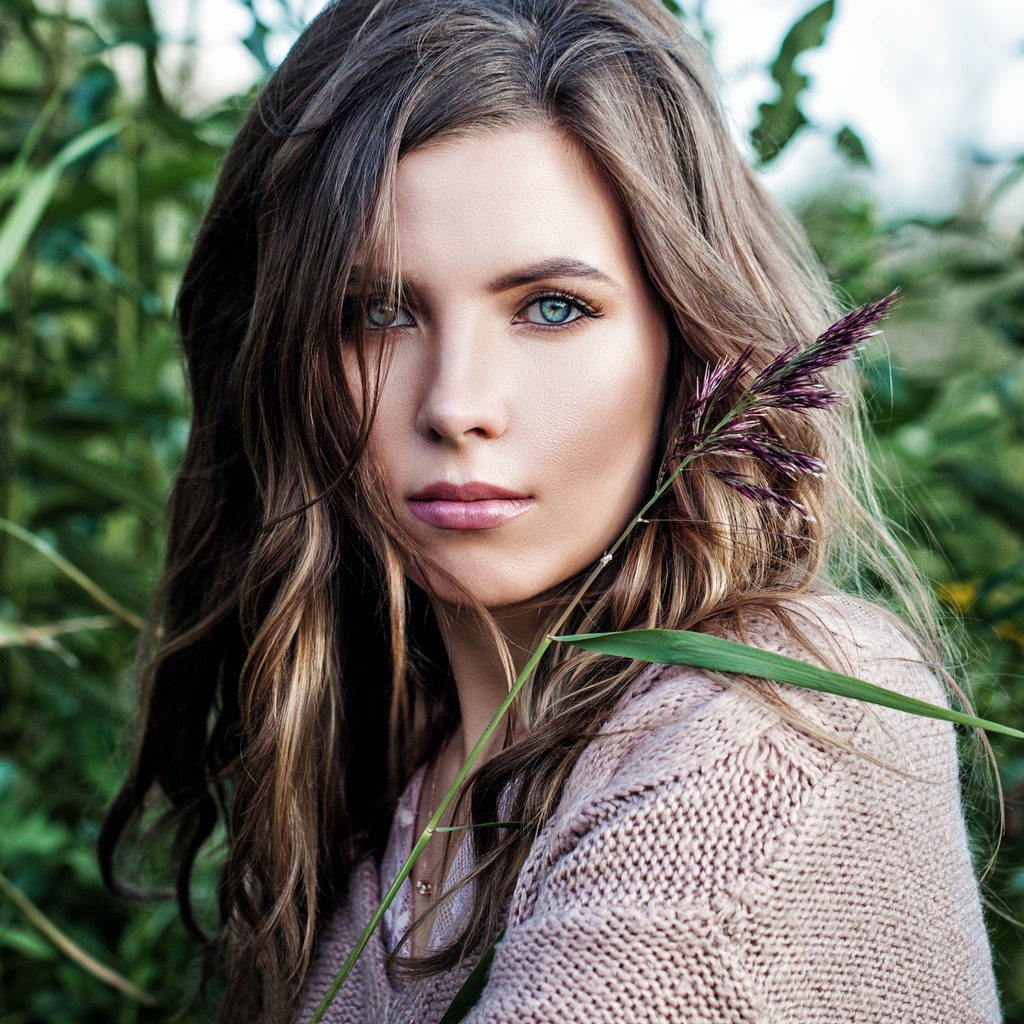
A better background option to pair with the model's floral top is something that's got a consistent color. In this case, that meant posing the model in front of some greenery, which provides a nice, dark backdrop on which the bright, floral shirt she's wearing has a lot of pop. Portrait posing tips like being mindful of small details give you much more power to create portraits that have tons of visual appeal. How to Pose for Portraits: Watch the Hands
The biggest problem people have when posing for portraits is what to do with their hands. The hands can get super awkward really fast, so ensuring that the model has somewhere to put them or something to hold will definitely help your photos. You can direct the subject to use their hands to frame their face, as was done above. This solves two issues - first, it gives them something to do to avoid awkward hands, and second, it helps you draw more attention to the most important part of the portrait, which is the subject's face.
Another option is to have the model perform some sort of action. This can be as simple as pointing or clapping. You can also have them play with their hair (as shown above), feel the material of their shirt or jacket, or have them hold something as well. Editor's Tip: Add color and texture to your portraits by adding portrait props.Final Thoughts
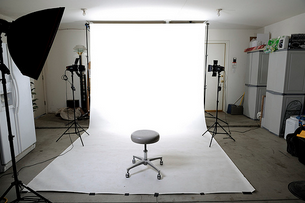
As they say, the devil is in the details. That's certainly true when you're creating a portrait. Posing a model that doesn't know how to pose doesn't have to be difficult; you just need to pay attention to little details that often derail portraits. By building rapport with your model before you take a single photo, keeping the model's wardrobe attuned to the environment of the shot, and helping them decide what to do with their hands, you might be surprised at how much better your portraits look and feel. This article about the topic "Best Portrait Posing Tips for People That Don't Know How to Pose" was first published on our website here https://www.photographytalk.com/contest-articles/8347-best-portrait-posing-tips-for-people-that-don-t-know-how-to-pose from https://photographytalkcom.blogspot.com/2021/04/best-portrait-posing-tips-for-people.html 1. Whatever drives you to pursue your interest in digital photography, it will eventually cause you to think about having a studio in your home. Before you take the plunge, however, make sure you’re confident and serious about making the investment in money and time to use a home studio. No one can predict the future, but you might want to explore many of the other common types of photography (landscapes, nature, sports, architecture, street life, etc.), in case one of these suddenly fires your imagination more than working in a studio much of the time. Learn more about home photography on our website PhotographyTalk.com.
2. The primary purpose of most first-time home photography studios is to shoot portraits with multiple lighting fixtures and various accessories, such as umbrellas, lightboxes, etc. It’s not only an excellent learning experience, but, after plenty of practice, it often leads to a serious amateur photographer’s first opportunity to make money with his or her camera.
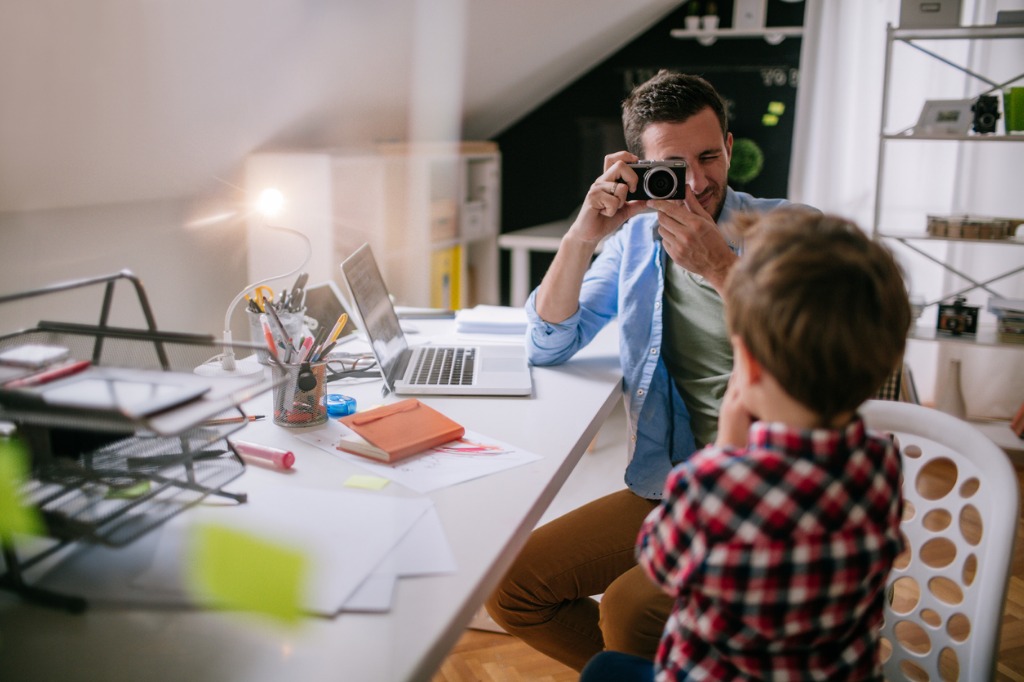
3. When it comes time to scratch that inch, you must have a plan before you start ordering equipment and moving one of your children from his or her bedroom to the basement, so you can commandeer the bedroom for a studio. 4. The location of your studio is the first factor to consider. You want it to be where you can leave equipment on the floor without having to pack it every time you finish a shoot. For that reason, it must be in a space in the basement or attic that doesn’t disrupt family life, but it should also be behind a closed, locked door, so children can’t enter and injury themselves. 5. It must also be an area of your home where you can erect a temporary structure for backdrops or to hang lights from the ceiling level. 6. It’s also important that your home studio is well ventilated, since studio lights generate plenty of heat very quickly. 7. Once you’ve decided on the location for your home studio (and your spouse or significant other agrees), you must next plan the layout of the studio. You want to use the longest dimension of the room, so you have more shooting options of your subject. Plan on finding some coverings to block any sunlight entering the windows. 8. You’ll then want to construct that temporary structure, so you can install a seamless white background that creates an “infinity” drop, which simply means that the background is one piece that hangs from and covers the back wall, and then spreads across the floor. A large white sheet will work just fine. An alternative to building a frame for a backdrop is to purchase a backdrop kit, such as the Photoflex FirstStudio Backdrop Support Kit. It sells for $149.95 at B&H Photo Video. It’s easy to drape a white sheet over the Photoflex frame or purchase studio-specific roll paper, so you’ll always have a fresh, clean background for each shoot. 9. Include a small stool, as part of your studio equipment. What the pros do is to place the stool where your subjects will sit under or behind the backdrop, so it’s not seen in your portrait photos. 10. Now that you know what kind of photography you will shoot in your home studio, where it will be located and how you plan to use the space, you can finally decide on the appropriate lighting package. Since this will be your first foray into the studio experience, you want to be budget-conscious and start with a basic kit. 11. An excellent choice is the FirstStudio Three-Light Portrait Kit from Photoflex. It includes 3 FirstStar light heads, 3 FirstStar 250-watt lamps, 3 45-degree silver umbrellas and 3 Photoflex LiteStands. This Photoflex FirstStudio Kit is available from B&H Photo Video for $379.50. 12. Once you have your Photoflex FirstStudio Kit, you can learn the three-point lighting concept and many other lighting techniques at the free online PhotoflexLightingSchool. You’ll find it at www.photoflexlightingschool.com/. Your feedback is important to thousands of PhotographyTalk.com fans and us. If this article is helpful, then please click the Like and Re-Tweet buttons at the top left of this article. This article about the topic "12 Tips To Create a Photographer’s First Home Studio" was first published on our website here https://www.photographytalk.com/photography-articles/1801-12-tips-to-create-a-photographers-first-home-studio from https://photographytalkcom.blogspot.com/2021/04/12-tips-to-create-photographers-first.html I remember when we brought our son home, thinking just how incredible it was to be a father. Of course, the problem is that kids are only kids for what seems like a moment. That's why it's so important for parents - whether we're photographers or not - to document those fleeting days of infancy and childhood before they're gone. Learn more about creative photography ideas at home on our website PhotographyTalk.com. I'm a big advocate of hiring a professional photographer to capture images of my little guy.
But our portrait sessions are so few and far between that I want to be able to capture memories along the way. I want you to be able to do the same as well. So, here's a few tips you can use to take better portraits of your newborn right in the comfort of your own home. Safety First
Julie Lynn Photography First things first...keep your baby safe. I know this is a no-brainer, but being extra cautious with your little one is paramount. That means having a second (or even third) set of hands with you as you work, just to ensure you've got plenty of helpers to assist you in dressing the baby, posing the baby, and holding/burping/changing the baby, too!
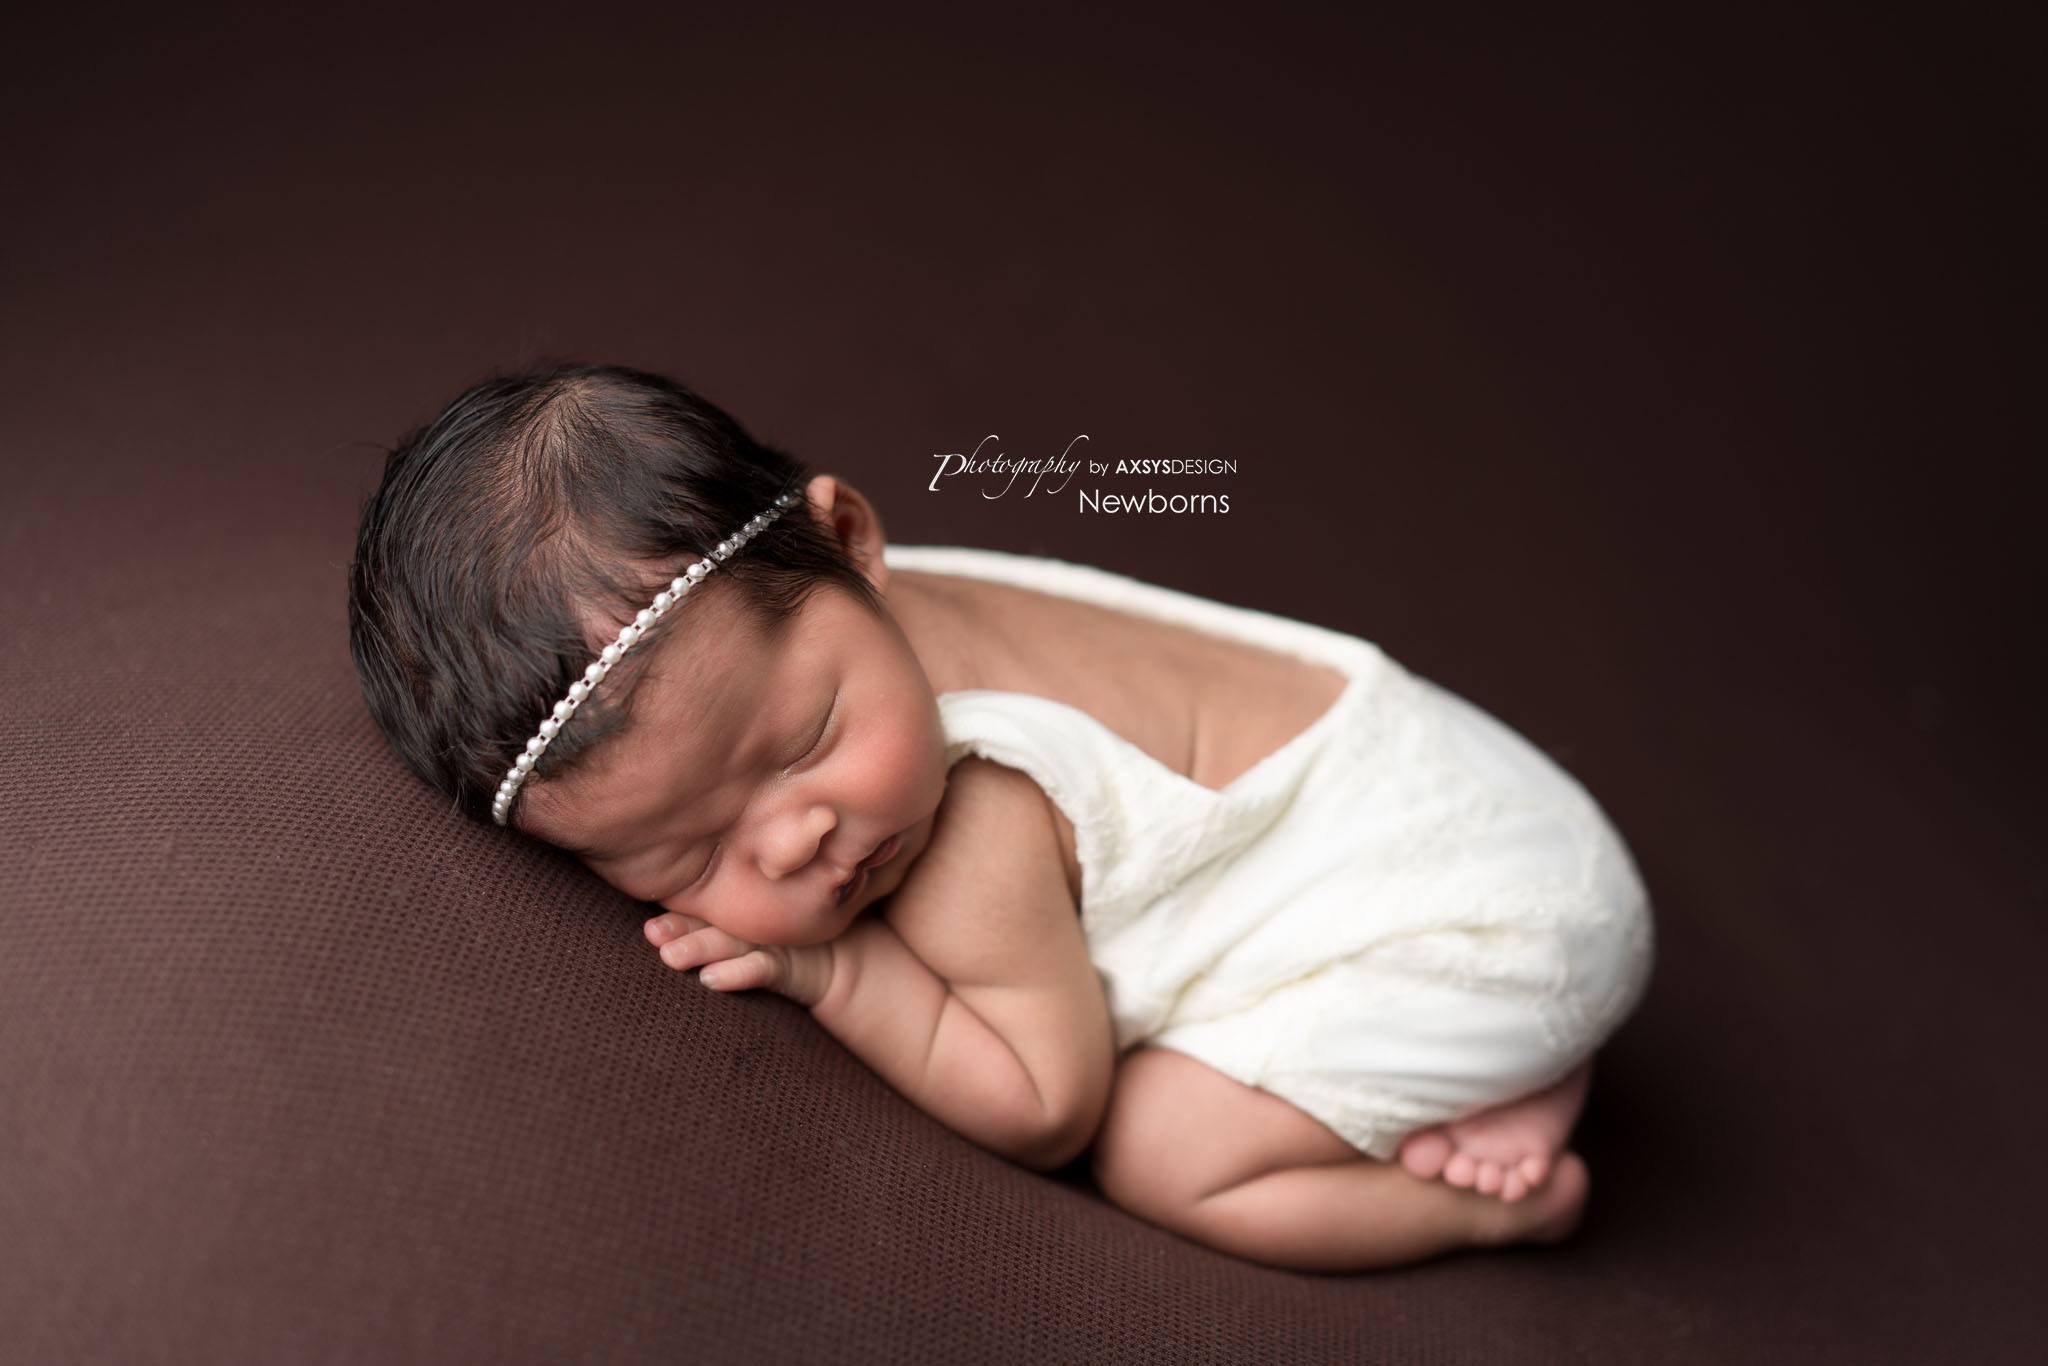
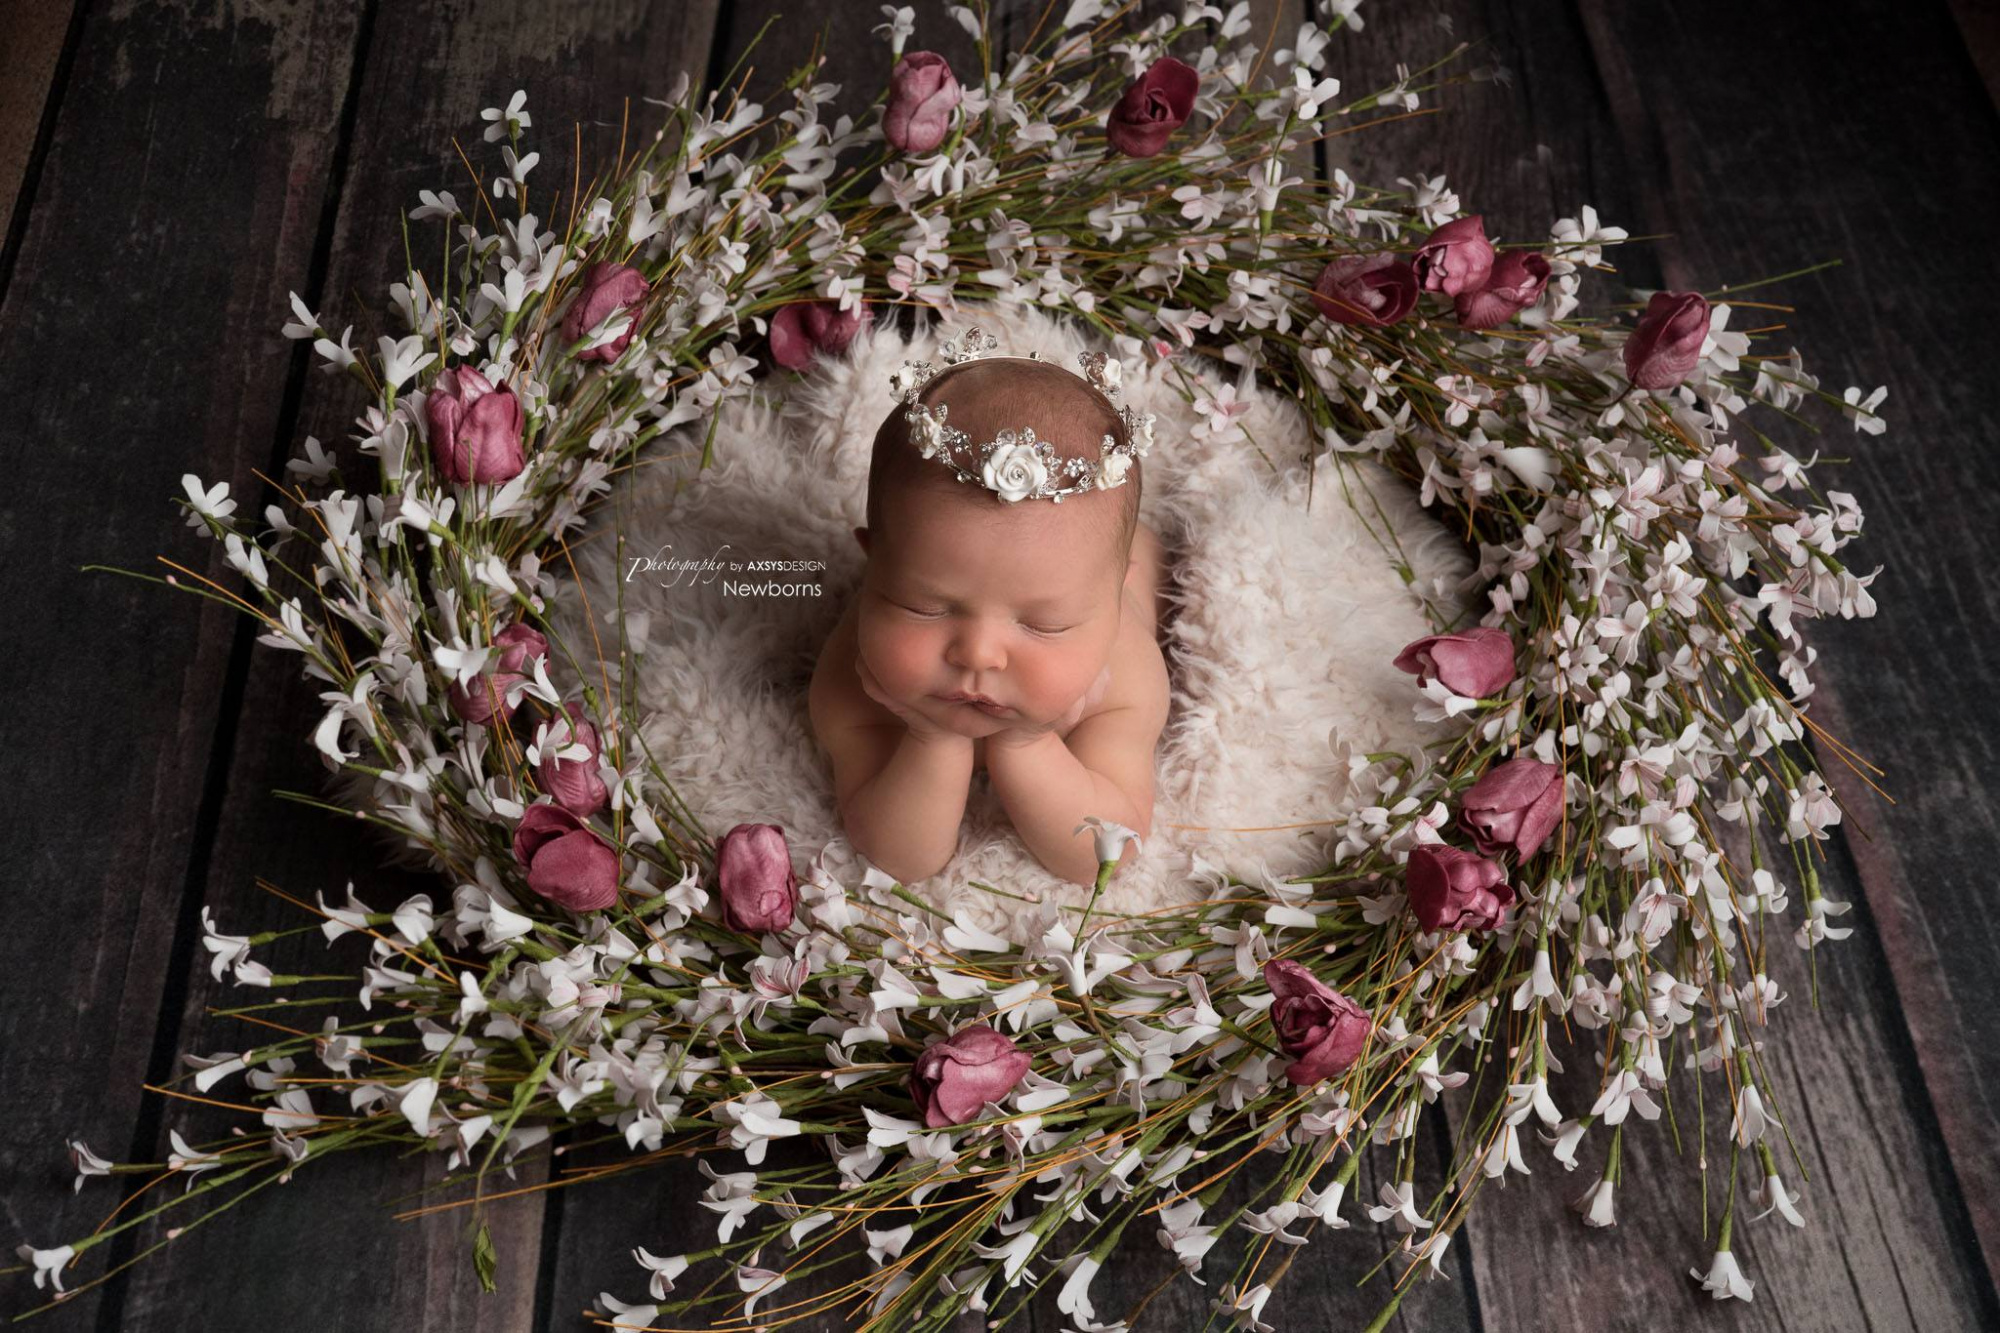
Axsys Design You also need to keep your little one comfortable by ensuring they have plenty of clothing or wraps to keep them warm, or if you're taking photos of them in the buff, be sure to crank up the heat beforehand so they don't get cold. You can also view another post about photo ideas at home. And if you want to pose your little guy or gal as was done in the image above, be sure you've got plenty of bumpers and foam underneath and behind them to support their little heads and necks and to keep them from suddenly rolling over. Lighting is Key
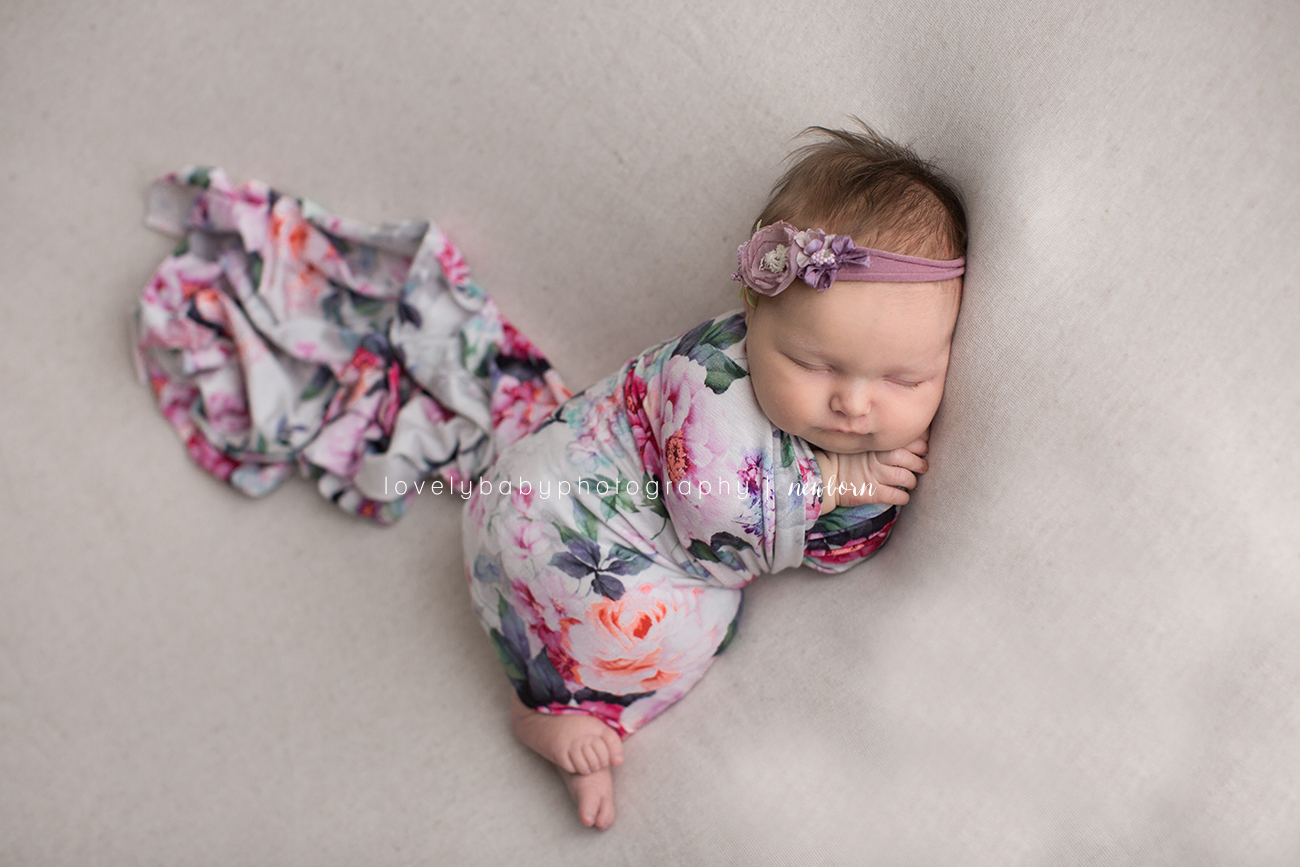
Lovely Baby Photography Take cues from sunlight to create lighting that looks and feels natural. One way to do that is to light the scene from above, just like the sun would do. Using something as simple as a single incandescent lamp, lighting the portrait such that the light falls across your newborn at around a 45-degree angle will give you warm highlights and soft shadows, not unlike those you see in the image above. If you see a small, soft shadow under your baby's nose, you'll know you've got it right.
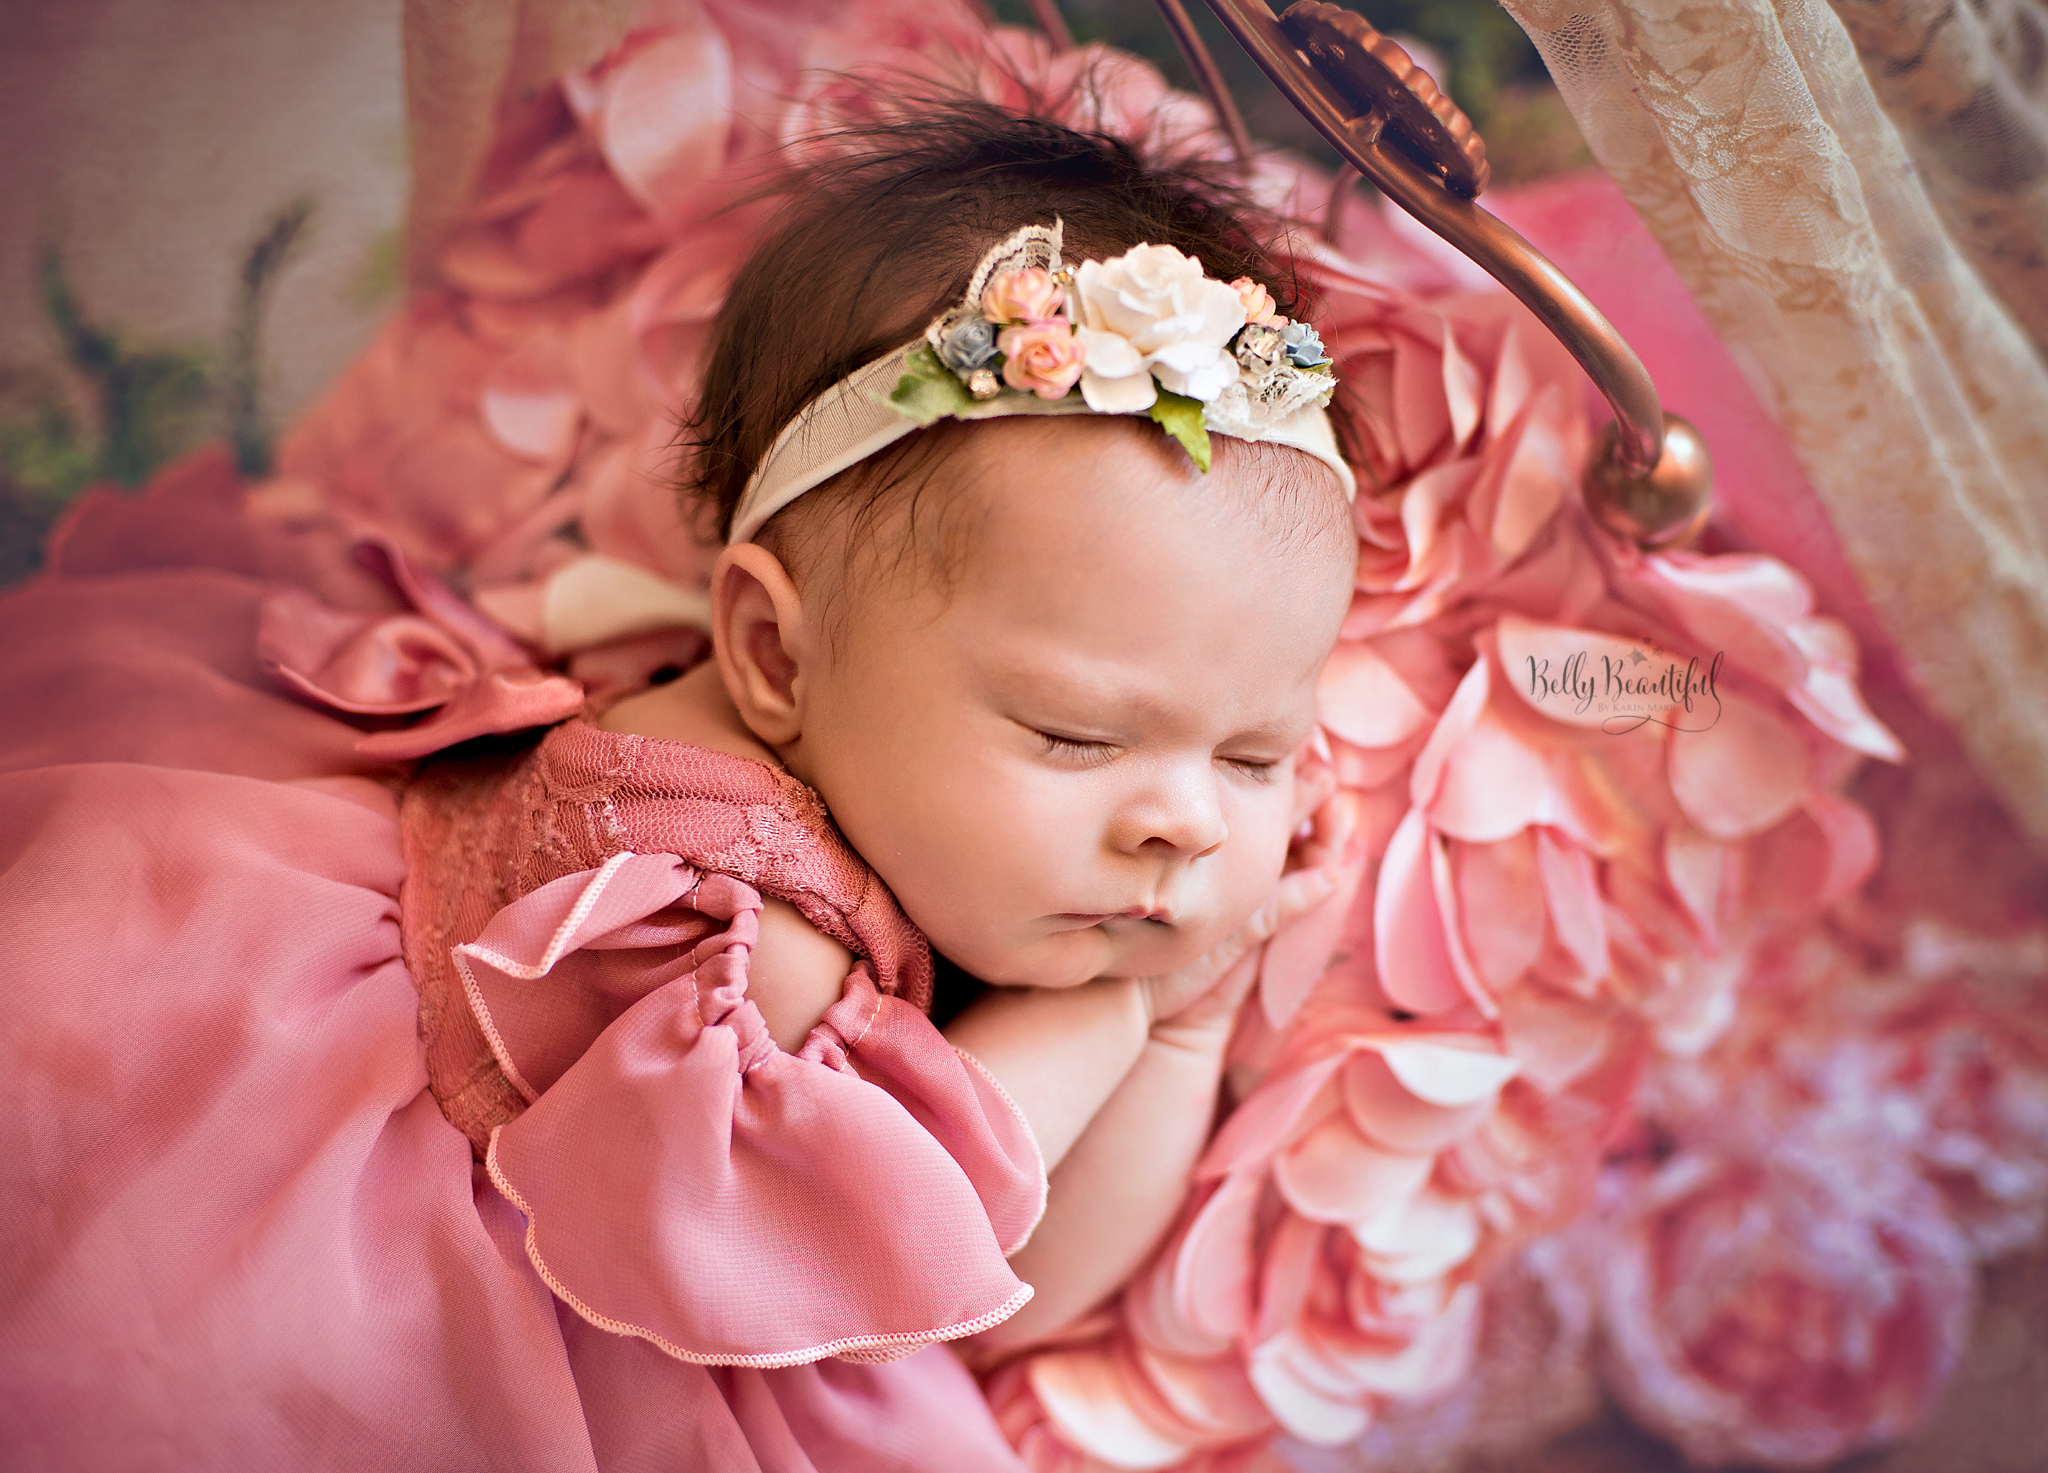
Belly Beautiful by Karen Marie Of course, natural light is a great idea, too. Just place your baby next to a window, and if need be, diffuse the light with a sheer curtain or just a plain, white sheet. Again, you'll find that this creates gentle shadows and highlights that are pleasing to view, as seen in the image above. Move Yourself, Not the Baby
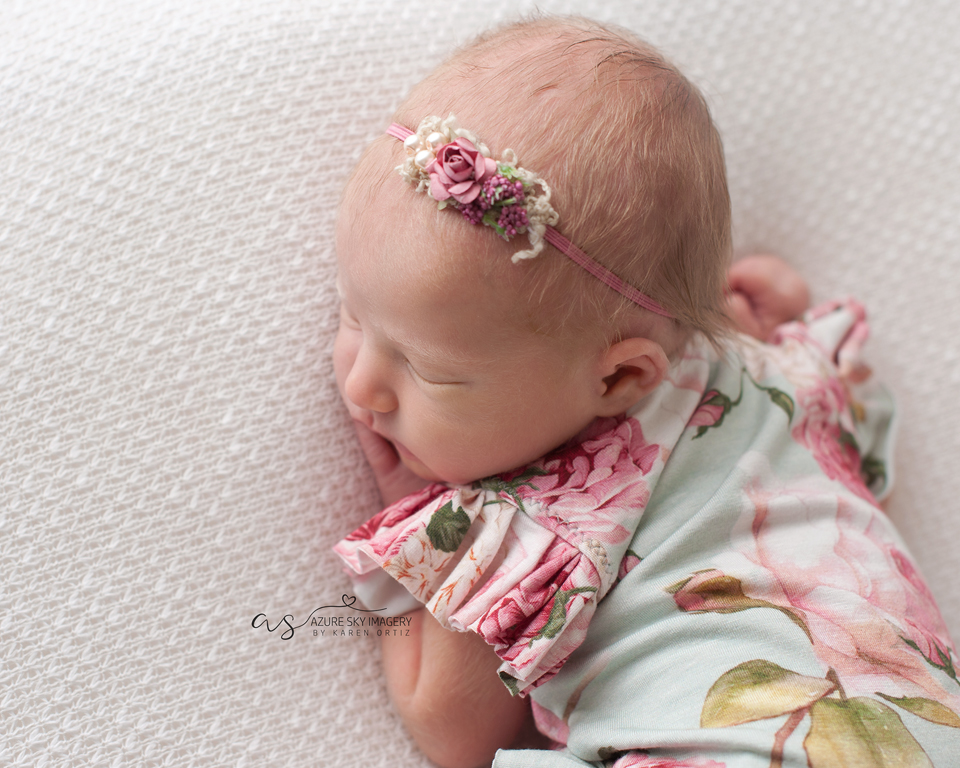
Azure Sky Imagery by Karen Ortiz As you undoubtedly already know, when your baby is fast asleep, you will do anything to make sure they stay that way. The same principle applies to when you're taking photos of your baby... Rather than picking them up, repositioning them, and taking another photo, try moving around the baby and experimenting with different camera angles. You might take photos looking up straight at them, as seen above, or down at them, as seen below.
Azure Sky Imagery by Karen Ortiz As you move around, don't just pay attention to your baby's face, either. Look for ways to capture interesting shadows and highlights. Take a few shots of chubby fingers and toes. Step back for full-body shots, then step in for close-ups. The point is that you should try to wrangle every single photo you can out of every pose, that way you minimize the amount of time you spend moving your baby (or trying to get them to go back to sleep!). Add Pop With Newborn Clothing
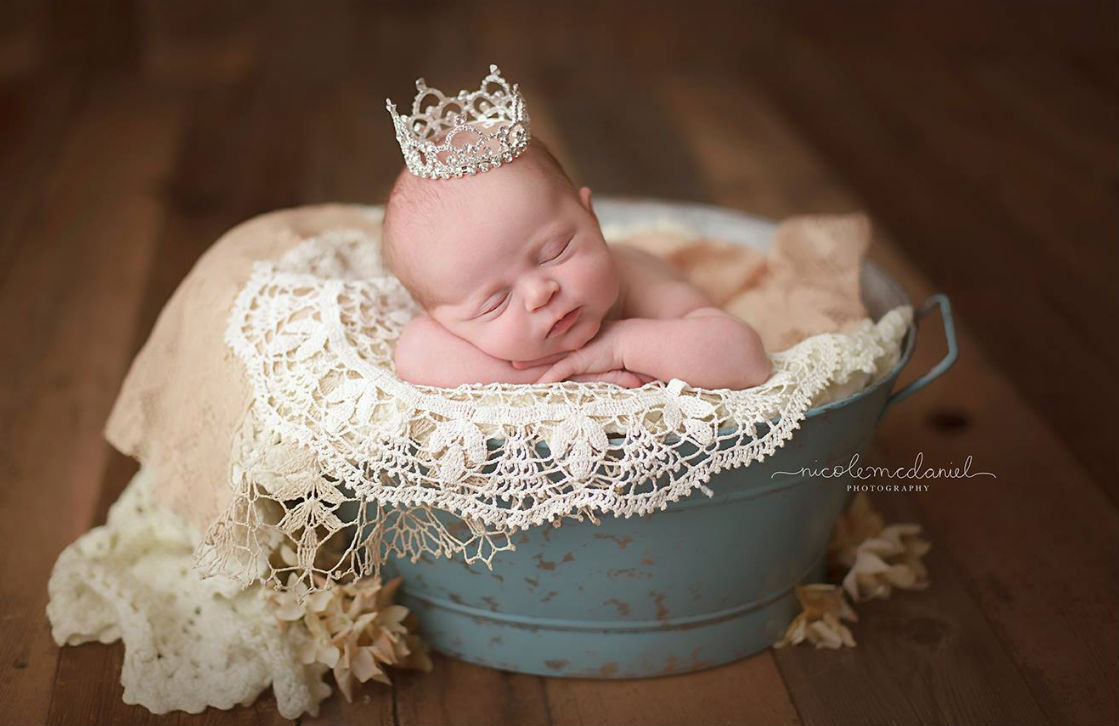
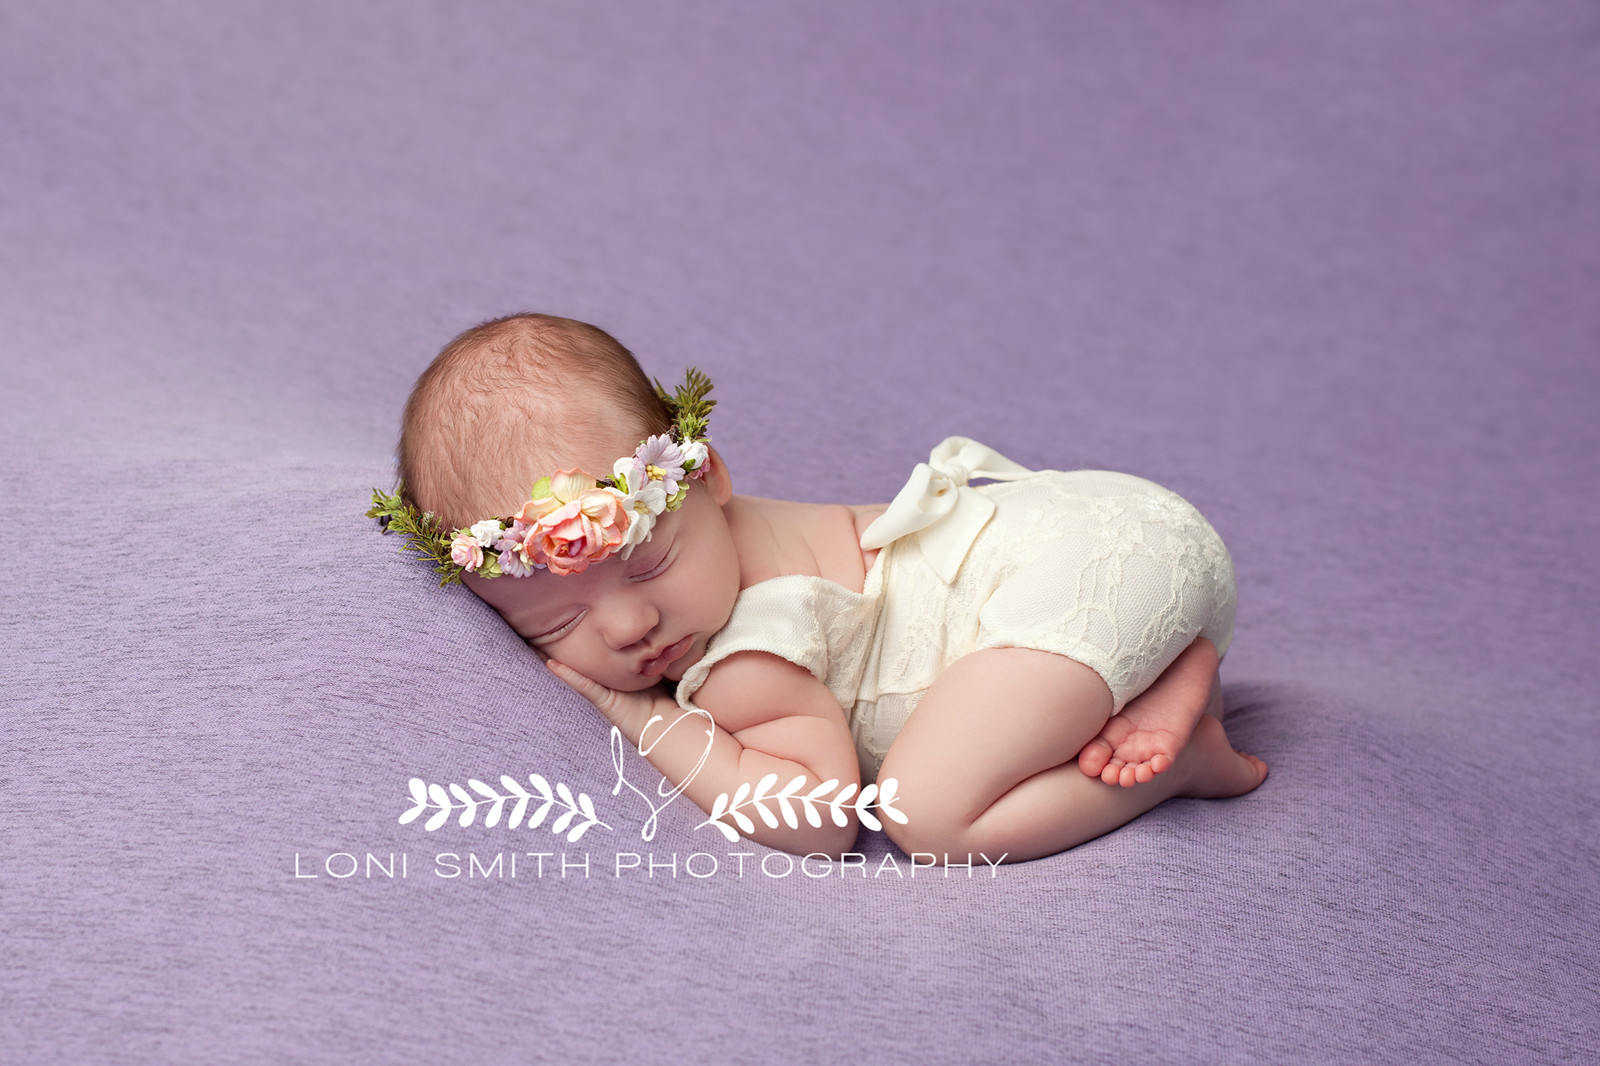
Loni Smith Photography I realize that you're not going to want to dress up your baby each day and spend two hours photographing them in heavily posed portraits. However, there is something to be said for sprinkling in a few mini sessions now and then that have a more professional look to them. One way to get more professional looking photos is to add some visual pop to the images by outfitting your newborn with a gown, romper, headband, and so forth. As you can see in the image above, the floral headband not only adds color but also adds texture to the shot, giving our eyes something to draw our attention toward the baby's face.
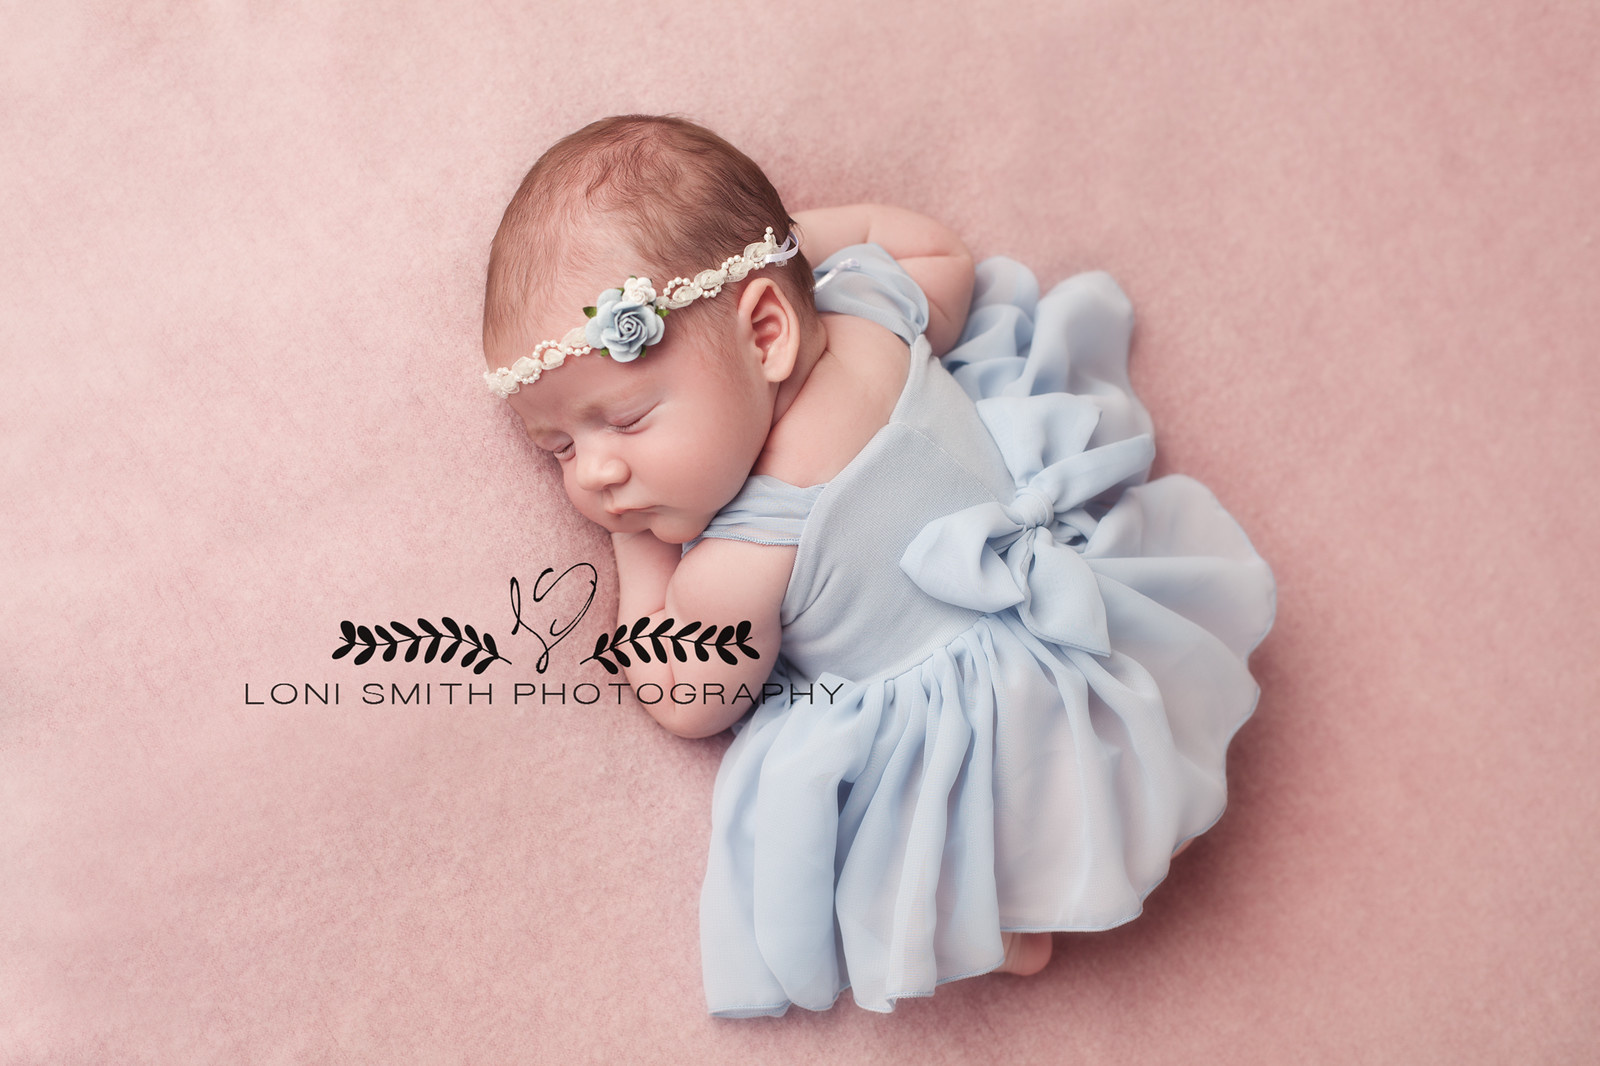
Loni Smith Photography Outfitting your newborn in a gown or a romper adds elegance to your newborn photos that's hard to achieve in quick snapshots when they're asleep in their crib. Like the floral grown in the previous image, the gown in the image above adds color and richness to the shot while also providing texture and a sense of fluidity as it flows outward from the baby's hips.
Axsys Design You can even add simple props to your home-based newborn photos that help create a visual story in which your baby is the central character. The point is that simple wardrobe choices and props, combined with varying your shooting angles and using soft, diffuse lighting, you can capture more beautiful and meaningful images of your newborn, right from the comfort of your home. All of the images in this article adhere to one or more of these principles, and I think you'll agree that the results are pretty darn good! Give each method a try and see what creative images you can come up with of your newborn. Learn MoreAbout Sew TrendyThis is a company that photographers absolutely need to be in touch with. Their gowns, crowns, and other high-quality accessories (like those shown in the images above) are just what you need for maternity photos, photos of newborns, and mommy and me sessions. These accessories not only make your clients look and feel great, but they also add a depth of detail and interest to your photos that elevate the images to an entirely other level. What started out with just a few people manufacturing these eye-catching items is a growing business that provides accessories to photographers worldwide. Help your clients look and feel their best by partnering with Sew Trendy Accessories. from https://photographytalkcom.blogspot.com/2021/04/newborn-photography-tips-you-can-use-at.html If you’re like me, you probably have way too many prints to hang on the walls of your home. But rather than displaying one image by itself, you can utilize the space around it to display other photos in a gallery wall. Gallery walls can be a fun addition to any room. The key is to go about setting up the gallery display in the right way. Learn more about home photography on our website PhotographyTalk.com.
Here are some tips about how to display your photos you absolutely have to hear. But first... Before you can display your photos on a gallery wall, you need to select a company to print your photos. For me, canvas is the way to go. But the question is, what's the best canvas printing company of 2020? Check out the video above to find out! Get Creative With Your Photo Display Placement |
ABOUT USPhotographyTalk is the all about talking photography to celebrity photographers. Those who are tops in their respective photography fields. You can catch up with PhotographyTalk at www.photographytalk.com. Archives
April 2021
Categories |


 YouTube Screenshot/Mango Street
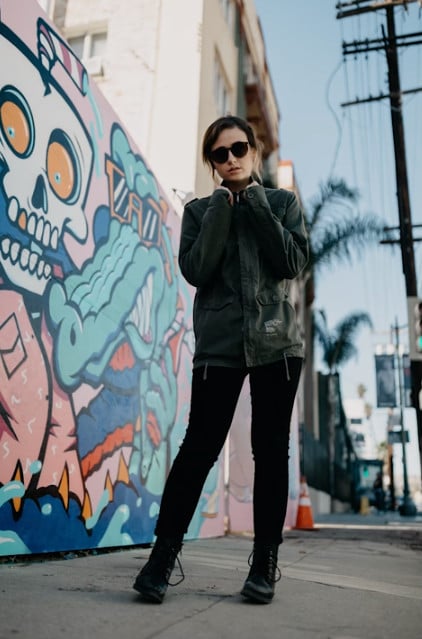 YouTube Screenshot/Mango Street
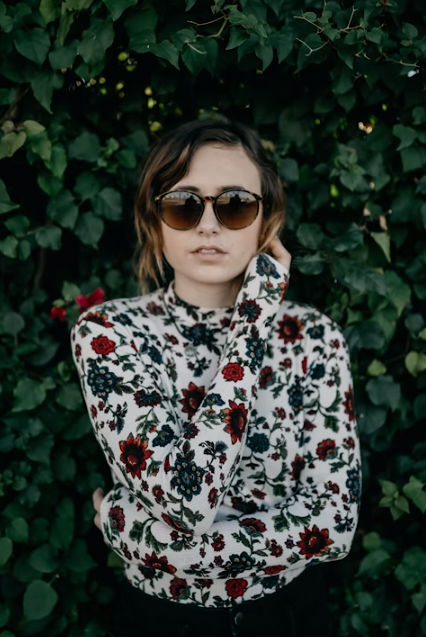 YouTube Screenshot/Mango Street
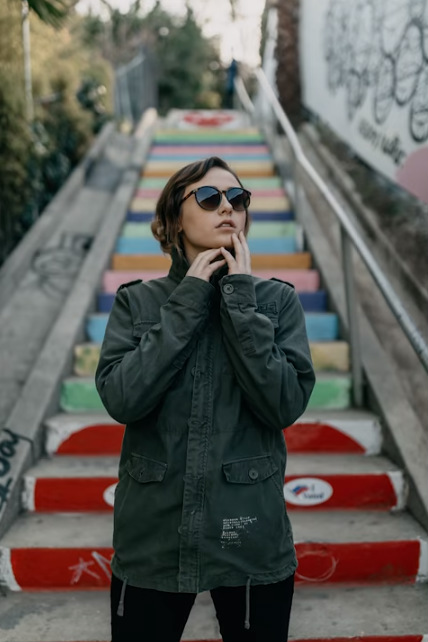 YouTube Screenshot/Mango Street
 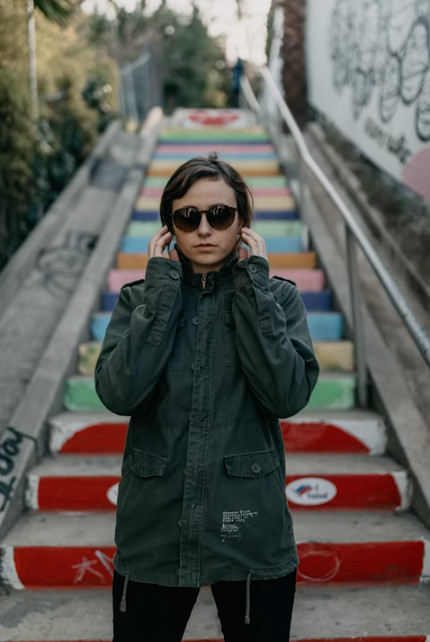 YouTube Screenshot/Mango Street
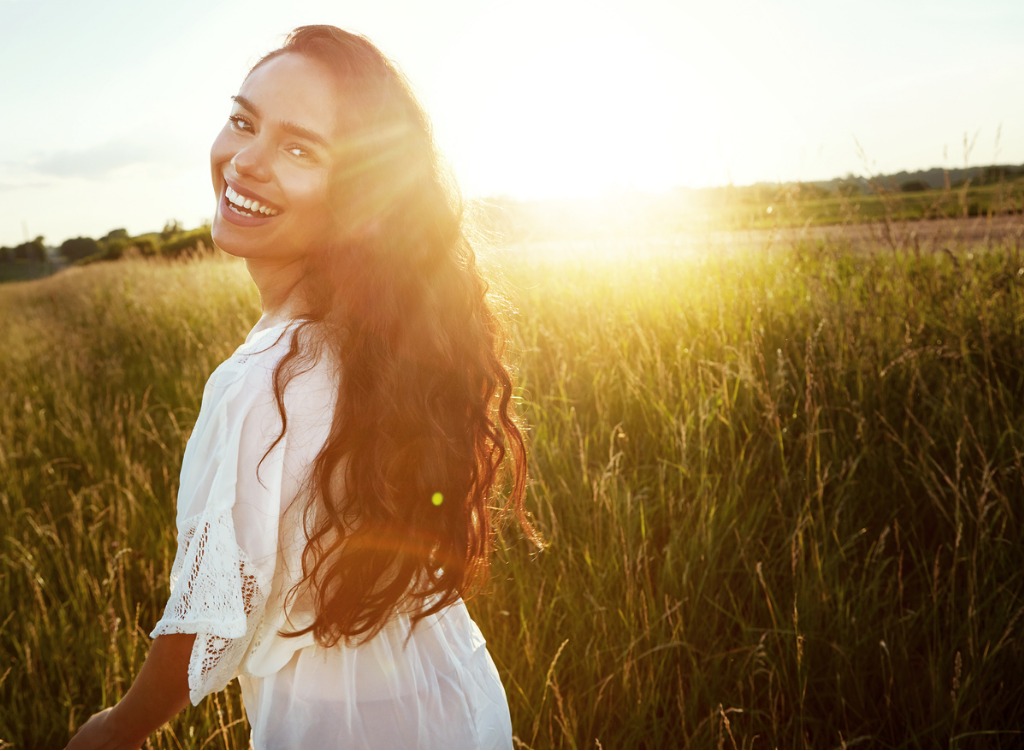


 RSS Feed
