|
It's easy to forget sometimes that in the grand scheme of things, photography is a relatively new art form. That's compared to other artf orms like sculpture and painting, and that's certainly compared to the earliest art forms like cave paintings that date to thousands and thousands of years ago. Do you know when was the camera invented? To say that photography has changed a lot in the last couple of centuries is certainly an understatement. Here are 14 moments that have shaped and changed the world of photography in one way or another. The First Permanent Photo
When talking about the first fixed image created by a camera, that credit is given to Joseph Nicephore Niepce. Learn more about the history of photography on our website PhotographyTalk.com. His tool of choice was a camera obscura that was fitted with a plate coated in pewter. That plate was exposed for a whopping eight hours, creating an image of Niepce's view of the courtyard outside his home, shown above. The image, taken in 1826 or 1827, was titled View From the Window at Le Gras. Once the exposure was complete, he used a mixture of white petroleum and lavender oil to render the photo in a process he would later call heliography. The Daguerreotype
The next step in the evolution of photography was the development of the Daguerreotype process, which was invented in 1829 by French painter Louis Daguerre. Do you know when was photography invented? Daguerre worked with Niepce to figure out a way to reduce the incredibly long exposure that was needed to get an image using the heliograph process. Eventually, Daguerre solved the problem by using copper plates that were coated in silver instead of using the pewter-coated plates Niepce used. The shorter exposure times resulted in a much more subtle image, but by using a chemical mixture, Daguerre discovered that he could develop the latent image into one that was actually far more visible. Though he perfected the process throughout the 1830s, it wasn't until 1839 that Daguerre revealed his new method of photography to the world. His photo, L’Atelier de l'artiste, shown above, was taken in 1837. Light-Sensitive Paper Makes Its Debut
Merely weeks after Louis Daguerre made his photography breakthrough known to the public, Fox Talbot, a British scientist, released news that he had devised a process of photography that relied not on metal plates, but on light-sensitive paper. You can also check when did photography start. Talbot had been working on the process for years, but it wasn't until the late 1830s that he discovered, by accident, the right chemical mixture needed to turn the paper into a negative that could in turn be used to make prints. In 1841, he went public with his work, calling it the calotype process. One of the earliest known calotypes (circa 1844), a portrait of Thomas Duncan, is shown above. Documentary Photography is Popularized
In 1855, Roger Fenton was sent by the British government to document the events unfolding in the Crimean War. That action resulted in Fenton being the first war photographer in the world, and one of the first documentary photographers used to immortalize world-changing events in the field. As photographers covering the American Civil War would find out just a few years later, creating photos in the field was a laborious process that required a wagonfull of equipment and a mobile darkroom. Likewise, even though exposure times were lightning fast compared to the heliotype, they still weren't fast enough to capture action. You can also check another post about when were photographs invented. As a result, Fenton photographed still portraits and landscapes, and never photographed soldiers that were injured or had died in battle. His photo above, taken in April 1855, is titled Valley of the Shadow of Death. The First Commercially-Licensed PhotosIn 1859, Jean Francois Gravelet (who performed under the name Charles Blondin) drew a crowd of thousands to the border between the United States and Canada to watch as he attempted to cross the Niagara River on a tightrope. Dispatched to the scene was William England, who at the time was serving as the London Stereoscopic Company's chief photographer. England's images immortalized Gravelet's 1100-foot walk across the tightrope in a series of stereoscopic images that were among the first to be internationally licensed for commercial use. Roll Film is BornAfter Kodak introduced the first simple-to-use publically available camera in 1889, George Eastman debuted transparent nitrocellulose film that came in rolls. Eastman's film rolls were in 70mm format, which Thomas Edison cut right down the middle to create a 35mm of film. Edison also cut perforations down both sides for easier advancement of the film from one frame to the next. Photojournalism Emerges
Where Roger Fenton's portrayal of the Crimean War was "toned down" a bit and excluded the human toll that the war was taking, Reinhold Thiele took no such approach. After covering joyous events in England - among them Queen Victoria's Diamond Jubilee - and perfecting his photojournalistic approach to photography, he was sent by the London Daily Graphic newspaper to document the Second Boer War. Learn more about where was photography invented on our website PhotographyTalk.com. But upon receipt of his images, the paper refused to print many of them due to their graphic nature and portrayal of the carnage that was occurring. As a result of the manner in which he documented events in a realistic manner, Thiele is considered one of the fathers of photojournalism. The 35mm Standard Opens Photography to the Masses
Oskar Barnack, a German engineer and amateur photographer, had a problem. His camera gear was way too heavy, especially in light of his poor health. He wanted to lighten his load by designing a smaller film camera that was easily transported. In 1913, he created his prototype (shown above), a 35mm still camera that used existing 35mm film for movies. Over a decade later, in 1925, Barnack's camera became available to the public under the brand name Leica, making photography accessible to anyone who could afford it. The rest, they say, is history! Instant Photography Makes Its Debut
Using a process called diffusion transfer, American physicist Dr. Edwin Land created a camera that could take, develop, and print a photo. The process required film that was both the film and the photo, which resulted in virtually instant photographic gratification. His Land Camera - the Polaroid Model 95 shown above - became available in 1948, ushering in the instant camera craze the Polaroid would make famous in the decades to come. Magnum Photos is FormedOne of the most influential photographers of the 20th Century, Henri Cartier-Bresson, started his photography career in earnest in 1947 when he started Magnum Photos, one of the most well-respected photo agencies of the time. Cartier-Bresson had a gift for depicting both the triumph and tragedy of human life. In his book, The Decisive Moment, he offered up 20 years of documentary images that gave people a glimpse at the best and worst in people. He also famously photographed the likes of Gandhi, Marilyn Monroe, Che Guevara, and many other influential figures of the time. Digital Photography Revolutionizes the IndustryIf you asked someone when digital photography became a thing, it's doubtful they would say 1974. Yet, that's the year that Gareth Lloyd, a worker at Kodak, questioned the possibility of using a semiconductor to create an image sensor for a camera and asked Steven Sasson, an electrical engineer, if it could be done. In 1975, Sasson had what they wanted - a digital camera that converted image information into an electronic signal to be stored in the camera's onboard memory. It was a huge camera, weighing in at eight pounds, and its images were a paltry .01-megapixels. However, it was the start of a revolution of which we are still experiencing effects today. The First Commercially Available Digital Camera
In 1991, Kodak released the first widely available digital camera, the Kodak DCS-100. It had a 1.3-megapixel sensor in a modified Nikon F3 body and an external memory storage unit (shown above) that had a 200-megabyte capacity. That was good enough for 156 uncompressed images! It was spendy, though. At $13,000, it certainly wasn't a massive success, with less than 1,000 units sold. However, it ushered in the modern era of photography that we all enjoy today. Photographers Get to GoPro
Even as digital photography was becoming more and more ubiquitous in the late 1990s and early 2000s, there was still a problem... As Nick Woodman discovered in 2002 on a surfing trip, it was difficult for amateur photographers to get high-quality action shots because the camera gear needed to do so was so expensive. Later that year, he founded GoPro to solve that problem. In 2005, GoPro came out with its first camera, the GoPro Hero 35mm, which you can still find floating around on places like Amazon. The camera came with a roll of Kodak 400 film, a clear waterproof case to protect the camera to a depth of 15 feet, and a camera strap to help photographers get those elusive action shots. The iPhone Arrives
Sure, there were plenty of phones that had a camera before the arrival of the first-generation iPhone in 2007. However, in terms of having an iconic place in the development of smartphone photography, the iPhone is at the top of the heap. It was equipped with a single, rear-facing camera that sported just 2-megapixels. You can also check another post about when was the photograph invented. However, the easy-to-use touchscreen interface on the phone made it quick and easy to snap and share photos. When the App Store was unveiled a year later in 2008, smartphone photography took another leap forward with the advent of being able to add supplemental features to the phone to take better photos, like improved camera apps, photo processing apps, and the like. At the time of this writing, we're awaiting the arrival of the iPhone X, a phone that has a 7-megapixel front-facing camera, a infrared front-facing camera for face detection, a 12-megapixel rear-facing camera with both wide-angle and telephoto lenses, and a host of other features that certainly would've been unimaginable to the likes of Niepce, Daguerre, and other pioneers in the field of photography. To say that we've come a long way is an understatement! This blog post about the topic "14 Turning Points in the History of Photography" was first published on our website here https://www.photographytalk.com/photography-articles/7980-14-turning-points-in-the-history-of-photography from https://photographytalkcom.blogspot.com/2021/04/14-turning-points-in-history-of.html
0 Comments
Your orientation may be totally digital photography, tuned into the newest cameras and lenses and all the advanced technologies they offer to be a 21st century photographer. Photography, as you know (or you should know) has a storied past. Many of the cameras and lenses that were just as popular in their day as digital equipment is today provide an interesting subtext to your photography. If you’re a younger photographer, then the design and features of older equipment can generate a new passion for you, as a collector. So knowing about history of photography can be fruitful.
Here are a few old, but timeless gems that could become an interesting conversation piece or be prominently displayed in your home or studio. One of the best places to find these rare collectors’ items is UsedPhotoPro.com, the online used photography store of Roberts Camera, a family-owned and -operated photography business in Indianapolis that has been serving beginners, amateurs and professionals and everyone that loves photography since 1957.
Busch Pressman 2x3 Format Camera – Manufactured by the Busch Precision Camera Corporation of Chicago, the Busch Pressman 2x3 format camera is a smaller version of the classic 4x5 press camera used throughout the 1940s and 1950s. The Busch Pressman was made of wood and metal and wrapped in black leather and was quite durable, as they were a favorite of photojournalist who could find themselves in different locales and weather conditions throughout a shooting day. This and similar cameras include a bellows that slides forward and back and uses sheet film instead of rolls. You can remove the back of the Busch Pressman 2x3 and attach a roll-film holder. You can check the post about when were cameras invented on our website. UsedPhotoPro.com had a Busch Pressman 2x3 Format Camera with a 101mm f/4.5 lens, rated in Fair condition, for just $75.00 during May 2015. Leica Rangefinder Cameras and Lenses – Canon and Nikon may have dominated the world of photography for many decades, but the name that is truly more legendary yet is Leica. To learn more about the history of Leica, read the PhotographyTalk article, For Purists and Collectors, the Leica Camera Brand Stands Alone. Many photographers still proudly shoot with Leica cameras and lenses, so they are not strictly collector’s items, but UsedPhotoPro.com has a regular selection, including these examples.
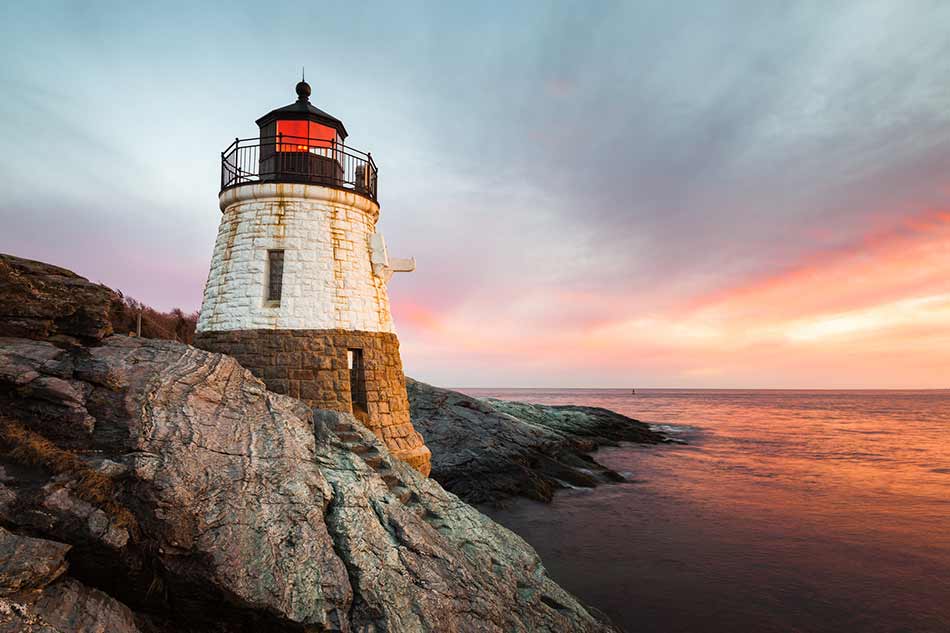
At the time of the writing of this article (May 2015), you could purchase this lens in Very Good condition from UsedPhotoPro.com for $469.00. Polaroid 230 Automatic Instant Film Land Camera – You have to be of a certain age to understand why the Polaroid Land Camera was such a phenomenon. To be able to take a picture and see it and share it almost instantly was a technological breakthrough that helped to sell millions of these cameras to families and casual photographers. The 230 model was manufactured for only three years, 1967–1969, but as many as 600,000 were sold. An example from UsedPhotoPro.com is a Polaroid 230 Automatic Instant Film Land Camera in Very Good condition for only $37. Learn more about when were pictures invented on our website PhotographyTalk.com. Kodak Retina IIIC Rangefinder Film Camera – Few brand names were more well known and iconic as Kodak during the mid-20th century, but sadly, it just couldn’t make the transition to the digital age quickly enough or well enough to survive. Although Kodak made its name selling film, it did make a number of low-priced, mass-produced cameras in the United States. The Retina series, however, was made in Germany and was of superior quality, especially because of the German optics in the lenses. The IIIC was introduced during 1957. The lens actually recesses into the body and a metal cover closes over it to protect the front element. This Kodak Retina IIIC rangefinder film camera with a 50mm f/2 Schneider Xenon lens was available at UsedPhotoPro.com during May 2015 in Very Good Condition for $159.00. UsedPhotoPro.com is not just the first place you should look for collectors’ items. It has thousands of refurbished and used digital cameras, lenses, other equipment and accessories. Plus, the people at UsedPhotoPro.com are happy to provide you with a free quote on your used equipment. Your feedback is important to thousands of PhotographyTalk.com fans and us. If this article is helpful, then please click the Like and Re-Tweet buttons at the top left of this article. This article about the topic "Relive the History of Photography as a Collector" was first published on our website here https://www.photographytalk.com/photography-articles/5473-relive-the-history-of-photography-as-a-collector from https://photographytalkcom.blogspot.com/2021/04/relive-history-of-photography-as.html Coastal landscapes are some of my favorites because they offer so many different opportunities for landscape photos. Sunrises and sunsets, detail shots of texture-filled beached, motion blur of the ocean’s waves, and piers at night are just a few of my favorite subjects.
But as with any kind of photography, there’s more to creating a beautiful coastal landscape photo than simply pointing your camera at something that looks pretty. With that in mind, here’s a few tips on how to photograph coastal landscapes. Coastal Landscape Photography Tip #1: Protect Your Camera
photo by dchadwick via iStock I think it probably goes without saying, but I’ll say it anyway - the coast is not a friendly place for cameras. Pretty much everything you will find when you photograph the sea is detrimental to your camera - salt, sand, and ocean spray among them. To keep those elements away from your gear to the greatest extent possible, follow these coastal photography rules:
The coast is just too beautiful to pass up, so all this work to protect your gear is certainly worth it Coastal Landscape Photography Tip #2: Mind the Horizon
photo by RobChristiaans via iStock When composing your shots, bear in mind that you not only need a strong subject to anchor the photo, but you also need to be aware of the best position for the horizon. Learn more about landscape pictures on our website PhotographyTalk.com. A good rule of thumb to follow is that if there is more interest in the sky - a beautiful sunset or dramatic clouds, for example - shift the horizon downward in the frame. Conversely, if the greatest area of interest is in the foreground - interesting rock formations or tide pools - shift the horizon upward in the frame.
Photo by Jose Llamas on Unsplash It’s also important to get the horizon perfectly straight. A wonky horizon is one of the easiest ways to ruin an otherwise good shot. And while it’s simple to fix crooked horizons in post-processing, it’s even easier to simply pay attention to the composition and adjust your camera accordingly to get a straight horizon in-camera. Many tripods have built-in bubble levels to keep things nice and straight. If your tripod doesn’t have a bubble level, you can buy one that fits in your camera’s hot-shoe mount. Alternatively, you can use your camera’s virtual horizon if equipped, and if not, simply turn on the rule of thirds grid in live view and use the upper and lower grid lines to get the horizon straight. Coastal Landscape Photography Tip #3: Blur the Water’s Movement
photo by simonbradfield via iStock You can’t visit the coast with your camera without taking a long exposure that blurs the movement of the water. If you’re shooting during the daytime and you want this effect, you’ll need a good neutral density filter to block some of the light out so you can extend the shutter speed to get the blur you want. On the one hand, you can use a set of solid ND filters that attach to your lens via a bracket. This allows you to stack filters to get the desired filtering power. It also allows you to stack different types of filters. For example, you might have a solid neutral density filter combined with a graduated neutral density filter to darken the sky more without impacting the landscape.
photo by Daniel_Kay via iStock Though this setup can work great, there’s two problems. First, using multiple ND filters can be a laborious task. For each shot, you might need to swap out one filter or another to get the right exposure level. Second, when you’re at the coast, the last thing you want is more gear out in the salt and sand. Not only does that mean you have more gear that might suffer the deleterious effects of that particular environment, but it’s just more gear you have to clean when you’re done for the day.
I started using the Kenko variable ND filter shown above a few months ago, and I have to say, it’s been a much smoother process than with my standard ND filters. What makes it easy to use a variable ND filter is that it just screws onto the end of my lens, so I don’t have to worry about a filter holder and a bunch of rectangular filters Furthermore, rather than having to swap out individual filters and stack filters to get the desired effect, with a variable ND filter, I just turn the filter in its housing ring. It really doesn’t get much easier than that.
photo by DAJH via iStock I appreciate the fact that I can put the filter on my lens in the car when I get to the beach and leave it on there the entire time. This means I have one filter to clean and the lens glass is protected from that pesky salt and sand. Of course, having a variable ND filter means I can easily blur the movement of the water and quickly get the desired effect I want. That’s because this filter varies from 1-10 stops, so you can get just a hint of motion blur, dramatic ethereal long exposures, and various points in between.
Coastal Landscape Photography Tip #4: Focus on the Details
Photo by Joshua Earle on Unsplash Not every photo you take on the coast has to be a wide-angle view of the beach or a sunset. Instead, if you focus on detail-oriented shots, you will find that there are tons of possibilities for alternative types of coastal photos.
Photo by Bruno van der Kraan on Unsplash Try finding interesting rock formations to highlight in a shot. Add people to a coastal landscape for added interest. Explore sand dunes and feature interesting textures in a shot. The point is that the more you explore, the more you’ll find that’s worthy of a coastal landscape photo. This post about the topic "How to Photograph Coastal Landscapes?" was first published on our website here https://www.photographytalk.com/how-to-photograph-coastal-landscapes from https://photographytalkcom.blogspot.com/2021/04/how-to-photograph-coastal-landscapes.html One of my favorite types of photography is time-lapse. When done well, time-lapse videos can be a breathtaking testament to the beauty of our natural surroundings.
Heck, even if the terrain isn't spectacularly beautiful, putting it into motion can still offer a sense of wonderment about the world in which we live. To master the art of time-lapse videos, there are a number of critical steps involved. Step 1: Scout the Location
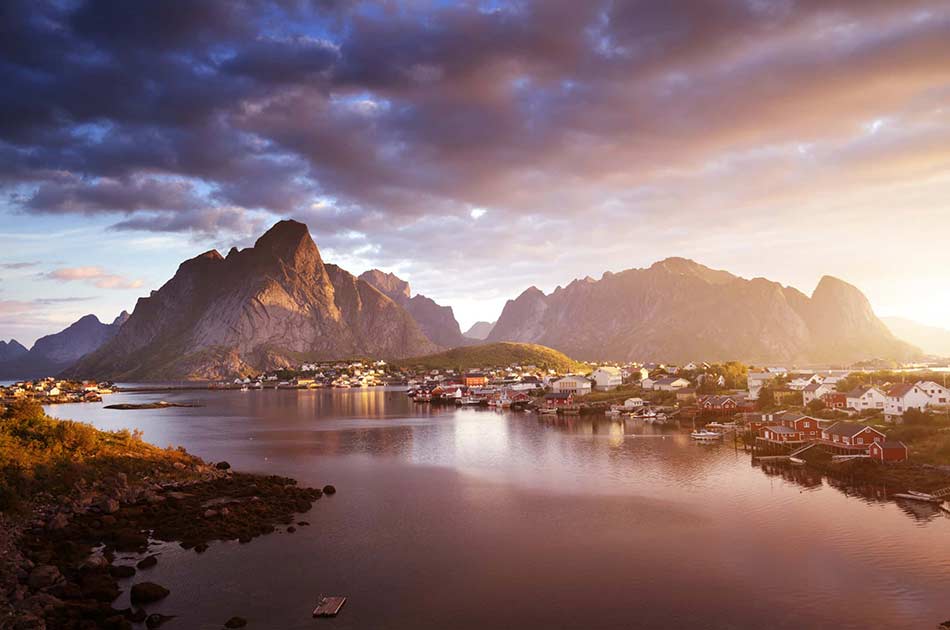
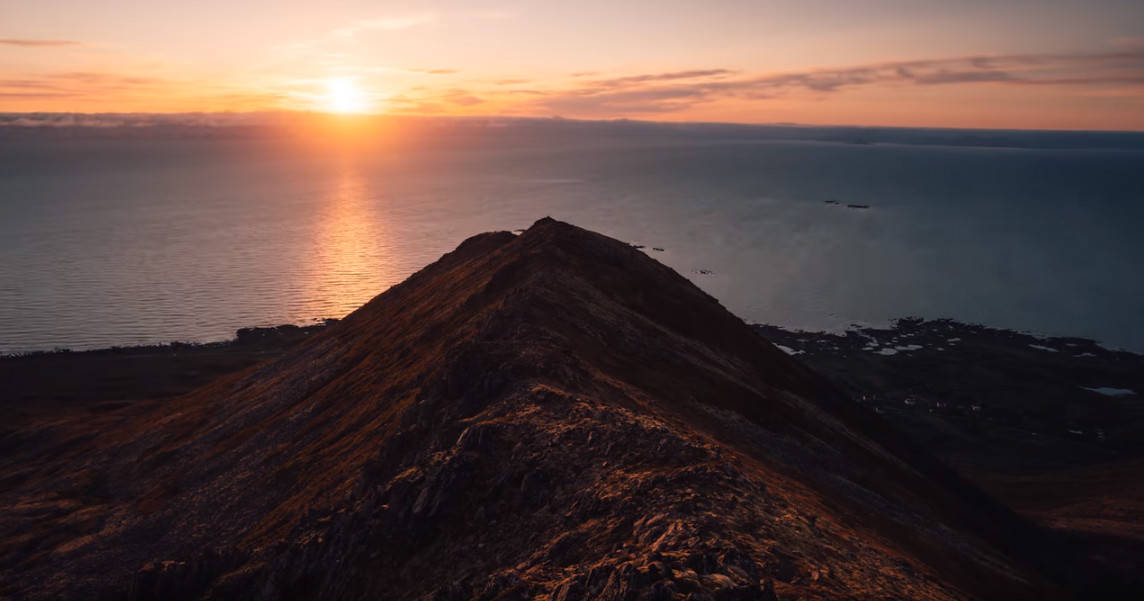
When looking for a landscape to feature in a day-to-night time-lapse, you want something that will allow you to capture the gorgeous transition of light as the sun falls below the horizon and shadows creep across the landscape. To do this, you need a location that affords you an unobstructed view of the western sky. But remember, you aren't just banking on a single moment in time to capture images for the video. Instead, you need to be assured that wherever you set up your gear, that you'll have a view of the entire sunset. You can use Google Earth to pinpoint a location and see an augmented reality version of the sun's path from that spot at any point in the day. Then, once you're in the field, you can use apps like PhotoPills to determine how the sun will track at your location and get pinpoint times for the sunset as well. Step 2: Pack the Essential Gear
Though there are plenty of excellent locations for sunset time-lapse photography that are easily accessible, not all locations are as easy as hopping out of the car and setting up shop. If you want to head to locations off the beaten path, it's wise to pack light and only take the essentials. In this case, that's your camera and lens, a tripod with a Syrp ballhead, a Syrp Super Dark Variable ND Filter, and a Syrp Genie Mini, which gives you motion control over your camera and works as an intervalometer as well.
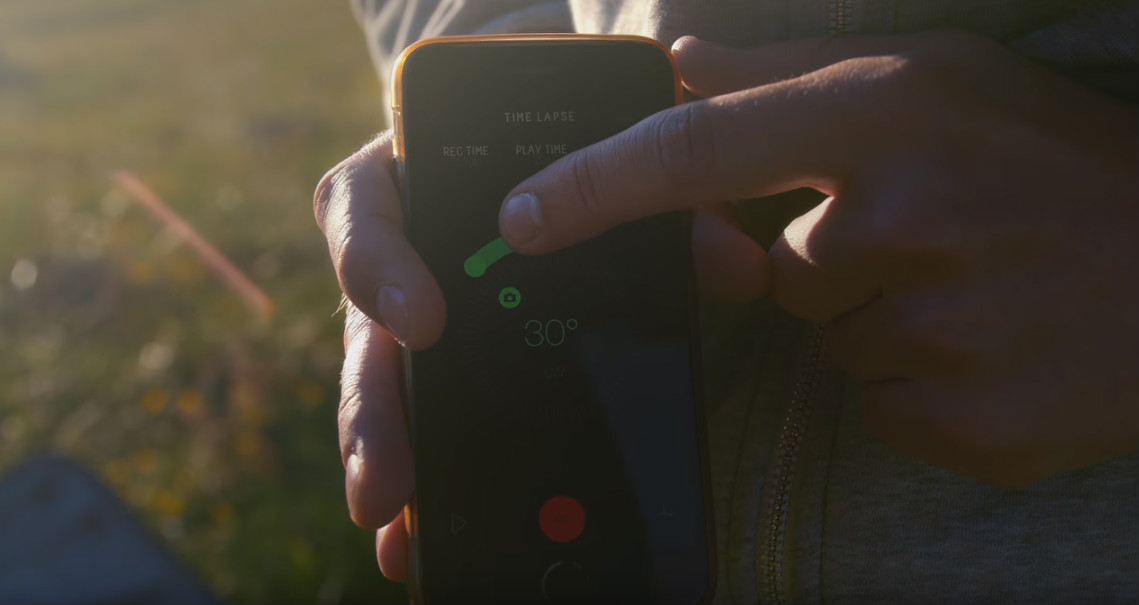
With the accompanying smartphone app, you can direct the Genie Mini to shoot smooth, panning time-lapse video. In fact, it comes pre-loaded with time-lapse video pre-sets to help even the most novice of time-lapse photographers create epic videos. And since it's compatible with a variety of DSLR and mirrorless cameras (and smartphones, too!), you can make gorgeous time-lapses with just about any camera. Step 3: Compose the Shot
Using the ballhead on your tripod, the next step is to compose the starting frame of the time-lapse. Simply adjust the head as needed, remembering that your camera will likely shoot in 3:2 format, whereas the time-lapse will be in 16:9 format. That means that the top and bottom of your image won't be visible in the time-lapse, so be sure to compose the shot such that nothing of great importance is in these areas. Additionally, when composing the shot, it's a good idea to have something of interest to draw the viewer into the time-lapse, like the building and the grasses in the screenshot above.
But composing the shot also requires that you arrange the elements within it to be pleasing to the eye. Using the rule of thirds can help you do that, by placing the sunset in the upper one-third of the frame. Of course, that means that the bottom two-thirds of the image needs to have elements that are visually engaging, which has been done in the screenshot above. Step 4: Set the Exposure Settings
The difficulty of creating a time-lapse at sunset is that the lighting starts out quite consistent, and then when sunset commences, the lighting changes rapidly. One way you can overcome this difficulty is to manually adjust the ISO over the course of the shoot, which allows you to maintain a constant shutter speed from start to finish. If you want to blur the movement of clouds and other objects in the shot, you'll need to extend the shutter speed by using a variable ND filter like the Syrp Super Dark shown below.
Another tip is that you don't have to shoot your time-lapse in full manual. In fact, if you don't need a long shutter speed, aperture priority mode should work well. However, regardless of what mode you use, err on the side of underexposure, that way you're sure not to blow out the highlights in the sky as the sun moves across the camera's field of view. And don't worry if the images you take look really dark - you can recover the details in shadowed areas in post-processing much easier than you can recover details in blown out highlights. Step 5: Set the Time-Lapse Settings
The settings you use to record the time-lapse images will depend on how long it takes the sun to set at your location. Thus, PhotoPills comes in handy for getting a specific time frame for your time-lapse. A good starting point is to set the duration for about 2-2.5 hours, and since the earth rotates around the sun at a rate of about 15-degrees per hour, a rotation of 30-degrees is advisable, as shown above. Learn more about DSLR settings for landscape photography on our website PhotographyTalk.com. With the Syrp Genie App, it's incredibly easy to set these parameters. Once you have the first frame set, you can use the Genie App to drag the camera and lock in the endpoint. From there, you can fine-tune the settings, press "Return Home" in the Genie App, and the camera will rotate back to their starting position.
Another thing to keep in mind is that when you set the interval, that is, the time between each individual photo, you need to account not only for the movement that the Genie Mini needs to make, but also the time your camera's buffer needs to work. An interval of 15 seconds should give your camera plenty of time to do its thing in between each shot. Now you can press start on your phone, and Genie Mini will take care of the shooting! Step 6: Processing the ImagesThe final step in the process is to process the images in post-processing. In the video above, Morten Rustad offers up a workflow for doing just that (and for setting up the time-lapse as outlined in this article). And with that, you have a complete how-to guide for creating stunning ramping sunset time-lapse videos! This article about the topic "How to Shoot a Ramping Sunset Motion Time-Lapse?" was first published on our website here https://www.photographytalk.com/landscape-photography/7976-how-to-shoot-a-ramping-sunset-motion-time-lapse from https://photographytalkcom.blogspot.com/2021/04/how-to-shoot-ramping-sunset-motion-time.html Landscape Photography Primer: Getting Sharp Images With Depth of Field and Hyperfocal Distance4/4/2021 When you gaze upon a landscape with your own eyes, you see the entire scene in sharp focus. Recreating that focus in the images you make of the landscape will have a lot to do with the image’s success or failure. However, with some elements that might just be a few feet away from your lens and others that might be miles away, it’s necessary to take steps to ensure that all of that scenery is in sharp focus. Learn more about scenery photography on our website PhotographyTalk.com. But how?
To get maximum sharpness in your images, you’ll need to use the principle of depth of field. Let’s explore a few critical components of this concept. Depth of Field Defined
When you raise your camera to your eye and adjust the focus of the lens on a specific landscape element, you’re creating a focal plane that is parallel to the sensor. That is, only the elements along that plane are in the sharpest focus - elements behind that plane and in front of it are not. That area of sharp focus is called depth of field. For example: in the image above, the focal point is the horse in the foreground. As a result, the plane of focus falls across that horse, which is where the maximum areas of sharpness are in the photo. Everything in front of the horse (i.e. the grasses in the foreground) and everything behind the horse (i.e. the other horses and the mountains in the background) are outside the depth of field and are therefore not as sharp. Note that the depth of field does not fall equally in front of and behind the focal point. Just one-third of the area of maximum sharpness is in front of the focal plane with the other two-thirds falling behind that point. Factors That Impact Depth of Field
There are, however, a number of factors that influence the size of depth of field. If you find that the area of acceptable sharpness is too small, you can adjust any of the following to get a larger depth of field:
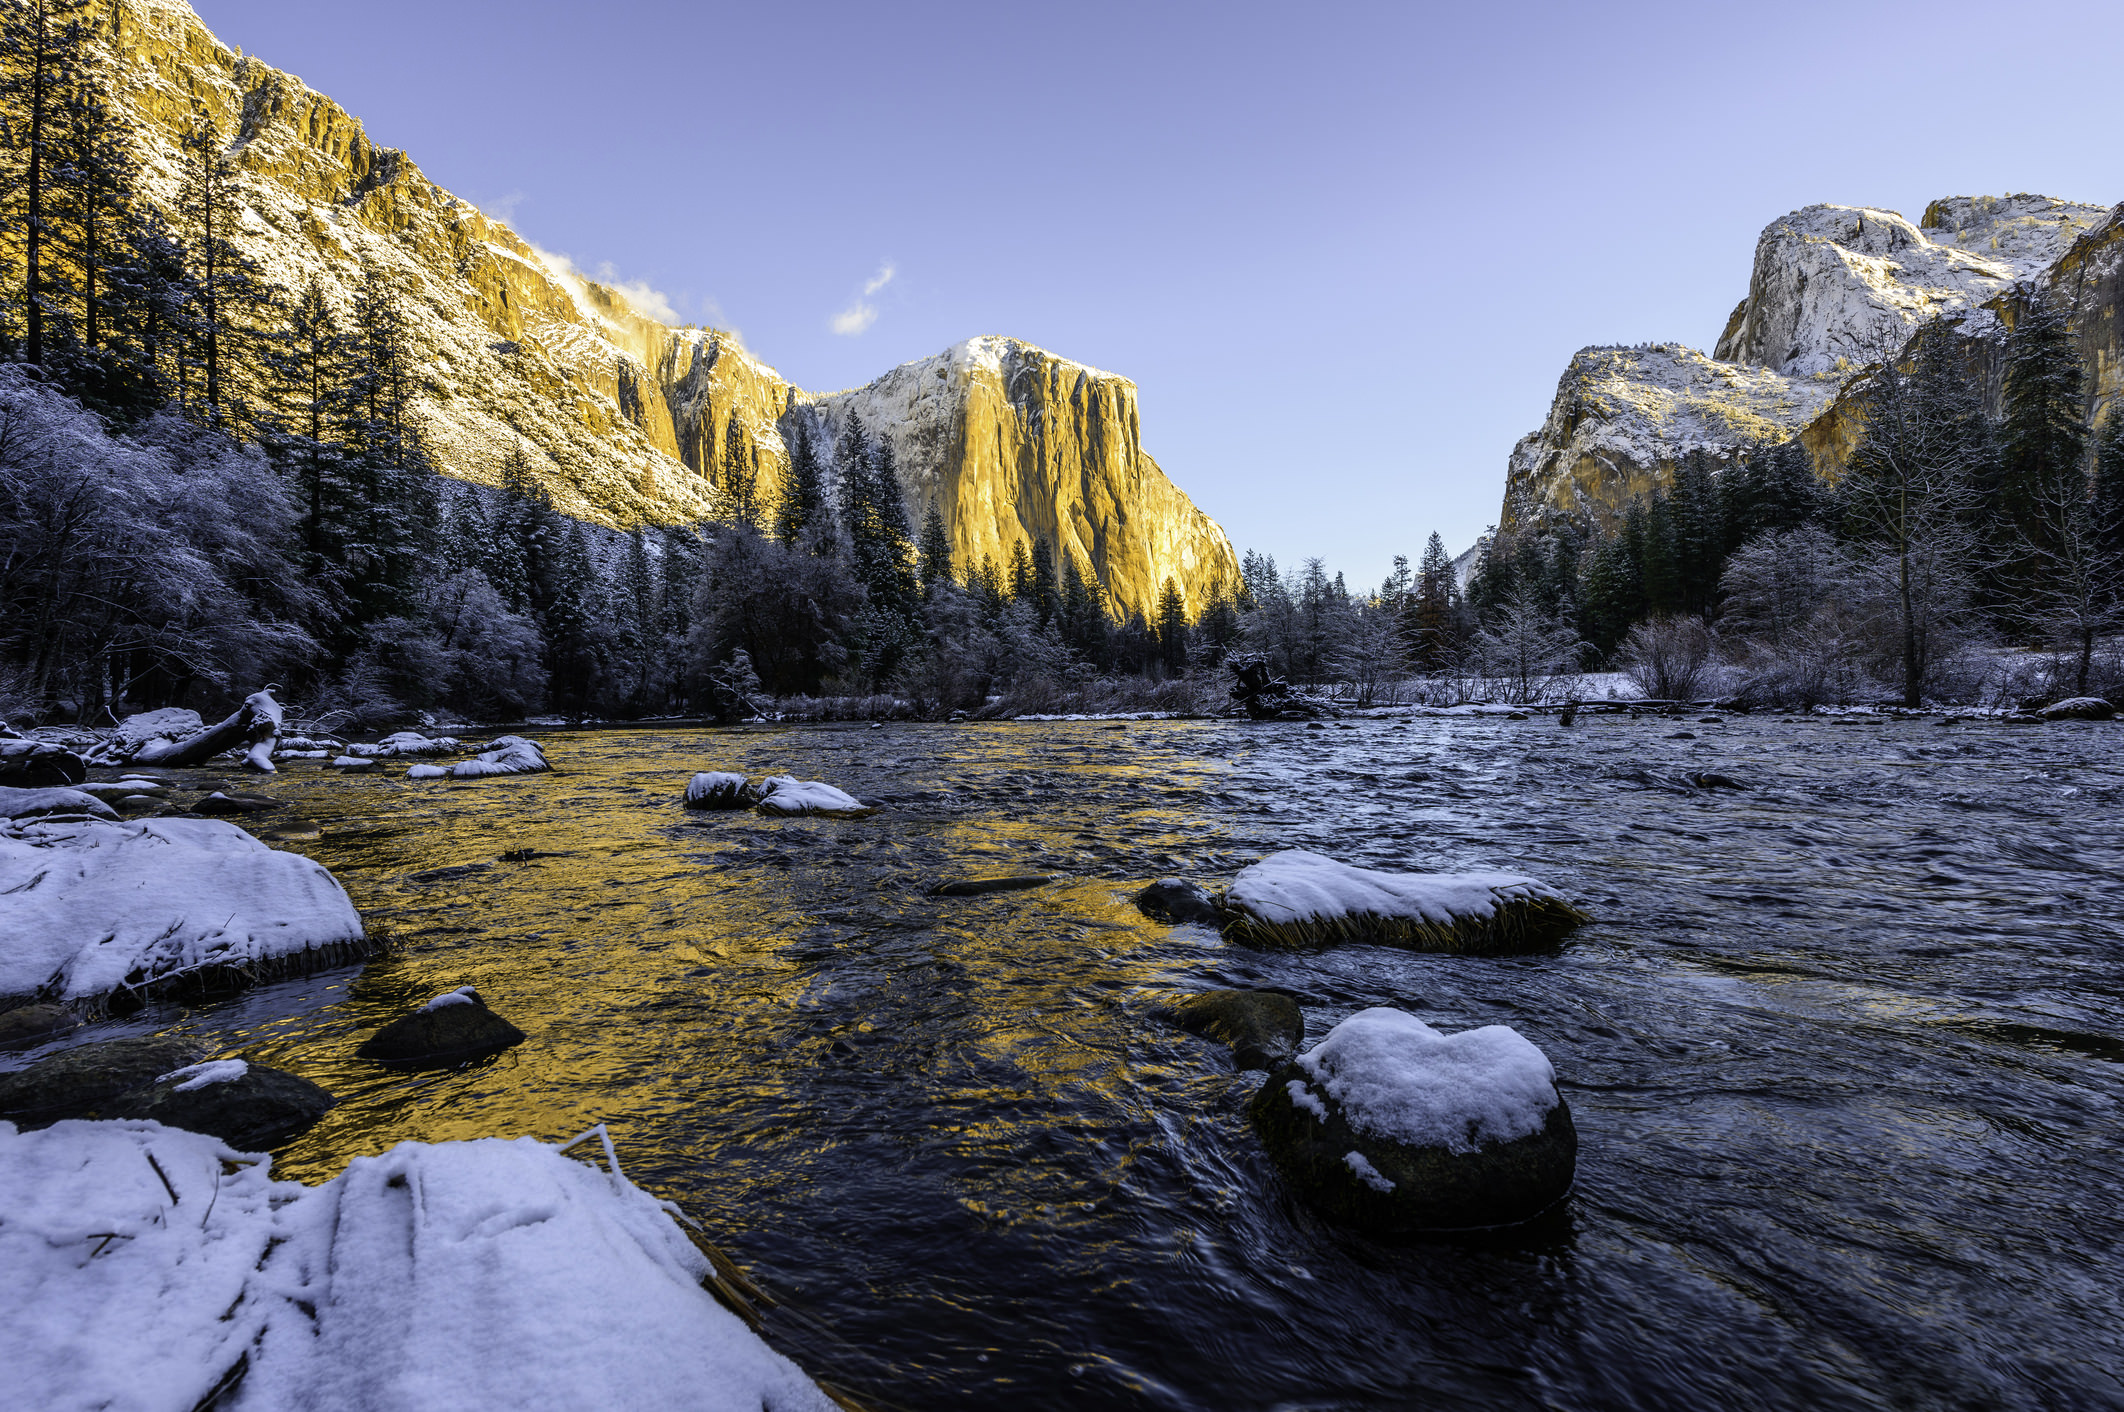
For example: In the image of the Yosemite Valley above, we see how the first three factors above have been used to maximize depth of field. A wide angle lens has been used, and, combined with a small aperture, the entire scene is acceptably sharp from the rock in the foreground to the mountains in the background. Note how the rock is far enough away from the photographer’s shooting position that it falls within the depth of field. Using Hyperfocal Distance
Though “hyperfocal distance” sounds highly technical and scary, it is one of the most effective methods a photographer can use to ensure everything in the scene is acceptably sharp. Hyperfocal distance helps you generate a depth of field that puts everything from the foreground to infinity in focus. Put simply, to maximize depth of field you need to focus at the hyperfocal distance for the aperture and focal length that you have selected. That means that by choosing the best aperture for landscape photography and adjusting the point of focus to the hyperfocal distance that the entire scene will be acceptably sharp.
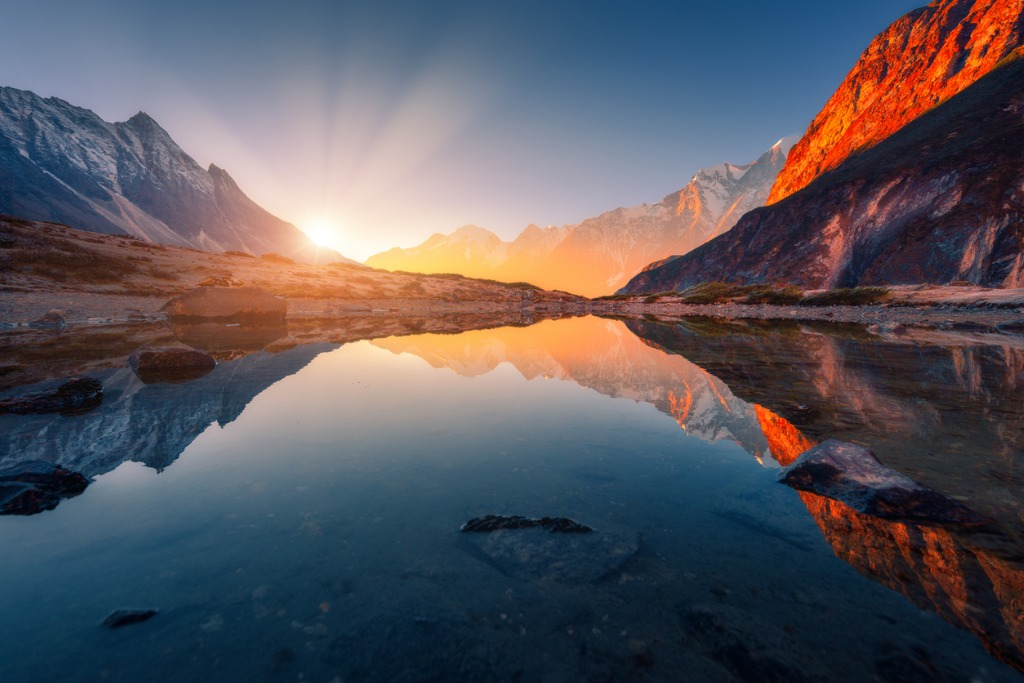
The problem is that the mathematical calculation to determine hyperfocal distance isn’t exactly an easy one to grasp. Fortunately, there are many apps and websites that make those calculations for you. For example: In the mountain scene above, if the point of focus was placed on the horizon line, the hyperfocal distance technique suggests that everything from about one-third from the bottom of the frame (i.e. the lakeshore) all the way to infinity will be acceptably sharp. In other words, by carefully selecting your focal point, you can determine which areas of the scene fall within the depth of field. If you want more of the background in focus, shift the focal point upwards in the frame. If you want more foreground in focus, shift the focal point downward in the frame. With practice, it will become far easier to understand where to shift your focal point to manipulate the depth of field based on the hyperfocal distance calculations. A Hyperfocal Distance Hack
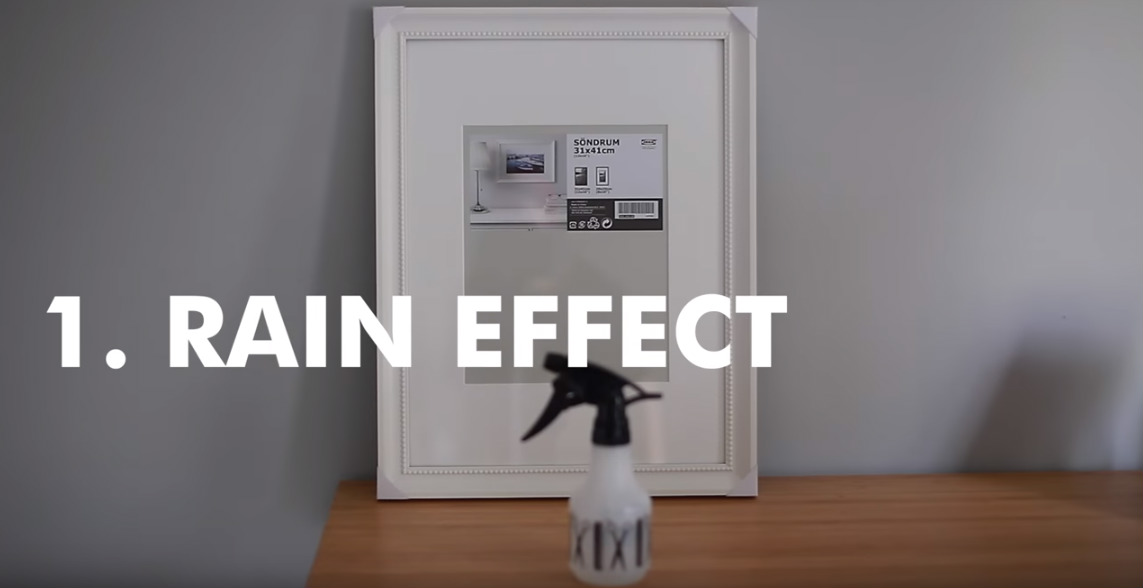
Because depth of field extends one-third in front of the focal point and two-thirds behind it, many photographers simply focus one-third of the way into the scene when using a very small aperture like f/22 to maximize depth of field. In theory, this is a good trick to use because it will often result in an adequate depth of field. The problem is in the selection of a tiny aperture. As you select apertures at the extreme ends of a lens’ range, image sharpness begins to decline due to diffraction. So, by using the smallest possible aperture to get a large depth of field, you might actually negate the benefits of the large depth of field because the lens isn’t its sharpest at f/22. This lack of sharpness is especially evident around the edges of the frame. Instead, endeavor to choose apertures in the lens’ sweet spot, or area of maximum sharpness. The sweet spot is different for every lens, but a good rule of thumb is that f/8 or f/11 will yield the sharpest photos. As a result, when using this hyperfocal distance hack, select f/8 or f/11, and then choose a focal point about one-third of the way from the bottom of the frame. The results will be sharper from edge to edge and from foreground to background. With that, you have a better understanding of depth of field. You’re now also armed with the hyperfocal distance technique to maximize depth of field. Download a hyperfocal distance app to help you make perfect calculations, and keep the hyperfocal distance hack in mind as well. It will take a little practice, but with time, you’ll likely see landscape images that are sharper with a larger depth of field. Get more details on hyperfocal distance in the video above by Brenda Petrella Photography. This blog post about the topic "Landscape Photography Primer: Getting Sharp Images With Depth of Field and Hyperfocal Distance" was first published on our website here https://www.photographytalk.com/landscape-photography/7215-landscape-photography-primer-getting-sharp-images-with-depth-of-field-and-hyperfocal-distance from https://photographytalkcom.blogspot.com/2021/04/landscape-photography-primer-getting.html I'm sure you're like me and know what it's like to get into a creative rut. It's the worst feeling because it can be so incredibly frustrating - and hard to get out of. But sometimes all you need is a few simple tips for inspiration to get your creative juices flowing again. Learn more about creative photography ideas at home on our website PhotographyTalk.com. The video above is all about easy, at-home photography tricks to help you get more creative photos. In it, Jessica Kobeissi shows just how simple it is to make something that's unique and unusual. Give the video a quick view, and for details on each trick, see below. Rain Effect
It's easy to make it rain with your camera... Just grab a spray bottle, fill it with water, and find an empty picture frame. Remove the back of the frame, secure the glass in place, and spray the front with the water bottle.
As you can see, the effect is quick eye-catching! You'd never know by looking at this photo that it was staged using nothing more than an old photo frame and a spray bottle! Fairy Lights
That old strand of lights you have in your garage isn't just for holiday decorations... It can also be used to add interesting lighting effects to your photos!
As you can see in the screenshot above, adding the fairy lights to this portrait adds gorgeous blobs of light that make the photo more unique. Just have the model hold the lights in front of their face, or for a more depth-inducing effect, have the model hold one end of the lights while you hold the other. By placing the lights in the field of view of your lens, you can get gorgeous bokeh effects that elevate your portraits to the next level. Lace Tablecloth
Lights aren't the only household item you can use to add interesting effects to your photos. If you have a lace tablecloth handy, just have the model hold it up in front of their face as you take the photo.
The sheer quality of the lace means that you still get a nice view of the model. But if the tablecloth has interesting designs on it, like the one in the screenshot above, you get beautiful, three-dimensional effects that make the photo something extra special. You can also view another post about photo ideas at home. Prism
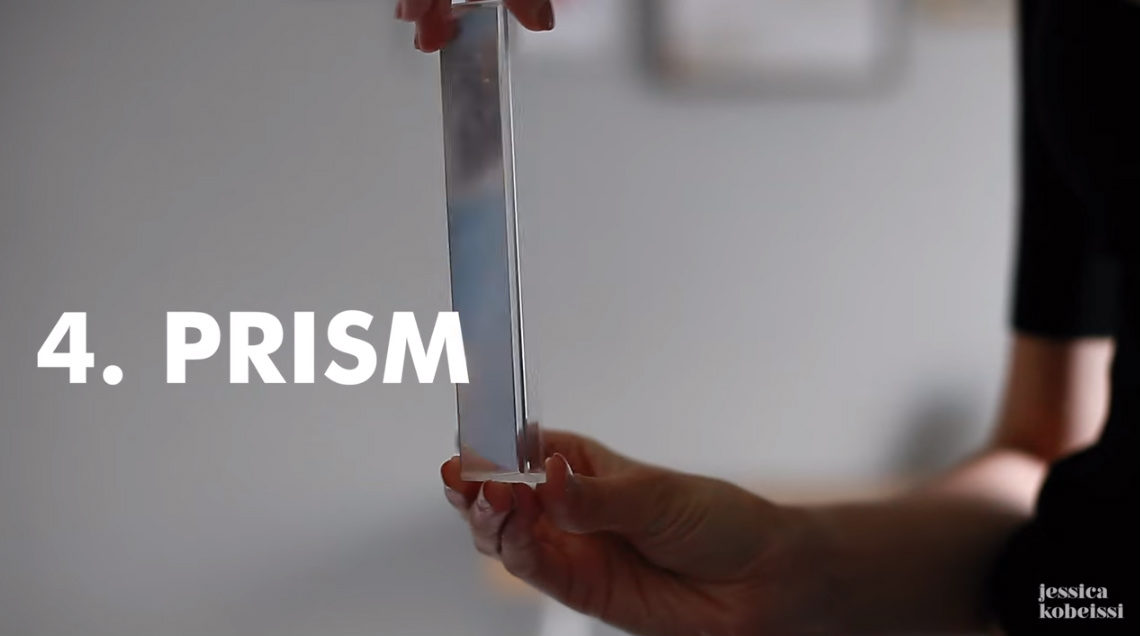
A prism is another simple object that can have complex effects on the photos you create. Since it refracts light, it will add beautiful light effects to your images, as seen below.
Just hold the prism in front of your lens as you shoot. Move the prism left, right, up, and down, and adjust its distance from the lens to change the effects it creates. The key is to play around to see what works best for your creative vision. Chandelier Crystal
Like a prism, a chandelier crystal is a fun and easy tool to use to add visual effects to your photos. Again, since it refracts light, holding the crystal in front of your lens generates beautiful effects.
As you can see in the image above, holding the crystal on the bottom left side of the frame adds a touch of whimsy to this shot. It also gives this portrait a little more depth and uniqueness that help it stand out. And all it took was a simple crystal! CD Rainbow
I know some younger photographers might be wondering what a CD is, but it's a round thing we used to use to save stuff like photos. The bottom of the CD reflects light, and when it does, it creates a rainbow.
Like the other objects on this list, it's easy to use a CD to get this effect. Turn on your phone's flashlight, shine it on the CD, and hold both in front of your camera lens (you'll need to put your camera on a tripod and use its timer). Then, work the angles of the light and the CD until you get the desired effect where you want it. As you can see in the image above, it's another way to create a photo that's more visually interesting. And with that, you have six super easy photography tricks to use to improve your photography! This article about the topic "6 Creative Photography Tricks You Can Try at Home" was first published on our website here https://www.photographytalk.com/beginner-photography-tips/6-creative-photography-tricks-you-can-try-at-home from https://photographytalkcom.blogspot.com/2021/04/6-creative-photography-tricks-you-can.html If there’s one thing I don’t like about amateur photographers and beginners is their complete ignorance of photography history. Seriously everyone, that stuff is important. It’s not just the fact that the latest cameras still work on roughly the same principles as two hundred years ago, but it’s important to know the great names that inspired and shaped this medium that has become so loved by the world.
You can trace the camera obscura principle back to ancient philosophers and it’s fascinating that it works with today’s high end sensors too. Without the likes of Niepce, Daguerre, Talbot and Eastman just to name a few, who knows how long it would have been before humanity could use photography to record its history and create art. As cameras became smaller and lighter, until eventually the film roll and the 35mm format were invented, photographers saw new opportunities. Some of them developed profitable businesses, others took their cameras to the far ends of the earth or to war, and others explored their creativity in the studio, sometimes using themselves as models. Learn more about the topic when did photography start on our website PhotographyTalk.com. Photography has had a long and fascinating journey before it could become what it is today and it has impacted history like no other medium. It might not be the most respected art form, but it’s definitely unique in its own way. Even with all the technology that has completely changed the process and made it accessible for everyone, the thrill of knowing you took a great photograph is pretty much unchanged. The fact that you can now take photos using so many different techniques is a blessing. You can use your iPhone with incredible results or you can go real old school and go back to silver plates. Whatever floats your boat, it’s still awesome. The guys at COOPH have made an awesome five minute video that shows you the entire history of photography unfolded. This is the stuff everyone with a camera and some form of expectations has to see. Enjoy! This blog post about "The History Of Photography In 5 Minutes" was first published on our website here https://www.photographytalk.com/photography-articles/6238-the-history-of-photography-in-5-minutes from https://photographytalkcom.blogspot.com/2021/04/the-history-of-photography-in-5-minutes.html My photography passion is landscapes. I'm just one of many, right? That includes my good friend, Amber Fite, whose photography expertise ranges from landscapes to maternity portraits.
She shared a few images with me the other day of beautiful, unique, and intimate nature scenes, and I just had to share them with you. Not only are these images fun to look at, but they offer teachable moments as well. So, have a look at these beautiful examples of nature photography and learn a few tips and tricks for improving your photos at the same time. Light is Always Key for Nature Photography
No matter if you're taking a photo of a large, sweeping landscape or zeroing in on a small detail like the plant in the image above, good lighting is an absolute must. In this case, the warm tones of the sunlight filtering into the shot from the background serves a couple of different purposes. First, it lightens up the background, keeping it from feeling too heavy. And second, it catches the dew on the plant, creating tiny flickers of light that add visual interest to the shot.
In this example, the sunlight is more obvious and direct. Again, you can see how the sun brightens up the background and provides gorgeous backlighting that helps make the grasses in the foreground a stronger subject. When creating photos of nature and landscapes, look for opportunities to backlight the scene to get contrast-filled, dramatic results. Texture Can Be the Subject
Any type of nature photography will benefit from the inclusion of textures in the image. That's because textures give the photo extra visual interest that grabs the viewer's attention. But textures don't have to play a supporting role in the photo - instead, they can be the subject of the shot. In the image above, the texture of the grasses is the focal point of the shot thanks to the very shallow depth of field that's blurred out everything else in the photo. Notice how the structure of the plants adds so much depth to the photo as well.
In this image, the texture takes a much different form. The linear lines created by the plant stems give a verticality to the shot while the tiny leaves created a repeating texture that delights the eye. Again, you can see how backlighting helps set this scene off, making these lines and textures much more obvious amongst the darker surroundings. Use a Shallow Depth of Field to Create a Sense of Intimacy
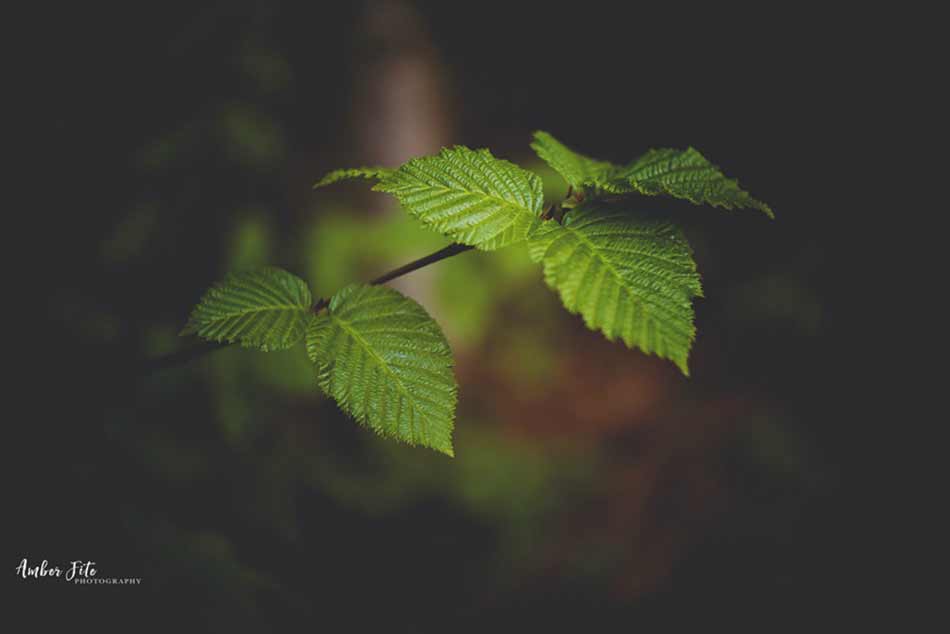
One of the problems that nature and landscape photographers have to get around is that when you photograph large landscapes, sometimes they can feel a little empty, and even overwhelming. One solution to this issue is to go against the norm and shoot with a very shallow depth of field. As you can see above, with such a narrow field of focus, you get a much more intimate photo in which this one branch on one plant becomes the star of the photo.
And again, in this shot, Amber has opted for a very narrow depth of field to bring our focus to an even smaller area - the group of leaves on this plant. By framing this shot with the plant in the foreground out of focus, she's also managed to create a photo with tons of depth, even though the area of focus is so small. If your large, sweeping landscapes are feeling a little too big and cold, give this more unique view of nature a try. Find Beauty in the Details
As noted earlier, sometimes nature photography can feel a little cold and impersonal. But finding the beauty in the very small details in a landscape is how to take nature photos with more visual appeal. Take the image above as a perfect example of this... Your eyes are drawn first to the remains of the white, circular flowers because they're the only thing in focus in the shot. But if you look carefully, notice how the spiderwebs that appear all over this plant add a touch more detail that elevate this shot even more.
In this example, Amber once again utilizes a delightfully shallow depth of field to keep our attention on the gorgeous shape of this single plant. But in doing so, she created a wonderland of bokeh in the background that provides a delicate richness to the shot. That bokeh works much like the spiderwebs in the previous image - it's a small detail that makes the image as a whole more successful. This is one of the easiest nature and professional landscape photography tips to implement, and one of the most successful, too! Find Ways to Incorporate Angles
Perhaps one of the lesser-known nature photography techniques is to incorporate angles into your photos. We all know about leading lines and how they can help you connect the foreground to the background and lead the viewer's eye through the photo along the way. But including angles in your photos can help you do the same thing. In the photo above, the branch creates two (roughly) triangular shapes - one below and to the right and one above and to the left. This helps our eyes "divide and conquer," and inspect the subject (the branch) as well as the background from corner to corner.
Of course, angles can be used in other ways to create interest. In this image, the left-leaning grasses form a right triangle with the bottom-left corner of the shot. This, in turn, makes for a more active scene - we understand that the breeze is moving the grasses to the left, and as a result, the photo has more life and vitality to it. The moral of the story is that rather than simply snapping photos, take time to consider the composition and how lines, angles, and other shapes can help you compose a more impactful photograph of nature. About These PhotosLocation: Alaska, Washington State Equipment: Nikon D750, D600, Nikon 50MM 1.4, Nikon 85MM 1.4 From the Photographer: Many photographers see the world in a different light. Things, people, objects, may look one way to the average person, but an artist sees the beauty in the simplest things. For me, I am a lover of light. Good light can make just about anything beautiful. For example, the images that I have taken for this article are the “in between” beauty of nature, the stages of nature between seasons. Most people are in awe over the flowers that are fully bloomed, or the tree that is full and plentiful. What is forgotten is how beautiful nature is during the transitions of season. The grass, the moss, the dead leaves, the ferns, the weeds; many things that people walk right by in search of that beautiful flower. This article about the topic "These Examples of Fine Art Nature Photography Show the Beauty of Simplicity" was first published on our website here https://www.photographytalk.com/landscape-photography/8421-these-examples-of-fine-art-nature-photography-show-the-beauty-of-simplicity from https://photographytalkcom.blogspot.com/2021/04/these-examples-of-fine-art-nature.html There’s a reason talk show hosts love to laugh at bad family portraits from the 80s… Photographers make family portrait posing mistakes every single day. Sometimes they are incredibly bad. So, here’s a quick list of tips that might prevent your family photos from ending up as an internet meme. Learn More about cool poses for guys on our website PhotographyTalk.com.
Family Portrait Posing Mistake #1: Having Men Cross Their Legs
photo by imtmphoto via iStock Yikes. Does anything look more unnatural than a grown man sitting on the ground criss-cross-apple-sauce? Unless you’re taking yoga or workout portraits, you should not put a man on the ground with his legs awkwardly all over the place.
photo by Arundhati Sathe via iStock I think the only exception to this rule is if it’s a father playing with his child. Otherwise, just avoid putting grownups on the ground. Family Portrait Posing Mistake #2: Using Trees Incorrectly
photo by monkeybusinessimages via iStock I don’t know why a favorite cliche for family portrait posing ideas is to put your family at the base of a tree. You can also view another post about photo pose for boys here. Trees in the background of family portraits, like in the photo above, are fine. The depth of field keeps them out of focus and they give the portait a nice setting.
photo by XiXinXing via iStock When you are outside using trees to shade your subjects from harsh sunlight, make sure the trees are part of the background. In the photograph above, the tree has become the foucs of the photograph taking up more space in the frame than the subjects. It is also important to be aware of branches and other objects in the background. You don't want any of the subjects appearing as though they have a branch growing out of their head! Family Portrait Posing Mistake #3: Not Staggering Couples
photo by Wavebreakmedia via iStock When multiple generations of family members are in the same photo, it’s important to stagger couples so viewers can identify who’s who. For example, is there anything more awkward than having your sibling accidentally identified as your significant other? In the image above, the mother and father should have been coupled in the middle of the shot, not their two children. Instead, their kids look like they’re the couple!
photo by Cecilie_Arcurs via iStock Since there are easy family photo pose that differentiate brother/sister pairs from married couples, this should be a portrait posing mistake that you don’t make. Stagger couples in each family portrait. Make sure couples are touching or embracing and siblings aren’t. In the image above, it’s clear who the couples are, not just because of their age difference but because of the manner in which they have been positioned in the shot. Family Portrait Posing Mistake #4: Unrealistic Expectations for Children
photo by inarik via iStock Kids want to play, they don’t want to stand around for hours waiting to politely smile for a family portrait. I also hate seeing family portraits where a toddler is standing with the exact same pose as their parents.
photo by oscarhdez via iStock You’re going to get better expressions out of children if you allow them to play around with their siblings and parents during the shoot. While you can still get some more traditional portraits, make sure you intersperse these shots with more fun photos. Doing so will help you create a more authentic collection of images to present to your clients. Family Portrait Posing Mistake #5: Relying Too Much on Formal Posing
photo by Spiderstock via iStock Out of all family portrait posing mistakes, this might be the biggest one. There are way too many cliches in family portrait photography. While these aren’t necessarily embarrassing, they are certainly boring.
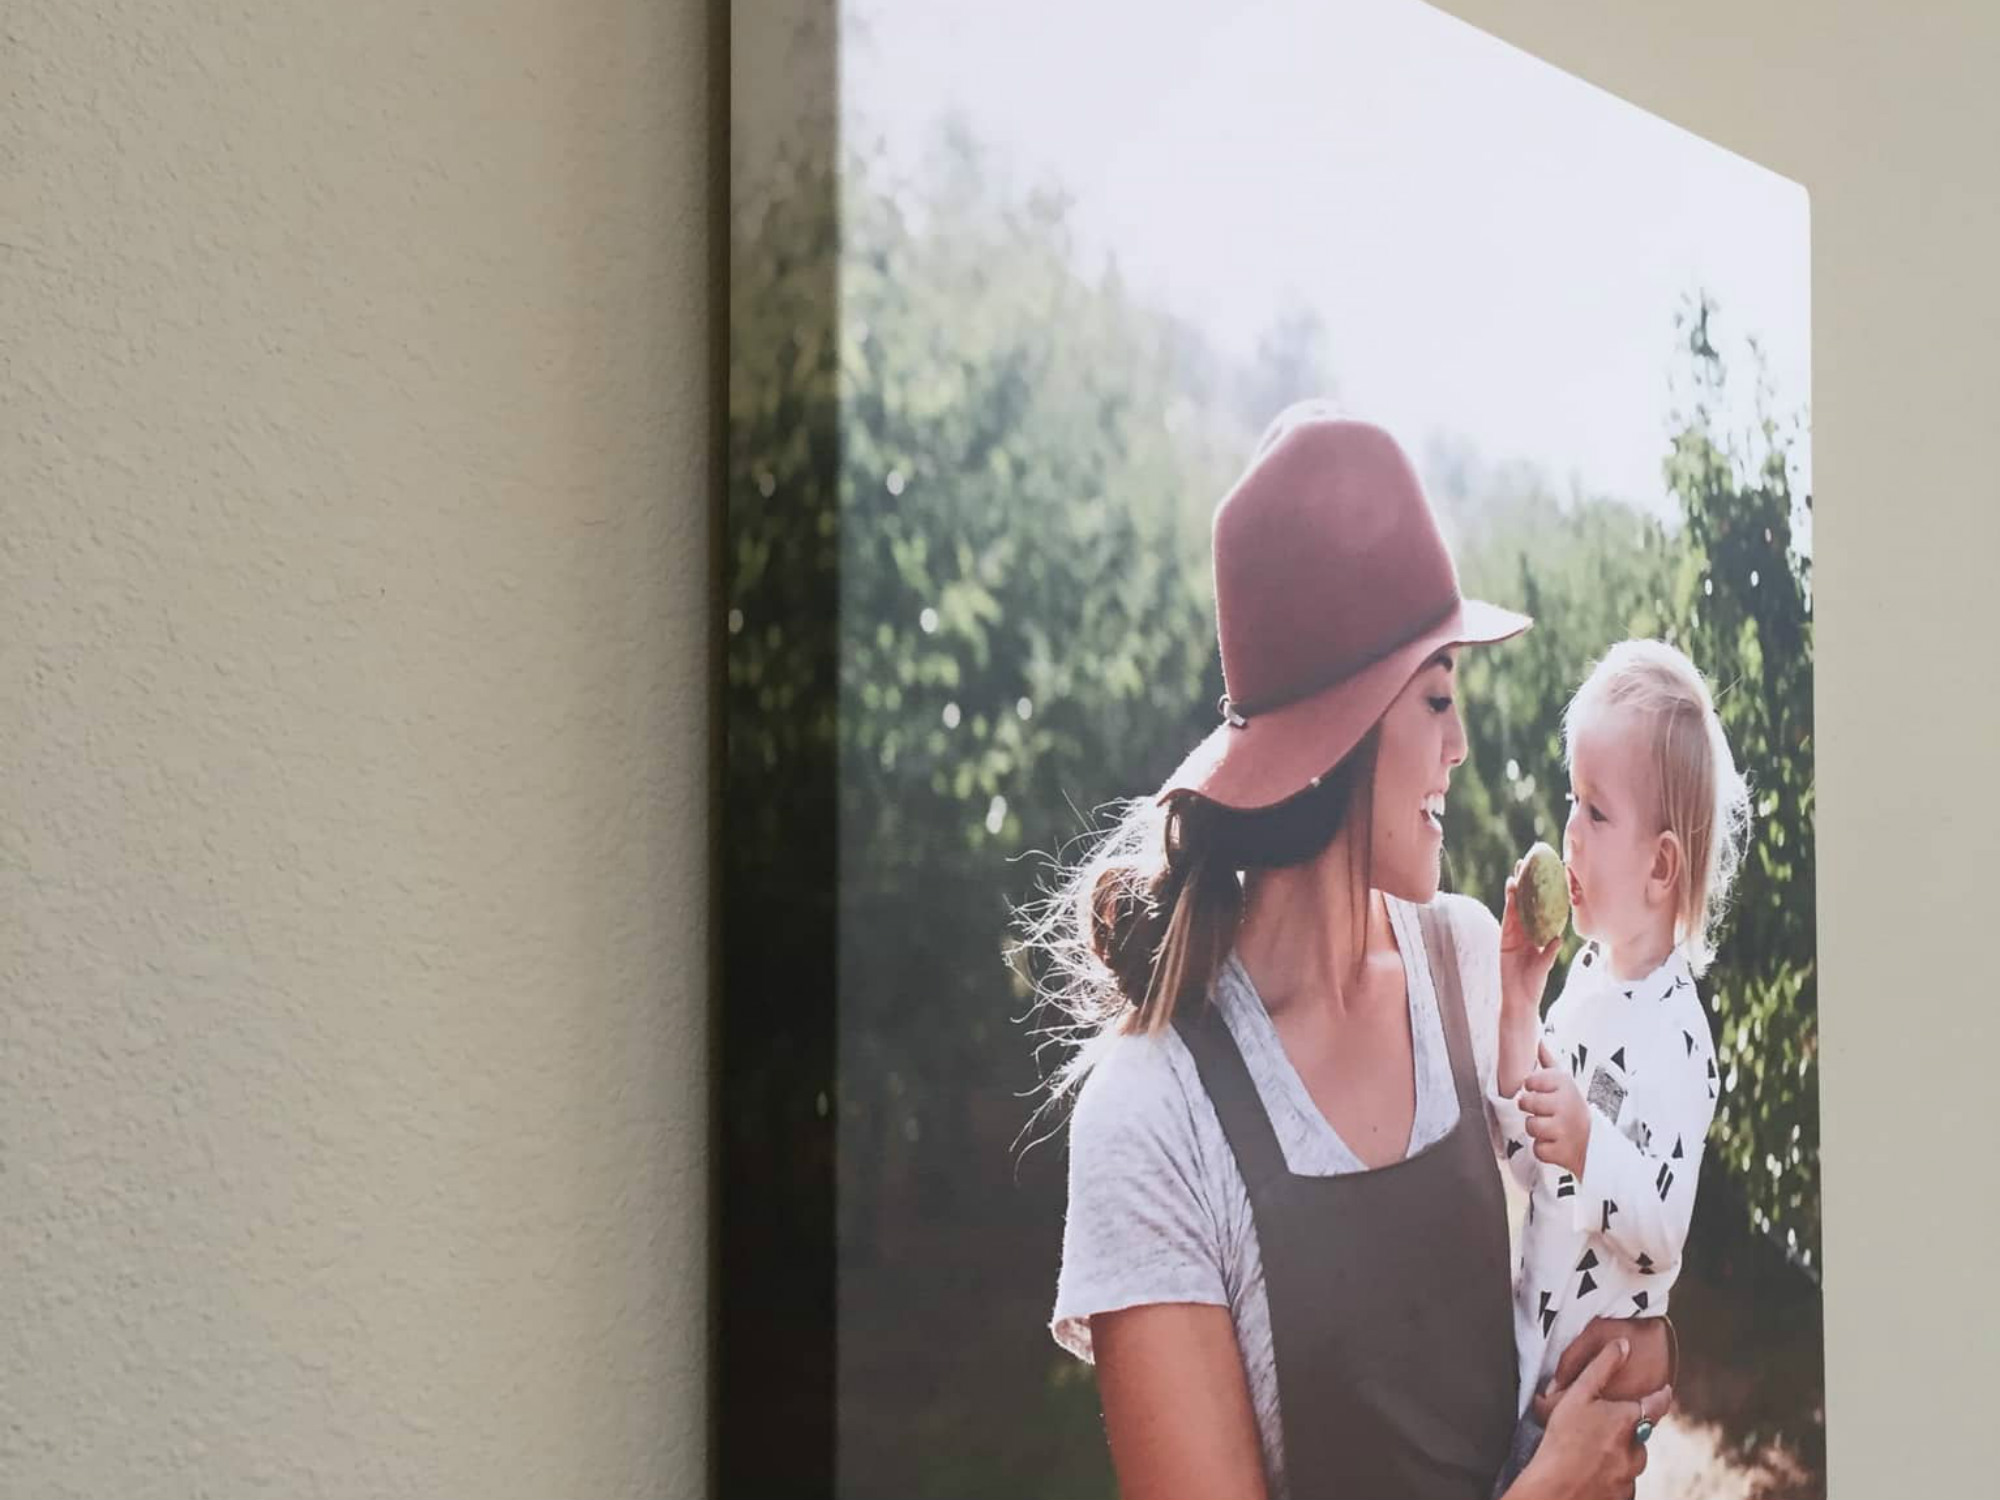
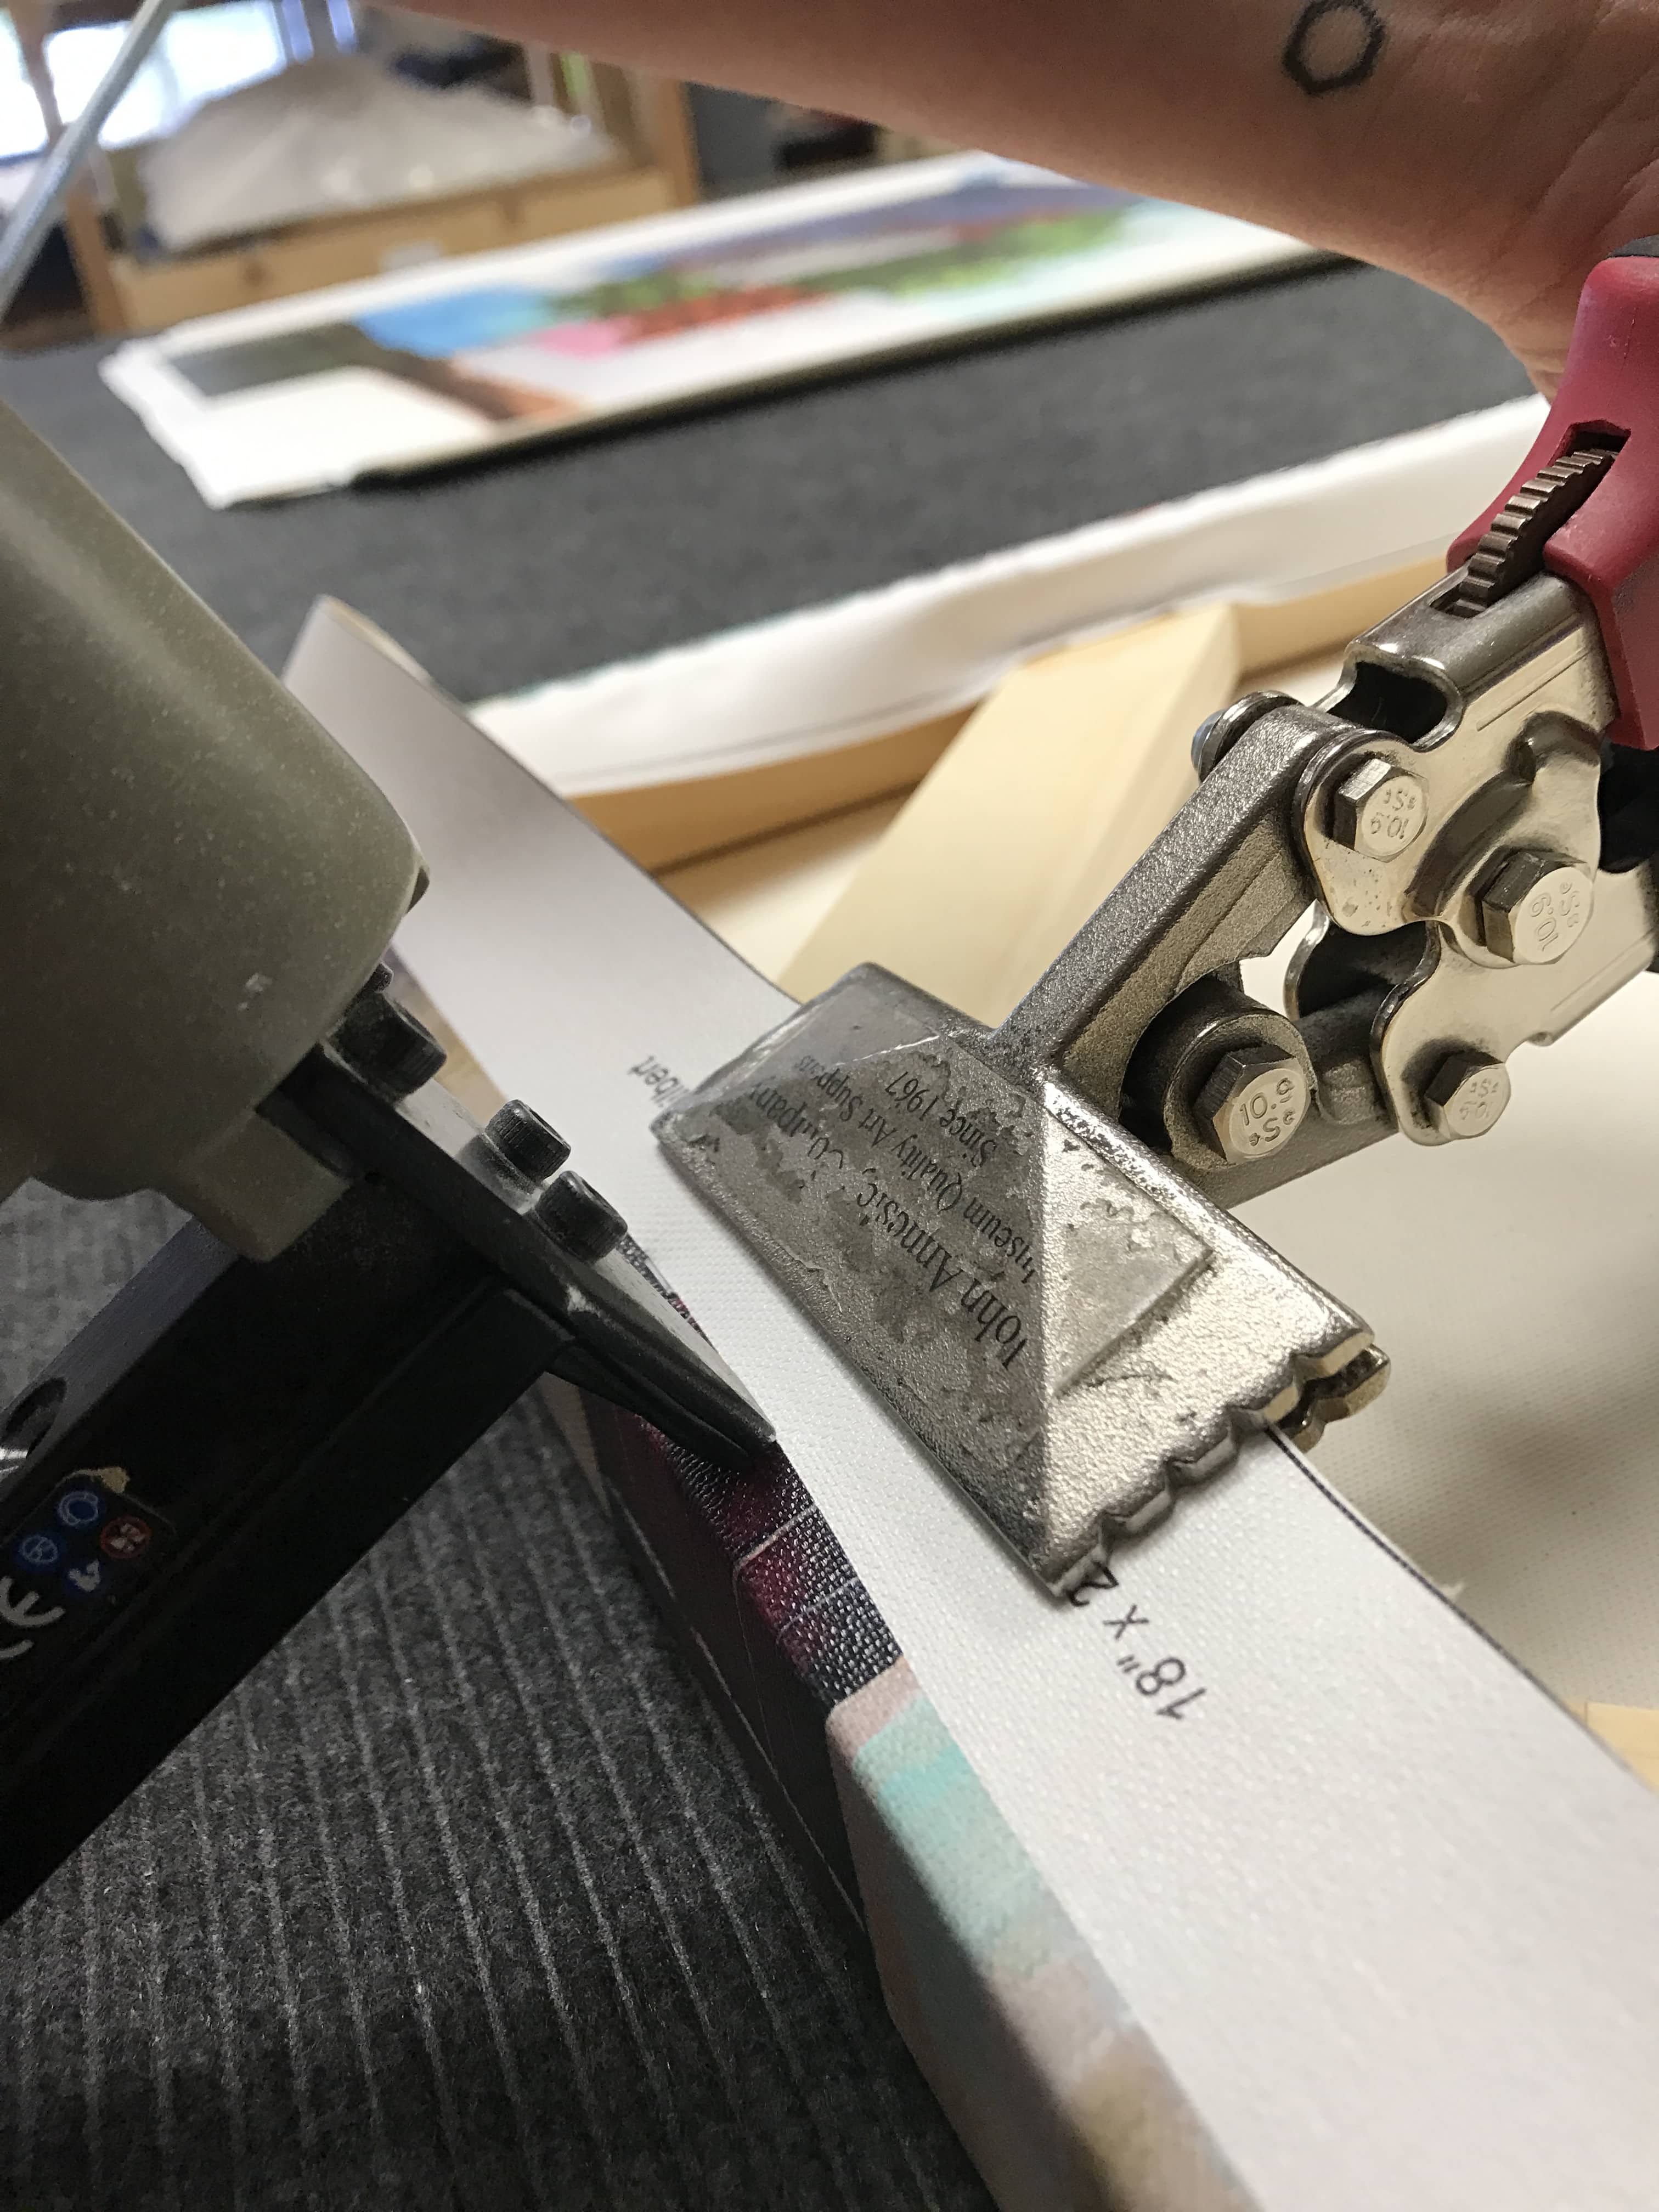
photo by filadendron via iStock If you allow the family to play during the shoot, or at least capture the in-between moments, they’ll appreciate the candid shots possibly more than the posed ones. Besides, one of the best portrait photography tips you can use is to incorporate props into the photo shoot. In the image above, the cookware and ingredients on the counter are excellent props for getting the family to relax in front of the camera and engage with one another in a meaningful way. The result of this is a much better portrait if you ask me! Bonus Tip: Make the Most of Portraits by Printing Them on Canvas |
ABOUT USPhotographyTalk is the all about talking photography to celebrity photographers. Those who are tops in their respective photography fields. You can catch up with PhotographyTalk at www.photographytalk.com. Archives
April 2021
Categories |
 By Joseph Nicéphore Niépce [Public domain], via
  Louis Daguerre [Public domain], via
  Hill & Adamson [Public domain or No restrictions], via
  Roger Fenton [Public domain], via
  By Thiele, Reinhold [Public domain], via
  By Leica (Leica Microsystems (früher Ernst-Leitz)) [CC BY-SA 2.0 de (https://creativecommons.org/licenses/by-sa/2.0/de/deed.en)], via
  By OppidumNissenae (Own work) [CC BY-SA 4.0 (https://creativecommons.org/licenses/by-sa/4.0)], via
  By John (Flickr: Early digital!) [CC BY 2.0 (http://creativecommons.org/licenses/by/2.0)], via
 By Rafael Fernandez (Own work) [CC BY-SA 4.0 (https://creativecommons.org/licenses/by-sa/4.0)], via
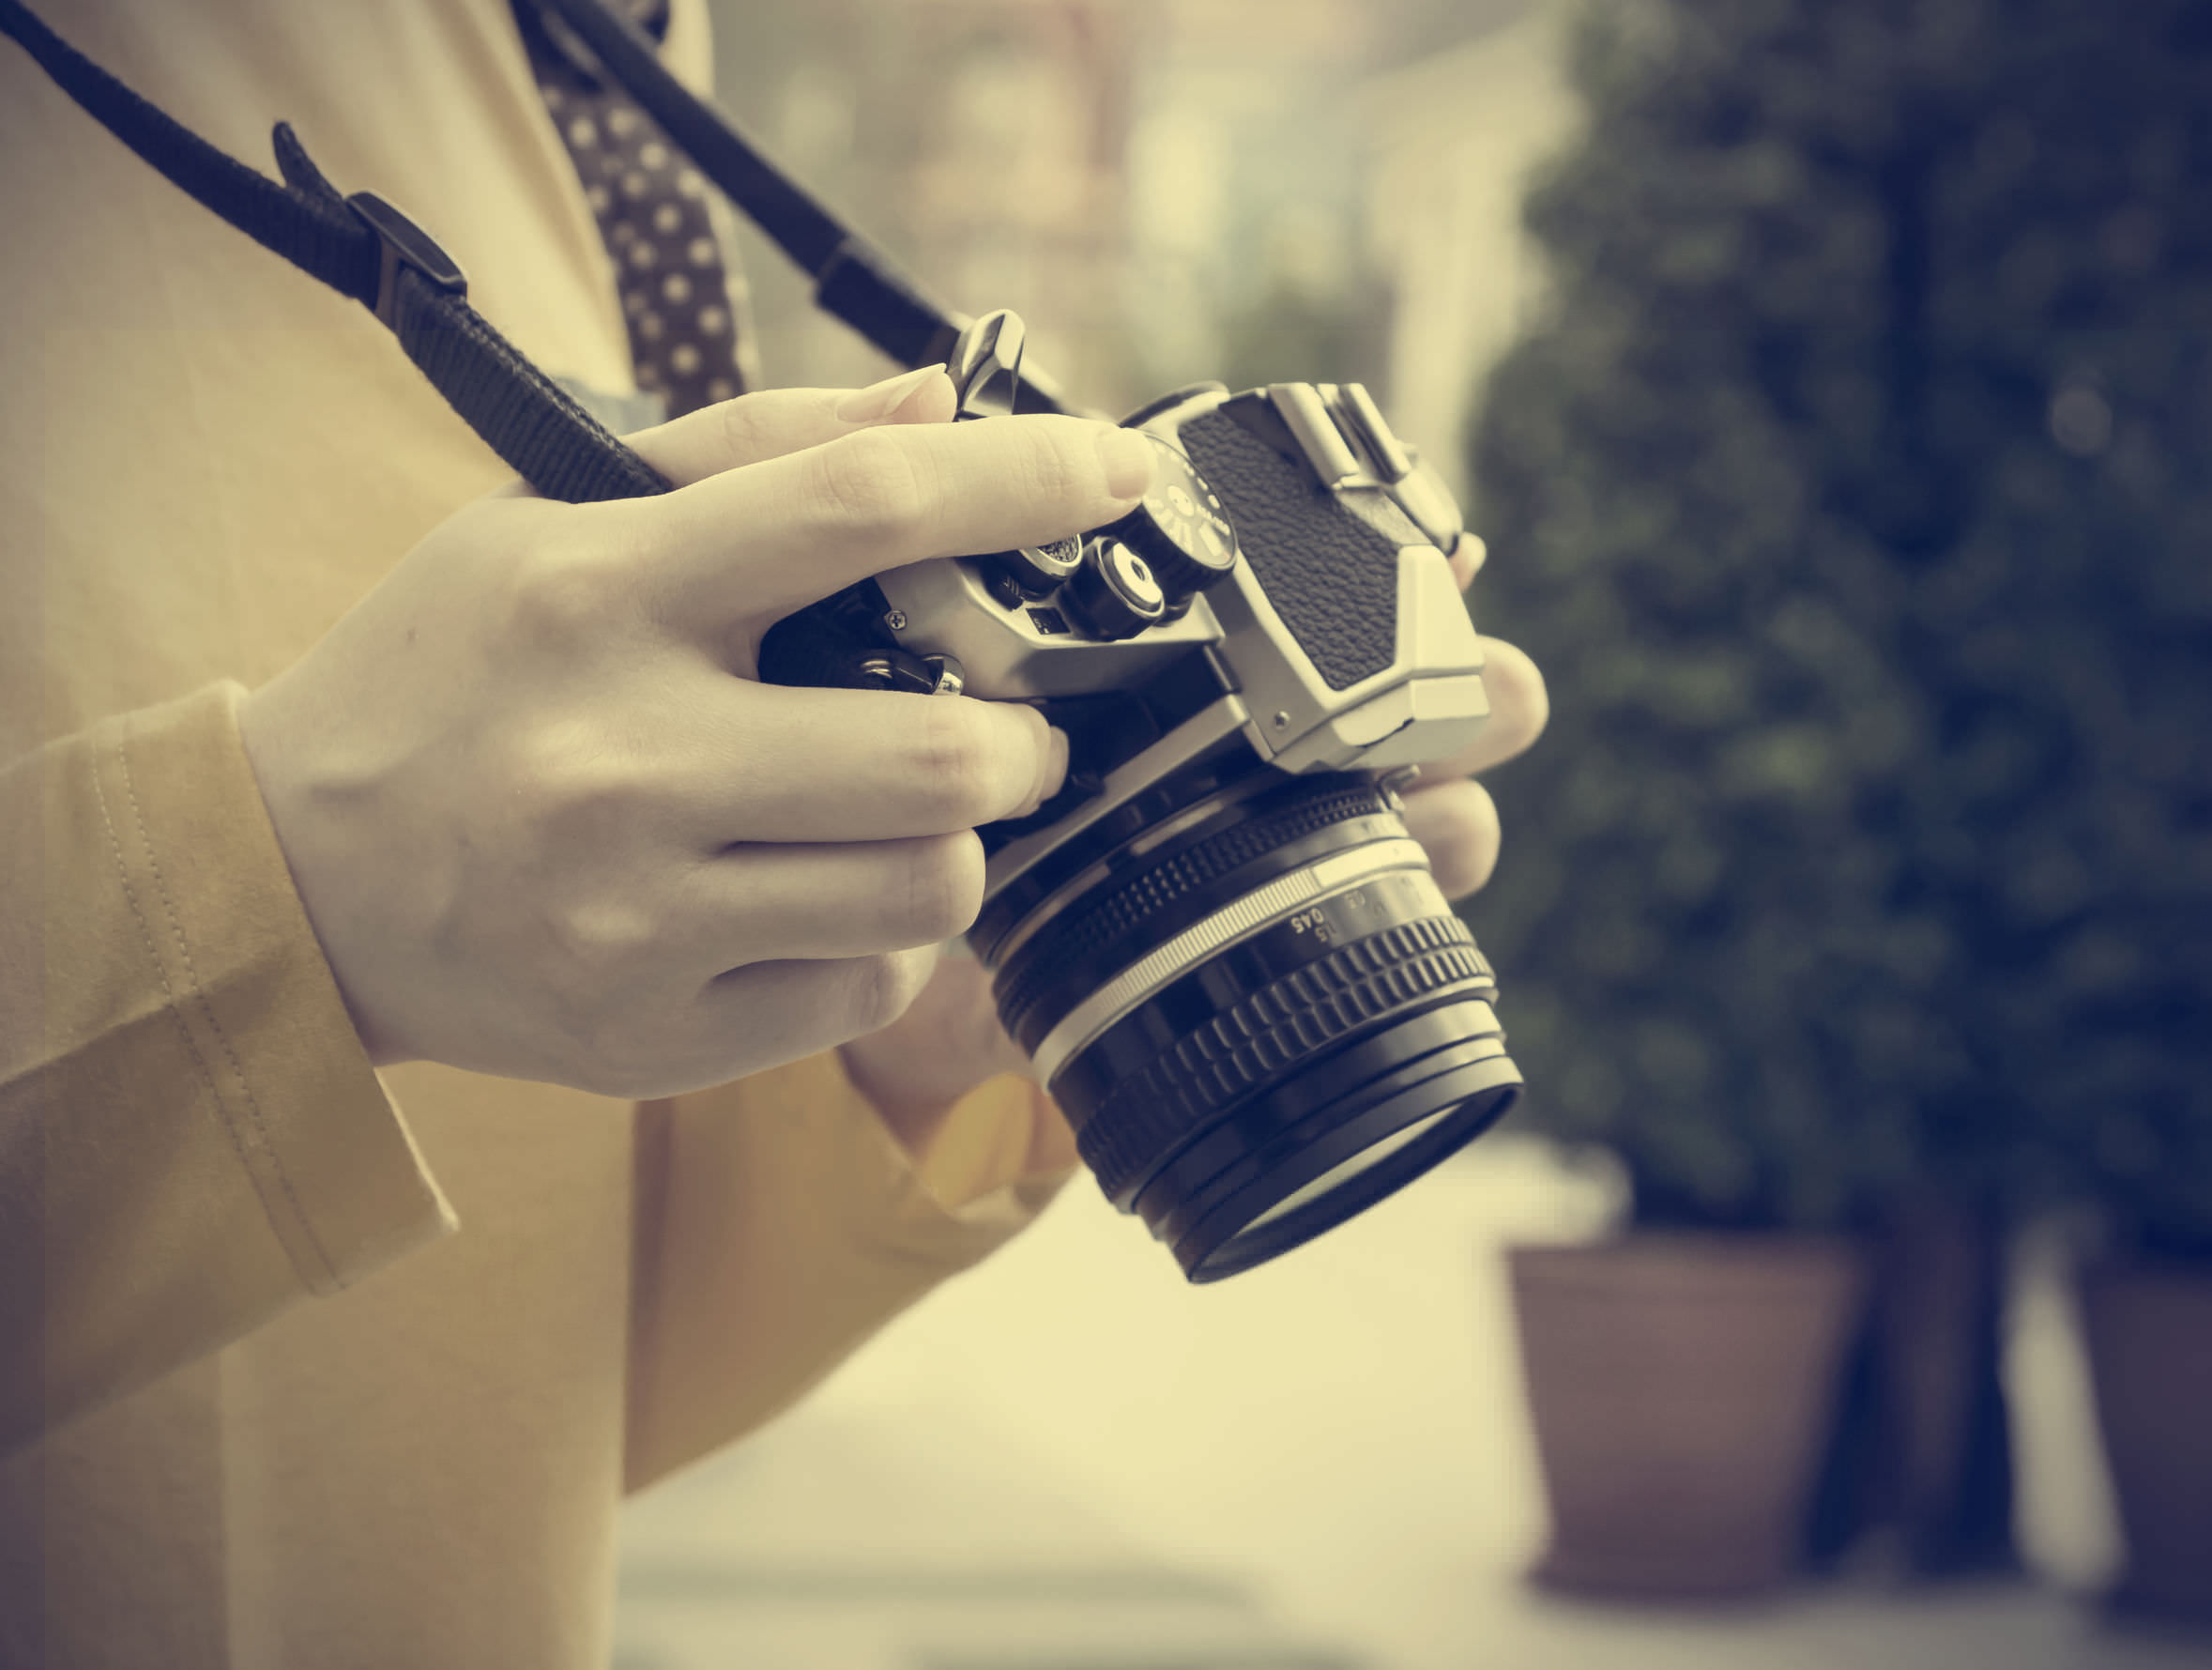


 YouTube Screenshot/Morten Rustad
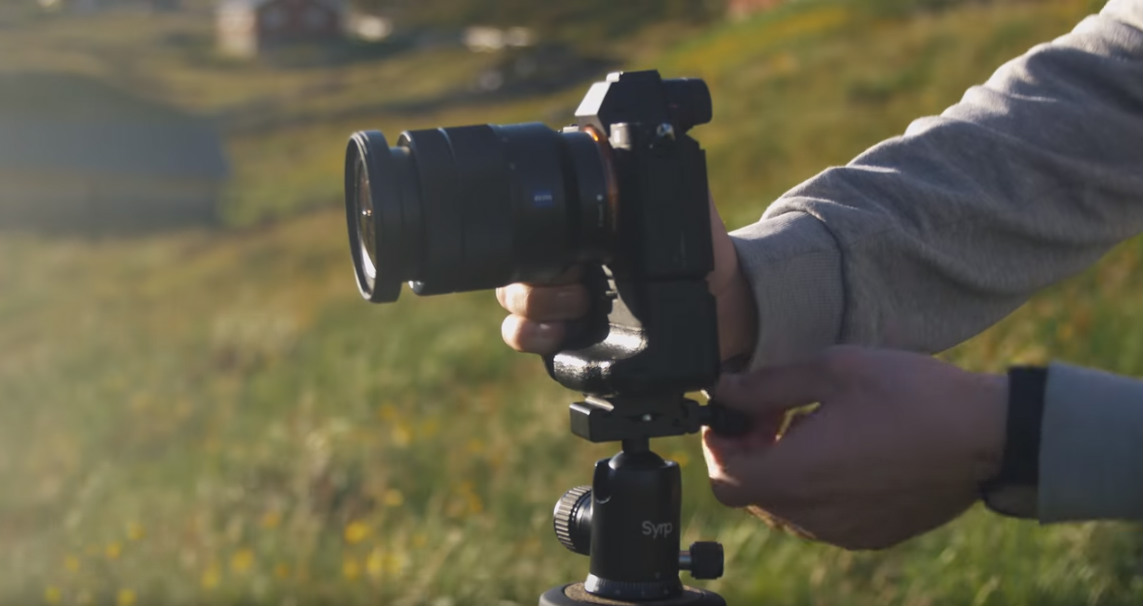 YouTube Screenshot/Morten Rustad
 YouTube Screenshot/Morten Rustad
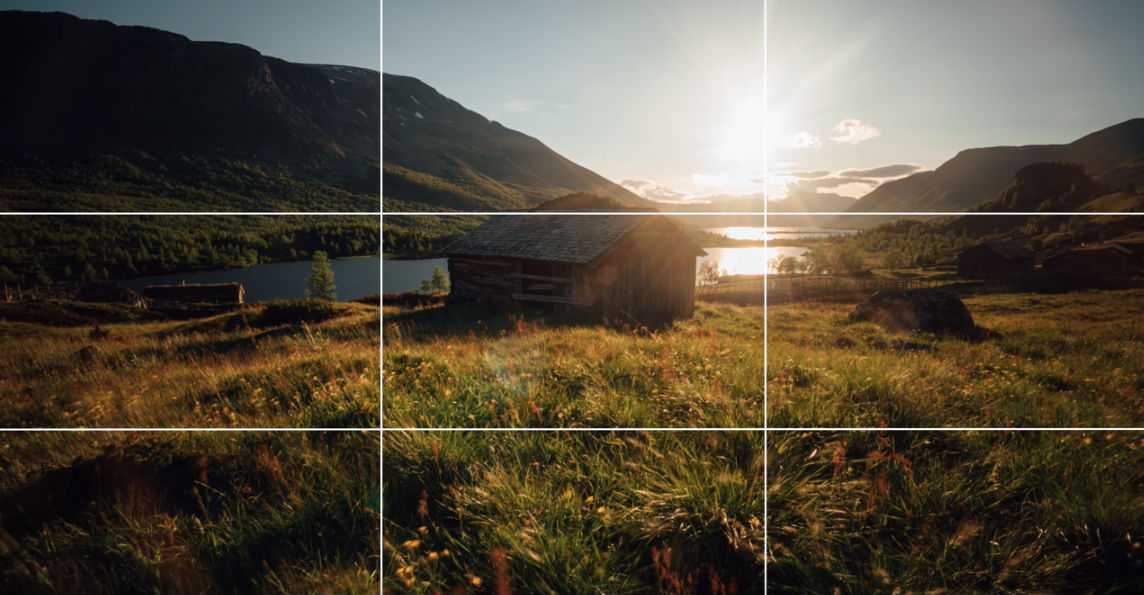 YouTube Screenshot/Morten Rustad
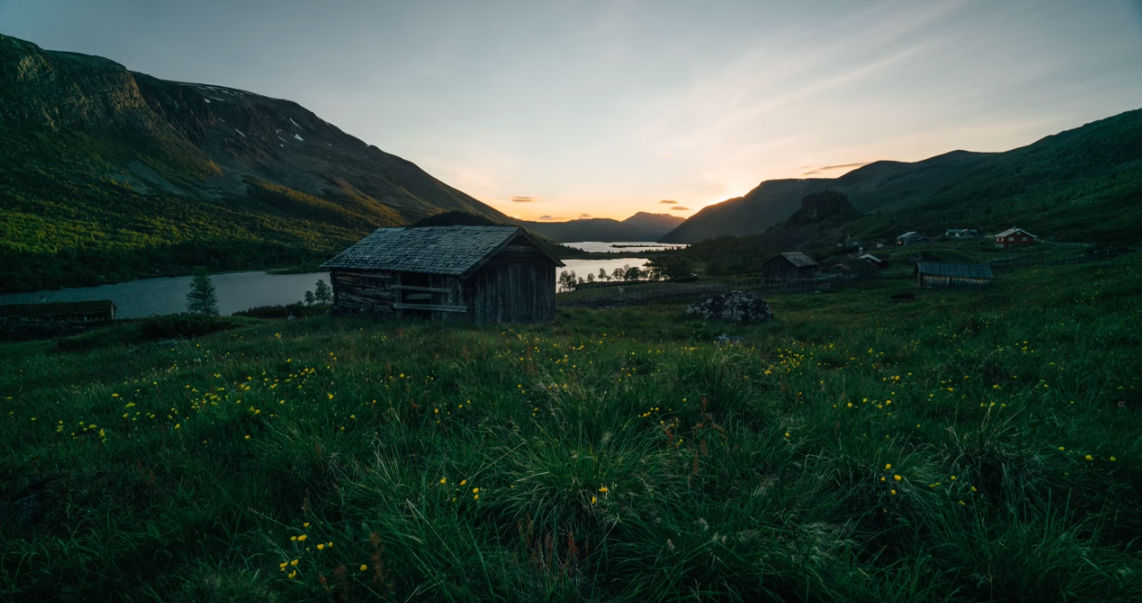 YouTube Screenshot/Morten Rustad
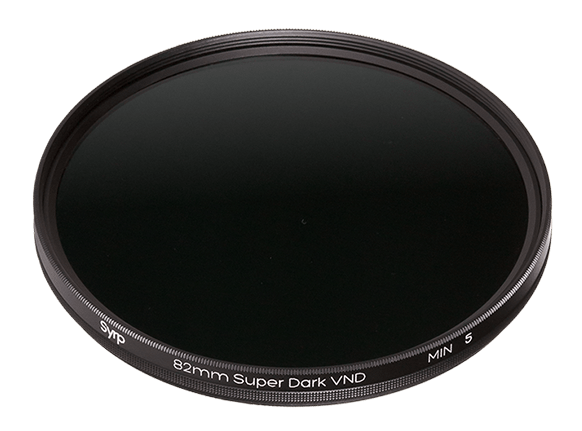
 YouTube Screenshot/Morten Rustad
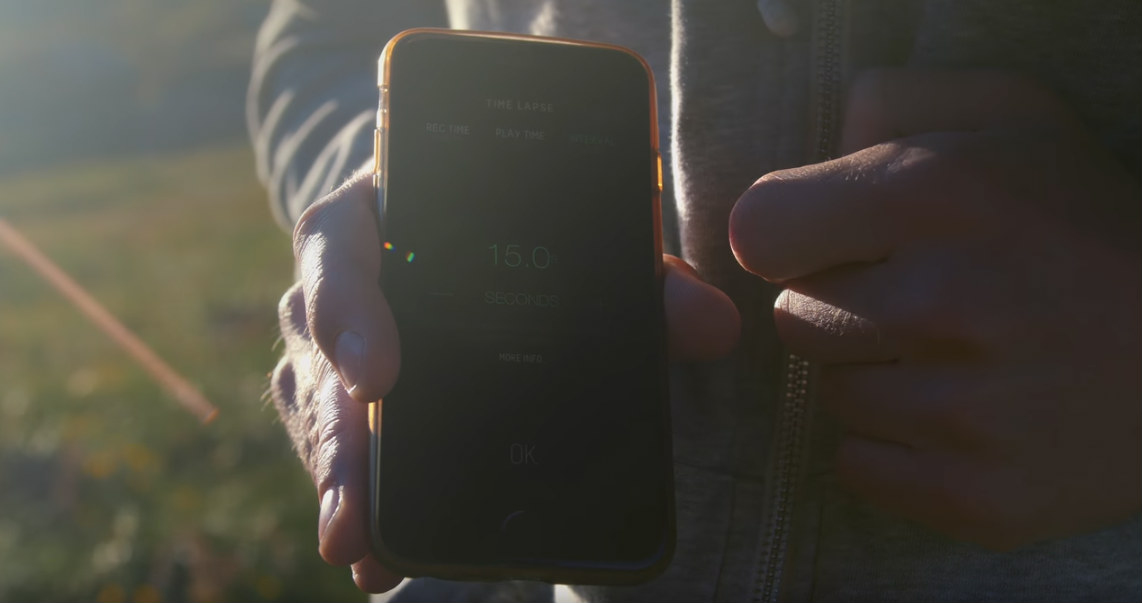 YouTube Screenshot/Morten Rustad
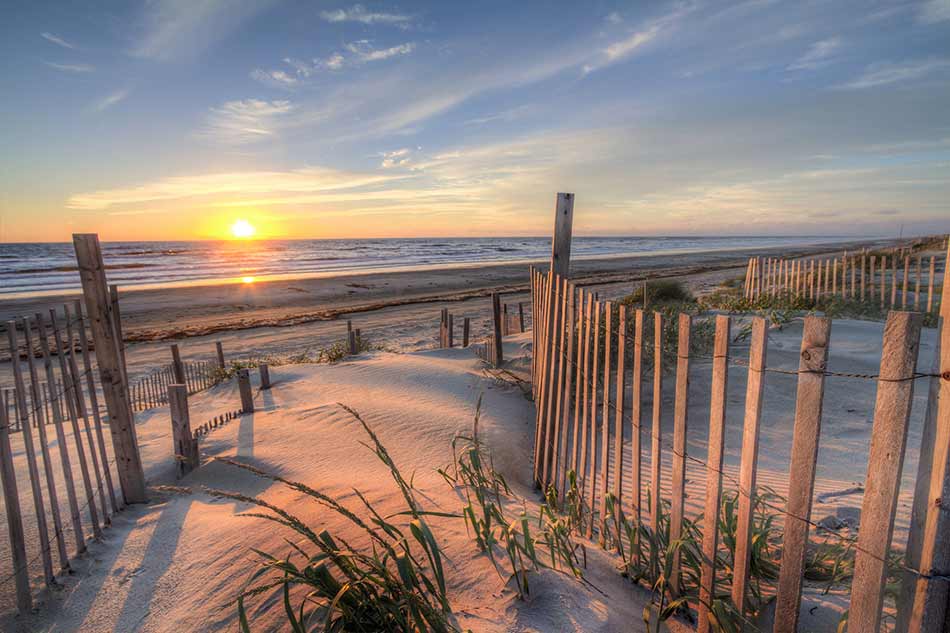


 RSS Feed
